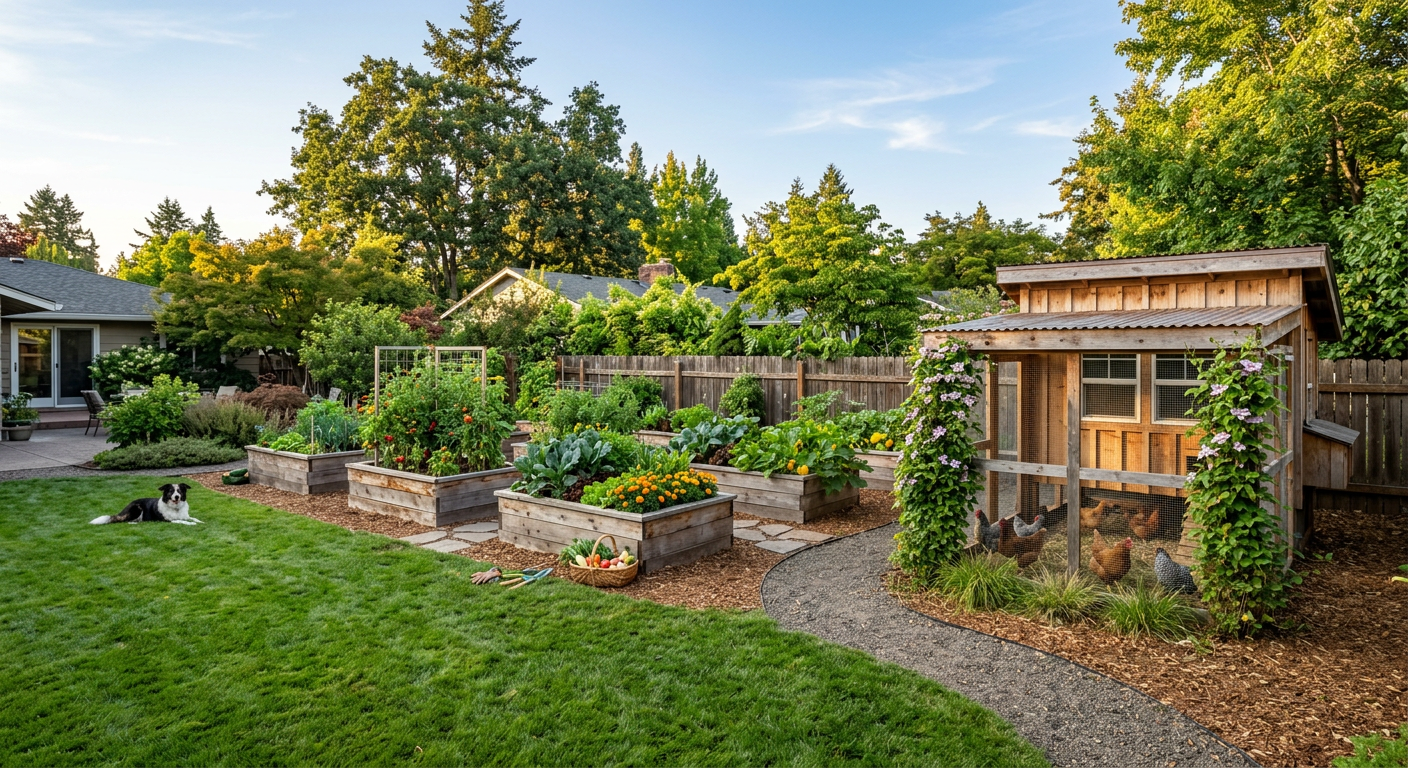
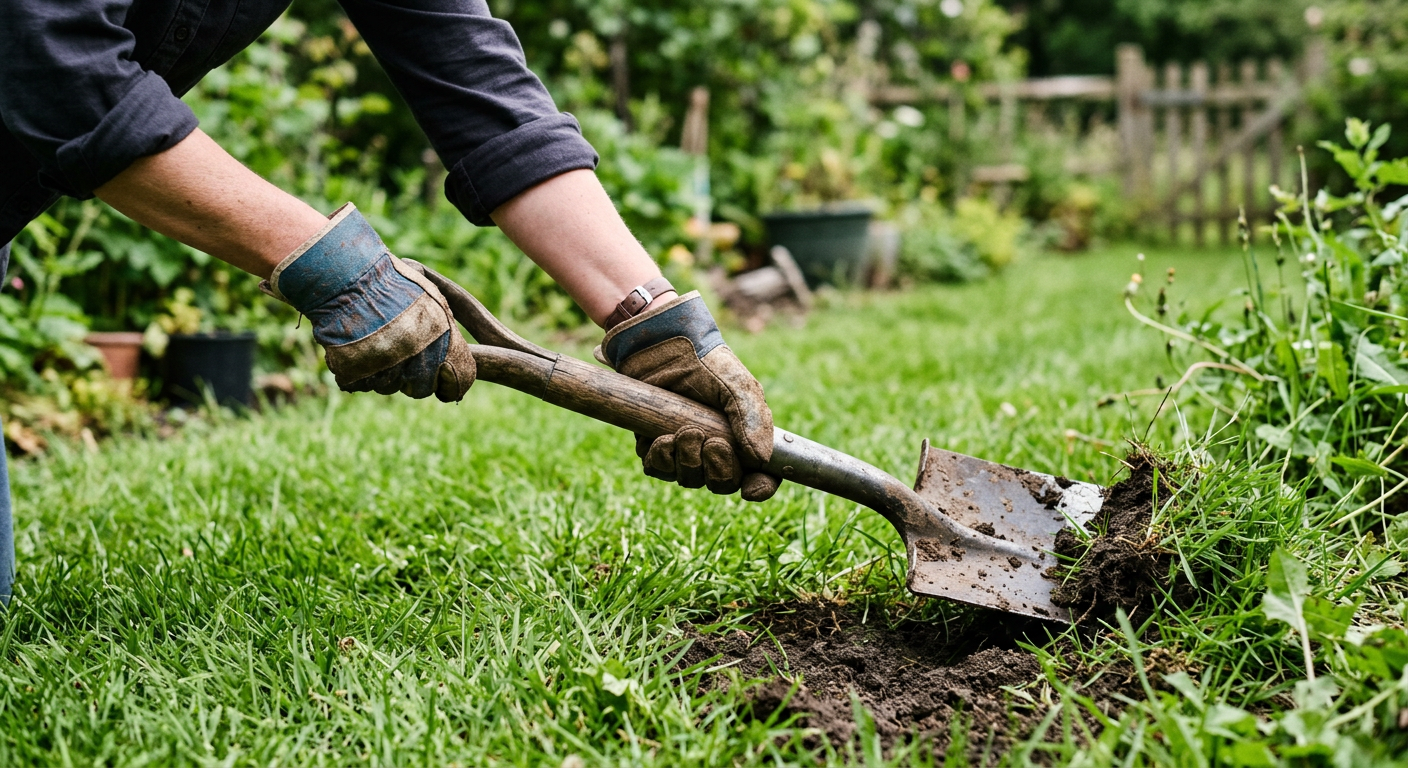
I remember staring out at our perfect, green, quarter-acre of Kentucky bluegrass. It cost us about $60 a month to water and fertilize, and all it produced was… more grass for my husband to mow. That’s the sunny afternoon I grabbed a shovel, walked to the middle of the yard, and plunged it into the sod, much to his confusion. That perfectly useless lawn was about to become our first real step toward self-reliance.
🎯 Quick Answer: The best way to learn how to start homesteading in a suburban backyard is to start small and focus on high-impact projects. Replace lawn with raised garden beds, check local laws for keeping small livestock like chickens or quail, and master one preservation skill like canning or dehydrating. It’s about using what you have, right where you are.
🔑 Key Takeaways
* Laws First, Shovel Second: Before you buy a single seed or chick, you MUST understand your local ordinances and any HOA rules. This is non-negotiable.
* Start with Soil: The success of your garden hinges entirely on the quality of your soil. Investing in good compost is more important than anything else.
* Think Small & Dense: Choose plants and animals that produce a lot in a small footprint. Vertical gardening and smaller livestock breeds are your best friends.
* Master One Skill at a Time: Don’t try to learn gardening, chicken-keeping, and cheesemaking all in one season. You’ll burn out. Pick one, get good at it, then add another.
* Focus on Food: A suburban homestead is about productivity. Every project should contribute to your pantry, reduce your grocery bill, or improve your land.
—
!A person using a shovel to learn how to start homesteading in a suburban backyard by removing lawn.
Step 1: The Legal Lowdown (Don’t Get Fined!)
I can’t stress this enough: your journey into suburban homesteading begins at your town hall’s website, not the garden center. When we decided to get chickens, I was so excited I built the coop before I read the fine print. I discovered our coop had to be 25 feet from any property line, not the 15 I had planned for. We had to move the entire thing. It was a sweaty, frustrating, and completely avoidable weekend of work.
Where to Look for Rules
Don’t be discouraged by this step. Knowing the rules gives you a framework to be creative within. For great general guidance, check out university extension resources like Penn State Extension’s articles on urban agriculture.
Knowing your boundaries is the first step to building something incredible within them.
—
Step 2: Your First Garden – Small But Mighty
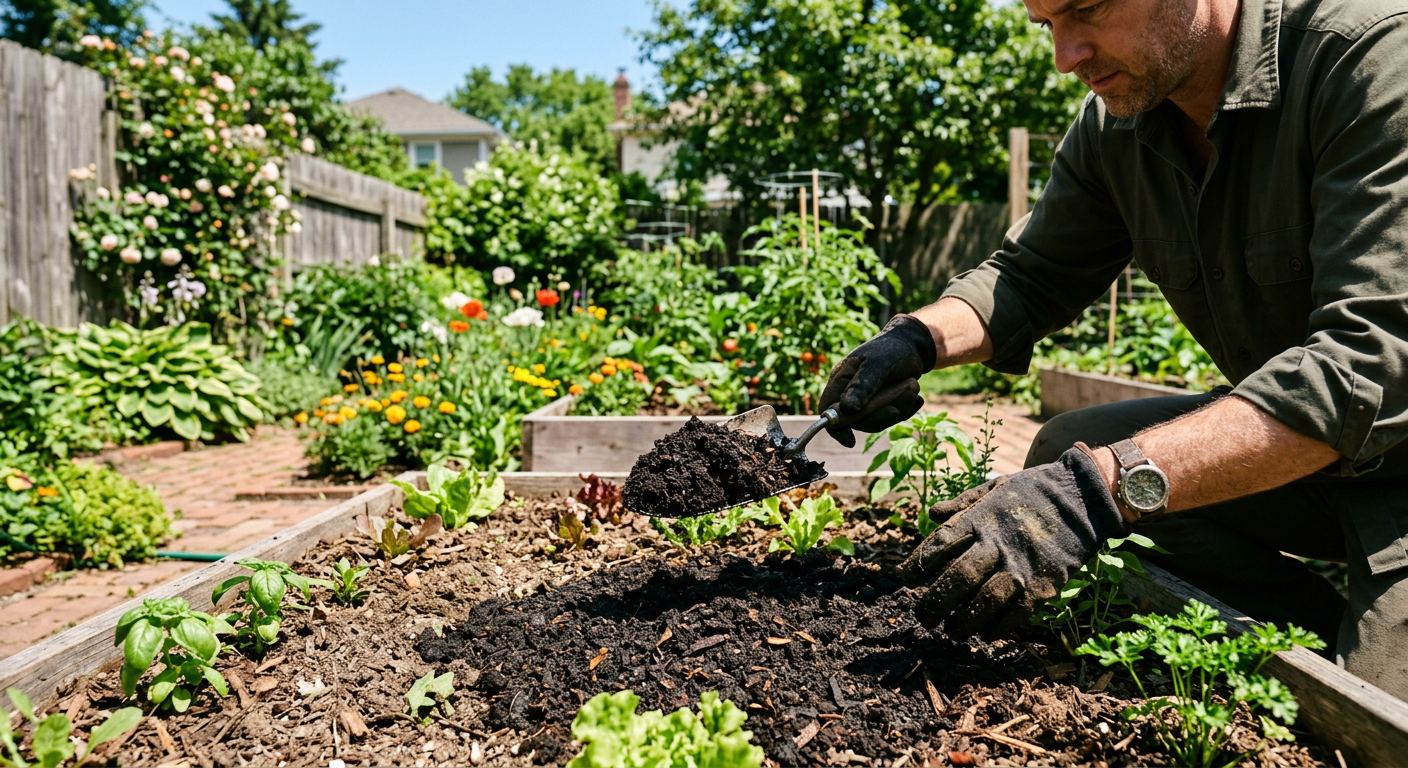
Forget plowing up your entire yard. Your first garden should be manageable. We started with two 4×8 foot raised beds. We spent about $160 on untreated pine boards, screws, and hardware cloth for the bottom to keep out the gophers. The biggest expense, and our biggest mistake, was the soil. We bought cheap, bagged “garden soil” and our first year’s harvest was pathetic.
The lesson: Your plants don’t eat dirt; they eat the nutrients in the dirt. Now, we make our own compost and supplement with high-quality organic compost from a local landscape supply. It costs more upfront—about $70 per cubic yard—but the return in produce is tenfold.
What to Plant First
- High-Value Greens: A packet of lettuce seeds costs $3 and can produce salads for months. Compare that to a $5 plastic box of greens from the store.
- Cut-and-Come-Again: Things like kale, chard, and most lettuces let you harvest the outer leaves while the plant keeps producing from the center.
- Radishes & Bush Beans: These grow incredibly fast, which gives you a quick win and a boost of confidence.
Learning how to start a vegetable garden in a small backyard for beginners is a core skill. It’s also where you see the first tangible results of your efforts. Even if you just have a patio, a few well-managed pots can provide a surprising amount of food. Thinking through these details is so important, which is why a solid plan makes all the difference. We built our homestead plan over many winter nights, sketching out ideas and making lists; you can see how we structure our homesteading plans to stay organized and focused.
Focus on what your family actually eats. Planting 10 kale plants is useless if nobody likes kale. Start there.
—
Step 3: Considering Small Livestock (Yes, in the ‘Burbs!)
This is where many people think, “No way I can do that.” You absolutely can. How to start homesteading in a suburban backyard often includes a small flock or herd! It’s the step that makes your little ecosystem feel truly alive. For most suburbs, your best bets are chickens or quail.
We started with six Buff Orpington chicks from the local Tractor Supply. They cost about $4 each. Our first real coop was a $350 kit that we assembled and reinforced. That first warm egg I collected on a chilly spring morning… it was a game-changer. Suddenly, we weren’t just gardeners; we were providing our own protein.
Chickens vs. Quail
* Chickens: The classic choice. They provide eggs and fantastic fertilizer. They’re personable and great for pest control. The downside: they need more space, can be noisier, and are more heavily regulated. Dig into the pros and cons of raising backyard chickens before you commit.
* Coturnix Quail: The silent ninjas of suburban livestock. They are quiet, require very little space (you can keep a dozen in a large rabbit hutch), and start laying tiny, delicious eggs at just 8 weeks old. They are often exempt from “poultry” rules because they are considered game birds.
Whichever you choose, start with a small number. You can always grow your flock later.
Keep reading — this next part is what separates a garden hobbyist from a true homesteader.
—
Step 4: Level Up with Homestead Skills
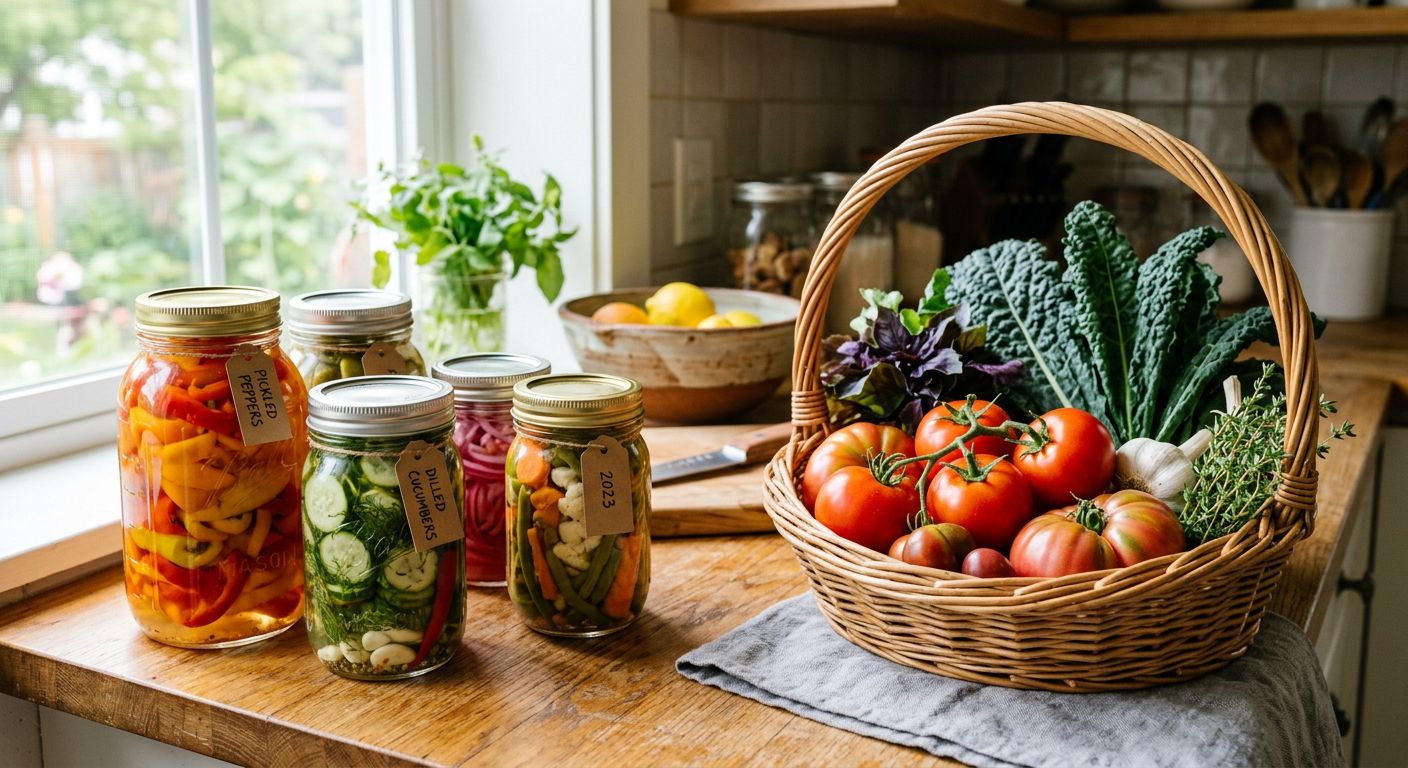
Growing food is only half the battle. A zucchini plant doesn’t care if you’re on vacation; it’s going to produce an avalanche of zucchini in August whether you’re ready or not. Learning what to do with that abundance is the key.
This is where you learn skills that truly build resilience. Our first year, we were so overwhelmed with tomatoes that we gave buckets of them away. The next year, I learned to can. I’ll never forget the satisfying pop of the first 12 jars of pasta sauce sealing on the counter. We had just captured summer in a jar. That sauce, which we ate in the dead of winter, tasted like pure victory. It was a tangible result of all our hard work.
Key Skills for the Suburban Homesteader:
These skills are what transform your backyard from a food production space into a functioning homestead.
—
💡 Pro Tips
* Go Vertical. Use trellises, cattle panels, and wall planters. We grow 50+ pounds of cucumbers on a single 8-foot-long arched cattle panel trellis that we walk under. It doubles your growing space for vining plants.
* Befriend Your Neighbors. The first time we harvested eggs, we walked a half-dozen over to our neighbors on each side. Now, instead of complaining about the occasional clucking, they ask when we’ll have more eggs to spare. A little generosity goes a long way.
* Observe Your Land. Don’t just work it, watch it. Where does the morning sun hit first? Where does water pool after a rain? That shady spot behind the garage is perfect for growing mushrooms. The hot, dry strip by the driveway is where your rosemary will thrive. Your yard will tell you what it needs.
* Plant Perennials. Plant things that come back year after year. Asparagus, rhubarb, fruit trees, and berry bushes are an investment that pays dividends for a decade or more.
—
⚠️ Beginner Mistakes to Avoid
The “All-In” Burnout: We tried it. Our second spring, we decided to get bees, double our garden space, and* get meat rabbits all at once. We were exhausted, stressed, and by July, we were failing at all three. Pick ONE new big project per year. That’s it.
* Ignoring the HOA (Again): A friend of mine got a violation notice for his compost pile, which was deemed “unslightly.” He had to spend $200 on a fancy tumbler-style bin to appease the board. Read the rules.
* Buying Cheap Tools: Our first shovel was a $15 piece of junk from a big box store. The handle snapped the first time I tried to pry a rock out of our clay soil. A good tool feels like an extension of your body. We have a post on the few essential homesteading tools you should actually buy first.
* Forgetting to Mulch: Leaving your soil bare is an invitation for weeds and evaporation. We lost a whole bed of carrots one year during a hot week because we didn’t mulch. A thick layer of straw, wood chips, or shredded leaves is like a blanket for your soil.
—
Frequently Asked Questions
How much land do you need for a suburban homestead?
You can start homesteading on a balcony with a few pots of herbs. We’re on a 1/4 acre lot, and much of that is the house and driveway. It’s not about acreage; it’s about a mindset of production and resourcefulness. Don’t let your lot size stop you.
Is homesteading in a suburban backyard expensive?
It can be, but it doesn’t have to. You can start a container garden for under $50. Our first two raised beds cost about $250 total (lumber and quality soil). Our first chicken setup was about $400 (coop, feeders, chicks). The key is that these are investments that pay you back in food and lower grocery bills. It’s a shift from being a consumer to a producer.
What are the easiest things to grow for beginners?
Herbs (mint, oregano, chives), loose-leaf lettuce, radishes, bush beans, and zucchini (be careful, you’ll have more than you know what to do with!). These all provide quick, rewarding harvests and build your confidence.
Can I have chickens in my suburban backyard?
Often, yes! Many cities allow a small number of hens (typically 3-6) but no roosters. Check your local ordinances. Some cities have specific requirements for coop placement and cleanliness. Chickens are surprisingly quiet, with their gentle clucking being much softer than a barking dog.
—
Homesteading isn’t an all-or-nothing deal defined by owning 40 acres and a milk cow. It’s a spectrum.
It’s choosing to plant a tomato plant where there was once a useless shrub. It’s the quiet satisfaction of cracking your own eggs into a skillet. It’s about taking one small piece of your world and making it more productive, more resilient, and more your own.
You can do this. Start with one thing. A pot of basil. A single raised bed. The journey starts with that first shovelful of dirt.
For more behind-the-scenes stories and day-to-day life on our little homestead, be sure to follow us on Facebook!
What’s the ONE thing you’d love to start producing in your own backyard? Let me know in the comments below!
📚 More From Our Homestead
- Rural vs Urban Homesteading: A Real-World Guide
- Homestead Budget: Plan From Scratch & Thrive!
- How to Start Urban Homesteading Small Balcony: 5 Steps
- Zero Budget Homestead: How to Begin Homesteading with No Money
- Mastering Practical Skills for Self-Sufficiency at Home
Ready to Start Your Homestead Journey?
Free guides, checklists, and tools to help you build your dream homestead.
Leave a Reply