Tag: gardening

  • Homesteading for Beginners on One Acre: The Ultimate Guide

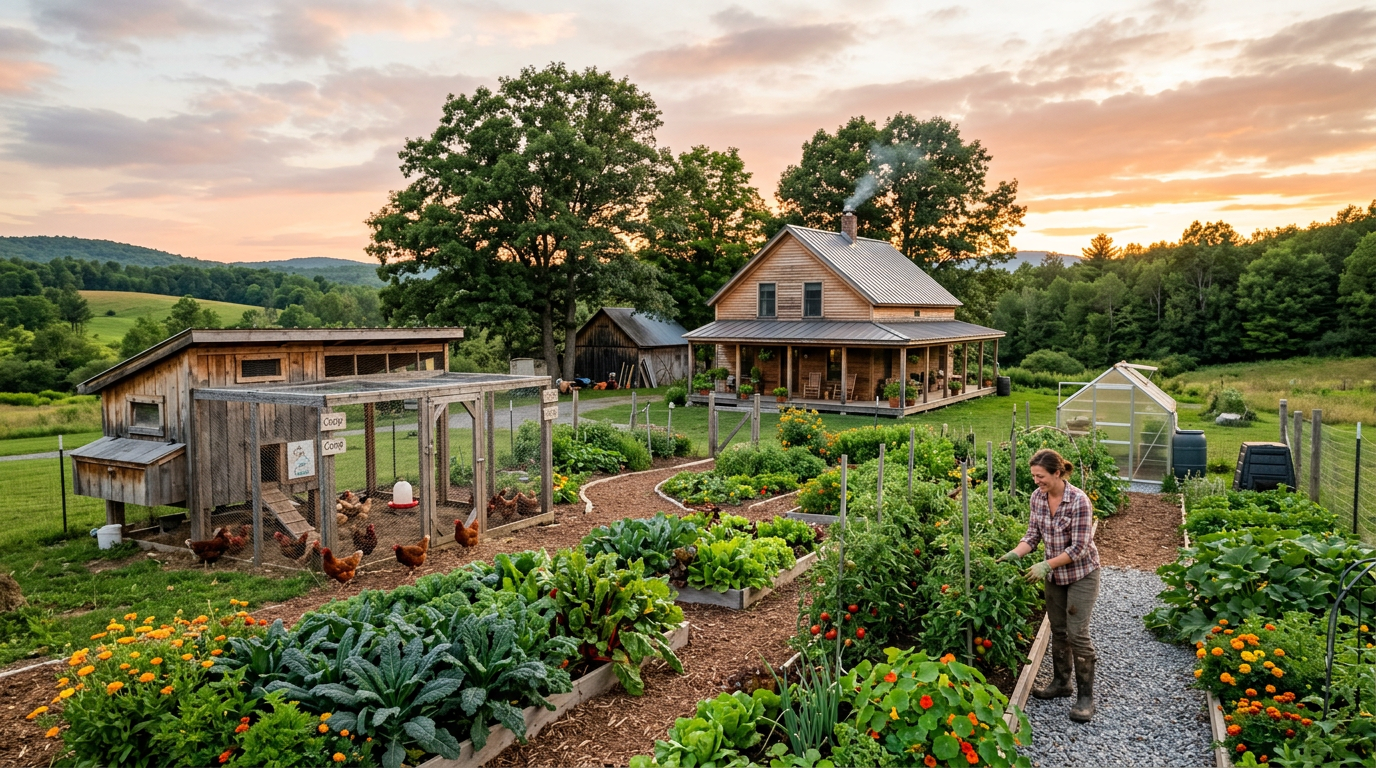
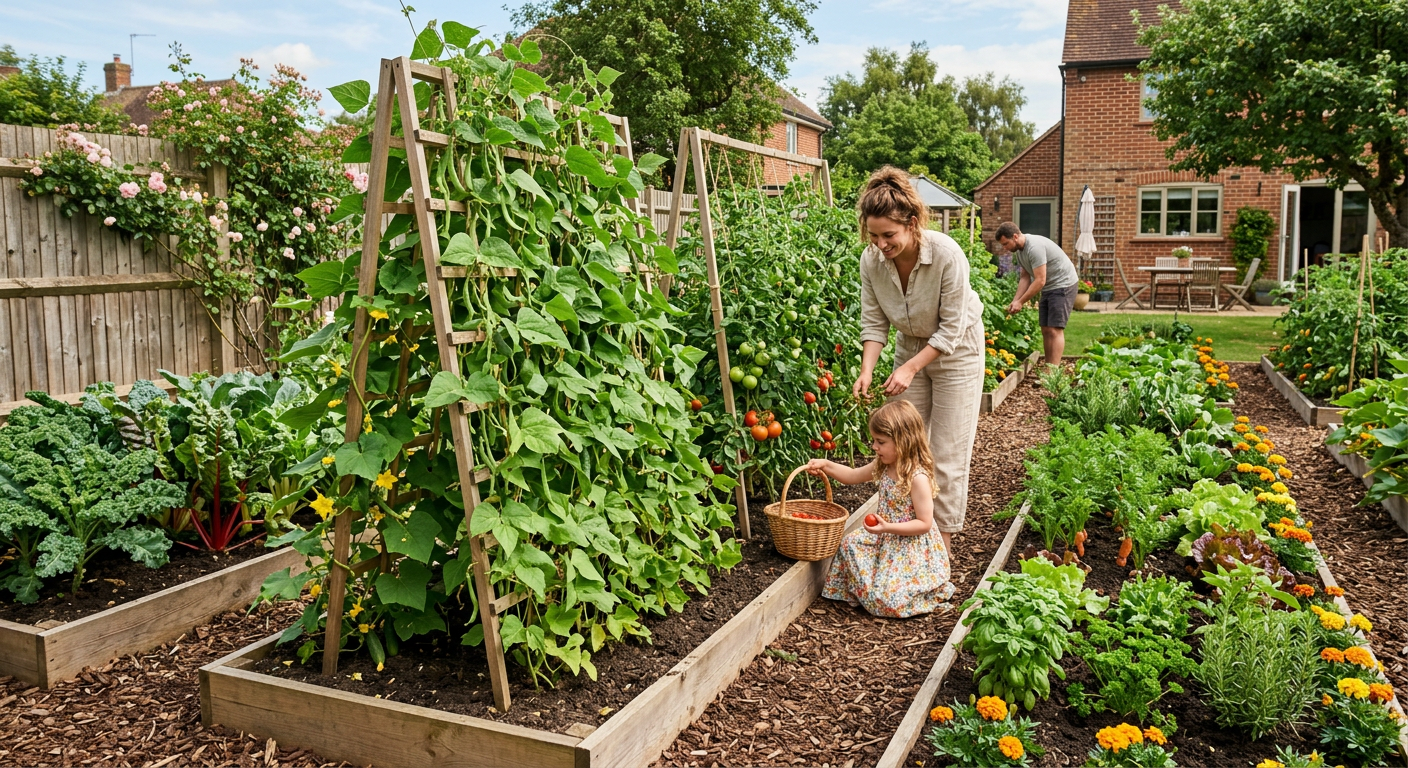
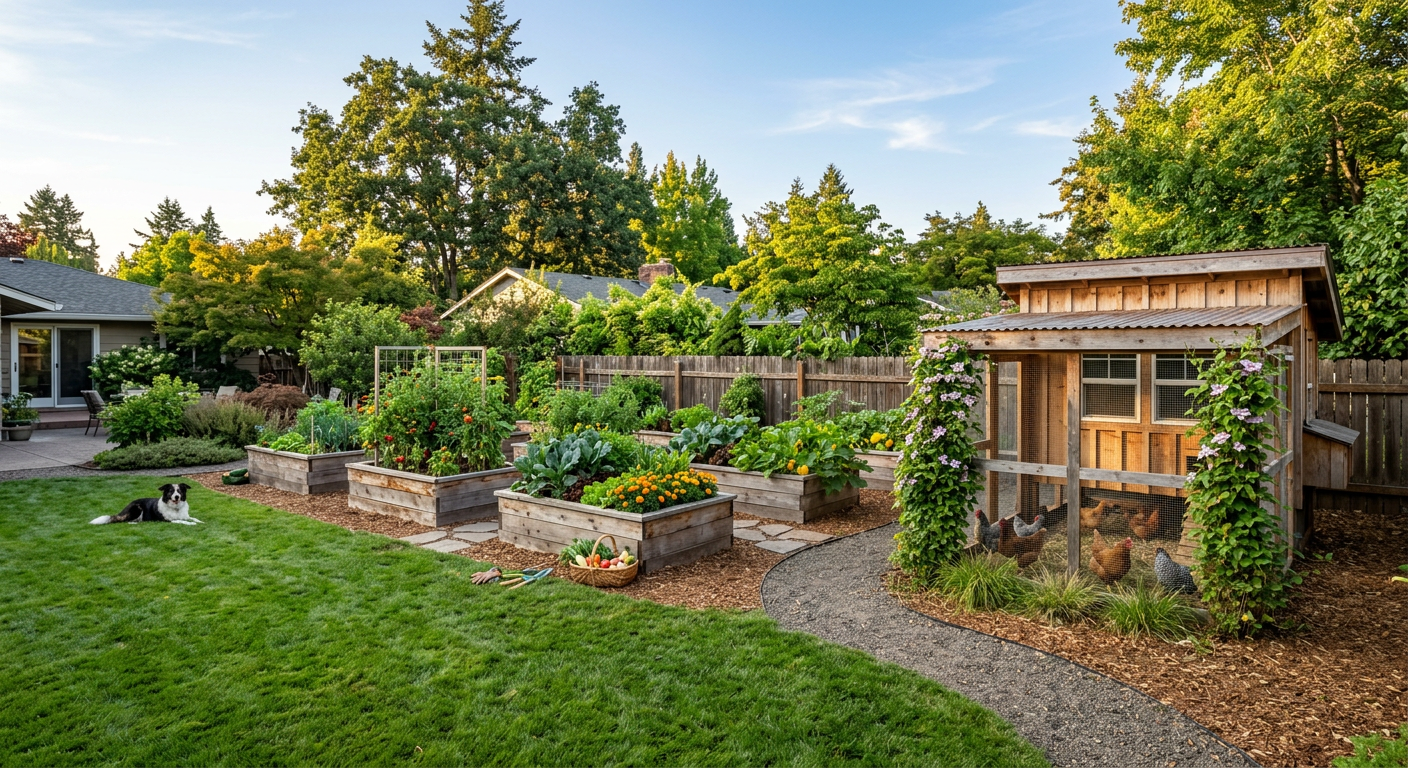
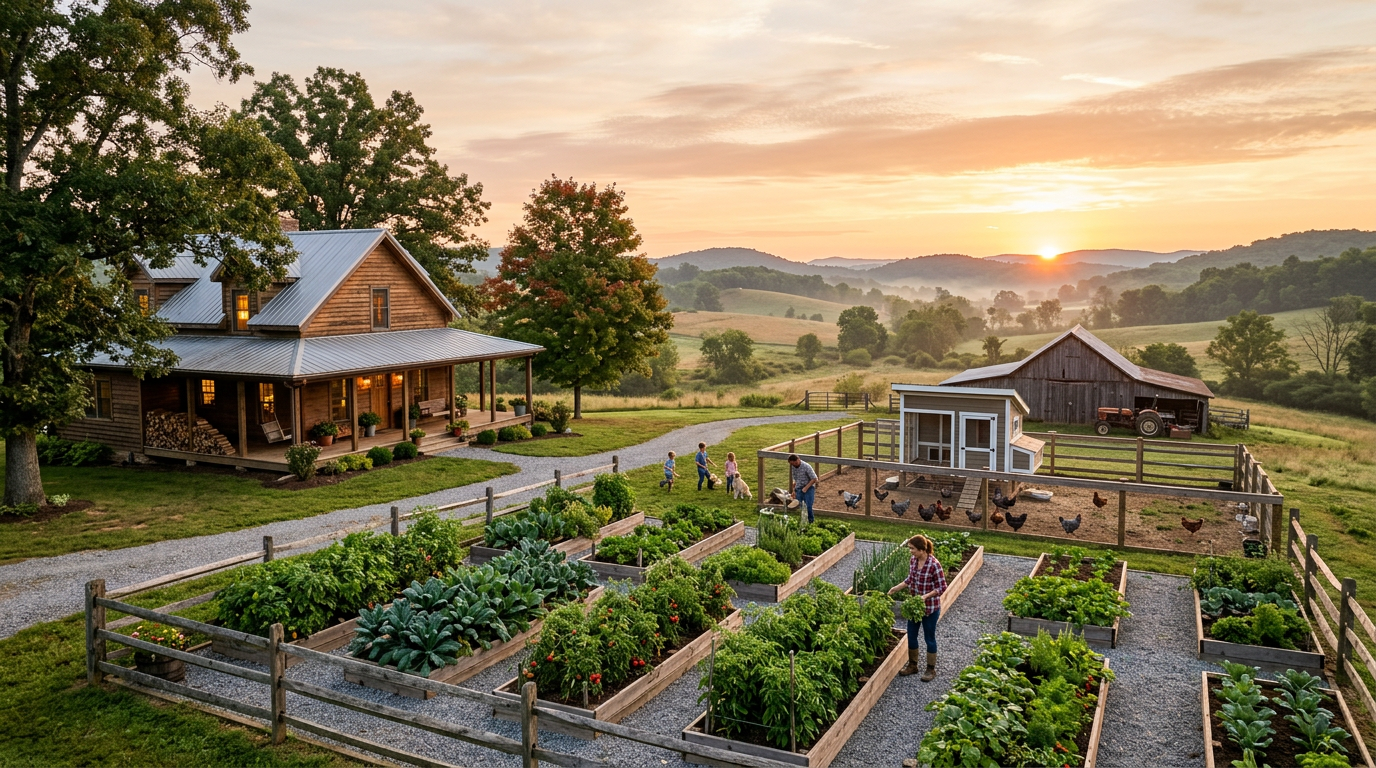
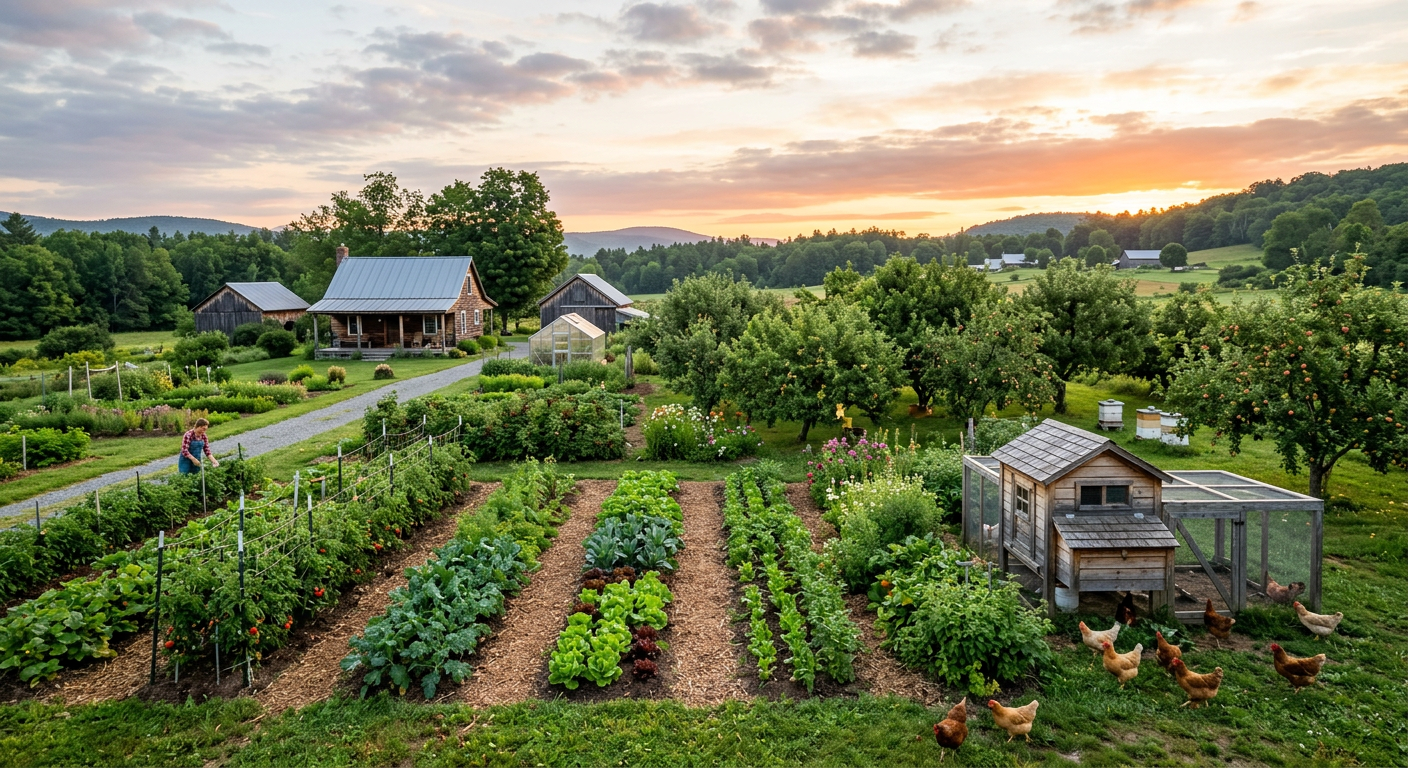
    !An organized backyard farm showing homesteading for beginners on one acre with gardens and a coop.

    Most people think you need a hundred-acre ranch in Montana to live your dreams, but the truth is your suburban backyard is a goldmine waiting to be tapped. I remember looking at my modest one-acre lot and feeling like it wasn’t enough, until I realized that one acre, managed well, can actually produce more food than a large farm left to go wild. Homesteading for beginners on one acre isn’t just possible—it’s the most efficient way to start.

    🎯 Quick Answer: Homesteading for beginners on one acre is about maximizing vertical space and intensive gardening to create a self-sufficient ecosystem. By focusing on high-yield crops, small livestock like chickens or rabbits, and smart layout design, a single acre can provide up to 75% of a family’s food needs.

    🌱 Start Your One-Acre Layout Plan →

    🔑 Key Takeaways

    * Learn how to zone your property for maximum efficiency and less walking.

    * Discover which high-yield crops provide the most calories per square foot.

    * Identify the best small-scale livestock for a one-acre footprint.

    * Understand the importance of intensive gardening techniques like permaculture.

    * Master the art of “stacking functions” to save time and money.

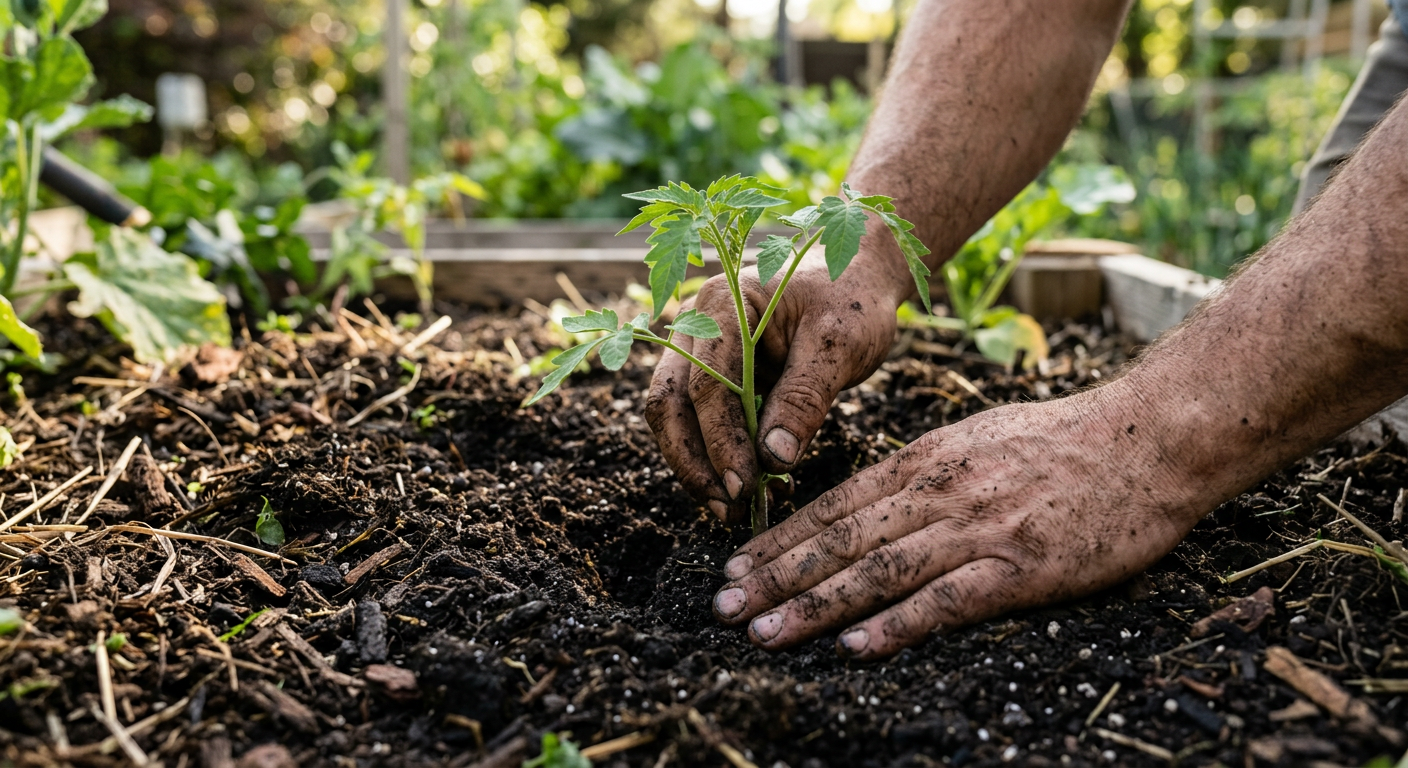
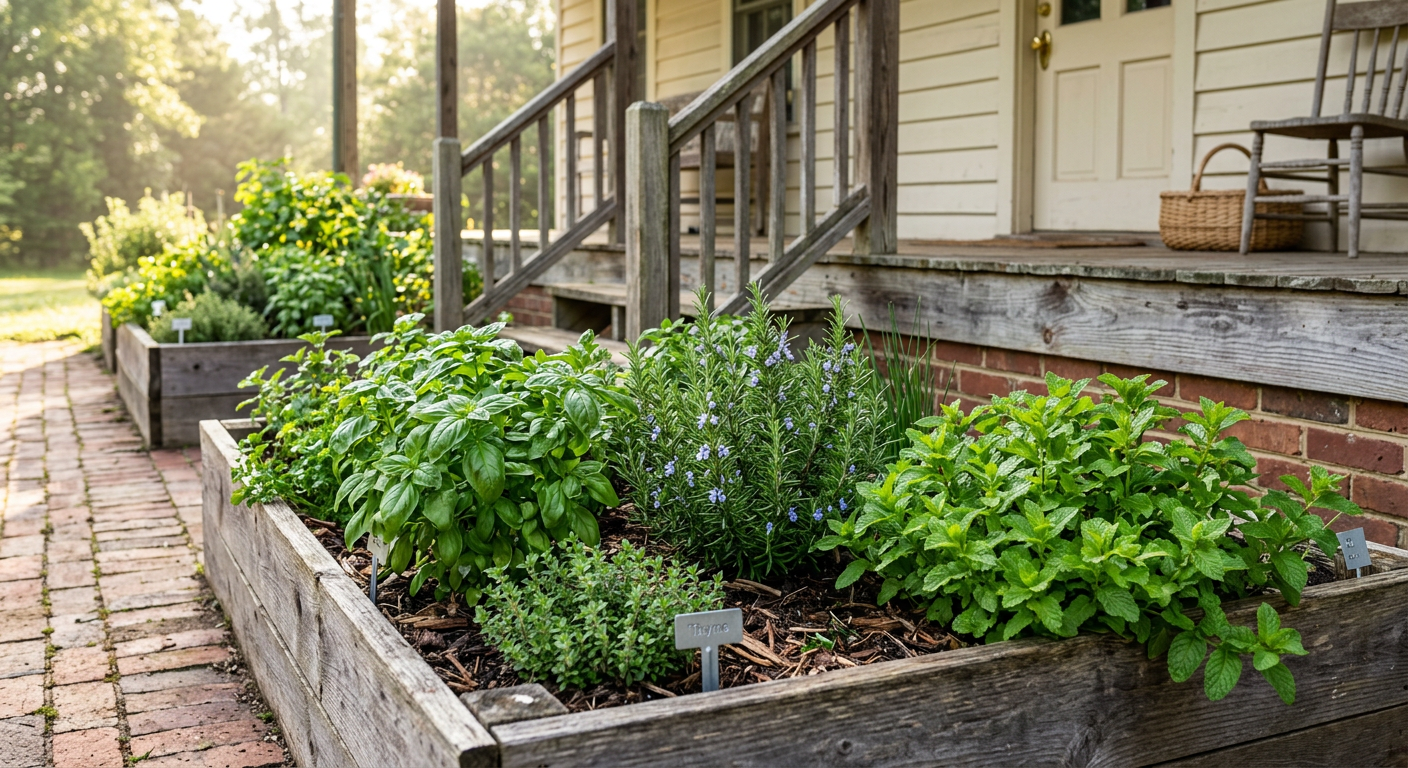
    !Close-up of a Zone 1 herb garden for homesteading for beginners on one acre near the house.

    The Secret Sauce: Zoning Your One Acre for Success

    When you’re working with limited space, you can’t just throw things wherever they fit. In the world of permaculture, we talk about “Zones.” Zone 0 is your house, and Zone 1 is the area right outside your door. This is where your most high-maintenance plants go—like herbs and salad greens—because if you have to walk to the back of the property to grab a pinch of basil, you simply won’t do it.

    As you move further out, you place your vegetable garden, then your chicken coop, and finally your fruit trees or woodlot on the perimeter. This flow ensures that the things needing daily attention are closest to you, making homesteading for beginners on one acre feel like a hobby rather than a grueling chore. If you’re feeling overwhelmed, you can use a homestead planning tool to map out your zones before you ever pick up a shovel.

    Keep reading — this is where most people mess up by overcomplicating their layout.

    But once your layout is set, you need to decide what’s actually going into the ground, and that’s where the magic of intensive production happens.

    Intensive Gardening: Growing More in Less Space

    You don’t need long, tractor-width rows on a one-acre plot. In fact, rows are a waste of space! Instead, look into raised beds or no-dig gardening. These methods allow you to plant crops closer together, which shades the soil (reducing weeds) and maximizes your harvest per square inch.

    Consider “Vertical Gardening” as your best friend. Trellis your cucumbers, squash, and even small melons. By growing up instead of out, you free up floor space for root crops like carrots and beets. Using these methods, a tiny 1,000 square foot garden can easily feed a family of four for the entire summer.

    Before you run to the nursery, though, there’s one specific animal every one-acre homesteader needs to consider—I’ll show you why in the next section.

    Livestock for the Small-Scale Homestead

    You might not have room for a herd of cattle, but you have plenty of room for “micro-livestock.” For anyone tackling homesteading for beginners on one acre, chickens are the gateway animal. A small flock of six hens provides plenty of eggs and, more importantly, high-quality nitrogen for your compost pile.

    If you want to level up, think about rabbits or dairy goats. Rabbits are incredibly space-efficient and produce some of the best fertilizer on the planet. Nigerian Dwarf goats are another favorite because they provide delicious milk but only require a fraction of the space a standard cow would need.

    📋 Get the Small Livestock Checklist →

    This next part? Nobody talks about it, but it changed everything for us.

    Having the animals is great, but managing the waste and turn-around is what separates a messy yard from a productive homestead.

    !Small livestock integration as part of homesteading for beginners on one acre.

    Water and Soil: The Invisible Engines

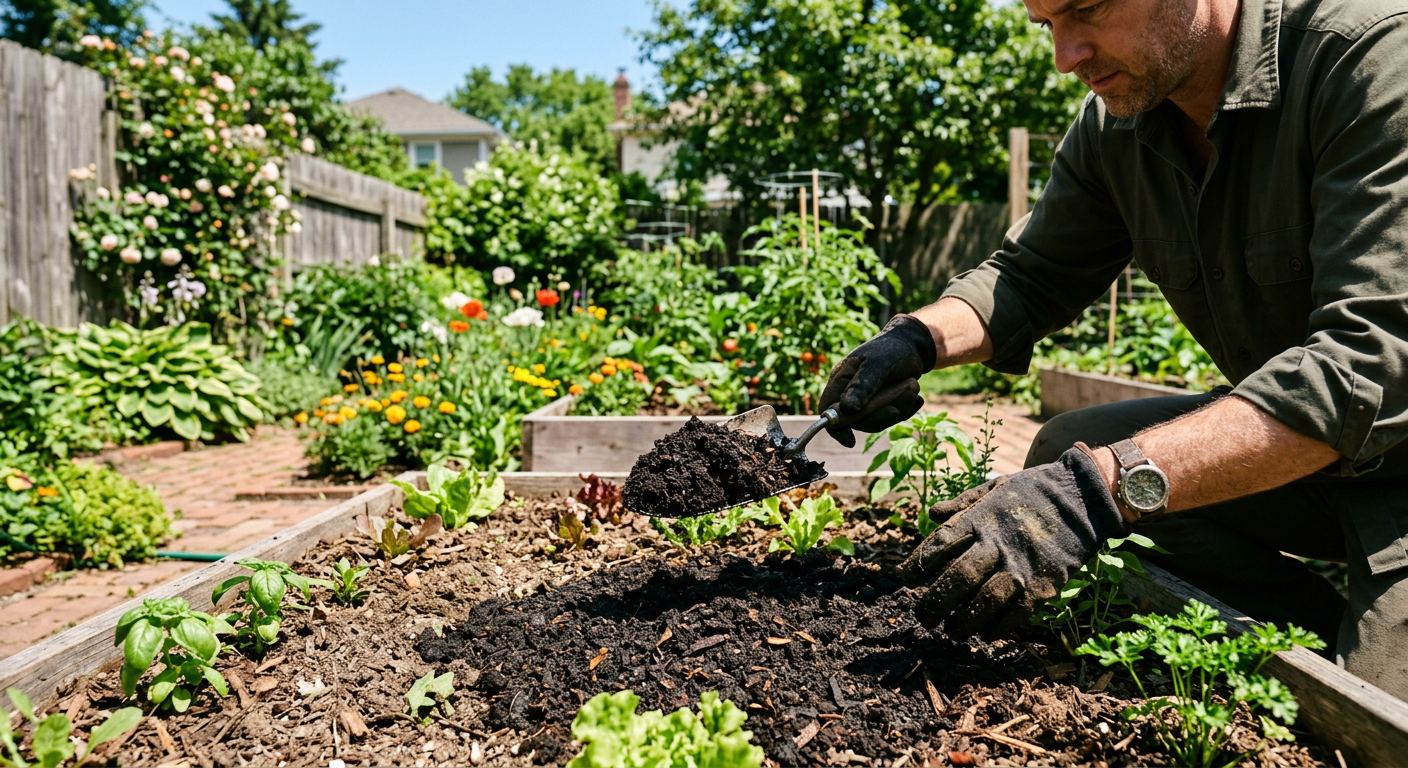
    You can have the best seeds and the cutest goats, but if your soil is dead, your homestead will struggle. On one acre, you have a closed-loop opportunity. Your animal bedding goes into the compost, the compost feeds the garden, the garden waste feeds the animals.

    Soil health is the foundation of self-sufficiency. Don’t strip-mine your land; nourish it. Using a digital management system can help you track your soil amendments and rotation schedules so you never forget when you last fertilized. Water catchment is equally vital. Installing rain barrels on your gutters can save you hundreds of dollars in utility bills and provide chlorine-free water for your sensitive plants.

    Now that you’ve got the basics, let’s look at how to avoid the common traps that burn people out by their second year.

    💡 Pro Tips

    * Start Small: Don’t buy the goats, the chickens, and the bees in the same month. Master one before adding another.

    * Plant Perennials Early: Fruit trees and berry bushes take years to produce. Get them in the ground during your first season.

    * Focus on Calories: Greens are great, but potatoes, squash, and beans are what actually fill the pantry and provide security.

    * Observe Before Acting: Spend a full season watching where the sun hits and where water pools before building permanent structures.

    ⚠️ Beginner Mistakes to Avoid

    * Over-Buying Gear: You don’t need a $30,000 sub-compact tractor for one acre. Most jobs can be done with a good wheelbarrow and a broadfork.

    * Neglecting the Soil: If you spend $500 on plants and $0 on soil health, you’re essentially throwing money away.

    * Ignoring Local Laws: Always check your zoning ordinances for livestock restrictions before you bring home those “quiet” ducks.

    * Skipping the Plan: A homestead without a map becomes a chaotic mess of projects that never quite get finished.

    !Abundant vegetable harvest from a successful layout of homesteading for beginners on one acre.

    Frequently Asked Questions

    Can one acre really feed a family?

    Yes! While it’s difficult to be 100% self-sufficient (growing your own grains takes a lot of space), you can easily produce all your vegetables, eggs, and a significant portion of your meat on a single acre.

    How much time does a one-acre homestead take daily?

    Expect to spend about 30-60 minutes a day on basic chores like feeding animals and watering. During planting or harvest season, this will increase, but good systems make it much faster.

    What is the most profitable thing to grow on one acre?

    High-value crops like garlic, mushrooms, or microgreens often provide the best return on investment for small-scale physical labor.

    Do I need a tractor for one acre?

    Generally, no. One acre is small enough to manage with hand tools, a good lawnmower, and perhaps a heavy-duty garden cart. Save that money for better seeds and fencing!

    What’s your biggest challenge with starting your homestead? I’d love to hear your story in the comments below!

    Homesteading isn’t about the size of your land; it’s about the size of your commitment to a better way of living. Even on a single acre, you can find a level of peace and productivity that most people only dream of. Just take it one garden bed at a time, and don’t be afraid to get your hands dirty. We’re all learning as we go!

    If you want to simplify the process and keep all your records, maps, and tasks in one place, check out our favorite tools to get started.

    🔧 See Recommended Homesteading Tools →

    For daily tips on maximizing your small-scale farm and staying inspired, follow our Facebook page here: https://xlvvlujsctgiorcwbtkv.supabase.co/functions/v1/social-redirect?p=facebook&loc=blog_conclusion


    📚 More From Our Homestead

    Ready to Start Your Homestead Journey?

    Free guides, checklists, and tools to help you build your dream homestead.
    Explore Free Resources →

  • Companion Planting Guide That Doubled Our Yields

    !A thriving garden showing how a companion planting guide increased yields through diverse plant placement.

    I can still feel the sick twist in my stomach from that first summer on the homestead. My beautiful tomato plants, which I’d started from seed on our freezing windowsill, were getting skeletonized overnight. Big, fat, green hornworms were feasting, and I was losing the battle. It wasn’t until my neighbor, a homesteader of 40 years, handed me a six-pack of borage starts and said, “Plant these, child,” that everything changed.

    🎯 Quick Answer: Companion planting is the strategic placement of different plants together to increase growth, deter pests, and improve soil health. Following a good companion planting guide for increased yields isn’t an old wives’ tale; it’s a proven ecological strategy that creates a resilient garden that produces more food with less work.

    🔑 Key Takeaways

    * It’s Science, Not Magic: Companion planting works by attracting beneficial insects, repelling pests, improving soil nutrients (like legumes fixing nitrogen), and providing ground cover or support.

    * Start Simple: You don’t need to memorize a thousand combinations. Start with a classic trio like Tomatoes, Basil, and Marigolds. The synergy is powerful.

    * More Than Veggies: Flowers and herbs are your garden’s workhorses. They are essential for pest control and attracting the pollinators you need for squash, cucumbers, and fruit.

    * Observe Your Land: What works for us in Zone 5b might need tweaking for you. The best guide is your own garden journal.

    * Bigger Harvests, Less Spraying: The goal is a balanced ecosystem. We haven’t used a chemical pest spray in over seven years, and our pantry is fuller than ever.

    * It’s a Long Game: The benefits accumulate. Each year you companion plant, your soil gets healthier and your beneficial insect population grows.

    🌱 Start Your Homestead Plan →

    !Borage and tomatoes growing together as part of a companion planting guide increased yields strategy.

    What is Companion Planting REALLY? (And Why It’s Not Magic)

    When we first started, I thought companion planting was just about which plants “liked” each other. It’s so much more than that. It’s creating a team of plants that help each other out. Some plants are the muscle, some are the defenders, and some are the medics.

    Here’s the breakdown of how it actually works:

    Pest Deterrence & Confusion

    Some plants, like marigolds or alliums (onions, garlic), release scents or compounds that pests just hate. That sharp marigold smell actually messes with the ability of insects like nematodes and tomato hornworms to find their target. We plant a border of French Marigolds around our tomato beds every single year. It’s non-negotiable.

    Attracting an Army of Helpers

    Other plants act like a giant welcome sign for beneficial insects. Ladybugs, lacewings, parasitic wasps, and pollinators are your best friends. Last spring, I watched our dill plants become covered in ladybug larvae. Just two weeks later, the aphid problem I was starting to see on my kale was completely gone. Those little predators did all the work for me. You can learn more about identifying these helpers from resources like the Penn State Extension.

    Improving the Soil

    This is the secret weapon of companion planting. Legumes—like bush beans and peas—have a superpower. They work with bacteria in the soil to pull nitrogen from the air and “fix” it onto their roots. When you plant them next to heavy feeders like corn, which desperately needs nitrogen, the beans provide a slow-release-fertilizer right at the root zone. It’s genius.

    Now you see why this isn’t just about good vibes; it’s about good science. It’s one of the key skills we talk about in our 10 Beginner Homesteading Tips a must-read if you’re just starting out.

    Keep reading — this is where we get into the exact combinations that work for us.

    The “Three Sisters” and Beyond: Classic Combos That Work

    The most famous companion planting guild is the Native American method known as the Three Sisters: corn, beans, and squash.

    It’s a perfect example of plant synergy:

  • Corn: Provides the tall stalk for the beans to climb.
  • Beans: Climb the corn (so you don’t need a trellis) and fix nitrogen in the soil to feed the hungry corn.
  • Squash: Sprawls out with its big, prickly leaves, acting as a living mulch to keep the soil cool and moist while deterring pests like raccoons.
  • My first attempt at the Three Sisters was a bit of a mess. I planted everything at the same time. The squash grew so fast it swamped the corn seedlings. Lesson learned: Plant the corn first. Wait until it’s about a foot tall, then plant the beans and squash. It took us two seasons to get the timing right, but when we did, the results were incredible.

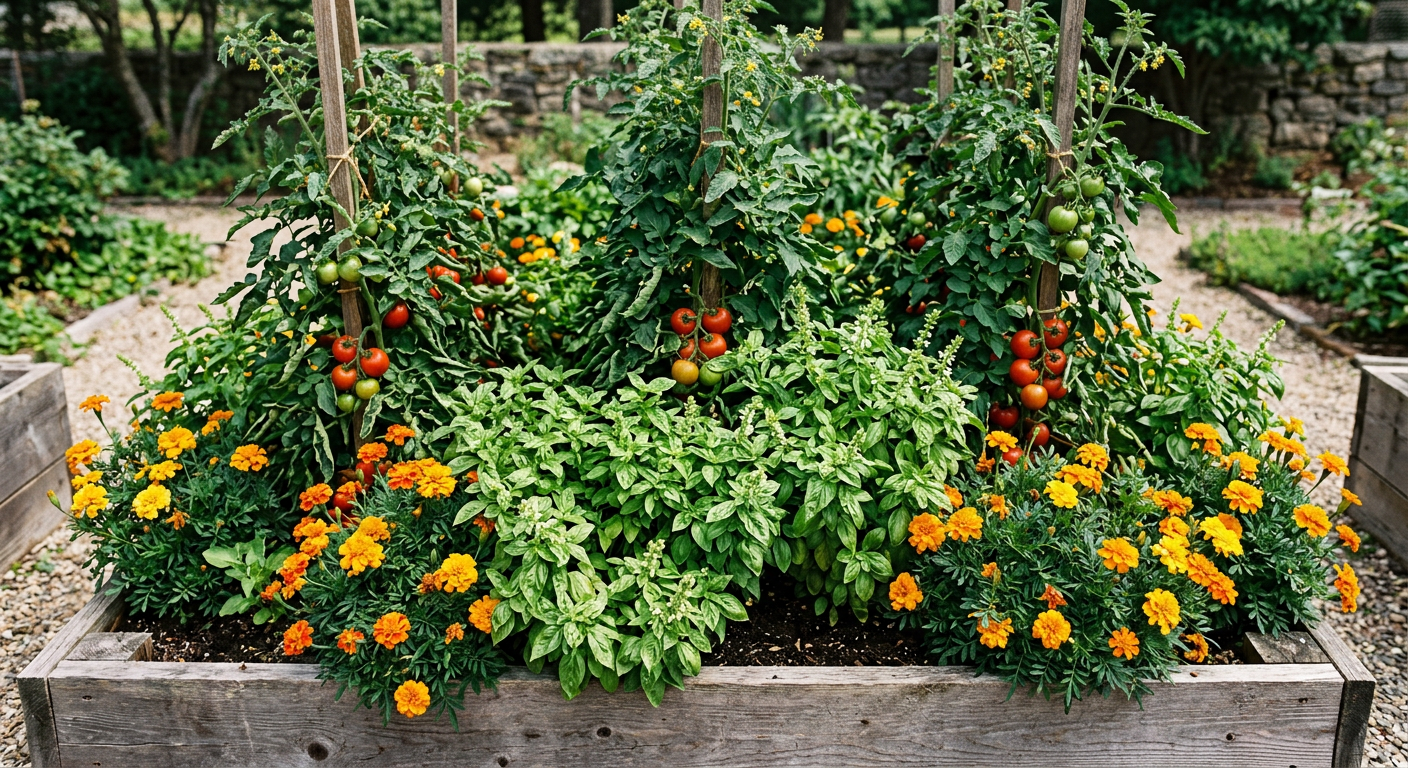
    But you don’t have to start with something that complex. The easiest and most rewarding combo we use is Tomatoes + Basil + Marigolds. The basil is said to improve the tomato’s flavor and repels hornworms. The marigolds ward off root-knot nematodes in the soil. It’s a powerhouse trio that works in garden beds and even in large containers.

    Understanding these basic guilds makes the whole process less intimidating. Now, let’s dig into the specifics.

    My Ultimate Companion Planting Guide for Increased Yields

    Alright, grab a cup of coffee. This is the list I wish I had when I started. These are the combos we use every single year on our homestead. No theory, just dirt-under-the-fingernails results. We keep track of all our planting experiments and successes using a simple garden planner, which is a key part of the Homestead OS system we rely on.

    The All-Stars: Tomatoes, Peppers & Eggplant (Nightshades)

    * ✅ Friends: Basil, Carrots, Onions, Garlic, Marigolds, Borage, Nasturtiums. Borage is my secret weapon; it attracts pollinators and deters hornworms better than anything else I’ve tried. Planting basil nearby has legitimately made our tomatoes taste sweeter.

    * ❌ Foes: Anything in the brassica family (cabbage, broccoli, kale), Fennel, Corn. Potatoes are also risky because they are susceptible to the same blight, and planting them close can cause it to spread like wildfire.

    📋 Get the Beginner Planting Checklist →

    The Leafy Greens: Lettuce, Spinach & Kale (Brassicas)

    * ✅ Friends: Onions, Garlic, Mint (in a pot!), Dill, Rosemary, Nasturtiums. The strong smells of aromatic herbs are fantastic for confusing cabbage moths. Nasturtiums are my favorite “trap crop” for aphids—they’ll go for the nasturtiums first, saving my kale. Seriously, it’s a game-changer.

    * ❌ Foes: Tomatoes, Peppers, Beans (some say they inhibit growth), Strawberries.

    The Vining Crops: Cucumbers & Squash

    * ✅ Friends: Corn, Beans, Peas (The Three Sisters!), Radishes, Marigolds, Nasturtiums, Borage, Oregano. Borage is a superstar here for bringing in bees. Our zucchini and cucumber pollination rates skyrocketed the year we started interplanting borage. We went from maybe 5-6 zucchini per plant to well over a dozen.

    * ❌ Foes: Potatoes and aromatic herbs like Sage (can stunt squash growth).

    The Root Veggies: Carrots, Radishes & Beets

    * ✅ Friends: Lettuce (provides ground cover), Rosemary, Sage, Onions, Leeks. The onion family helps repel the dreaded carrot rust fly. We always plant a row of carrots, then a row of onions, and repeat.

    * ❌ Foes: Dill (can attract pests that harm carrots), Fennel, Celery.

    Many of these beneficial plants are perennial herbs, which are a must-have on any homestead. We have a whole guide on the best perennial herbs for cold climates if you want to plant once and reap the benefits for years.

    Next, we’ll talk about how to supercharge this guide with flowers and dedicated herbs.

    !Tomatoes, basil, and marigolds demonstrating how a companion planting guide increased yields in a raised bed.

    Beyond Vegetables: Integrating Flowers and Herbs

    Your vegetable garden should not be a monoculture of just vegetables. The most productive and resilient gardens look a little wild, buzzing with life. That life is driven by flowers and herbs.

    Forget neat, single-variety rows. We tuck these everywhere.

    * Marigolds (Tagetes sp.): I’ve mentioned them a dozen times for a reason. They’re cheap, they’re easy, and they work. They release a substance that kills root-knot nematodes, one of the most destructive soil pests. We spent about $15 on seeds five years ago and have been saving our own ever since.

    * Nasturtiums: The ultimate sacrificial plant. Aphids LOVE them. I plant them at the ends of my brassica and squash rows. The aphids flock to them, leaving my food crops alone. Plus, the leaves and flowers are edible with a peppery kick—great in salads! 🔥

    * Borage: The pollinator magnet. The fuzzy blue flowers are like a buffet for bees. If your squash, cucumbers, or melons aren’t setting fruit, you probably have a pollination problem. Borage will fix it. We went from hand-pollinating our squash to having more than we could eat in one season.

    * Aromatic Herbs: Think Rosemary, Thyme, Oregano, Sage, and Dill. Their strong scents act like a “smokescreen” in the garden, making it hard for pests to find their preferred plants. We plant pots of mint around the garden (NEVER in the ground) to repel ants and flea beetles.

    This is the core of Integrated Pest Management (IPM). You’re creating an entire ecosystem, not just planting vegetables. It takes a bit more planning upfront, but the payoff is a massive reduction in pests and an increase in harvests.

    🔧 See Our Recommended Garden Tools →

    💡 Pro Tips

    * Think in Guilds, Not Pairs. Instead of just planting basil with your tomatoes, plant a guild: A tomato plant, surrounded by a few basil plants, with a marigold at the corner and maybe some carrots in between. You’re creating a small, self-sufficient neighborhood.

    Keep a Journal. Seriously. I can’t stress this enough. Every year, I jot down what I planted where, what worked, and what was a total disaster. That journal is now the most valuable gardening book I own. It’s how I know that borage works better than basil for hornworms in my specific garden*.

    * Go Vertical and Horizontal. Use vining companions (like pole beans on corn) to maximize vertical space. Use sprawling companions (like squash or oregano) as a living mulch to shade the soil and suppress weeds.

    * Don’t Be Afraid to Move Things. If a combination isn’t working, or a plant is getting swamped, move it! A garden is a living, changing thing. A little bit of planning goes a long way, and a tool like the Homestead OS garden planner can save you a season of headaches.

    ⚠️ Beginner Mistakes to Avoid

    I’ve made every single one of these. Learn from my pain.

  • Planting Mint (or any aggressive perennial) in the ground. I did this our second year. I thought, “Oh, fresh mint for tea!” By year four, it was staging a military coup in three of my garden beds. It took me an entire spring of diligent, back-breaking digging to eradicate it. Plant mint, lemon balm, and oregano in containers. Always.
  • Ignoring Spacing. Companion plants still need to breathe. If you crowd a tomato plant with a dozen other things right at its base, nothing will thrive. Respect the final spacing recommendations on the seed packet, even for the companions.
  • Planting All Your Brassicas Together. Grouping all your kale, broccoli, and cabbage into one big block is like putting out a giant neon sign for cabbage moths and flea beetles. It’s better to intersperse them throughout the garden, separated by non-brassicas like onions or lettuce, to confuse the pests.
  • Expecting Overnight Miracles. Companion planting is an investment in your garden’s ecosystem. You’ll see some benefits the first year, but the real magic happens in years two, three, and beyond as your soil biology improves and populations of beneficial insects establish themselves on your land.
  • Frequently Asked Questions

    H3: Does companion planting really work for pests?

    Absolutely. It works in two ways: repelling and trap cropping. I’ll never forget the year I planted nasturtiums at the end of my kale row. The nasturtiums were covered in black aphids, but my kale, just two feet away, was almost completely clean. The nasturtiums sacrificed themselves. It’s a strategy we use every single year now.

    H3: What should you not plant with tomatoes?

    The big no-no’s are fennel (it inhibits the growth of most plants), corn (they attract the same worms), and brassicas like broccoli and cabbage (they can stunt each other’s growth). Also, avoid planting potatoes nearby. They are both in the nightshade family and highly susceptible to early and late blight, which can spread between them and wipe out both crops.

    H3: What is the easiest companion planting combo for beginners?

    Hands down, it’s Tomatoes, Basil, and Marigolds. It is a tried-and-true trio. You get three benefits: the marigolds protect the roots from nematodes, the basil repels hornworms and improves flavor, and you get to harvest delicious tomatoes and basil for fresh sauce and pesto. It’s a win-win-win.

    H3: Can you companion plant in containers or raised beds?

    Yes, and it’s arguably even more important in a small space! In a container, you can easily tuck a marigold or a basil plant in with your patio tomato. In our 4×8 raised beds, we almost never plant in monoculture rows. We’ll have a row of carrots, a row of onions, and some lettuce tucked in between. It maximizes space and builds a healthier, more resilient little ecosystem.

    !A bountiful vegetable harvest proving that a companion planting guide increased yields naturally.

    It’s Your Garden’s Turn to Thrive

    The first time you walk out to your garden and see it humming with bees, ladybugs crawling on the leaves, and your plants looking healthier than ever… that’s a feeling of satisfaction that’s hard to beat. It’s the feeling of working with nature, not against it. It’s less work, less worry, and a whole lot more food in the pantry.

    This companion planting guide should give you the confidence to start building those plant teams in your own garden for increased yields and a healthier homestead. Don’t be afraid to experiment and find what works for you.

    For more behind-the-scenes stories and daily tips from our homestead, come say hi and follow us on Facebook!

    What’s the one companion planting pair you swear by, or are you excited to try for the first time this year? Let me know in the comments below!


    📚 More From Our Homestead

    Ready to Start Your Homestead Journey?

    Free guides, checklists, and tools to help you build your dream homestead.
    Explore Free Resources →

  • How to Become Self-Sufficient in Five Years: Our Plan

    !A thriving family farm showing how to become self-sufficient in five years through planning.

    I still remember the silence. Standing on a patch of overgrown weeds that would one day be our homestead, the only sound was the wind and the frantic beating of my own heart. We had a five-year-old, a mountain of student debt, and a wild dream of learning how to become self-sufficient in five years, starting from absolute zero.

    🎯 Quick Answer: Becoming self-sufficient in five years is an aggressive but achievable goal. It requires a disciplined, phased approach: spend year one on skill-building and debt elimination, year two on acquiring land and basic infrastructure, year three on intensive food production, year four on energy/water systems, and year five on refining and creating redundancy.

    🔑 Key Takeaways

    Front-Load the Skills: Your most important work happens before* you buy land. Learn to budget, cook from scratch, preserve food, and make basic repairs in your current home.

    * Debt is the Enemy: You cannot be truly self-sufficient if you’re a slave to a car payment or credit card bill. Our first year was a brutal, no-spend bootcamp to kill our debt.

    * Infrastructure is Expensive: The land is just the start. The well, septic, and shelter will cost more and take longer than you think. Plan for it.

    * Start Small, Then Scale: Don’t get 20 chickens, 4 goats, and 2 pigs in your first year. Start with a small garden and a few hens. Master one system before adding another.

    * It’s a Marathon, Not a Sprint: Burnout is real. This is a five-year plan, not a five-month fantasy. Progress over perfection is the mantra.

    🌱 Start Your Homestead Plan →

    !Financial planning and debt reduction as part of how to become self-sufficient in five years.

    Year 1: The Foundation – Skills & Financial Warfare

    This is the least glamorous year, and it’s the most important. The goal for Year 1 isn’t to own land; it’s to become the kind of person who can succeed on it. For us, this meant war on our $42,000 of consumer and student loan debt.

    We did a full financial audit. Every subscription was cut, we went down to one clunky (but paid-for) car, and date nights became learning to bake bread together. It was hard. It tested our marriage. But 14 months later, we were debt-free except for our apartment rent.

    Building Skills in Place

    While we were attacking our finances, we were also learning. You don’t need acreage to learn essential homesteading skills.

    * Cooking: We learned to make everything from scratch. Bread, yogurt, bone broth, pasta. This alone saved us hundreds each month.

    * Gardening: We started with three 5-gallon buckets on our tiny apartment patio growing tomatoes, lettuce, and herbs. It wasn’t much, but it was a start.

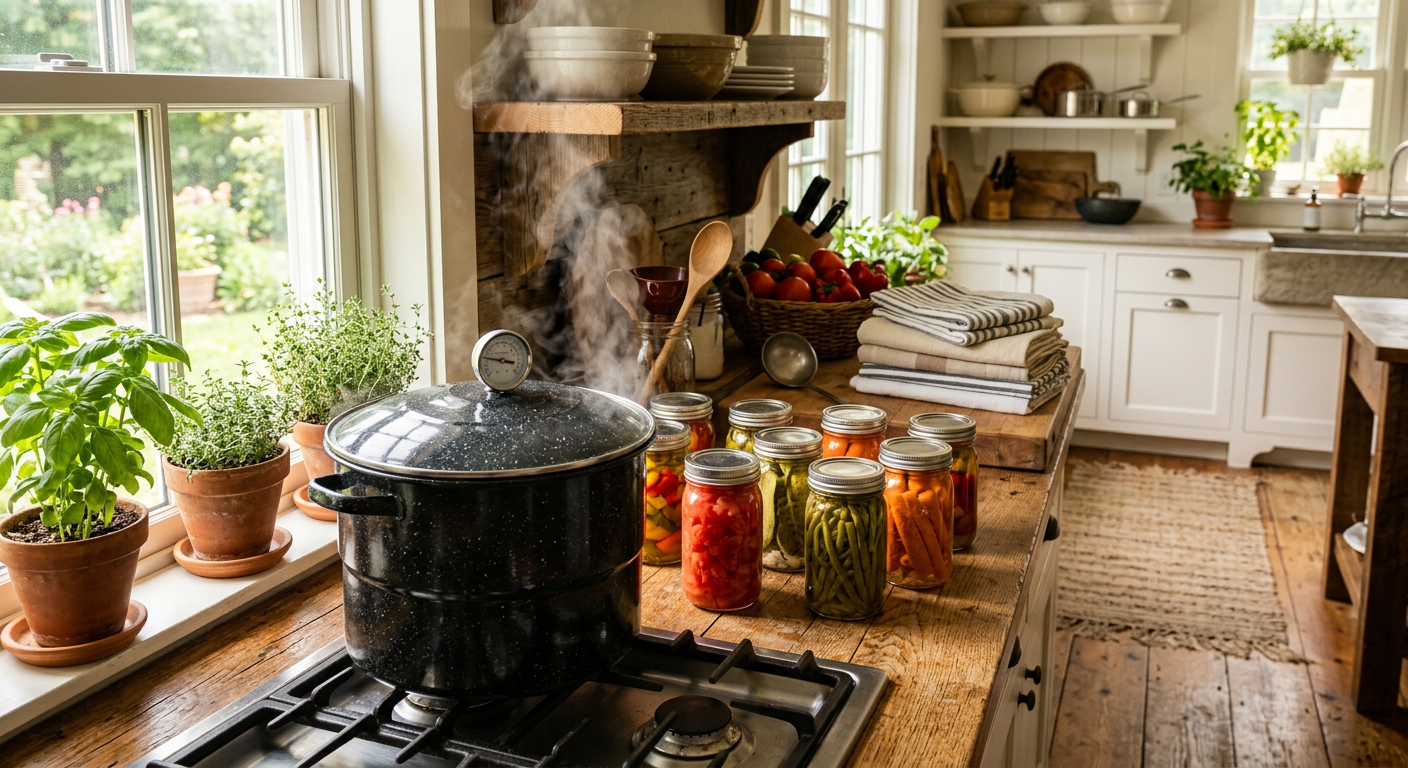
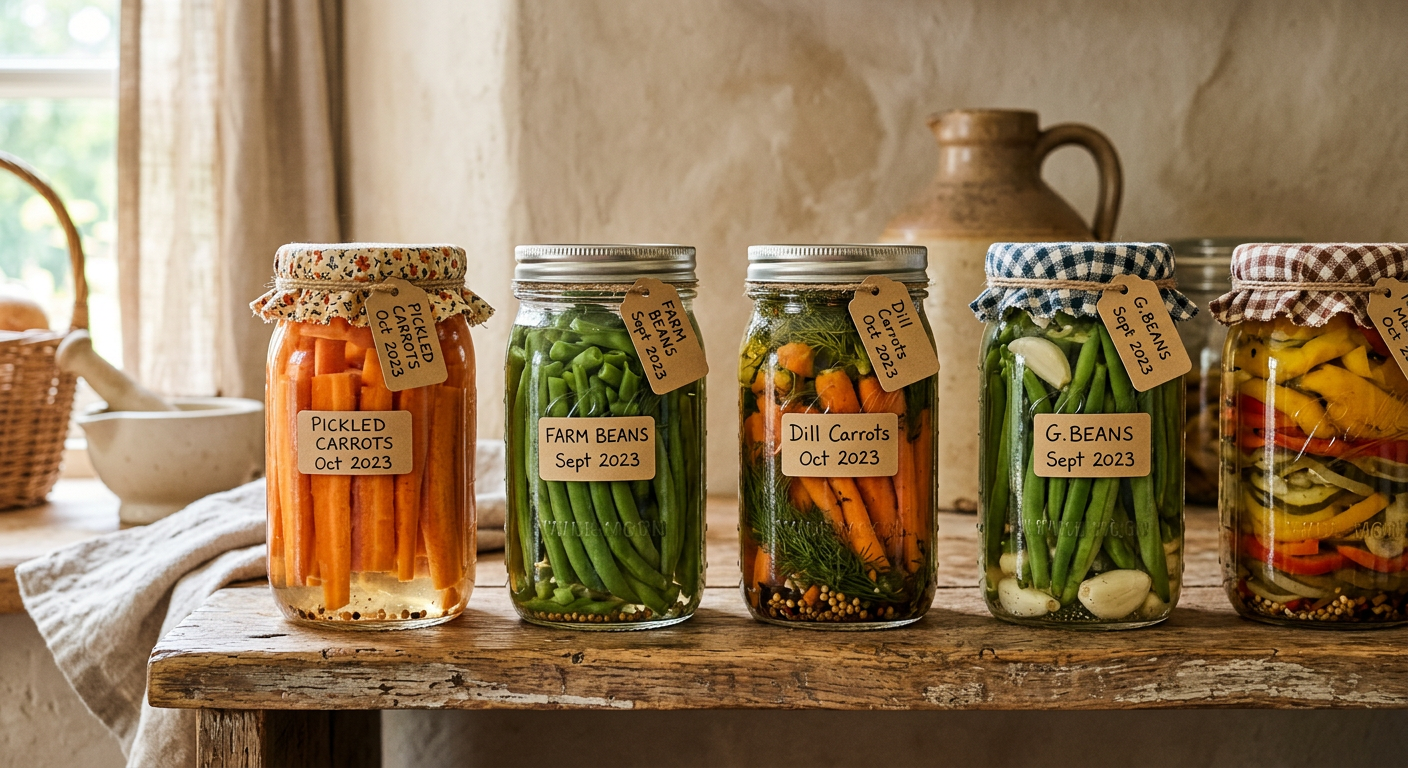
    * Preserving: I’ll never forget my first attempt at canning green beans. I bought a cheap water-bath canner for $30 and read everything I could find. We were so proud of those first 12 jars. It was a tangible piece of the future, sitting on our Ikea shelf.

    * Mending & Repair: We learned to sew on buttons, patch jeans, and fix the leaky faucet ourselves by watching YouTube videos. These small acts of self-reliance build confidence.

    We treated this year like a training montage in a movie. It was our chance to fail small. If you’re serious about this life, tracking your progress from the very beginning is key. We used a simple spreadsheet, but there are dedicated tools now like the ones on HomesteadOS that can help you map out your goals and inventory from day one.

    By the end of this year, you won’t have a homestead, but you will have the mindset and the savings account to make it happen.

    Keep reading — this is where the real money gets spent.

    Year 2: Land & Basic Infrastructure

    With our debt gone and a down payment saved, Year 2 was about finding our place. This process took us a solid six months of searching, driving down dirt roads, and learning about zoning laws and water rights. Don’t rush this. Check out our detailed guide on how to choose a homestead property for a full breakdown.

    Once we closed on our 7 acres (which cost $65,000 at the time), the real work began. Your mantra for this year is Water, Waste, and Walls.

  • Water: We had to have a well drilled. We got three quotes, and the cheapest was still a staggering $11,200 for a 300-foot well. It was a painful check to write, but without water, you have nothing.
  • Waste: Next came the septic system. This was another $8,500, dictated by county permits and regulations. This isn’t a place to cut corners.
  • Walls: We couldn’t afford a full house build. So, we bought a used 28-foot travel trailer for $7,000 to live in while we started building a small cabin. It wasn’t glorious, but it got us on our land.
  • This year is a massive cash drain. You’ll feel like you’re making no progress on the ‘fun’ parts of homesteading. You’re just setting the stage. Be prepared for sticker shock and delays.

    📋 Get the Beginner Checklist →

    Year 3: A Deeper Dive into How to Become Self-Sufficient with Food Systems

    With basic shelter handled, Year 3 is GAME ON for food production. This is the year your property starts to look like a homestead.

    The Garden Gets Serious

    Our first-year garden on the land wasn’t in cute raised beds. It was a 50×50 foot tilled plot we amended with truckloads of free compost from the municipal yard. We focused on high-calorie, easy-to-store crops: potatoes, winter squash, dry beans, garlic, and onions. Plus tons of tomatoes for canning.

    I made a huge mistake that first year: I didn’t get a soil test. Our production was okay, but not great. The next year, we sent a soil sample to our local university extension office for $15, and the report told us exactly what our soil was missing. Don’t skip this step!

    Introducing Livestock

    This was the year we got chickens. We started with 15 laying hens. The joy of collecting those first warm, brown eggs is something I’ll never forget. It’s a true milestone. For anyone considering it, we have a whole post on the a href=’https://blog.usehomesteados.com/raising-backyard-chickens-for-eggs-pros-cons’>pros and cons of raising backyard chickens you should read.

    That fall was a blur of harvest and preservation. Every weekend was spent canning, freezing, dehydrating, and storing root vegetables in the small cellar we dug. We put up over 400 jars of food. It was exhausting, satisfying work.

    Year 4: Energy, Water & Scaling Up

    By Year 4, you’ve got food systems dialed in. Now it’s time to reduce your reliance on outside utilities. For us, this meant tackling energy and water independence.

    Our Off-Grid Lite Approach

    We couldn’t afford a full $30,000 solar array. So we started smaller.

    * Wood Heat: We installed a wood-burning stove as our primary heat source. We spend our autumns harvesting firewood from our own property. It’s labor-intensive but incredibly rewarding to heat your home with your own sweat.

    * Rainwater Collection: We added gutters and a 500-gallon tank to our cabin roof to collect rainwater for the garden. This cut our well pump usage dramatically during the dry summer months.

    * Power Station: We invested about $1,500 in a Bluetti solar generator and a couple of panels. It doesn’t run the whole house, but it can power the fridge, our chest freezer, and our lights during a power outage. It’s a critical piece of resiliency we learned we needed after a 3-day winter outage.

    We also expanded our livestock this year, adding two dairy goats. This was a whole new level of commitment, with twice-a-day milking, but the fresh milk, cheese, and yogurt were a game-changer for our food self-sufficiency. Managing all these moving parts—breeding schedules, feed calculations, harvest times—can get overwhelming, which is why having a central place to track everything, like a dedicated homestead management system, moves from a ‘nice-to-have’ to a necessity.

    This is the year you really start to feel the security you’ve been working toward.

    !Learning food preservation skills while figuring out how to become self-sufficient in five years.

    Year 5: How To Become Self-Sufficient Through Refinement & Redundancy

    Year 5 isn’t about adding new things. It’s about strengthening the systems you already have. The goal is to create a resilient, regenerative homestead that requires fewer outside inputs.

    Our focus this year was:

    * Closing Loops: This means breeding our own animals instead of buying chicks or kids. It means getting serious about seed saving from our best-performing vegetables. It means creating better compost systems to create our own fertilizer.

    * Building Redundancy: What happens if the well pump breaks? We have the rainwater system as a backup. What if a predator gets the chickens? We have a freezer full of preserved meat. We thought about every potential failure point and built a Plan B.

    * Community: This is a huge one. We established a barter network with our neighbors. We trade our excess eggs and goat milk for their beef. Another neighbor is a mechanic who helps us with our tractor in exchange for a side of pork. True self-sufficiency isn’t about being an island; it’s about being part of a strong, local community.

    By the end of Year 5, our grocery bill was down 80%, we had no debt, and we produced our own heat, a good portion of our power, and most of our food. We weren’t 100% self-sufficient—and I don’t think anyone truly is—but we had built a life of freedom and security we once only dreamed of.

    🔧 See Recommended Tools →

    💡 Pro Tips

    * Focus on One Thing at a Time. In Year 3, don’t start a garden, get chickens, AND get goats. Master the garden. Then add chickens the next year. Slow is smooth, and smooth is fast.

    * Buy Quality Tools Once. We learned the hard way that a cheap, $100 chainsaw is more dangerous and frustrating than it’s worth. Save up and buy good tools. Our post on essential homesteading tools covers our must-haves.

    * Define ‘Sufficient’ For YOU. Does it mean zero grocery bills? Or just being able to survive a 3-month job loss? Your goal dictates your plan. Be specific.

    * Celebrate the Small Wins. When you successfully bake your first loaf of sourdough, that’s a party. When you eat the first tomato from your garden, savor it. This journey is long, and you need to fuel it with joy.

    ⚠️ Beginner Mistakes to Avoid

    * Ignoring Local Knowledge: Don’t just read books. Talk to the old-timer at the feed store. Ask your neighbors what grows well in your specific microclimate. They have decades of experience you can learn from.

    Getting Animals Before Fencing: We watched a neighbor spend their first summer constantly chasing their free-range goats out of the road. Your fencing and shelter must be 100% ready before* the animals arrive. No exceptions.

    * Underestimating ‘Sweat Equity’ Time: That cabin we planned to build in six months? It took two years of weekends. Everything takes twice as long and costs 50% more than you plan. Budget time and money accordingly.

    Analysis Paralysis: Don’t spend three years ‘researching’ without ever getting your hands dirty. Start a container garden today. Learn to mend a sock tonight*. Action is the greatest teacher.

    Frequently Asked Questions

    H3: How much money does it take to become self-sufficient?

    This varies wildly, but let’s be real: it’s not cheap. Aside from the land cost, we spent roughly $30,000 on essential infrastructure (well, septic, temporary housing) in Year 2. After that, we probably invested another $10,000 over the next three years in animals, fencing, tools, and preservation supplies. We did it by paying cash and avoiding debt like the plague.

    H3: Can you truly be 100% self-sufficient?

    Honestly, no. And it’s not a great goal. We still buy things like coffee, salt, and tractor parts. A better goal is ‘community-sufficient,’ where you rely on a network of local producers. Total isolation is fragile; community is resilient.

    H3: What is the hardest part of this lifestyle?

    It’s not the physical labor. It’s the mental and emotional toll. Animals get sick and die. Crops fail. You will face setbacks that make you want to quit. The resilience to get up at 5 AM the next day and do it all over again is the hardest and most important skill.

    H3: What can I do to start in an apartment?

    A LOT. The most important year is Year 1, and it can be done anywhere. Get out of debt. Learn to cook from scratch, bake, and mend. Start a small container garden. Learn to can using produce from the farmer’s market. These skills are the foundation of everything.

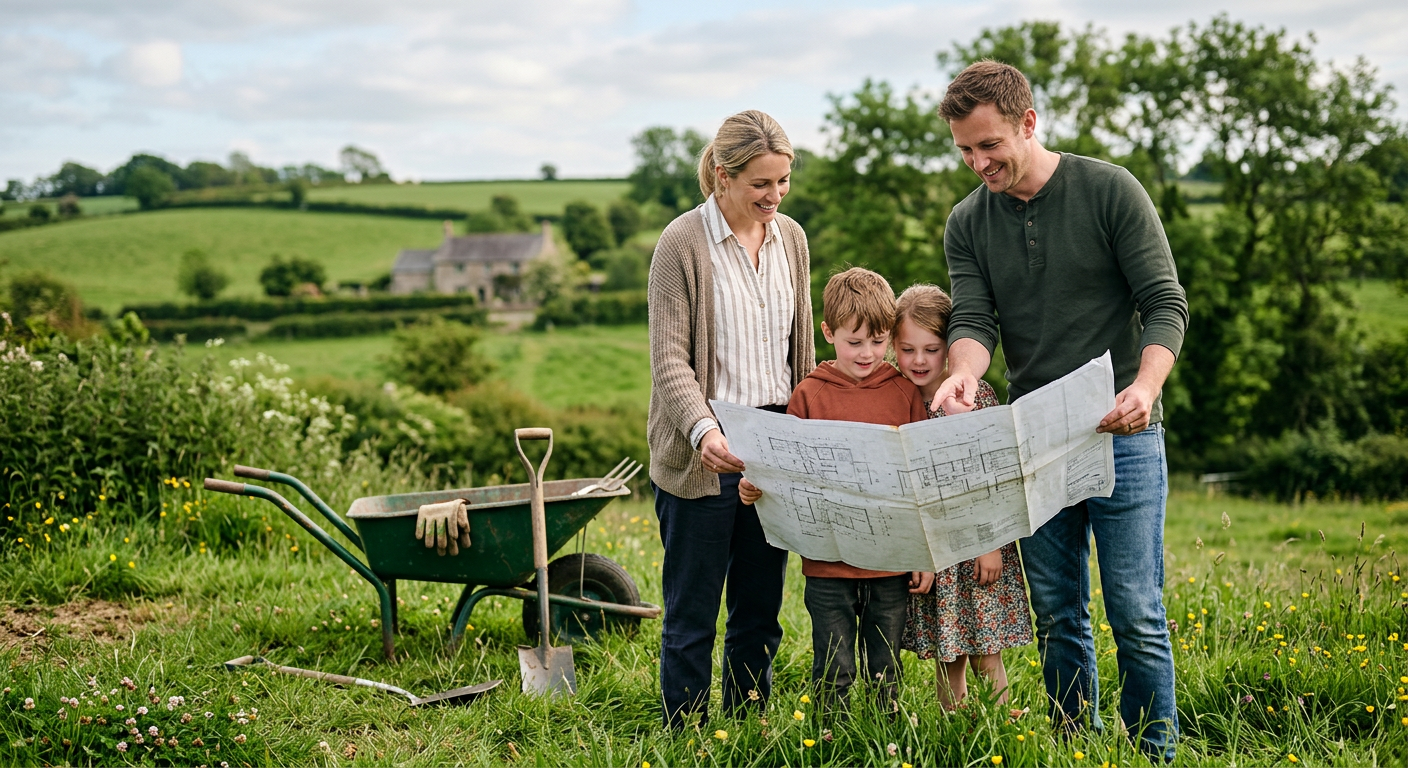
    !A family planning their future homestead and learning how to become self-sufficient in five years.

    Are You Ready for the Work?

    The path to become self-sufficient in five years is paved with dirty fingernails, early mornings, and a lot of mistakes. But it’s also a path to incredible freedom, security, and a connection to your food and your family that’s impossible to describe.

    It’s not just about surviving; it’s about thriving. If you want to see more of our day-to-day successes and failures, be sure to follow our Facebook page!

    What’s the one skill you’re most excited (or scared) to learn on your self-sufficiency journey? Share it in the comments below!


    📚 More From Our Homestead

    Ready to Start Your Homestead Journey?

    Free guides, checklists, and tools to help you build your dream homestead.
    Explore Free Resources →

  • Best Veggies for a Backyard Organic Garden (Our Picks)

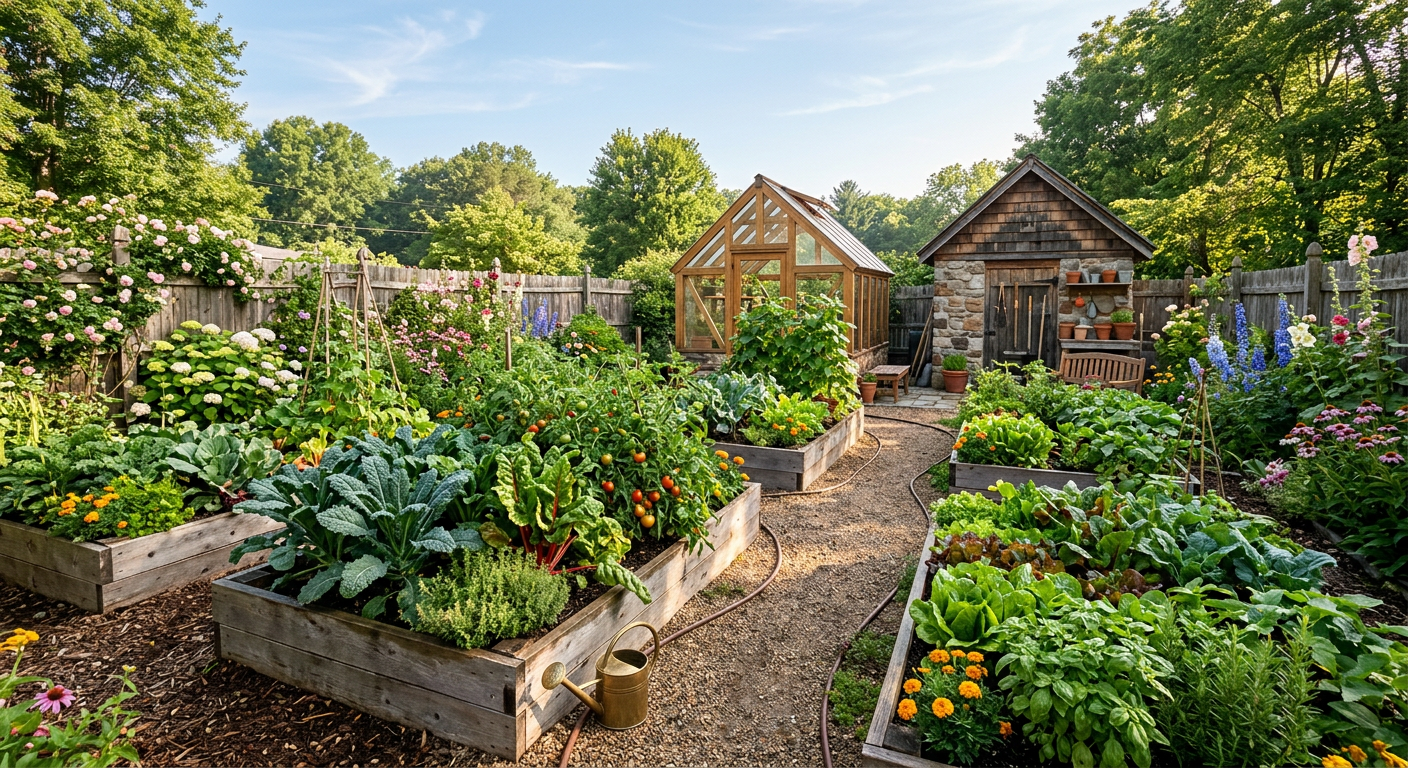
    !A thriving backyard organic garden with raised beds, featuring the best vegetables to grow.

    I’ll never forget our first summer garden. I’d planted twelve zucchini plants, imagining beautiful, neat rows of green bounty. By August, it was a jungle. We were hauling in 20 pounds of zucchini a week, leaving them on neighbors’ porches in the dead of night. That’s when I learned the first, and most important, lesson of gardening: choose your crops wisely.

    🎯 Quick Answer: The best vegetables to grow in a backyard organic garden are those that are productive, resilient, and match your climate. For beginners, focus on zucchini, bush beans, cherry tomatoes, lettuce, and potatoes. They offer the biggest reward for the least amount of heartbreak.

    🔑 Key Takeaways

    • Start with the ‘Easy Wins’: Choose vegetables known for their high productivity and low fuss, like zucchini and bush beans, to build confidence.
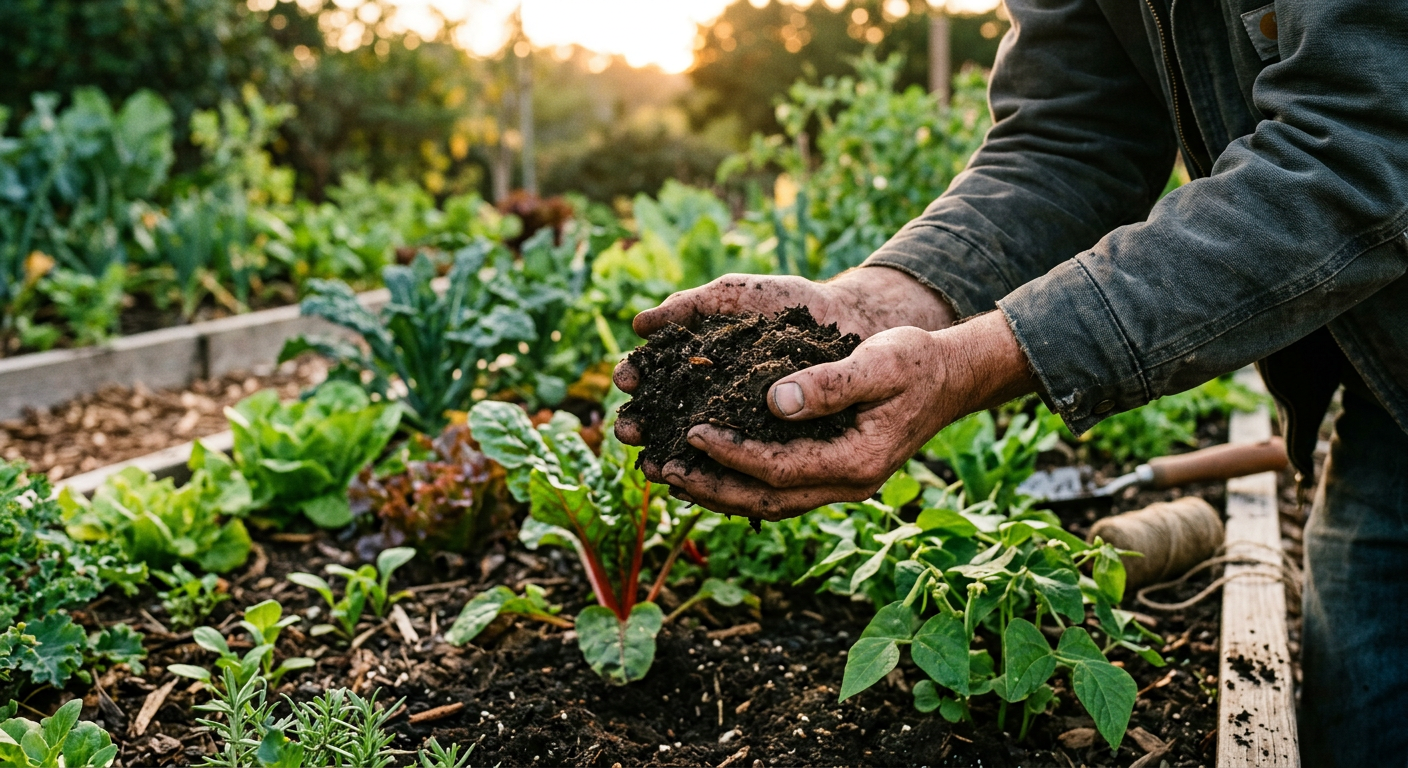
    • Focus on Soil Health: Your success isn’t about fancy fertilizers. It’s about building rich, living soil with compost and organic matter.
    • Plant What You’ll Actually Eat: It sounds simple, but it’s easy to get carried away. Prioritize the vegetables your family loves to avoid waste.
    • Plan for Pests Organically: You don’t need chemicals. Healthy soil, companion planting, and physical barriers are your best defense.
    • Maximize Your Space: Even a small backyard can be incredibly productive with vertical growing techniques and succession planting.
    • Don’t Be Afraid to Fail: You will lose some plants. Every dead seedling is a lesson learned. That’s homesteading.

    🌱 Start Your Homestead Plan →

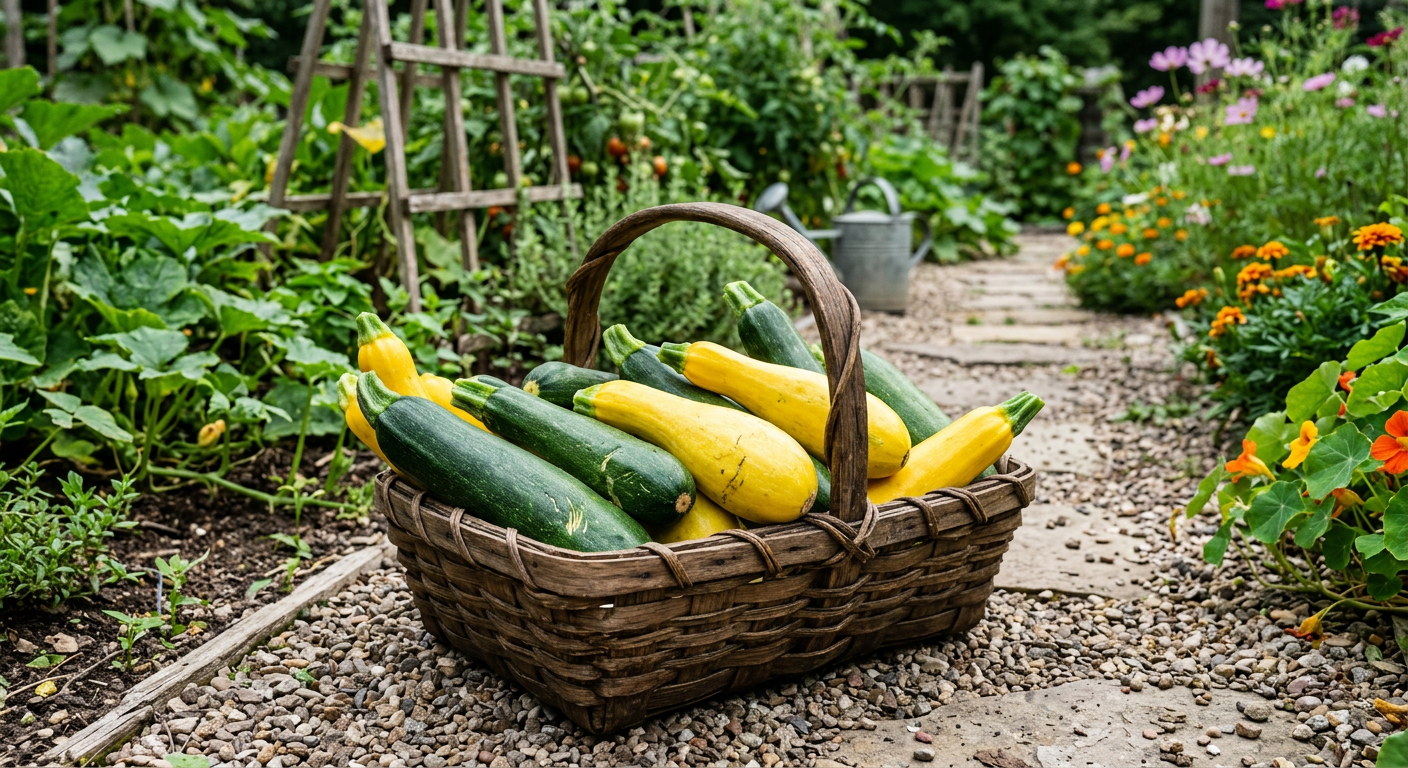
    !A harvest of zucchini and squash from a backyard organic garden.

    The Easiest Wins: Our Top 3 No-Fail Vegetables

    When you’re just starting, you need a victory. You need to pull something out of the ground that you grew yourself. It’s a powerful feeling. These are the crops that give you that win without much of a fight.

    1. Zucchini & Summer Squash

    I already told you my zucchini story. One or two plants is all a family of four needs. Seriously. They are ridiculously productive. We just give them decent soil with plenty of compost, water them deeply once a week, and they take care of the rest. This year we’re growing the ‘Black Beauty’ zucchini and a yellow crookneck variety. They just don’t stop.

    2. Bush Beans

    Forget the finicky pole beans for your first year. Bush beans are compact, fast-growing, and you get a huge harvest all at once—perfect for learning to can or freeze. We plant a 10-foot double row of ‘Blue Lake 274’ and it gives us enough green beans for a dozen meals plus about 15-20 quarts for the pantry. We learned quickly that a little planning helps manage these big harvests. Using a simple journal or one of the planning guides on https://xlvvlujsctgiorcwbtkv.supabase.co/functions/v1/social-redirect?p=homesteados&loc=blog_inline_early made a huge difference in our second year, preventing us from feeling overwhelmed.

    3. Leaf Lettuce

    We love the ‘Black Seed Simpson’ cut-and-come-again variety. Instead of waiting for a whole head to form, you just snip the outer leaves as you need them. The plant keeps producing for weeks. We plant a small patch every three weeks (succession planting!) from April to September for a continuous supply of fresh salads. It’s so much better than the sad, plastic-bagged stuff from the store.

    Next up: the crops that will fill your pantry for the winter.

    High-Yield Staples: Our Best Vegetables to Grow in a Backyard Organic Garden

    Once you’ve got a few wins under your belt, it’s time to think about food security. These are the calorie-dense, high-yield crops that make a real dent in your grocery bill.

    Potatoes

    There is nothing, and I mean nothing, like digging up your own potatoes. It feels like a treasure hunt. We dedicate a 10×10 foot area to them. Last year, from just 5 pounds of seed potatoes (cost: $12), we harvested over 90 pounds of Kennebec potatoes. They’re now curing in our cool, dark basement, and we’ll be eating them well into February. All they need is loose soil, hilling them up with dirt a couple of times, and consistent water.

    Tomatoes (Specifically, Determinate & Cherry)

    Everyone wants to grow tomatoes. My advice: start with a cherry tomato plant like ‘Sun Gold’—they are disease-resistant and produce handfuls of sweet fruit daily. For preserving, we grow a determinate ‘Roma’ variety. ‘Determinate’ means they set all their fruit at once, which is a lifesaver for making big batches of sauce. Wrestling with a giant, sprawling indeterminate plant can be a full-time job.

    Winter Squash

    This is a set-it-and-forget-it crop. We plant butternut and spaghetti squash at the edge of the garden and let the vines ramble. They shade out weeds and require almost no attention after they’re established. The reward? Dozens of hard-shelled fruits that will keep in a cool room for 4-6 months, providing delicious, healthy food deep into winter.

    Getting this part right is how you transition from a hobby to a lifestyle.

    But what if you don’t have a huge yard? I’ve been there.

    !Rich organic soil and compost for growing the best vegetables in a backyard organic garden.

    Space Savers: Vertical & Container-Friendly Crops

    Our first ‘homestead’ was a rental with a small concrete patio. We still grew a ton of our own food. You just have to think up.

    Vertical Growers

    Anything that vines can be grown on a trellis to save space. We use simple cattle panel arches for cucumbers (‘Marketmore 76’ is a workhorse) and pole beans. This not only saves ground space but also improves air circulation, which reduces fungal diseases like powdery mildew. Growing vertically is one of the most important essential homesteading skills beginners need.

    Container All-Stars

    Lots of the best vegetables to grow in a backyard organic garden do surprisingly well in pots. We use 5-gallon buckets (with drainage holes drilled in the bottom) for single pepper plants, eggplants, and even our determinate tomatoes. Herbs are perfect for containers, and having a pot of the best perennial herbs right outside your kitchen door is a game-changer for daily cooking.

    📋 Get the Beginner Checklist →

    Super-Dense Planting

    When space is tight, look into intensive planting methods. Carrots, radishes, and beets can be planted much closer together than the seed packet suggests, as long as your soil is deep and fertile. We’ll sow a 2×4 foot area with carrots and get a surprising amount of food from that tiny patch.

    Moving beyond the basics is where the real fun and nutrition starts.

    💡 Pro Tips

    We learned these lessons through sweat, dirt, and plenty of mistakes. Pay attention here.

  • Feed Your Soil, Not Your Plants. This is the core of organic gardening. Forget the blue miracle liquids. We spend our time and money on compost, aged manure from our chickens, and cover crops in the off-season. Healthy soil grows healthy plants that resist pests and disease. A soil test from your local university extension is the best $20 you can spend.
  • Succession Plant Everything. Don’t plant all your lettuce at once. Plant a small amount every 2-3 weeks. This gives you a continuous, manageable harvest instead of a glut you can’t handle. We do this with lettuce, radishes, carrots, and bush beans.
  • Water Deeply, and Infrequently. A light sprinkle every day encourages shallow, weak roots. We water our garden beds deeply once or twice a week, letting the water soak down 6-8 inches. This forces the plant roots to grow deep and strong, making them more resilient to drought.
  • Mulch is Your Best Friend. A thick layer of straw, wood chips, or grass clippings conserves moisture, suppresses weeds, and breaks down to feed the soil. We spent literally hundreds of hours weeding our first year. Now, with heavy mulch, we spend maybe 30 minutes a week.
  • Plan for Expansion. Once you get the hang of it, you’ll want to grow more. You can start mapping out your entire property for maximum efficiency. We used the planning tools at https://xlvvlujsctgiorcwbtkv.supabase.co/functions/v1/social-redirect?p=homesteados&loc=blog_inline_late to design our larger garden beds and rotational planting schedule.
  • ⚠️ Beginner Mistakes to Avoid

    I’ve made every single one of these. Hopefully, you won’t have to.

    * Planting Too Much, Too Soon: That zucchini story? It’s a classic. Start smaller than you think you need. Master 5-6 crops your first year, then expand. A small, well-managed garden is better than a large, weedy, overwhelming mess.

    * Ignoring a Soil Test: We just threw seeds in our clay-heavy soil the first year and wondered why things were stunted. A simple soil test told us we were critically low on nitrogen and organic matter. A few bags of compost and some organic fertilizer changed everything.

    * Freaking Out About Pests: The first time I saw aphids on my kale, I nearly ripped it all out. Wrong move. Healthy plants in healthy soil can handle some pest pressure. A strong blast of water from the hose and encouraging beneficial insects (ladybugs love dill and cilantro!) is usually enough. For cabbage moths, we use simple insect netting—it’s one of the essential homesteading tools to buy first. No chemicals needed.

    Forgetting to Plan for the Harvest: Growing is only half the battle. What’s your plan when you have 40 pounds of tomatoes ready? Do you know how to can? Do you have freezer space? Thinking about preservation before* you plant is critical.

    !A productive and well-maintained backyard organic garden with various easy-to-grow vegetables.

    Frequently Asked Questions

    H3: What’s the cheapest way to start an organic garden?

    Compost is key. You can create a compost pile for free using kitchen scraps and yard waste. Use reclaimed materials for raised beds (or don’t use them at all). And save your own seeds from open-pollinated varieties at the end of the season to plant for free next year. Starting a garden on the cheap is totally doable; it’s a huge part of homesteading on a budget.

    H3: How many hours of sun do my vegetables need?

    Most fruiting vegetables (like tomatoes, peppers, squash) need what’s called ‘full sun’—at least 6-8 hours of direct sunlight per day. Root vegetables (carrots, potatoes) can get by with 6. Leafy greens (lettuce, spinach, kale) can tolerate partial shade, with as little as 4 hours of direct sun. A good tip is to just watch your yard for a full day before you decide where to put the garden.

    H3: How do I handle pests without chemicals in an organic garden?

    It’s a multi-pronged approach called Integrated Pest Management (IPM). First, build healthy soil. Second, use physical barriers like row covers. Third, attract beneficial insects (ladybugs, lacewings) by planting flowers like alyssum and dill. Fourth, hand-pick larger pests like hornworms. As a last resort, use organic-approved sprays like insecticidal soap or Neem oil, but even those should be used sparingly.

    H3: What are the best vegetables to grow together in a backyard organic garden?

    The classic is the “Three Sisters” method from Native American agriculture: corn, pole beans, and squash. The corn provides a trellis for the beans. The beans fix nitrogen in the soil for the heavy-feeding corn. The big squash leaves shade the ground, suppressing weeds and conserving moisture. Another great pairing is planting basil around your tomatoes—many gardeners swear it improves the tomato’s flavor and repels some pests.

    🔧 See Recommended Tools →

    That first taste of a sun-warmed cherry tomato you grew yourself changes you. It connects you to your food, to the land, and to the seasons in a way that buying from a store never can. It’s not always easy, and you’ll have failures. But the successes feed your body and your soul. You just have to get started.

    We share even more of our day-to-day garden wins (and losses!) over on our Facebook page, so come say hi!

    What was the first vegetable you ever successfully grew? Share your story in the comments below!

    Start Your Own Homestead Journey Today →


    📚 More From Our Homestead

    Ready to Start Your Homestead Journey?

    Free guides, checklists, and tools to help you build your dream homestead.
    Explore Free Resources →

  • Start Urban Homesteading on a Small Balcony (Our Story)

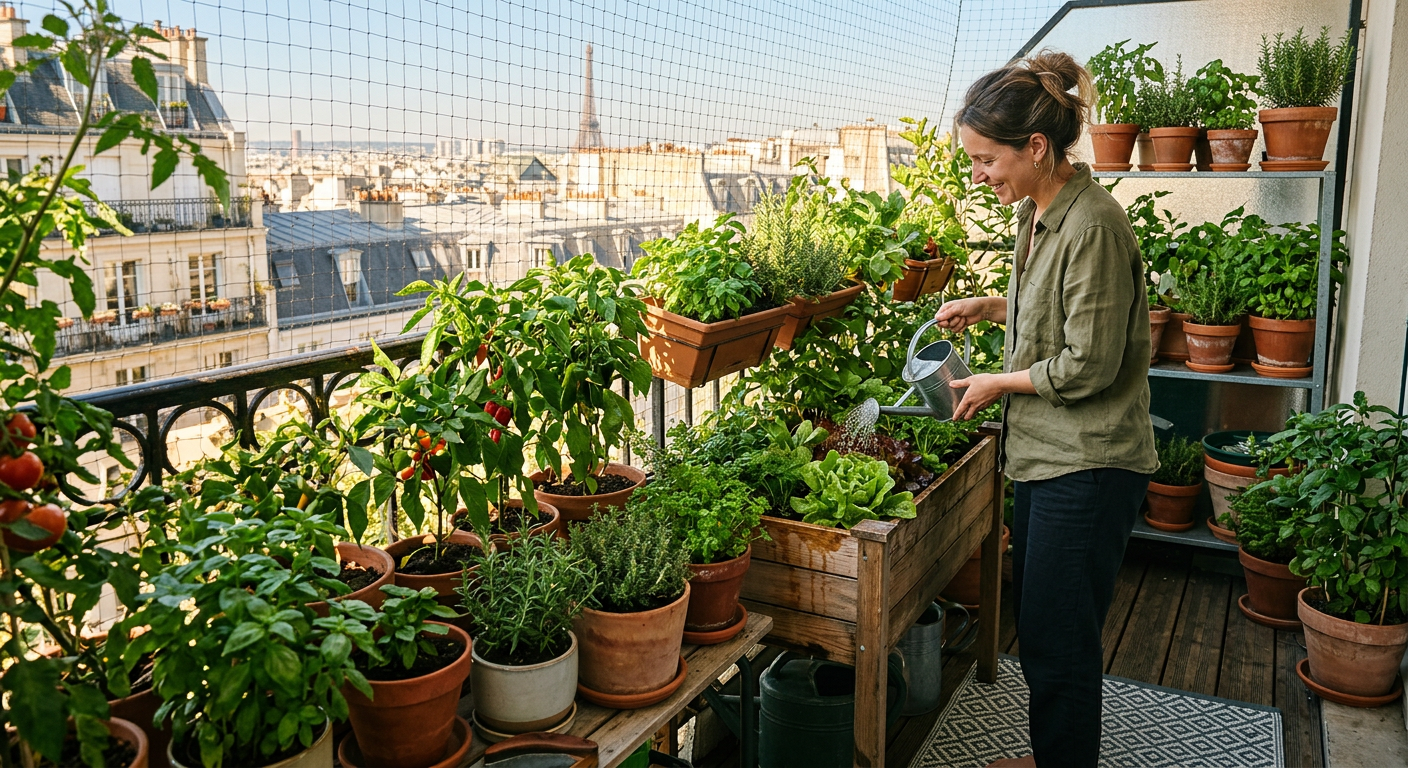
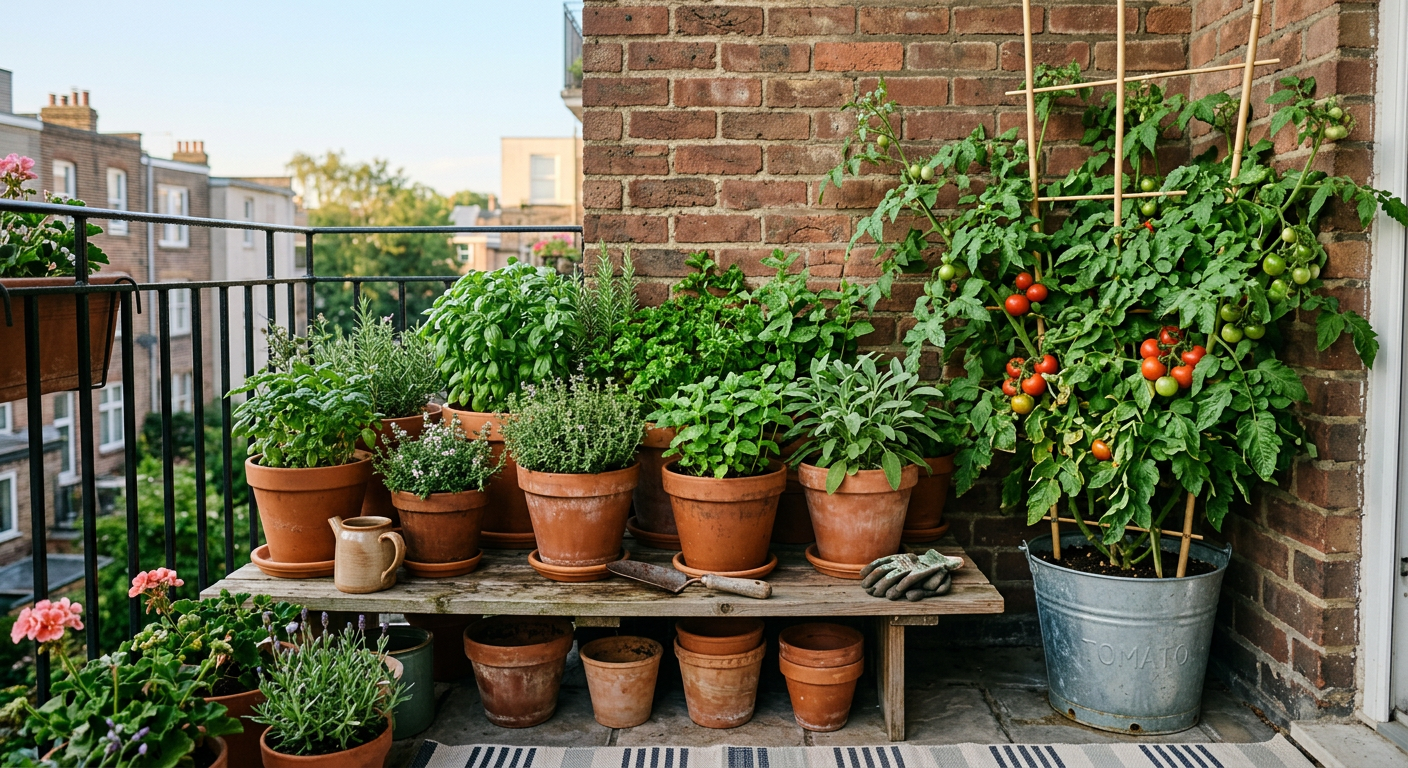
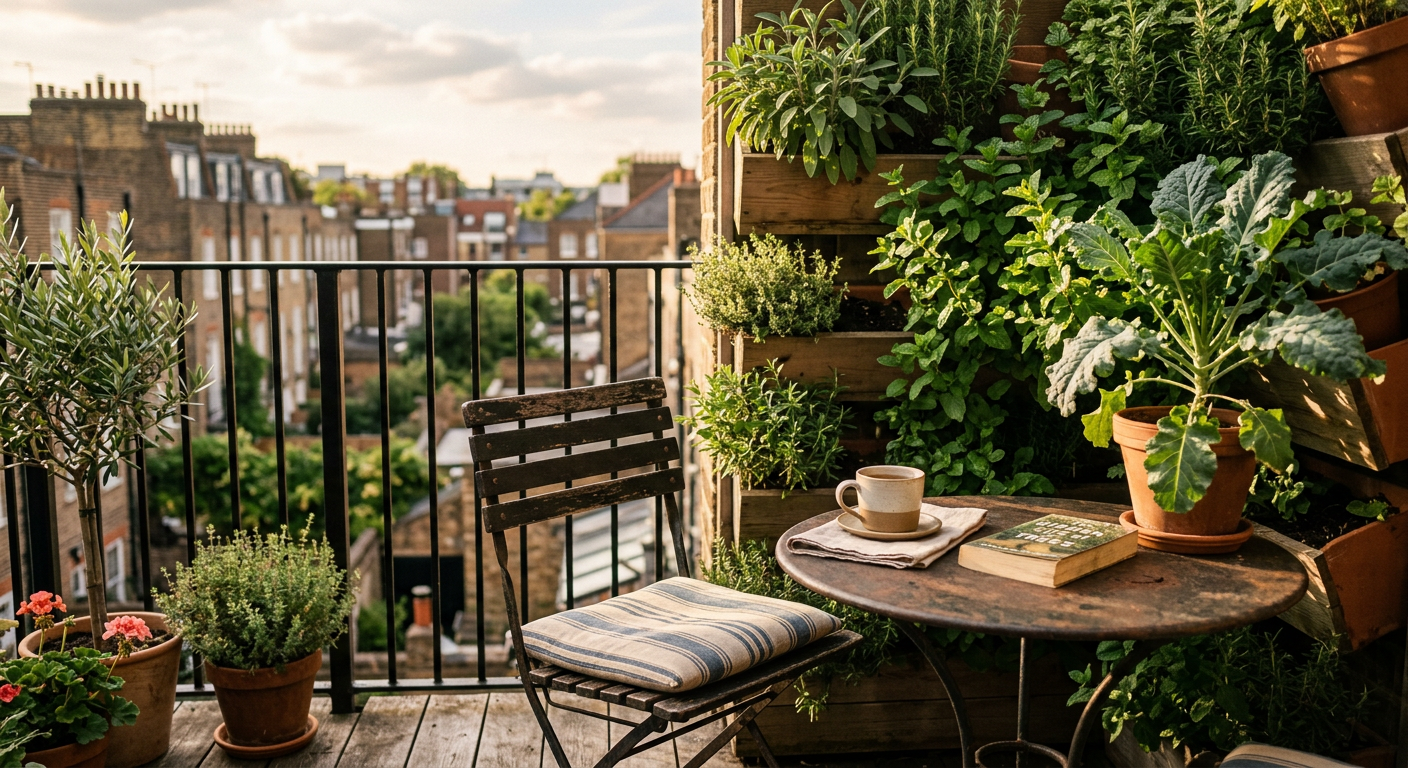
    !Learning how to start urban homesteading small balcony with lush potted herbs and sunny morning light.

    I can still smell the damp potting mix we spilled on the living room floor of our third-story apartment. We’d hauled two giant bags up the stairs, convinced this was the year we’d be “urban homesteaders.” I had this glorious vision of plucking ripe, red tomatoes from our tiny 5×8 foot balcony, but by August all we had was one sad, green-shouldered tomato and a bad case of blossom end rot. That failure was the best thing that ever happened to our homesteading journey.

    🎯 Quick Answer: To start urban homesteading on a small balcony, focus on vertical space with stacking planters and trellises. Choose high-yield, small-footprint crops like herbs and salad greens over space-hogs like large tomatoes. The goal is to build skills and supplement your food, not replace the grocery store.

    🔑 Key Takeaways

    * Assess Your Space: Before buying anything, check your balcony’s weight limit, sun exposure (real hours, not just a guess), and your building’s rules.

    * Go Vertical: Your most valuable real estate is vertical. Use railing planters, wall-mounted trellises, and stacking pots to multiply your growing area.

    * Choose Plants Wisely: Focus on value and yield per square foot. Herbs, cut-and-come-again lettuces, and radishes are winners. Heirlooms can wait.

    * Close the Loop: Start a small worm bin (vermicomposting) to turn kitchen scraps into incredible fertilizer. It’s odorless and perfect for small spaces.

    * Skill Up: Homesteading isn’t just about growing. Learning to dry herbs, make simple ferments, or sprout seeds are skills that fit any size home.

    * Manage Expectations: You won’t be fully self-sufficient from a balcony. Celebrate every single leaf you grow and every meal you supplement.

    🌱 Start Your Homestead Plan →

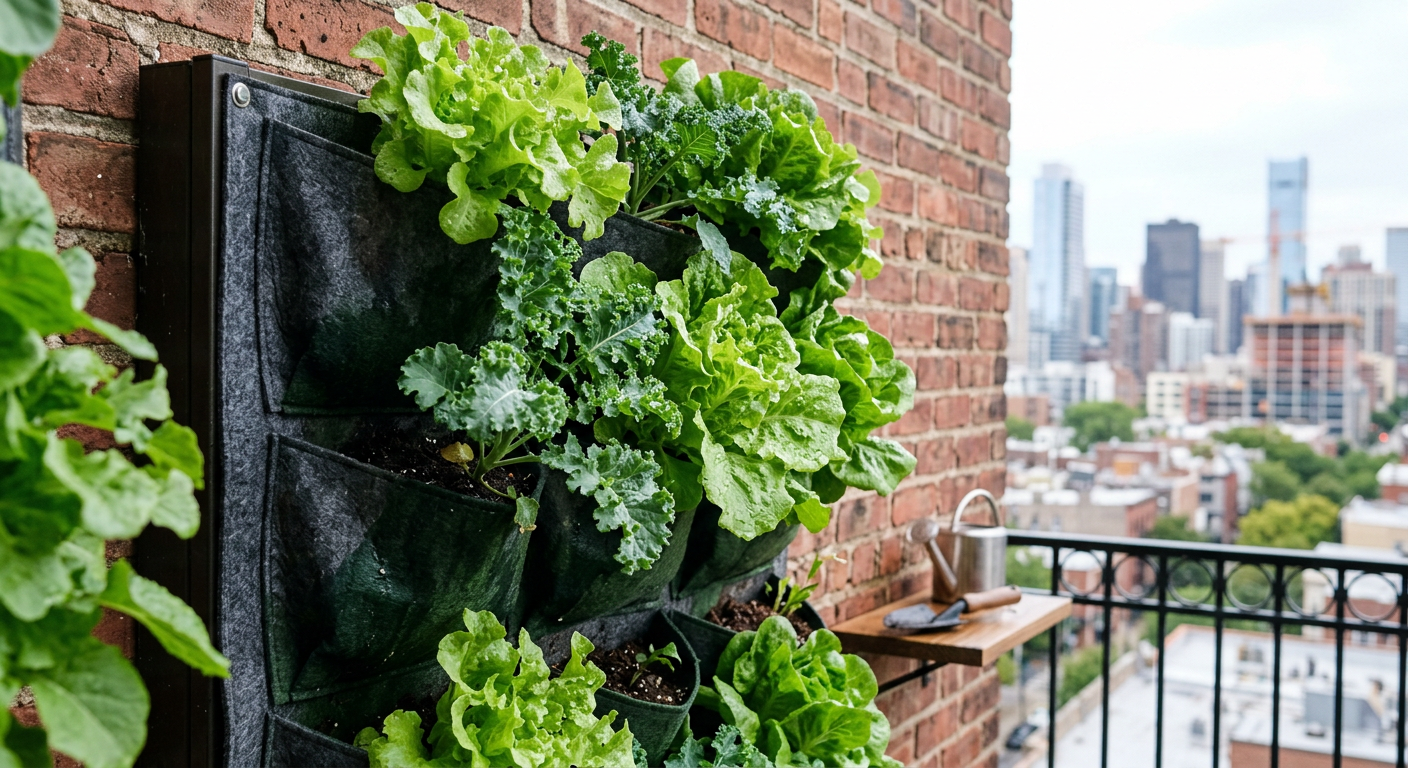
    !Vertical gardening setup for how to start urban homesteading small balcony using pocket planters and lettuce.

    Know Your Balcony Before You Begin

    Before you spend a single dollar, you need to play detective. We learned this the hard way. We assumed our east-facing balcony got “full sun.” We were wrong.

    It got four hours of absolutely scorching morning sun, which was enough to fry our delicate lettuce starts but not enough to ripen a Brandywine tomato. We wasted a whole season—and about $75 on fancy seeds and soil—because we didn’t observe first.

    How to do a Balcony Audit

  • Sun Mapping: Get a sun tracker app or just go out every hour for a full day. Mark down exactly when the sun hits your balcony and when it leaves. Be honest. Six hours is the bare minimum for most fruiting plants (tomatoes, peppers). Less than that? You’re in the greens and herbs zone.
  • Weight Limits: This is the serious part. Potting soil, water, and containers get HEAVY. A 10-gallon pot can easily weigh 80-100 pounds when wet. Check your lease agreement or contact your building management about balcony load capacity. A good rule of thumb from most engineers is about 40-60 pounds per square foot, but you must verify. A University of Missouri Extension article gives a good overview on container weights.
  • Wind and Rain: Is your balcony covered? Is it a wind tunnel? We had a beautiful basil plant get snapped in half by a wind gust on our old corner balcony. Now we know to create windbreaks or secure taller plants.
  • Failing to do this audit is the first step towards a balcony full of dead plants and disappointment. Do the boring work first.

    This next step is where you can literally triple your growing space.

    Vertical Victory: How to Maximize a Small Footprint

    Once you know your space, it’s time to think up, not out. This is the absolute key to how to start urban homesteading on a small balcony successfully.

    I’ll never forget the day my husband came home with a discarded shipping pallet. I thought he was nuts. He stood it on its end against the balcony wall, stapled some landscape fabric inside to create pockets, and for about $20 in supplies, we created a vertical garden that held 12 separate plants—mostly lettuce and herbs. It changed everything.

    Your Vertical Toolkit

    * Railing Planters: The easiest win. They use space that is otherwise completely wasted. We used simple coco-liner planters for flowers and herbs. Cost: $15-30 each.

    * Stacking Pots: These are brilliant for strawberries or herbs. A single pot’s footprint can hold 3-5 tiers of plants. Look for brands like Mr. Stacky.

    * Trellises: A simple lattice against the wall is perfect for vining plants like peas, beans, or even a small-variety cucumber. It guides them upward and keeps them from sprawling.

    * Shelving Units: A cheap, rust-resistant metal shelving unit can hold dozens of small pots for starting seeds or growing microgreens.

    Don’t just put three pots on the floor. That’s a patio, not a homestead. Think like an engineer and use every available Z-axis.

    📋 Get the Beginner’s Balcony Checklist →

    Now that you have the space, what on earth should you grow in it?

    Choosing Your Crops: Be a Ruthless CEO

    That first year, my heart was set on growing heirloom tomatoes. They’re the iconic homesteading plant, right? I spent months babying that one plant in a giant, expensive pot. My total harvest was three tomatoes. Three.

    Next to it, in a pot half the size, I had a mix of basil and oregano. We harvested from it every other day for four months. It saved us at least $50 in fresh herbs from the store.

    Which one was the better “homestead” plant? It wasn’t the tomato.

    You have to be the ruthless CEO of your balcony. Your currency is square inches. Your goal is return on investment (ROI). It’s all about shifting your mindset, which is something we cover a lot in our HomesteadOS system.

    High ROI Balcony Crops

    * Cut-and-Come-Again Greens: Mesclun mix, arugula, leaf lettuce. You can harvest the outer leaves, and the plant keeps producing for weeks. Infinitely better than a single head of lettuce.

    * Herbs, Herbs, Herbs: Especially perennial herbs. Chives, mint (in its own pot!), oregano, thyme. They are expensive to buy fresh and incredibly easy to grow. We have a whole guide on the best perennial herbs that work well in containers.

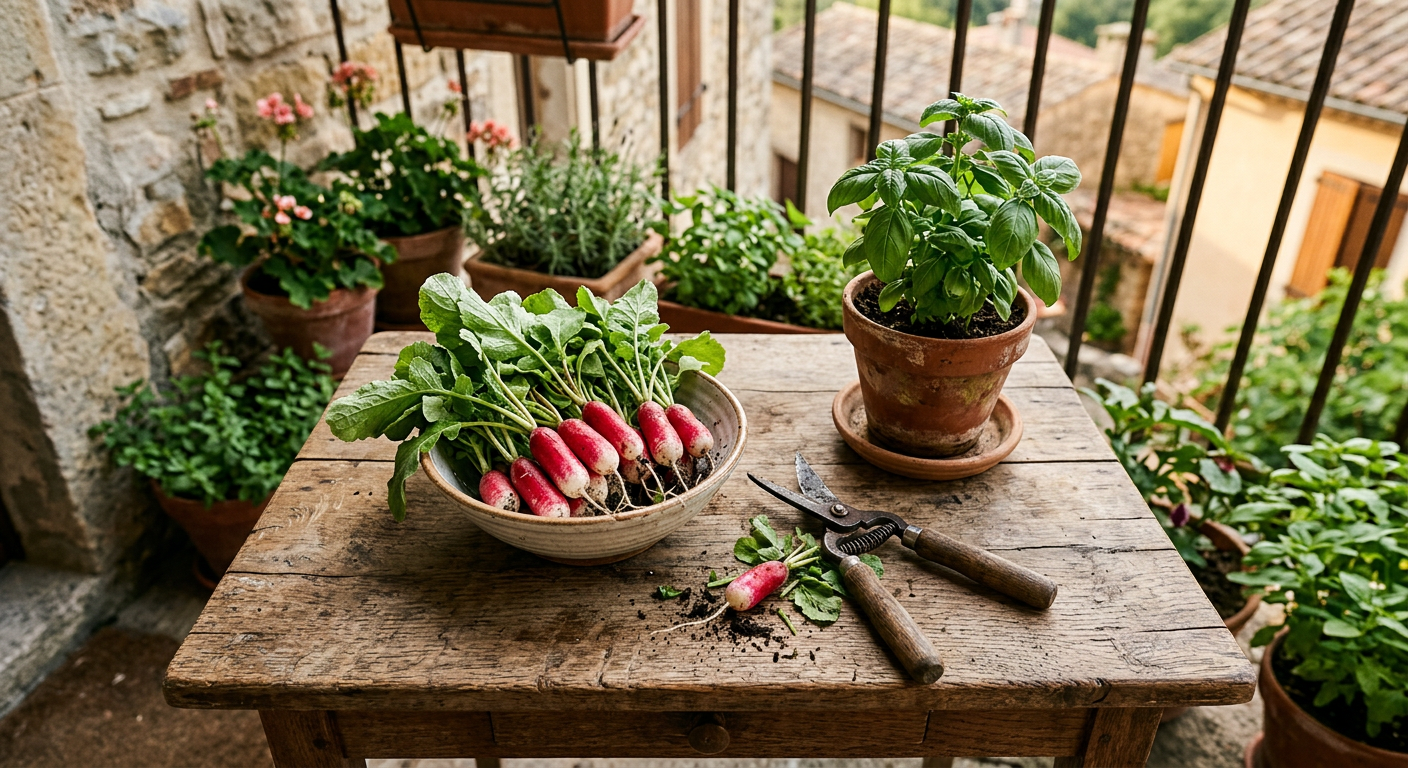
    * Radishes: They go from seed to plate in as little as 25 days. The satisfaction is immense, and you can succession plant them all season.

    * Bush Beans: They don’t need a huge trellis and are very productive for their size.

    Stop dreaming about pumpkins. Start getting excited about having fresh chives for your eggs every single morning.

    But growing is only half the battle. You need to close the loop.

    !A fresh harvest of radishes and basil showing how to start urban homesteading small balcony successfully.

    The Balcony Ecosystem: Composting & Skills

    Real homesteading is about creating systems, not just hobbies. Even on a balcony, you can create a tiny, closed-loop system.

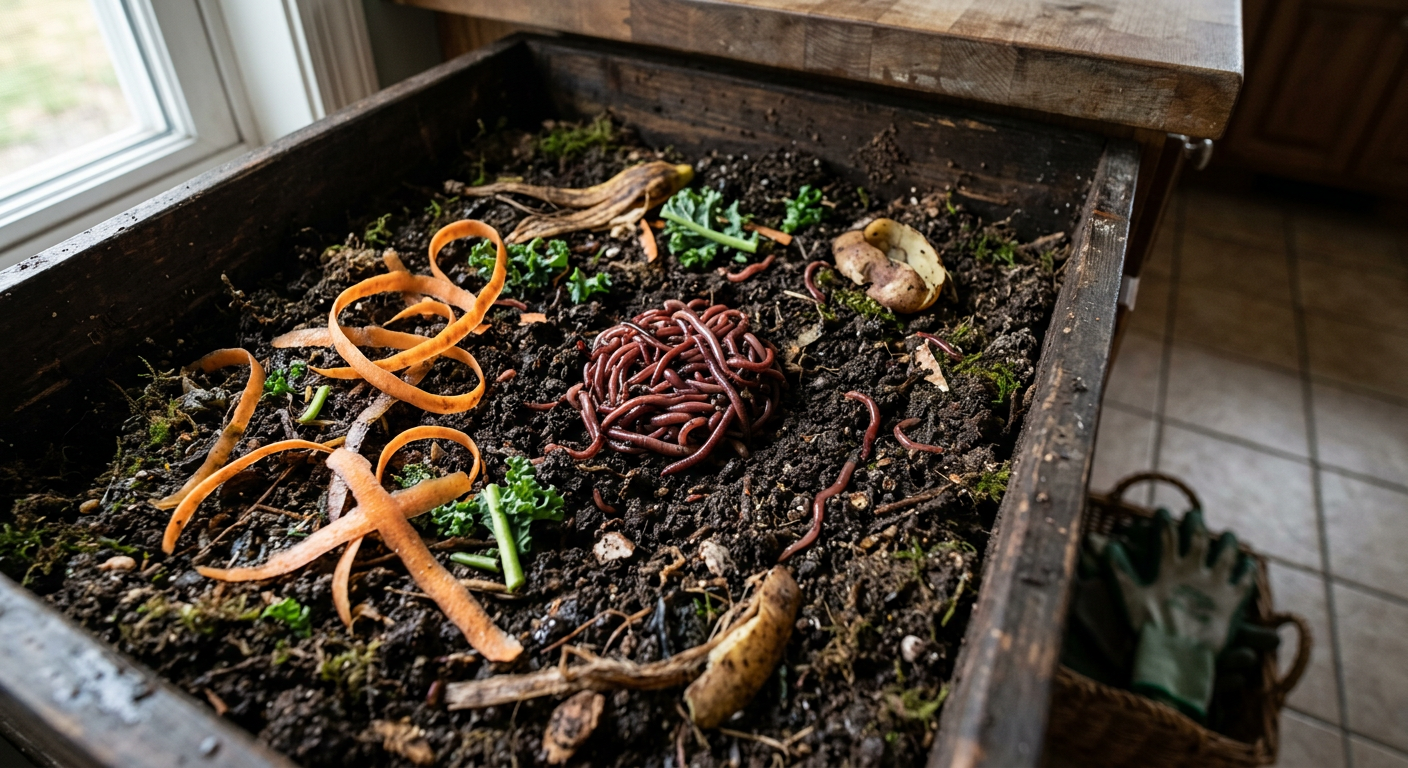
    The game-changer for us was vermicomposting—a worm bin. I was so hesitant. Worms? In our apartment? But a proper bin is completely odorless and takes up about one square foot of shady space.

    We bought a Worm Factory 360 for around $120 and a pound of red wigglers for $30. We feed them our coffee grounds, vegetable peels, and shredded junk mail. They turn it into the most incredible black gold fertilizer I’ve ever seen. No more buying bags of fertilizer. We were creating our own.

    This is also where you practice other homesteading skills. Instead of just growing basil, learn to dry it for winter. Instead of growing mint, learn to make mint tea or simple syrup. These are some of the most essential homesteading skills beginners need, and they require zero acres.

    Every time you turn a “waste” product (kitchen scraps) into a resource (fertilizer), you are homesteading. 🔥

    Keep reading — this is where most people mess up.

    💡 Pro Tips

    These are the things we learned through pure trial and error. Mostly error.

    * Water Correctly. Water the soil, not the leaves. Water deeply in the morning so the plants have time to dry out, which prevents fungus. We spent $15 on a simple moisture meter, and it was a godsend.

    * Saucers Are Not Optional. A single overflowing pot can stain the concrete and make your downstairs neighbor furious. Get saucers big enough to catch a full watering.

    * Invest in Potting Mix. Don’t just use dirt from the ground. It’s too heavy, compacts easily, and has pests. Buy a quality potting mix designed for containers. It’s worth the money.

    * Feed Your Plants. Container plants are entirely dependent on you for nutrients. The worm castings are amazing, but a regular feeding with a balanced liquid organic fertilizer every 2-3 weeks during peak season is crucial.

    Start Small. Please, don’t try to plant 20 different things your first year. Pick 3-5 plants and learn to grow them well*. Success builds momentum.

    🔧 See Our Recommended Balcony Tools →

    ⚠️ Beginner Mistakes to Avoid

    I cringe when I see new gardeners making these same mistakes we did. Save yourself the heartache.

    * Ignoring a Pest Problem. One aphid is a warning. Ten aphids is an issue. A hundred is an infestation. On a balcony, things can get out of hand FAST. Check your plants daily and act immediately (a simple soap spray often works).

    * Overcrowding Seedlings. The seed packet says thin to 6 inches apart for a reason. If you let ten radish seedlings compete in a tiny pot, you’ll get ten tiny, useless roots instead of one big, crunchy one. Be ruthless and snip the weak ones.

    * Forgetting to Secure Things. A sudden thunderstorm can turn your beautifully arranged pots into a disaster. We once had a railing planter get ripped off in a storm. Use zip ties or wire to secure anything that could become a projectile.

    * Wingin’ It. Just buying stuff without a plan is a recipe for failure. Getting a solid plan in place first for what to plant where and when is crucial. We built the HomesteadOS dashboard to help new homesteaders avoid these exact pitfalls and map out their seasons.

    Frequently Asked Questions

    H3: How do I know if my balcony can support the weight of a garden?

    This is critical. You absolutely must check your lease or building management for specific load capacity limits. As a very general, non-professional guideline, most concrete balconies are designed to hold 40-60 lbs per square foot. To be safe, use lighter-weight fiberglass or fabric pots, use a soilless potting mix, and spread the weight out rather than clumping it all in one corner.

    H3: What can I realistically grow with only 3-4 hours of sun?

    Don’t despair! This is prime real estate for shade-tolerant crops. Think leafy greens like spinach, kale, and various lettuces. Many herbs thrive in part-sun, including mint, chives, parsley, and cilantro. You can also grow root vegetables like carrots and radishes, though they may mature a bit slower.

    H3: How do I deal with pests like aphids or spider mites on a balcony?

    Prevention is key. Healthy, properly watered plants are less susceptible. Check under leaves regularly. If you see pests, act fast. Often, a strong spray of water from a bottle is enough to dislodge them. For more persistent pests, an insecticidal soap spray (you can buy it or make your own with a few drops of Castile soap in water) is a safe and effective option.

    H3: Is it cheaper to grow my own food on a balcony?

    Honestly? At first, no. Initial setup costs for good pots, soil, and maybe a shelving unit can be $100-$200. The real savings come from growing high-value items you’d otherwise buy expensive and organic. A $3 packet of basil seeds can give you $50+ worth of fresh basil over a summer. The value is in the fresh, nutrient-dense food and the skills you build.

    !A worm bin for composting, a key step in how to start urban homesteading small balcony for organic fertilizer.

    It Starts with a Single Pot

    That first failed tomato taught me more about homesteading than any book could have. It taught me to observe, to be realistic, and to find joy in a single, perfectly crisp radish instead of a fantasy of self-sufficiency.

    Urban homesteading on a small balcony isn’t about acreage; it’s about attitude. It’s a declaration that you want to be more connected to your food, even if it’s just one pot at a time. So go for it. Buy one pot, some good soil, a packet of lettuce seeds, and begin.

    And for more stories from our journey and tons of practical tips, we’d love for you to follow our page on Facebook. We’re all in this together.

    What’s the ONE thing you’re most excited to try growing on your balcony? Drop a comment below!


    📚 More From Our Homestead

    Ready to Start Your Homestead Journey?

    Free guides, checklists, and tools to help you build your dream homestead.
    Explore Free Resources →

  • Start Homesteading with No Land? Here’s How We Did It

    !A thriving balcony garden showing how to start homesteading with no land experience in an apartment.

    I still remember the smell of hot concrete on our third-floor apartment balcony. I had one pathetic tomato plant in a five-gallon bucket, and it was getting absolutely annihilated by aphids. I felt like a total failure, staring at my sad little plant while dreaming of acres of green pasture I couldn’t afford.

    That was my first lesson in homesteading: it doesn’t start with a deed to a property. It starts with a mindset, and learning how to start homesteading with no land experience is the most valuable first step you can take.

    🎯 Quick Answer: The best way to start homesteading with no land is to transform your current space (apartment, rental, suburban yard) into a learning lab. Focus on building practical skills like container gardening, food preservation, and basic repairs before you ever sign a mortgage. Your homesteading journey begins with your hands and your head, not a plot of land.

    🔑 Key Takeaways

    * Start Now, Where You Are: Homesteading is a set of skills and a mindset, not a location. You can begin in a city apartment or a suburban rental.

    * Focus on Skills, Not Acres: Learning to bake bread, mend clothes, or can jam is more valuable initial experience than owning land you don’t know how to manage.

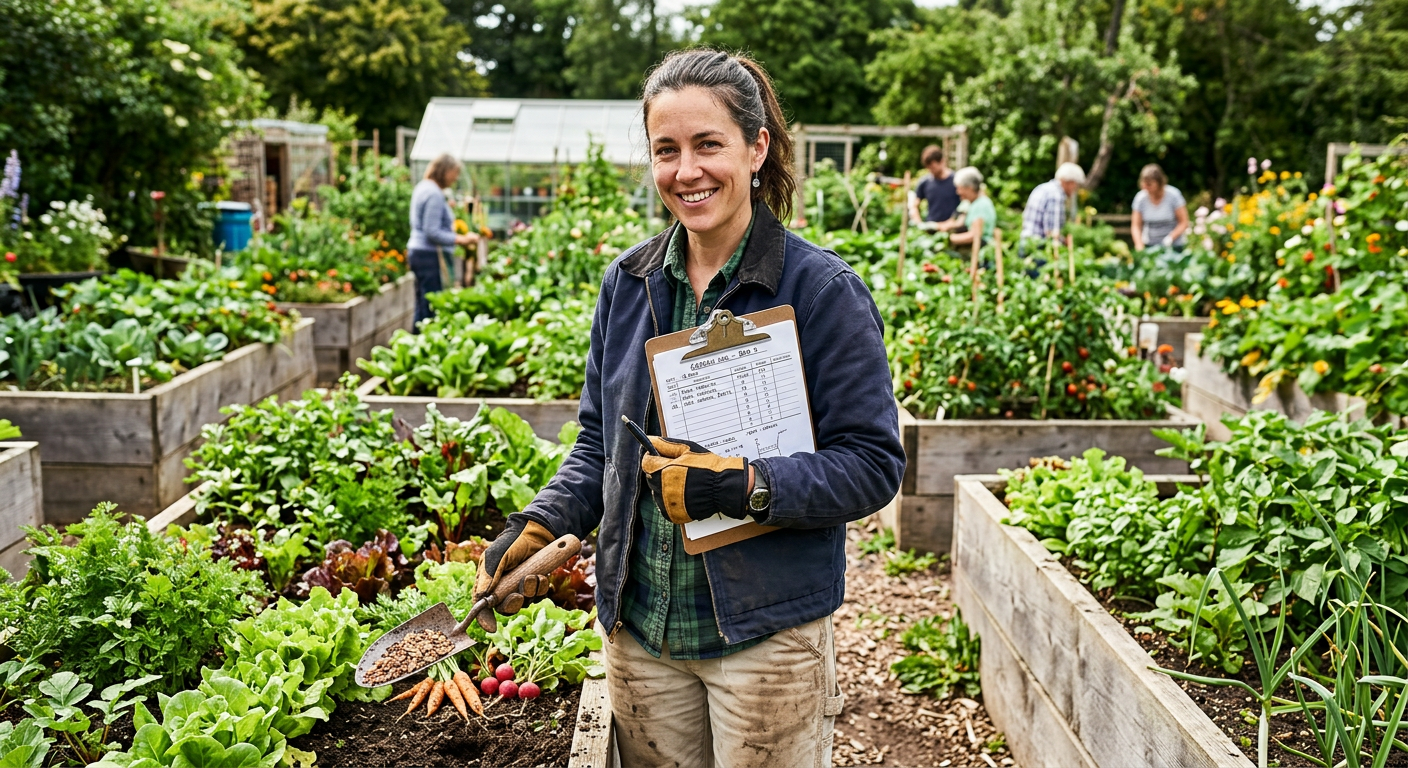
    * Sweat Equity is Real: Volunteer on local farms, help neighbors with their gardens, or join a community garden to gain practical, hands-on land experience for free.

    * The Kitchen is Your First Farm: Master food preservation, scratch cooking, and minimizing waste. This is the heart of a homestead and can be done anywhere.

    * Plan and Save Aggressively: Use this land-less time to build a rock-solid financial plan and a’knowledge bank.’ Read, research, and budget like your future depends on it—because it does.

    * Community is Your Best Crop: Connect with other homesteaders, gardeners, and farmers online and in person. They are your future support system and a goldmine of information.

    🌱 Start Your Homestead Plan →

    !Hands kneading dough to learn how to start homesteading with no land experience through kitchen skills.

    Bloom Where You’re Planted: Your First Homestead is Your Mindset

    Everyone thinks you need five acres and a barn to start homesteading. They’re wrong. The truth is, if you can’t keep a basil plant alive on your windowsill, you’re going to have a brutal time managing a quarter-acre garden.

    We spent three years in a 900-square-foot rental before we bought our land. I thought of it as our ‘homesteading incubator’.

    Master the Micro-Garden

    Forget acres. Think in square feet. Or even square inches.

    * Container Gardening: We grew so much in containers on our tiny concrete patio. We had two EarthBox systems that cost us about $50 each and produced an insane amount of salad greens and peppers. We killed a lot of plants, but each dead plant was a cheap lesson.

    * Windowsill Herbs: Start with a few pots of simple herbs. They’re forgiving and the ROI is huge. Fresh chives for your eggs is a little victory that keeps you going.

    * Sprouts & Microgreens: You can grow these on your kitchen counter in a jar with just seeds and water. It’s the fastest, cheapest way to produce your own food. We got started with a $15 sprouting kit.

    My balcony tomato failure taught me about pests. The next year, I learned about neem oil and companion planting with marigolds. It was a small-scale, low-stakes education. Getting a concrete plan for even a small space is crucial; we used a system similar to the one at usehomesteados.com to map out our tiny patio garden so we knew exactly what to plant and when.

    Want to dig deeper? Our guide on starting a small backyard vegetable garden translates perfectly to a container setup.

    This next section is about getting real, dirty, hands-on experience… for free.

    Trade Sweat for Skills: The Secret to Free Land Experience

    You don’t own land. But someone near you does, and they are probably overworked and could use a hand. This is your golden ticket.

    I’ll never forget the Saturdays I spent helping an old timer, Mr. Henderson, with his small goat herd. I offered to help him mend fences—a skill I wanted to learn—in exchange for him teaching me the basics of animal care. I learned how to trim hooves, spot signs of illness, and how truly stubborn a goat can be. That education was priceless, and it cost me nothing but sweat and a willingness to listen.

    How to Start Homesteading with No Land Experience via Bartering

  • Find the People: Visit local farmers’ markets. Don’t just buy produce; talk to the farmers. Tell them you’re eager to learn and willing to work.
  • Offer a Specific Skill: Are you good with computers? Offer to help a farm set up a simple website. Can you build? Offer to repair a chicken coop.
  • Just Offer to Weed: Seriously. No farmer in history has ever turned down a genuine offer for help with weeding. It’s how you get your foot in the door. You learn plant identification and you get to ask all the questions you want while you work.
  • Check for Formal Programs: Look into organizations like WWOOF (Worldwide Opportunities on Organic Farms). You can often trade work for room, board, and an intensive learning experience.
  • This is about being humble. You’re not going to be driving the tractor on day one. You’re going to be hauling manure. Embrace it. The lessons are in the manure.

    Once you’re learning to work the land, you need to learn what to do with the bounty.

    Learn the Lost Arts (In Your Modern Kitchen)

    Homesteading isn’t just growing things. It’s about a cycle of production and preservation. You can master 90% of these skills in a regular apartment kitchen. This knowledge is CRITICAL when you have a garden explosion and need to deal with 40 lbs of zucchini at once.

    Kitchen Skills to Master Now

    * Canning & Preserving: My first attempt at pressure canning was terrifying. I was sure the whole thing would explode. I followed a recipe from the Ball Blue Book and processed six jars of green beans. When I heard the ‘ping’ of each lid sealing as they cooled, it was one of the most satisfying sounds I’d ever heard. Start with water-bath canning for high-acid foods like pickles and jam. It’s less intimidating.

    * Baking from Scratch: Forget the bread machine. Learn to make a simple loaf of sourdough or no-knead bread. It connects you to your food, saves money, and makes your house smell incredible. My sourdough starter, which I’ve had for seven years, was born in that city apartment.

    * Basic Mending: A sewing machine is great, but just learning to sew on a button or patch a pair of jeans with a needle and thread is a foundational skill. It’s the anti-consumerism mindset in action.

    These are the essential homesteading skills that will truly make you self-sufficient, and they don’t require a single acre.

    📋 Get the Beginner Checklist →

    Now for the least glamorous, but most important part: the planning.

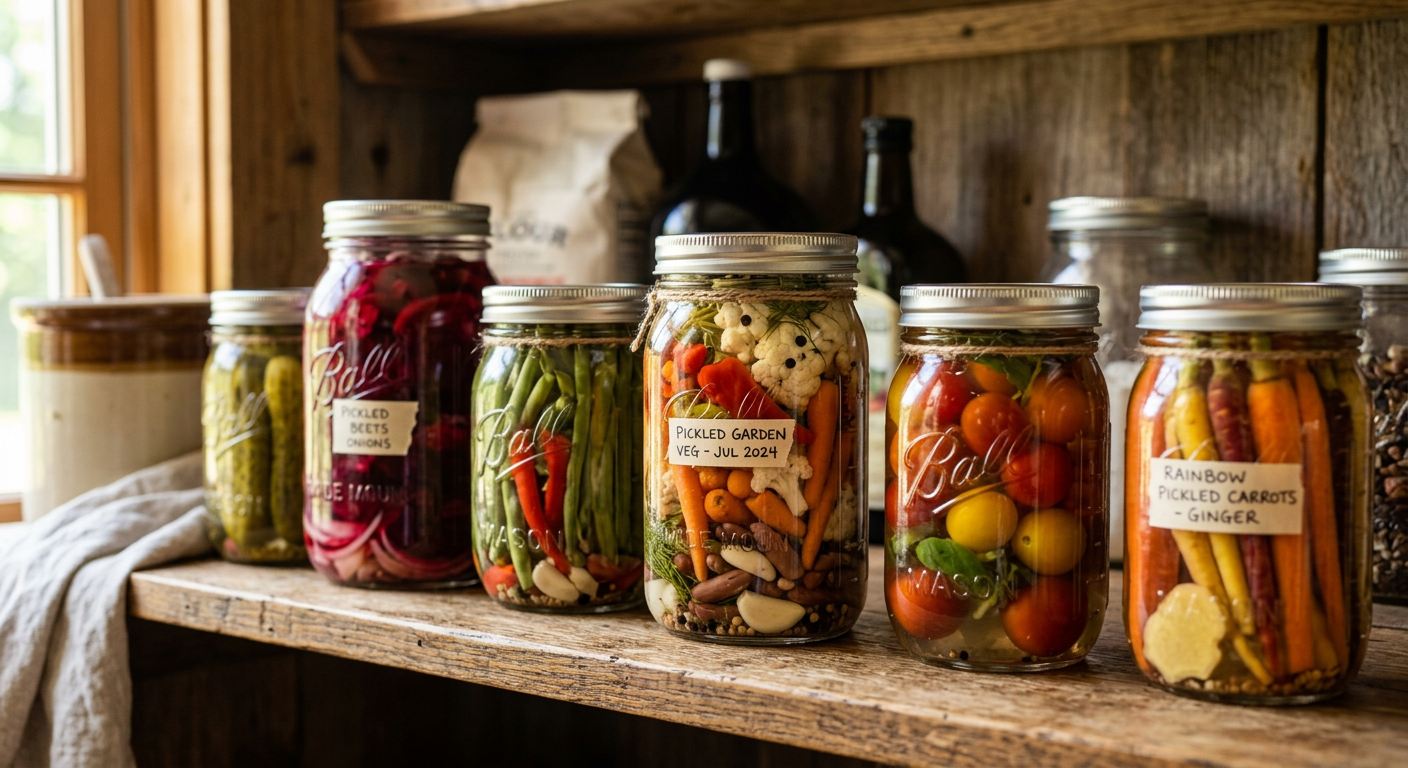
    !Canned vegetables on a shelf demonstrating how to start homesteading with no land experience.

    Build Your ‘Homestead Brain’ (And Your Bank Account)

    While you’re weeding someone else’s garden and canning pickles in your kitchen, your other full-time job is planning and saving.

    Running a homestead is running a small, very demanding business. You are the CEO, the janitor, and the head of livestock health. Using this land-less period to get your financial and mental house in order is the single biggest predictor of success.

    How to Prepare for the Financial Reality

    * The No-Fun Budget: We got ruthless. We tracked every single penny for an entire year. That meant no more unplanned $5 coffees, no more takeout when we were tired. That ‘saved’ money went directly into a ‘Homestead Down Payment’ account.

    * The ‘Dream Sheet’ Budget: We used a massive spreadsheet to game out the future. What would a mortgage cost? How much for property taxes in the counties we were looking at? What’s the startup cost for 10 laying hens? We over-estimated everything by 20%. This wasn’t just a budget; it was our road map.

    * Read Voraciously: Absorb everything. Follow homesteading bloggers (the real, dirt-under-the-fingernails kind), subscribe to magazines like Mother Earth News, and read books. Create a plan, even if you don’t have the land yet. A detailed plan of action is what separates the dreamers from the doers; we used a framework from usehomesteados.com to build out our first five-year goals.

    This is your time to learn about homesteading on a budget before the costs are real and unforgiving.

    Keep reading — this is where most people mess up.

    💡 Pro Tips

    * Start with ONE thing. Don’t try to learn sourdough, kombucha, and container gardening all in the same week. Master one skill, feel the win, then add another. Overwhelm is the number one dream-killer.

    * Document Everything. Take pictures of your sad, aphid-infested tomato plant. Keep a journal of your canning successes and failures. When we finally bought our land and I felt overwhelmed, I looked back at those early notes and realized how far we’d come. It was a huge morale boost.

    Focus on Knowledge, Not Gear. You don’t need a $300 Excalibur dehydrator when you live in an apartment. Learn to do it in your oven on the lowest setting first. Buy the gear when you have a proven need* for it, not a perceived want.

    * Find Your ‘Why’. Why do you want this life? Write it down. On the hard days—and there will be many—that ‘why’ is what will get you out of bed before sunrise.

    ⚠️ Beginner Mistakes to Avoid

    * Buying the Land First: This is the biggest one. People fall in love with a piece of property but have no idea about water rights, zoning, soil quality, or the skills needed to manage it. The land is the LAST piece of the puzzle, not the first.

    * Romanticizing the Work: I watched a friend buy 50 meat chickens for their new homestead. They loved the idea of raising their own food. They were not prepared for the reality of processing day. It’s muddy, bloody, and emotionally taxing. Don’t gloss over the hard parts.

    * Ignoring Local Laws: You can’t just put a goat in your suburban backyard. Before you even dream of animals, read your city and county ordinances. We knew a couple who had to re-home their beloved hens because a neighbor complained and they were in violation of a local rule.

    * Going Into Debt for ‘Stuff’: Your homestead dream can be crushed by a tractor payment you can’t afford. Start with good, solid hand tools. We broke ground on our first big garden with a $40 broadfork, not a $20,000 tractor.

    🔧 See Recommended Tools →

    Frequently Asked Questions

    H3: Can you really homestead in an apartment?

    Absolutely. Apartment homesteading focuses on skills, not scale. You can bake bread, ferment foods (like sauerkraut and kimchi), grow sprouts, manage a worm composting bin under your sink, and learn to mend and repair. It’s about creating a productive, self-sufficient mindset within the space you have.

    H3: What is the very first skill I should learn?

    Cooking from scratch. 100%. If you can’t transform raw ingredients into a meal, you can’t be a homesteader. It teaches you planning, reduces waste, saves an enormous amount of money, and is the foundation for every other food skill like canning and baking.

    H3: How much money do I need to save to start homesteading?

    It varies wildly, but the answer is: more than you think. Don’t just save for a down payment. You need a separate, substantial fund for startup costs: tools, fencing, initial livestock, seeds, infrastructure repairs. We had a $15,000 ‘Oh Crap’ fund on top of our down payment, and we used about a third of it in the first six months.

    H3: Where can I find local farms to volunteer on?

    Start at your local farmers’ market and just talk to people. Use social media to search for farms in your area; many are active on Instagram or Facebook. You can also check with your local USDA Extension office as they often have connections to community gardens and local agricultural programs.

    H3: Is it better to learn gardening or animal husbandry first?

    Gardening. Always gardening. Plants are cheaper, the mistakes are less heartbreaking than with animals, and the learning curve is more forgiving. The skills you learn tending a garden—observation, patience, dealing with pests and disease—directly translate to animal care later on.

    !A person gardening in a community plot to understand how to start homesteading with no land experience.

    Your Homestead Starts Today

    Looking back at that sad little tomato plant on my city balcony, I don’t see a failure anymore. I see the beginning. I see the first step on a path that led us here, to our own land, with dirt under our nails and a pantry full of food we grew ourselves.

    Your land is out there, maybe. But your homestead is right here, right now. It’s in the jar of sourdough starter on your counter, the needle and thread in your drawer, and the desire in your heart. You’ve already started.

    For more of our day-to-day wins and messy learning experiences, you can follow our journey on our Facebook page. We share the real, unfiltered side of this life.

    What’s the one skill you’re going to start learning this week? Let me know in the comments below!


    📚 More From Our Homestead

    Ready to Start Your Homestead Journey?

    Free guides, checklists, and tools to help you build your dream homestead.
    Explore Free Resources →

  • Rural vs Urban Homesteading: A Real-World Guide

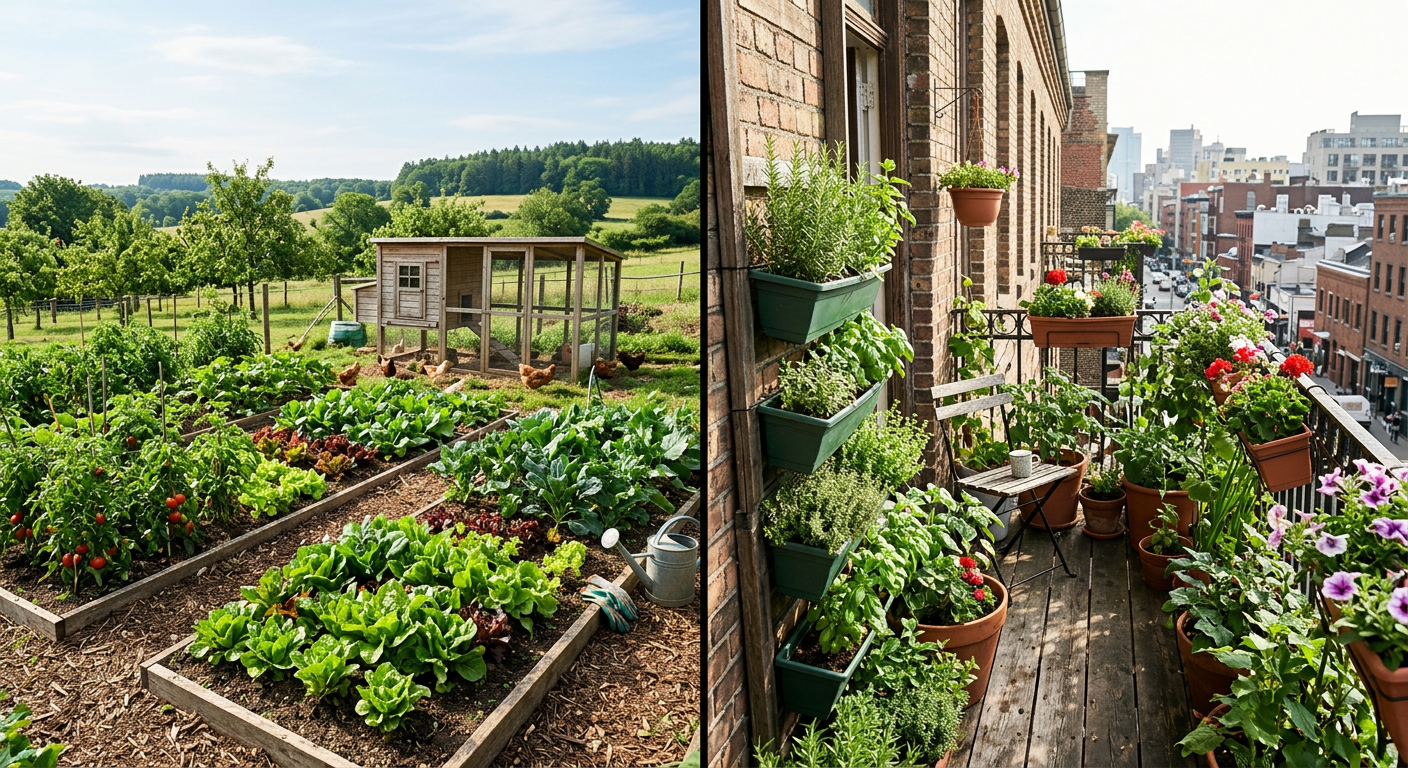
    !A visual showing what is difference between rural and urban homesteading in terms of space.

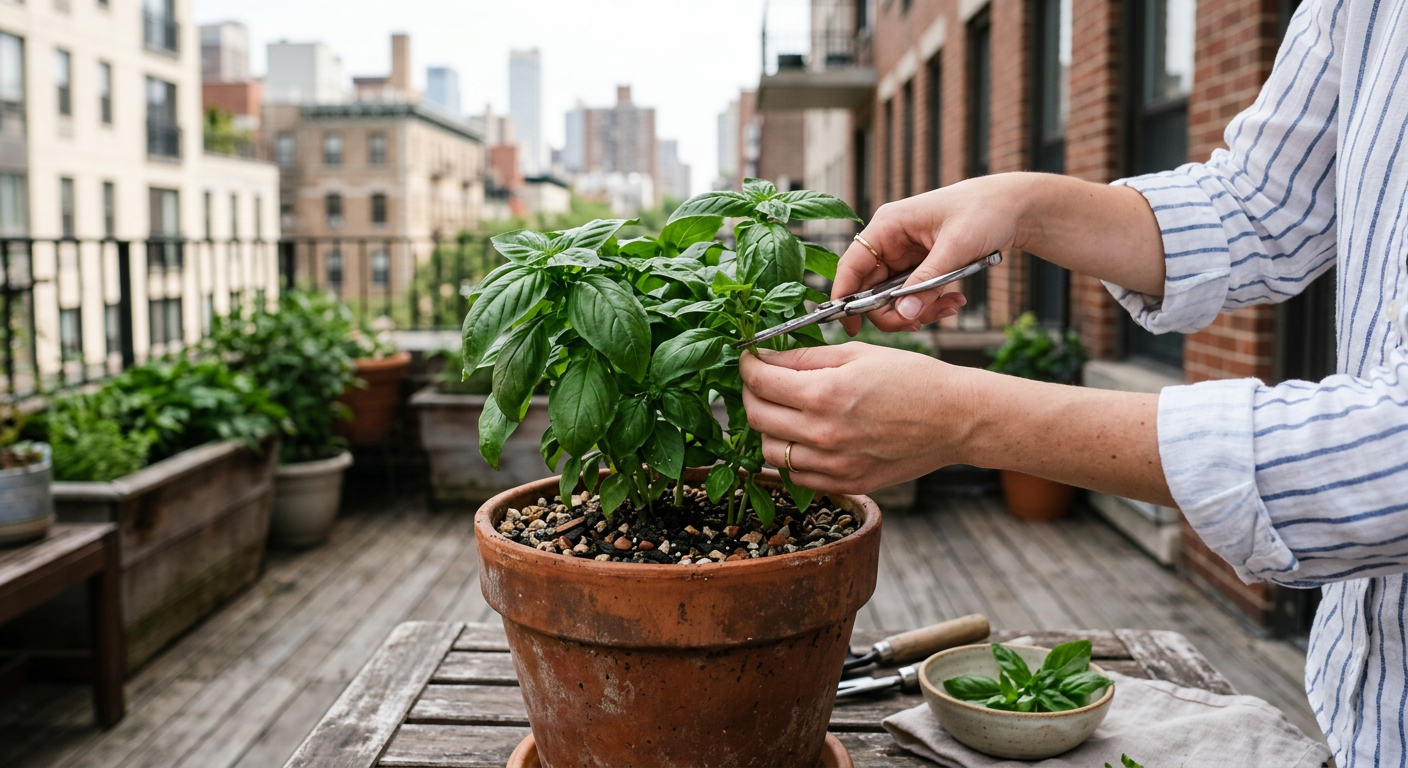
    I’ll never forget the smell of our neighbor’s two-stroke leaf blower mixing with exhaust fumes on our tiny city patio. I was trying to feel connected to the basil I was growing in a cracked terracotta pot, but the noise was a constant reminder of how little space we really had. Now, the loudest sound at 6 AM is a rooster clearing his throat two hundred yards away, and the air smells like damp earth and pine. People always ask what is the difference between rural and urban homesteading, and for me, it’s all in that memory.

    🎯 Quick Answer: The core difference between rural and urban homesteading is scale, dictated by space and local regulations. Rural homesteading allows for larger animals, bigger gardens, and more infrastructure like wells and septic, while urban homesteading focuses on maximizing small spaces with skills like container gardening, preserving, and raising small livestock like quail or chickens where permitted.

    🌱 Start Your Homestead Plan →

    🔑 Key Takeaways

    • Space is the Game Changer: Rural offers acres; urban offers square feet. This single factor dictates almost every other choice you make.
    • Regulations Rule Everything: Urban homesteaders live by city ordinances (chickens, composting, water barrels). Rural homesteaders face zoning, land use codes, and water rights.
    • Cost Varies Wildly: Urban homesteading has lower entry costs but can be expensive per square foot. Rural homesteading requires massive upfront investment in land and infrastructure.
    • Animal Choices Are Drastically Different: A few hens or quail might be possible in the city. Goats, pigs, and cattle are strictly a rural option.
    • Community Looks Different: Urban homesteaders often find tight-knit online groups and local meetups. Rural communities can be more spread out, requiring deliberate effort to connect.
    • The Goal is the Same: Both paths are about building resilience, producing more than you consume, and learning valuable skills.

    !Urban homesteader harvesting basil on a city balcony to show what is difference between rural and urban homesteading.

    The Soul of Urban Homesteading: A Haven in the City

    Before we bought our land, we spent five years learning on a 1/8th acre lot in the suburbs. It was our laboratory. It wasn’t about total self-sufficiency; it was about learning the rhythm of the seasons on a small, manageable scale.

    Your Biggest Puzzle: Space

    Our first “farm” was a 10×12 foot concrete patio. I was obsessed. We built vertical planters out of scavenged pallets and grew lettuce and strawberries. We had five-gallon buckets filled with potatoes and tomatoes. It’s amazing what you can do when you stop thinking about acreage and start thinking in cubic feet. We learned more about soil composition and intensive planting in that tiny space than we did in our first year on acres because every inch mattered.

    Our journey into Urban Homesteading with Kids was a fantastic way to teach them where food actually comes from, even with sirens in the background.

    The Legal Maze: Know Your Code

    I’ll never forget the thrill and terror of researching our city’s ordinances on chickens. I spent a week scrolling through the municipal code, a dry and confusing document. The verdict? We could have six hens, no rooster. They had to be 25 feet from any neighboring dwelling. Our coop plan had to be submitted for approval. It was a lesson: urban homesteading is a partnership with your local government, whether you like it or not.

    A great place to start your own search is the American Legal Publishing Corporation’s Code Library, which hosts municipal codes for thousands of towns and cities. Don’t guess—know the rules before you invest a dime.

    Ultimately, urban homesteading is an exercise in creativity and optimization. You’re not taming the wilderness; you’re carving out a productive paradise within it.

    Keep reading — this is where most people mess up.

    The Reality of Rural Homesteading: Big Dreams, Big Work

    Moving to our five acres was like stepping onto another planet. The silence was the first thing we noticed. And then, the sheer amount of work hit us like a physical blow. The difference between rural and urban homesteading became crystal clear that first spring.

    Acres of Opportunity (and Weeds)

    The first time I stood in the middle of our field, I was paralyzed. Where do you even start? In the city, the garden was a defined project. Here, the project was… everywhere. We spent our first six months just clearing brush, pulling invasive blackberries, and trying to understand the flow of water on the land. That year, we spent over $800 on a heavy-duty Stihl brush cutter, a tool we’d never even conceived of needing in the city.

    Finding the right piece of land is its own challenge. We spent a year looking before we found our spot, and our Beginner’s Property Guide covers the mistakes we almost made.

    Freedom From Rules… Sort Of

    Yes, I can build a greenhouse without asking a committee. I can have a rooster (we have three). I can dig a pond. But that freedom comes with a new set of responsibilities. We had to learn about septic systems—a breakdown is a multi-thousand-dollar disaster. We had to understand our well—when the power went out for 72 hours last winter, we had no water. That’s a lesson that hits hard and fast. Every homesteading choice you make is affected by your initial planning, and using a framework like the one from HomesteadOS can mean the difference between thriving and just surviving.

    Rural living isn’t lawless; the laws are just written by nature and physics instead of a city council.

    📋 Get the Beginner Checklist →

    What is the Difference Between Rural and Urban Homesteading Costs?

    This is the question that trips everyone up. The financial realities are polar opposites. One is a slow burn; the other is a series of massive financial hits.

    Urban: Death by a Thousand Cuts

    In the city, the land itself is your biggest expense (via mortgage or rent). After that, it’s a constant stream of smaller costs. You have to buy everything. Good organic compost? $10 a bag. Raised bed kits? $150 each. Specialized, compact tools cost a premium. Our first-year urban garden setup, with four raised beds and all the soil, cost us around $1,200. It wasn’t one big check, but it added up fast.

    Rural: Big Ticket Shock

    On our rural homestead, the land purchase was just the entry fee. The real costs came after.

    • Used Kubota Tractor: $14,500
    • Fencing for 1 Acre: $6,200 (and we installed it ourselves over 11 weekends)
    • Emergency Well Pump Replacement: $2,800
    • Barn Roof Repair: $4,500

    You aren’t just buying land; you’re buying infrastructure. And if it’s not there, you’re paying to build it. Our guide on Homesteading on a Budget started with lessons learned from these exact expenses.

    Deciding what animals to bring onto the homestead is the next big financial and logistical hurdle you’ll face.

    Don’t skip this next part—these mistakes cost us time and money.

    !Chickens in a rural setting explaining what is difference between rural and urban homesteading animal options.

    The Animal Question: Chickens, Goats, and Ordinances

    Your location directly dictates your livestock options. This is a non-negotiable part of understanding what is the difference between rural and urban homesteading.

    Urban Livestock: Small and Stealthy

    In the city, we had four Buff Orpington hens. They were wonderful pets that gave us breakfast. But managing them was an art. We built a coop that was more like a piece of fine furniture to keep the neighbors happy. We dealt with pests like rats drawn to the feed. We had to have a plan for what to do with an ailing chicken since vets who treat them are rare in cities. It’s totally doable, but it’s high-management. Many urban homesteaders turn to quail, which are quiet, take up very little space, and are often not regulated like chickens.

    Rural Livestock: The Dream and the Nightmare

    The day we brought home our first two Nigerian Dwarf goats was one of the best days on the homestead. The reality check came a week later when one of them found a single, tiny flaw in our very expensive fencing and got out. Rural homesteading means you are fully responsible for the safety, health, and containment of your animals. There’s no one to call. You become the vet, the fence-mender, and the herdsman. It requires a completely different level of knowledge you often have to gain on the fly. The systems for managing your whole operation, from animals to gardens, need to be robust, which is why we’ve come to rely on the dedicated tools found at HomesteadOS to keep it all straight.

    💡 Pro Tips

    • Start Right Where You Are. Don’t wait for acres. Learn to bake bread, ferment vegetables, or mend clothing in your apartment right now. These skills are portable and foundational.
    • Soil is Everything. We learned the hard way that you must get a soil test, urban or rural. We wasted an entire season and hundreds of dollars on amendments because our rural soil was incredibly acidic. A $30 test from your local University Extension Office would have saved us a year.
    • Master One Thing at a Time. Don’t try to get chickens, start a giant garden, and learn to make cheese in the same season. You’ll burn out. Pick one project, master it, then add another. Slow is smooth, and smooth is fast.
    • Redefine “Community”. In the city, community was easy to find. In the country, we had to build it. It meant showing up at the Grange meetings, shopping at the local feed store and actually talking to people, and offering to help a neighbor when a storm knocked down their fence. It takes more effort but can be incredibly deep.

    ⚠️ Beginner Mistakes to Avoid

    • Romanticizing Rural Life: Thinking it’s all peaceful sunrises and cute goats. It’s also frozen pipes, predator attacks, and physical exhaustion.
    • Ignoring City Code (Urban): A friend in a nearby town had to get rid of her beloved flock of four hens because a new neighbor complained and she was, technically, in violation of a setback rule. It was heartbreaking and totally avoidable.
    • Buying Too Much Land (Rural): Our five acres is plenty. I’ve seen friends buy 20+ acres and become slaves to mowing it, paying taxes on it, and worrying about it. Start smaller than you think you need.
    • Using the Wrong Tools: A cheap, plastic wheelbarrow from a big box store will last one season on a rural homestead. A city hand trowel will bend in rocky country soil. Invest in the right tools for your specific environment. See our list of Essential Homesteading Tools to Buy First.

    !Preserved food and garden harvest showing what is difference between rural and urban homesteading lifestyles.

    Frequently Asked Questions

    Can you really be self-sufficient on an urban homestead?

    No, not completely. True self-sufficiency (food, water, energy) is nearly impossible in a city. The goal of urban homesteading is increased self-reliance. This means growing a significant portion of your own produce, preserving food, reducing waste, and maybe producing your own eggs or honey. It’s about dependence on the system, not complete independence from it.

    What is the minimum land for rural homesteading?

    This depends entirely on your goals. For a large garden, a small flock of chickens, and a couple of dairy goats, you can do a surprising amount on just 1-2 acres. If you want to raise larger livestock like cattle for meat or have space for woodlot management, 5-10 acres is a more realistic minimum. We feel our 5 acres is the perfect balance of manageable work and productive space.

    Is rural or urban homesteading cheaper?

    Urban homesteading is cheaper to start. The barrier to entry is much lower. Rural homesteading is vastly more expensive upfront due to the cost of land and infrastructure (wells, septic, barns, tractors). Over a 30-year timeline, the costs might even out, but the initial financial shock of going rural is significant.

    What’s a better way to start, rural or urban?

    I am a huge advocate for starting in an urban or suburban environment first, even if your dream is rural. Use a small space to learn the basic skills: gardening, food preservation, basic tool use. Making mistakes on a small patio garden is a cheap lesson. Making those same mistakes on a 2-acre market garden can be a financial disaster.

    Ultimately, the difference between rural and urban homesteading isn’t about which one is better. It’s about which one is right for you, right now. Both paths are valid. Both are hard work. Both are incredibly rewarding.

    It’s a mindset, not a zip code. It’s about turning your home, wherever it is, into a place of production.

    For more daily stories from our homestead and to connect with others on this path, be sure to follow our journey on Facebook.

    What’s the one homesteading skill you’re most excited to learn, regardless of where you live? Let me know in the comments below!

    🔧 See Our Recommended Tools →


    📚 More From Our Homestead

    Ready to Start Your Homestead Journey?

    Free guides, checklists, and tools to help you build your dream homestead.
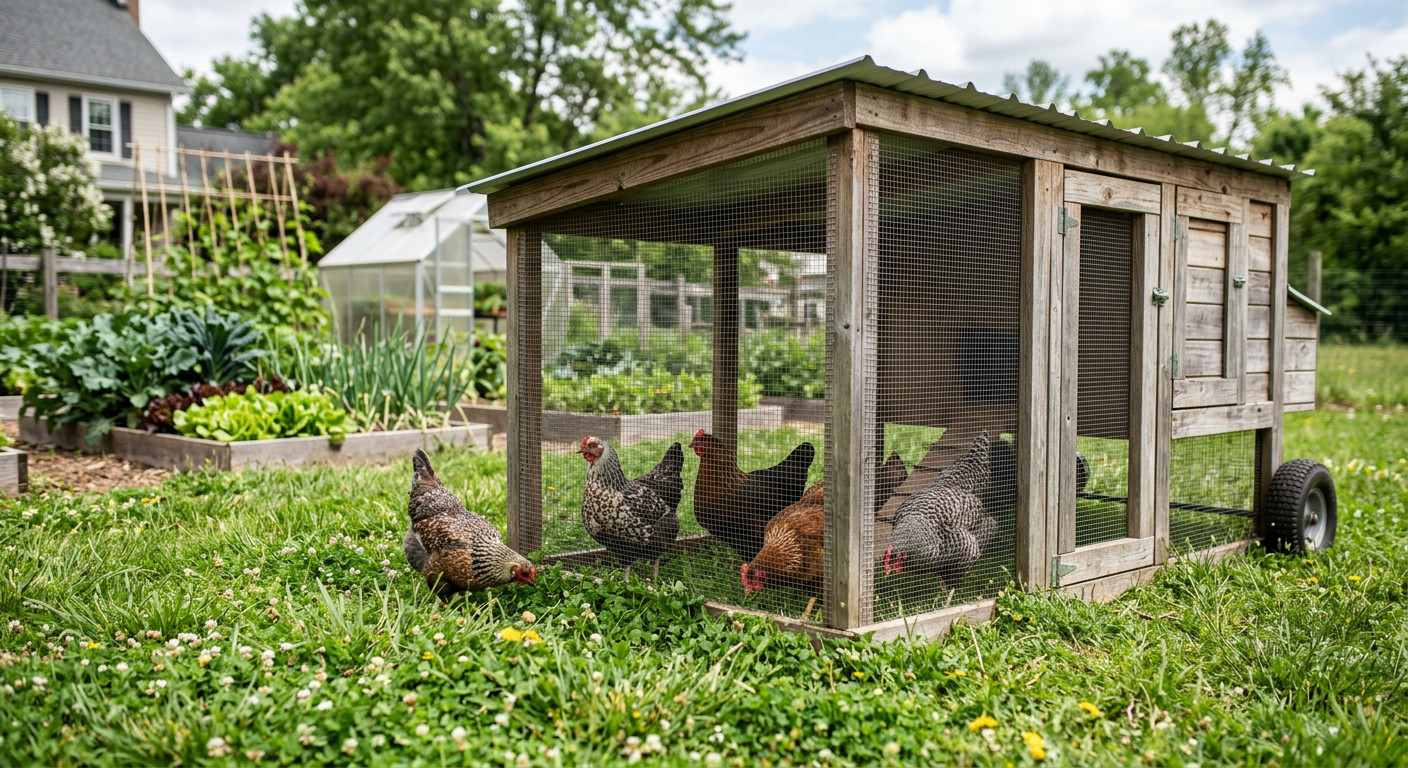
    Explore Free Resources →

  • How to Start Homesteading in a Suburban Backyard

    !A lush garden showing how to start homesteading in a suburban backyard with raised beds and a chicken coop.

    I remember staring out at our perfect, green, quarter-acre of Kentucky bluegrass. It cost us about $60 a month to water and fertilize, and all it produced was… more grass for my husband to mow. That’s the sunny afternoon I grabbed a shovel, walked to the middle of the yard, and plunged it into the sod, much to his confusion. That perfectly useless lawn was about to become our first real step toward self-reliance.

    🎯 Quick Answer: The best way to learn how to start homesteading in a suburban backyard is to start small and focus on high-impact projects. Replace lawn with raised garden beds, check local laws for keeping small livestock like chickens or quail, and master one preservation skill like canning or dehydrating. It’s about using what you have, right where you are.

    🔑 Key Takeaways

    * Laws First, Shovel Second: Before you buy a single seed or chick, you MUST understand your local ordinances and any HOA rules. This is non-negotiable.

    * Start with Soil: The success of your garden hinges entirely on the quality of your soil. Investing in good compost is more important than anything else.

    * Think Small & Dense: Choose plants and animals that produce a lot in a small footprint. Vertical gardening and smaller livestock breeds are your best friends.

    * Master One Skill at a Time: Don’t try to learn gardening, chicken-keeping, and cheesemaking all in one season. You’ll burn out. Pick one, get good at it, then add another.

    * Focus on Food: A suburban homestead is about productivity. Every project should contribute to your pantry, reduce your grocery bill, or improve your land.

    🌱 Start Your Homestead Plan →

    !A person using a shovel to learn how to start homesteading in a suburban backyard by removing lawn.

    Step 1: The Legal Lowdown (Don’t Get Fined!)

    I can’t stress this enough: your journey into suburban homesteading begins at your town hall’s website, not the garden center. When we decided to get chickens, I was so excited I built the coop before I read the fine print. I discovered our coop had to be 25 feet from any property line, not the 15 I had planned for. We had to move the entire thing. It was a sweaty, frustrating, and completely avoidable weekend of work.

    Where to Look for Rules

  • City/Town Ordinances: Go to your municipality’s website and search for terms like “zoning code,” “animal ordinances,” or “fowl.” Look for rules on setbacks (how far structures must be from property lines), a maximum number of animals, and whether roosters are allowed (they usually aren’t).
  • Homeowner’s Association (HOA): If you have an HOA, this is your first and most important stop. They have rules about everything from garden bed appearance to clotheslines to sheds. Get a copy of the covenants and read them. A friend of ours spent $1,500 on a beautiful greenhouse only to get a letter from his HOA demanding he tear it down because it wasn’t an “approved structure.”
  • Don’t be discouraged by this step. Knowing the rules gives you a framework to be creative within. For great general guidance, check out university extension resources like Penn State Extension’s articles on urban agriculture.

    Knowing your boundaries is the first step to building something incredible within them.

    Step 2: Your First Garden – Small But Mighty

    Forget plowing up your entire yard. Your first garden should be manageable. We started with two 4×8 foot raised beds. We spent about $160 on untreated pine boards, screws, and hardware cloth for the bottom to keep out the gophers. The biggest expense, and our biggest mistake, was the soil. We bought cheap, bagged “garden soil” and our first year’s harvest was pathetic.

    The lesson: Your plants don’t eat dirt; they eat the nutrients in the dirt. Now, we make our own compost and supplement with high-quality organic compost from a local landscape supply. It costs more upfront—about $70 per cubic yard—but the return in produce is tenfold.

    What to Plant First

    Learning how to start a vegetable garden in a small backyard for beginners is a core skill. It’s also where you see the first tangible results of your efforts. Even if you just have a patio, a few well-managed pots can provide a surprising amount of food. Thinking through these details is so important, which is why a solid plan makes all the difference. We built our homestead plan over many winter nights, sketching out ideas and making lists; you can see how we structure our homesteading plans to stay organized and focused.

    Focus on what your family actually eats. Planting 10 kale plants is useless if nobody likes kale. Start there.

    📋 Get the Beginner Checklist →

    Step 3: Considering Small Livestock (Yes, in the ‘Burbs!)

    This is where many people think, “No way I can do that.” You absolutely can. How to start homesteading in a suburban backyard often includes a small flock or herd! It’s the step that makes your little ecosystem feel truly alive. For most suburbs, your best bets are chickens or quail.

    We started with six Buff Orpington chicks from the local Tractor Supply. They cost about $4 each. Our first real coop was a $350 kit that we assembled and reinforced. That first warm egg I collected on a chilly spring morning… it was a game-changer. Suddenly, we weren’t just gardeners; we were providing our own protein.

    Chickens vs. Quail

    * Chickens: The classic choice. They provide eggs and fantastic fertilizer. They’re personable and great for pest control. The downside: they need more space, can be noisier, and are more heavily regulated. Dig into the pros and cons of raising backyard chickens before you commit.

    * Coturnix Quail: The silent ninjas of suburban livestock. They are quiet, require very little space (you can keep a dozen in a large rabbit hutch), and start laying tiny, delicious eggs at just 8 weeks old. They are often exempt from “poultry” rules because they are considered game birds.

    Whichever you choose, start with a small number. You can always grow your flock later.

    Keep reading — this next part is what separates a garden hobbyist from a true homesteader.

    !Rich brown soil and compost in a garden for those learning how to start homesteading in a suburban backyard.

    Step 4: Level Up with Homestead Skills

    Growing food is only half the battle. A zucchini plant doesn’t care if you’re on vacation; it’s going to produce an avalanche of zucchini in August whether you’re ready or not. Learning what to do with that abundance is the key.

    This is where you learn skills that truly build resilience. Our first year, we were so overwhelmed with tomatoes that we gave buckets of them away. The next year, I learned to can. I’ll never forget the satisfying pop of the first 12 jars of pasta sauce sealing on the counter. We had just captured summer in a jar. That sauce, which we ate in the dead of winter, tasted like pure victory. It was a tangible result of all our hard work.

    Key Skills for the Suburban Homesteader:

  • Composting: Turn your kitchen scraps and yard waste into black gold for your garden. It’s the heart of a closed-loop system.
  • Food Preservation: Start with one method. Freezing is easiest. Water-bath canning is great for high-acid foods like pickles and tomatoes. Dehydrating is perfect for herbs and fruit.
  • Basic DIY Repairs: Things break. Coops, trellises, tools. Knowing how to make simple repairs with a drill and a saw will save you a ton of money and frustration. For us, building a homestead isn’t just a list of projects; it’s a complete mindset shift, a whole system of thinking. This is why we rely on tools like the Homestead OS to manage everything from our planting schedule to our winter pantry inventory.
  • These skills are what transform your backyard from a food production space into a functioning homestead.

    🔧 See Recommended Tools →

    💡 Pro Tips

    * Go Vertical. Use trellises, cattle panels, and wall planters. We grow 50+ pounds of cucumbers on a single 8-foot-long arched cattle panel trellis that we walk under. It doubles your growing space for vining plants.

    * Befriend Your Neighbors. The first time we harvested eggs, we walked a half-dozen over to our neighbors on each side. Now, instead of complaining about the occasional clucking, they ask when we’ll have more eggs to spare. A little generosity goes a long way.

    * Observe Your Land. Don’t just work it, watch it. Where does the morning sun hit first? Where does water pool after a rain? That shady spot behind the garage is perfect for growing mushrooms. The hot, dry strip by the driveway is where your rosemary will thrive. Your yard will tell you what it needs.

    * Plant Perennials. Plant things that come back year after year. Asparagus, rhubarb, fruit trees, and berry bushes are an investment that pays dividends for a decade or more.

    ⚠️ Beginner Mistakes to Avoid

    The “All-In” Burnout: We tried it. Our second spring, we decided to get bees, double our garden space, and* get meat rabbits all at once. We were exhausted, stressed, and by July, we were failing at all three. Pick ONE new big project per year. That’s it.

    * Ignoring the HOA (Again): A friend of mine got a violation notice for his compost pile, which was deemed “unslightly.” He had to spend $200 on a fancy tumbler-style bin to appease the board. Read the rules.

    * Buying Cheap Tools: Our first shovel was a $15 piece of junk from a big box store. The handle snapped the first time I tried to pry a rock out of our clay soil. A good tool feels like an extension of your body. We have a post on the few essential homesteading tools you should actually buy first.

    * Forgetting to Mulch: Leaving your soil bare is an invitation for weeds and evaporation. We lost a whole bed of carrots one year during a hot week because we didn’t mulch. A thick layer of straw, wood chips, or shredded leaves is like a blanket for your soil.

    !Canned vegetables and fresh produce from a project on how to start homesteading in a suburban backyard.

    Frequently Asked Questions

    How much land do you need for a suburban homestead?

    You can start homesteading on a balcony with a few pots of herbs. We’re on a 1/4 acre lot, and much of that is the house and driveway. It’s not about acreage; it’s about a mindset of production and resourcefulness. Don’t let your lot size stop you.

    Is homesteading in a suburban backyard expensive?

    It can be, but it doesn’t have to. You can start a container garden for under $50. Our first two raised beds cost about $250 total (lumber and quality soil). Our first chicken setup was about $400 (coop, feeders, chicks). The key is that these are investments that pay you back in food and lower grocery bills. It’s a shift from being a consumer to a producer.

    What are the easiest things to grow for beginners?

    Herbs (mint, oregano, chives), loose-leaf lettuce, radishes, bush beans, and zucchini (be careful, you’ll have more than you know what to do with!). These all provide quick, rewarding harvests and build your confidence.

    Can I have chickens in my suburban backyard?

    Often, yes! Many cities allow a small number of hens (typically 3-6) but no roosters. Check your local ordinances. Some cities have specific requirements for coop placement and cleanliness. Chickens are surprisingly quiet, with their gentle clucking being much softer than a barking dog.

    Homesteading isn’t an all-or-nothing deal defined by owning 40 acres and a milk cow. It’s a spectrum.

    It’s choosing to plant a tomato plant where there was once a useless shrub. It’s the quiet satisfaction of cracking your own eggs into a skillet. It’s about taking one small piece of your world and making it more productive, more resilient, and more your own.

    You can do this. Start with one thing. A pot of basil. A single raised bed. The journey starts with that first shovelful of dirt.

    For more behind-the-scenes stories and day-to-day life on our little homestead, be sure to follow us on Facebook!

    What’s the ONE thing you’d love to start producing in your own backyard? Let me know in the comments below!


    📚 More From Our Homestead

    Ready to Start Your Homestead Journey?

    Free guides, checklists, and tools to help you build your dream homestead.
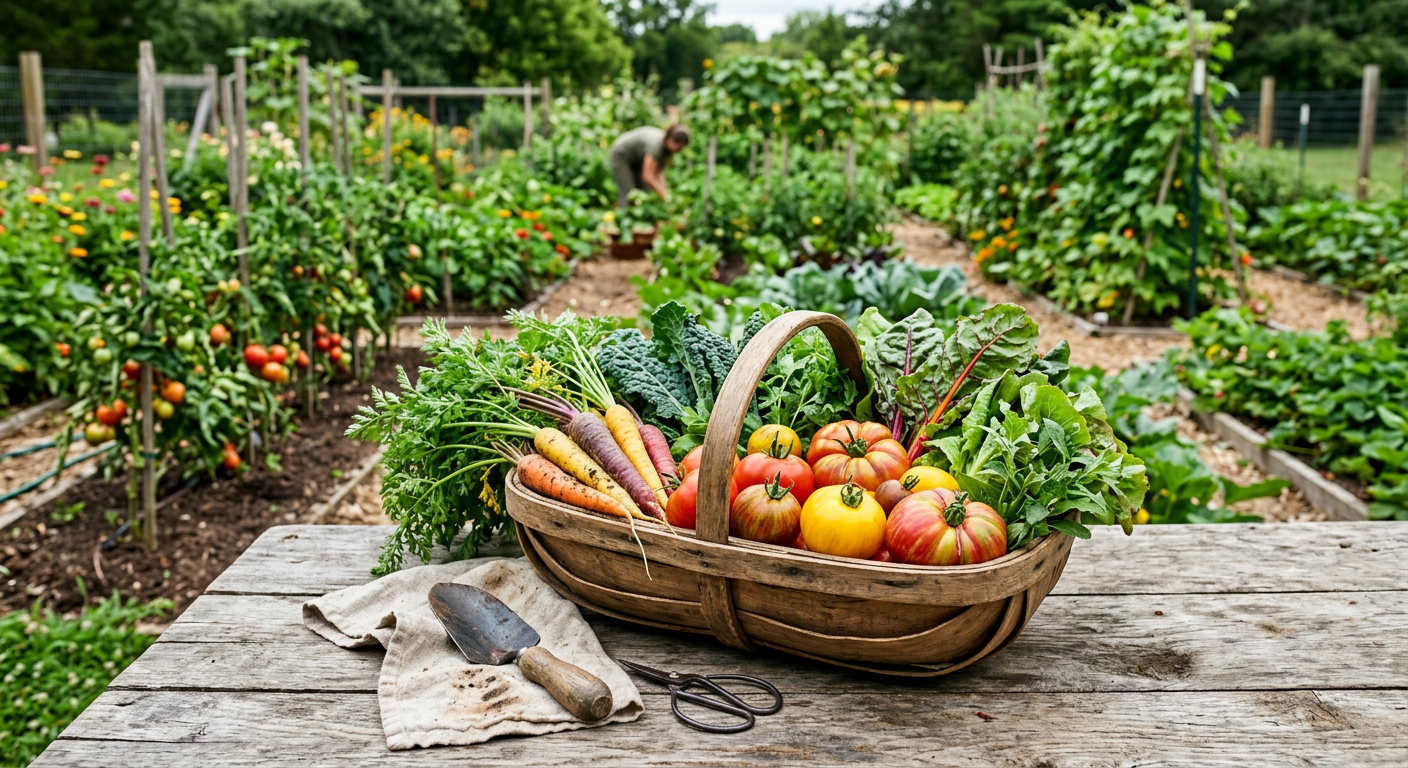
    Explore Free Resources →

  • Homestead Budget: Plan From Scratch & Thrive!

    !A thriving small farm showing how to plan a homestead budget from scratch for long-term success.

    When we first started dreaming of our homestead, visions of overflowing gardens and happy chickens danced in our heads. What didn’t dance? The numbers. We quickly learned that a homestead, while eventually saving you money, requires a thoughtful financial plan upfront. Without knowing how to plan a homestead budget from scratch, we would have been in a world of trouble.

    🎯 Quick Answer: Planning a homestead budget from scratch involves tracking current expenses, projecting start-up and ongoing costs for specific projects (like chickens or a garden), identifying income sources, and continually adjusting with a 12-24 month outlook. It’s about realistic expectations and living within your means to achieve long-term self-sufficiency.

    🌱 Start Your Homestead Plan →

    🔑 Key Takeaways

    * Start with your ‘why’: Your homestead goals dictate your budget priorities.

    * Track everything: Understand your current spending before projecting future costs.

    * Categorize ruthlessly: Separate essential homestead costs from ‘wants’.

    * Research relentlessly: Get real-world costs for seeds, tools, animals, and infrastructure.

    * Build in a buffer: Unexpected costs are a homesteading guarantee.

    * Revisit regularly: Your budget is a living document, not a set-it-and-forget-it plan.

    !A person learning how to plan a homestead budget from scratch using a notebook and laptop.

    Understanding Your Current Financial Landscape

    Before you can plan for future homestead expenses, you absolutely have to know where your money is going right now. This was a huge eye-opener for us when we first sat down with our bank statements. We thought we were frugal, but boy, were there some surprises!

    Where is Your Money Going?

    Take a good hard look at your last 3-6 months of spending. Don’t just glance; print it out or export it to a spreadsheet. We use a simple spreadsheet to categorize every single transaction.

    * Fixed Expenses: Rent/mortgage, car payments, insurance, utilities (average these out).

    * Variable Expenses: Groceries, dining out, entertainment, gas, clothing, subscriptions.

    * Surprise Expenses: Medical bills, car repairs, house maintenance (again, average these over a year if possible).

    You might find that you’re spending $300 a month on takeout, or $75 on streaming services you barely watch. Every dollar counted when we were dreaming of our first flock of chickens and a decent garden.

    Identifying Savings & Debt

    Once you know your outflow, compare it to your income. Are you saving anything? Are you accumulating debt? This isn’t just about homestead spending; it’s about your overall financial health. We made a commitment to pay off consumer debt before taking on any big homestead projects, as that monthly payment was a direct drain on funds we could use for seeds or fencing. Think of it this way: every dollar freed from debt is a dollar that can grow your homestead. We also started a dedicated ‘homestead savings’ pot.

    Keep reading — this is where most people mess up.

    Projecting Homestead Start-Up Costs

    This is where the rubber meets the road. Knowing how to plan a homestead budget from scratch means breaking down those big dreams into tangible, costed projects. When we started, we wanted everything at once: chickens, a huge garden, fruit trees, maybe even a goat! We quickly realized that’s a recipe for financial disaster and burnout.

    Prioritizing Your First Projects

    We decided to start small. Our first year focus was a basic vegetable garden and a small flock of laying hens. This allowed us to keep start-up costs manageable. What are your absolute must-have first steps?

    * Garden: Seeds, soil amendments, tools (check out our list of Essential Homesteading Tools to Buy First!), fencing, watering system. A 4×8 raised bed could cost $100-$300 in materials alone, plus seeds/soil.

    * Chickens: Coop, feeder, waterer, chicks, feed, bedding. Our first small coop cost around $400 in materials, and chicks were about $4 each. For more on this, read our post on Raising Backyard Chickens: Pros, Cons & What to Expect.

    * Land: If you don’t have it yet, this will be your single largest expense. Don’t forget closing costs, surveys, and potential utility hookups. This is a whole budget in itself! Our guide on Finding Your Homestead: A Beginner’s Property Guide can help.

    Researching and Estimating Costs

    This isn’t a one-and-done task. We spent hours comparing prices online, calling local suppliers, and asking experienced homesteaders about their costs. For example, a basic chicken coop might cost $200 if you build it from reclaimed materials, or $800+ for a pre-fab kit. Always get multiple quotes or price points. Don’t forget the ‘little’ things — garden gloves, twine, a good watering can, electrical wiring, lumber for raised beds… these add up quickly!

    This next part? Nobody talks about it, but it changed everything for us.

    Planning for Ongoing Homestead Expenses

    It’s easy to focus on the big initial buy-in, but the day-to-day and season-to-season costs are what really shape your long-term homestead budget. We learned this the hard way with chicken feed!

    Monthly & Seasonal Operating Costs

    These are the expenses that keep your homestead running. They might seem small individually, but they are relentless.

    * Animal Feed: This is a big one. Our 6 laying hens eat about 15-20 lbs of feed a week, costing us roughly $15-$20 a month (feed prices fluctuate!). This adds up to $180-$240 annually just for feed.

    * Garden Supplies: Seeds, compost, fertilizer, pest control, row covers. We budget about $100-$200 annually for these for our 1/4 acre garden.

    * Utilities: Even if you’re aiming for off-grid, you’ll likely have some utility costs – well pump electricity, propane for heating/cooking, internet. Average these over the year.

    * Maintenance & Repairs: Fencing breaks, tools wear out, irrigation needs fixing. We set aside a small monthly ‘homestead repair’ fund, even if it’s just $25. This covers things like a broken shovel handle or new chicken wire.

    Factoring in Unexpected Expenses

    Oh, the unexpected! A sick animal, a sudden tool breakdown, or a late-season frost that necessitates buying pricey seedlings. We learned fast that a buffer is essential. We try to keep a separate emergency fund of at least $500 for homestead-specific issues. This isn’t just a good idea; it’s practically a necessity to avoid dipping into your personal savings or going into debt when things inevitably go wrong.

    📋 Get the Beginner Checklist →

    Considering Homestead Income & Savings

    One of the most exciting parts of homesteading is the potential for self-sufficiency and even generating a little income. When you plan a homestead budget from scratch, it’s crucial to be realistic about this. Don’t count your chickens before they hatch, literally!

    Potential Revenue Streams

    Harking back to our earlier days, we always hoped to sell extra eggs or produce. While it’s possible, it’s rarely a get-rich-quick scheme. Focus on offsetting costs first.

    * Selling produce: Excess vegetables, fruits, herbs. We sell a few extra tomatoes and cucumbers at a roadside stand, bringing in perhaps $50-$100 over the summer.

    * Eggs: Selling a dozen eggs for $4-$6 can help cover feed costs. If you have 12 hens, that’s potentially 6-8 dozen a week, maybe $100-$200 a month in sales.

    * Value-added products: Jams, jellies, baked goods, soaps. These require more time and often local permits.

    * Breeding animals: Selling chicks, piglets, or kids can be lucrative but also requires significant investment and knowledge.

    Cost Savings from Self-Sufficiency

    This is where homesteading truly shines. Every vegetable you grow, every egg you collect, the less you have to buy at the grocery store. We track our grocery bill rigorously, and seeing it drop year over year is incredibly motivating.

    * Food Savings: For a family of four, growing a significant portion of your vegetables can save hundreds of dollars a month. We estimate we save at least $200-$300 on produce, herbs, and eggs each month compared to buying organic at the store.

    * Reduced Waste: Composting scraps, reusing materials, and mending instead of replacing all contribute to savings.

    * Skills-based Savings: Learning to fix things, basic carpentry, or preserving food reduces reliance on outside services or expensive packaged goods. For example, learning Cracking the Code: Preserving Eggs Long-Term (No Fridge Needed!) means less waste.

    Don’t skip this — it’ll save you hours (and money).

    !Reviewing financial statements to understand how to plan a homestead budget from scratch.

    Monitoring and Adjusting Your Homestead Budget

    Your homestead budget isn’t a static document; it’s a living, breathing guide that needs regular attention. We review ours quarterly, sometimes even monthly when we’re working on a new project or facing unexpected costs. This transparency is key to homesteading successfully long-term.

    Regular Review Schedule

    Set a reminder! We sit down every three months, usually at the start of a new season, to go over our budget. This is valuable as seasons directly impact homestead expenses and income.

    * Annually: Big picture review. Compare actual spending to budget for the entire year. What worked? What didn’t? Where did we overspend or underspend?

    * Quarterly: More detailed review. How are current projects tracking financially? Are we on target for our savings goals?

    * Monthly: Quick check of income vs. expenses. Are we staying within our variable spending limits? Is there any unexpected spending we need to adjust for next month?

    Adapting to Changes and Unexpected Events

    Life on a homestead is never predictable. A severe drought might mean higher water bills or buying more feed. A bumper crop might mean investing in more canning supplies. Be flexible and willing to adjust.

    * Flexibility is Key: If a new fence becomes an urgent safety need, you might need to temporarily defer a different, less critical expense.

    * Embrace ‘Lean Homesteading’: This means re-evaluating if something is a ‘need’ or a ‘want’ when funds are tight. Can you build it yourself instead of buying? Can you find it used? We’ve found so many treasures on local classifieds and at yard sales rather than buying new.

    💡 Pro Tips

    * Start a ‘Homestead Dream’ fund: Even if it’s just $5 a week, consistently contributing to a dedicated fund for future projects (like a greenhouse or tractor) keeps your motivation high.

    * Utilize free resources: Libraries for books, YouTube for tutorials, local extension offices for advice and soil testing – all can save you money. The USDA provides excellent resources on small farm planning.

    * DIY where safe and feasible: Building a chicken run can save hundreds. Learning basic plumbing can save a plumber’s visit. Just be honest about your skill level!

    * Barter and trade with neighbors: Have extra eggs? Trade for some fresh milk or help with a project. Community is a huge asset on a homestead. This is one of the best Beginner Homesteading Tips we ever got.

    * Track your time: Time is money, especially on a homestead. Knowing how much time you spend on each project helps balance your efforts and budget.

    ⚠️ Beginner Mistakes to Avoid

    * Not budgeting for tools: We initially forgot about the cost of good quality shovels, wheelbarrows, and specialized garden tools. They add up! Our guide on Essential Homesteading Tools to Buy First! helps here.

    * Underestimating feed costs: Animal feed is a continuous, significant expense. Don’t just budget for the initial animals.

    * Ignoring a buffer: New homesteaders often budget down to the penny and then crumble when the inevitable happens (like a predator attack requiring better fencing).

    * Trying to do too much too soon: This leads to burnout and overspending. Start small, succeed, then expand.

    Not tracking actual spending: If you don’t know where your money actually* went, your budget is just a pretty piece of paper. You need to verify it.

    Frequently Asked Questions

    ### How much does it cost to start a small homestead?

    This varies wildly, but for a small, suburban homestead focused on gardening and a few chickens (no land purchase), you could start with $500 – $2,000 for initial setup (raised beds, seeds, basic tools, a small coop, chicks). If you include land, the costs skyrocket into the tens or hundreds of thousands, depending on location and acreage.

    ### Can I homestead with no money?

    Starting a homestead with absolutely no money is extremely challenging, but not impossible. You’d need to leverage skills, community, bartering, and upcycling. Focus on micro-homesteading, foraging, and extremely low-cost food production like container gardening. We have a lot of tips on Homesteading on a Budget.

    ### How do I budget for unexpected homestead expenses?

    Allocate a specific line item in your monthly or quarterly budget for ‘Homestead Contingency’ or ‘Emergency Fund’. Start with $25-$50 a month and build it up to at least $500-$1000. This fund is specifically for things like urgent animal vet bills, critical equipment breakdowns, or unforeseen project costs.

    ### Should I include my time in my homestead budget?

    While you might not assign a monetary value to your time, it’s wise to budget your time as a resource. Knowing how many hours a project will take helps you prioritize. If you have to spend 20 hours fixing a fence, that’s 20 hours you’re not doing something else, or potentially earning outside income. It’s a key part of resource allocation.

    !Seed packets and tools representing the initial steps of how to plan a homestead budget from scratch.

    Conclusion

    Learning how to plan a homestead budget from scratch was one of the most foundational steps we took on our journey. It wasn’t the most glamorous part, but it has saved us from financial headaches and allowed us to grow our homestead sustainably, year after year. It’s about being intentional, realistic, and always willing to learn and adapt. We started small, made mistakes, and learned from every single one, and you can too!

    What’s your biggest challenge with homestead finances? I’d love to hear your story in the comments!

    🔧 See Recommended Tools →


    📚 More From Our Homestead

    Ready to Start Your Homestead Journey?

    Free guides, checklists, and tools to help you build your dream homestead.
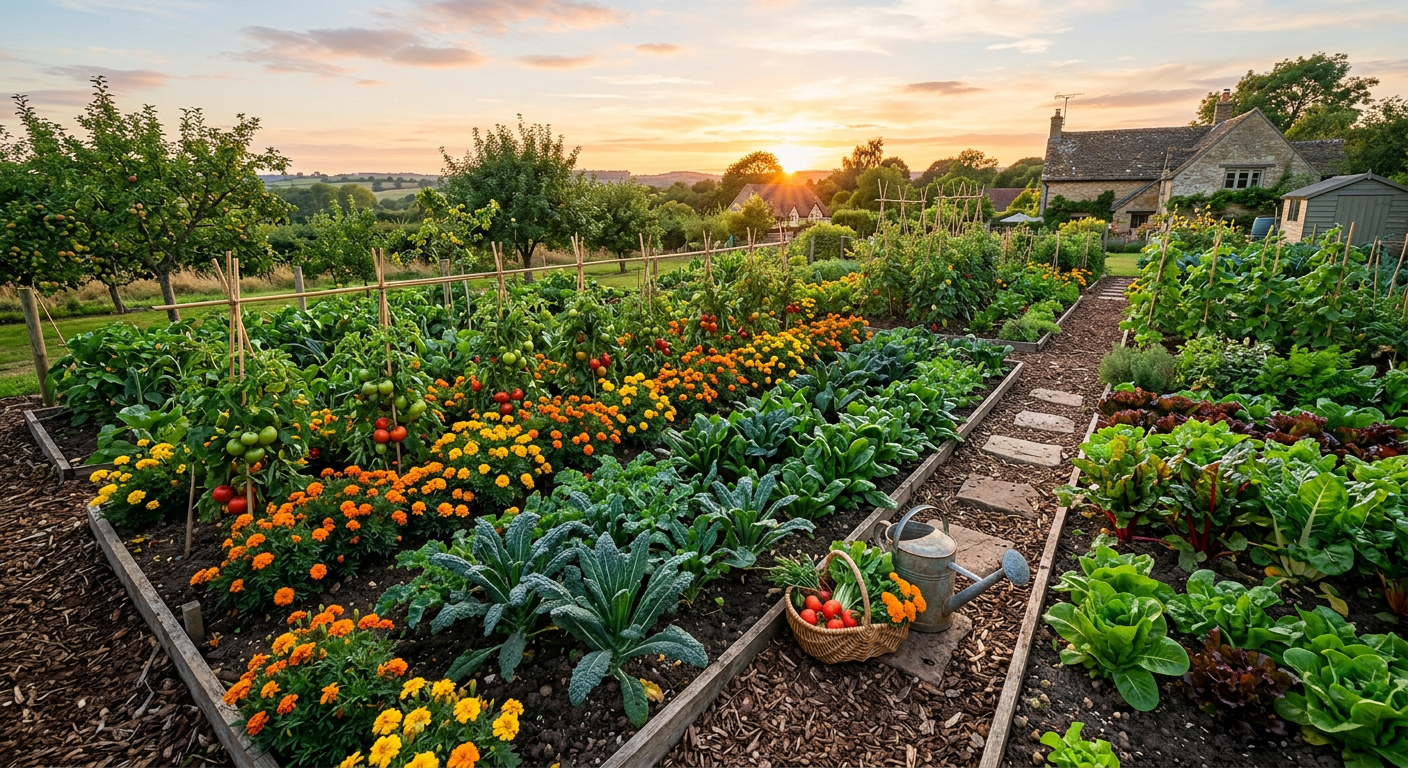
    Explore Free Resources →

  • How to Start Urban Homesteading Small Balcony: 5 Steps

    !A lush apartment balcony showing how to start urban homesteading small balcony gardening with many plants.

    You don’t need a 100-acre ranch to call yourself a homesteader; sometimes, all you need is a couple of pots and a sunny railing. I remember staring at my tiny third-floor concrete slab thinking it was impossible to grow anything, but six months later, I was harvesting fresh salads every single night. The truth is, self-sufficiency isn’t about the size of your land, it’s about the size of your ambition.

    🎯 Quick Answer: To learn how to start urban homesteading small balcony spaces, focus on vertical gardening, high-yield container crops like greens and herbs, and small-scale solutions like worm composting. Start with just three pots and expand as you master the unique microclimate of your balcony.

    🌱 Start Your Urban Homestead Plan →

    🔑 Key Takeaways

    * Maximize Vertical Space: Use walls and railings to double your growing area.

    * Choose High-Value Crops: Focus on plants that are expensive at the store but easy to grow.

    * Master the Microclimate: Understand how wind, sun, and heat reflect off your apartment walls.

    * Scale Sustainably: Learn why starting with two plants is better than starting with twenty.

    * Circular Systems: Incorporate small-scale composting to eliminate waste and feed your soil.

    Assess Your Balcony’s Unique Microclimate

    Before you buy a single bag of soil, you have to play detective. Urban balconies are strange beasts—they are often significantly hotter than the ground level because concrete and brick soak up solar heat all day and radiate it back at night.

    First, track your sun exposure. Most vegetables need at least 6 hours of direct sunlight, but if you have a north-facing balcony, don’t panic! You can still thrive with leafy greens and herbs like mint or parsley that tolerate shade.

    Keep reading — this is where most people mess up.

    Wind is the silent killer of the urban garden. On higher floors, the wind can dry out a pot in a matter of hours or even snap delicate stems. If you’re on a high floor, consider installing a mesh windbreak or choosing sturdier, low-profile plants.

    Now that you know your environment, let’s talk about the gear that actually fits in a 4×8 space.

    Choosing the Right Containers and Soil

    When you’re learning how to start urban homesteading small balcony gardens, weight is a major factor. You can’t just throw heavy clay pots and farm dirt onto a balcony without considering structural limits and drainage.

    Go for lightweight materials like resin, fabric grow bags, or high-quality plastic. Fabric bags are a personal favorite because they prevent ‘root circling’ and allow the soil to breathe, which is vital in humid city summers.

    Never use ‘topsoil’ from the ground. It’s too heavy and doesn’t drain well in pots. Instead, invest in a high-quality organic potting mix. Look for ingredients like coco coir or peat moss, perlite for drainage, and a bit of compost for nutrients.

    But here’s the secret: even the best soil won’t help if your water runs straight onto your neighbor’s patio below. Always use saucers or a self-watering system to keep the peace with the folks downstairs.

    📋 Get the Beginner Checklist →

    Vertical Gardening: The Ultimate Space Hack

    If you only grow on the floor, you’re missing out on 70% of your potential harvest. Vertical gardening is the backbone of the urban homestead. Look at your walls and railings as prime real estate.

    Wall-mounted planters, pockets, and trellises allow you to grow ‘up’ instead of ‘out.’ You can grow cucumbers, snap peas, and even small melons on a sturdy trellis leaning against the building wall.

    Don’t skip this — it’ll save you hours (and money).

    Railings are perfect for ‘saddlebags’ or hanging planters. I love using these for strawberries and trailing herbs like thyme. Just make sure everything is securely fastened; a falling pot is a homesteader’s worst nightmare.

    Once your plants are climbing the walls, you’ll need a way to keep them fed without buying chemical fertilizers. That’s where the ‘hidden’ homesteading comes in.

    Small-Scale Composting and Sustainability

    Yes, you can compost on a balcony without the smell! A traditional pile won’t work, but a worm bin (vermicomposting) or a Bokashi bucket is perfect for apartment dwellers.

    Vermicomposting uses red wiggler worms to turn your kitchen scraps into ‘black gold.’ A small, ventilated plastic bin under a bench can process several pounds of scraps a week. It’s silent, odorless when done right, and provides the best fertilizer on earth.

    Bokashi is another great option. It’s a fermentation process that allows you to compost almost anything—including meat and dairy—which aren’t usually allowed in standard composting. It happens in a sealed bucket, making it a dream for small spaces.

    This next part? Nobody talks about it, but it changed everything for us.

    By closing the loop and turning your waste into soil, you’re creating a miniature ecosystem. You’re no longer just a consumer; you’re a producer. Now, let’s make sure you don’t fall into the common traps that break most beginners.

    💡 Pro Tips

    * Use ‘Cut and Come Again’ Greens: Instead of harvesting a whole head of lettuce, snip the outer leaves. The plant will keep growing, providing food for months.

    * Automate Your Watering: A simple drip irrigation kit with a battery-powered timer is a lifesaver if you travel or get busy.

    * Pot in Groups: Putting pots closer together creates a humid ‘micro-microclimate’ that helps plants survive extreme heat waves.

    * Label Everything: You think you’ll remember what kind of tomato that is, but three months later, it’s a mystery. Use permanent markers on wooden stakes.

    ⚠️ Beginner Mistakes to Avoid

    * Overwatering: More balcony plants die from ‘kindness’ (too much water) than from neglect. Wait until the top inch of soil is dry.

    * Buying ‘Big’ Varieties: Look for ‘Bush’ or ‘Patio’ labels on seeds. Growing a standard 8-foot beefsteak tomato on a balcony is a recipe for frustration.

    * Ignoring Pests: Aphids and spider mites love city balconies. Check the undersides of leaves once a week so you can catch issues early.

    * Forgetting the Bees: If you’re high up, pollinators might not find you. Plant some lavender or marigolds to invite them to the party.

    Frequently Asked Questions

    Can I really grow enough food to make a difference?

    While you likely won’t grow 100% of your calories, you can absolutely grow 100% of your herbs and a significant portion of your fresh greens. The nutritional value of ‘picked 5 minutes ago’ produce is also much higher than store-bought.

    Is it expensive to start a balcony homestead?

    It doesn’t have to be! You can upcycle food-grade buckets, start plants from seeds instead of buying starts, and make your own fertilizer with a worm bin. Start small and reinvest your savings into better gear over time.

    How do I handle the wind on a high-floor balcony?

    Use heavy pots (like glazed ceramic) for the base and secure lightweight pots to the railing with zip ties. Use ‘living windbreaks’ like tall, sturdy grasses to protect more delicate herbs.

    Do I need to worry about the weight on my balcony?

    Generally, modern balconies can handle about 50-100 lbs per square foot. Use lightweight potting soil and plastic/fabric pots to stay safe. Avoid heavy stone statuary or massive wooden raised beds.

    Your balcony is a blank canvas waiting to be turned into a lush, productive sanctuary. There is a deep, quiet thrill in eating a sandwich with tomatoes and basil you grew just three feet from your kitchen door. Don’t wait for ‘someday’ when you have land—start where you are.

    What’s your biggest challenge with starting an urban garden? I’d love to hear your story in the comments!

    🔧 See Recommended Urban Tools →


    📚 More From Our Homestead

    Ready to Start Your Homestead Journey?

    Free guides, checklists, and tools to help you build your dream homestead.
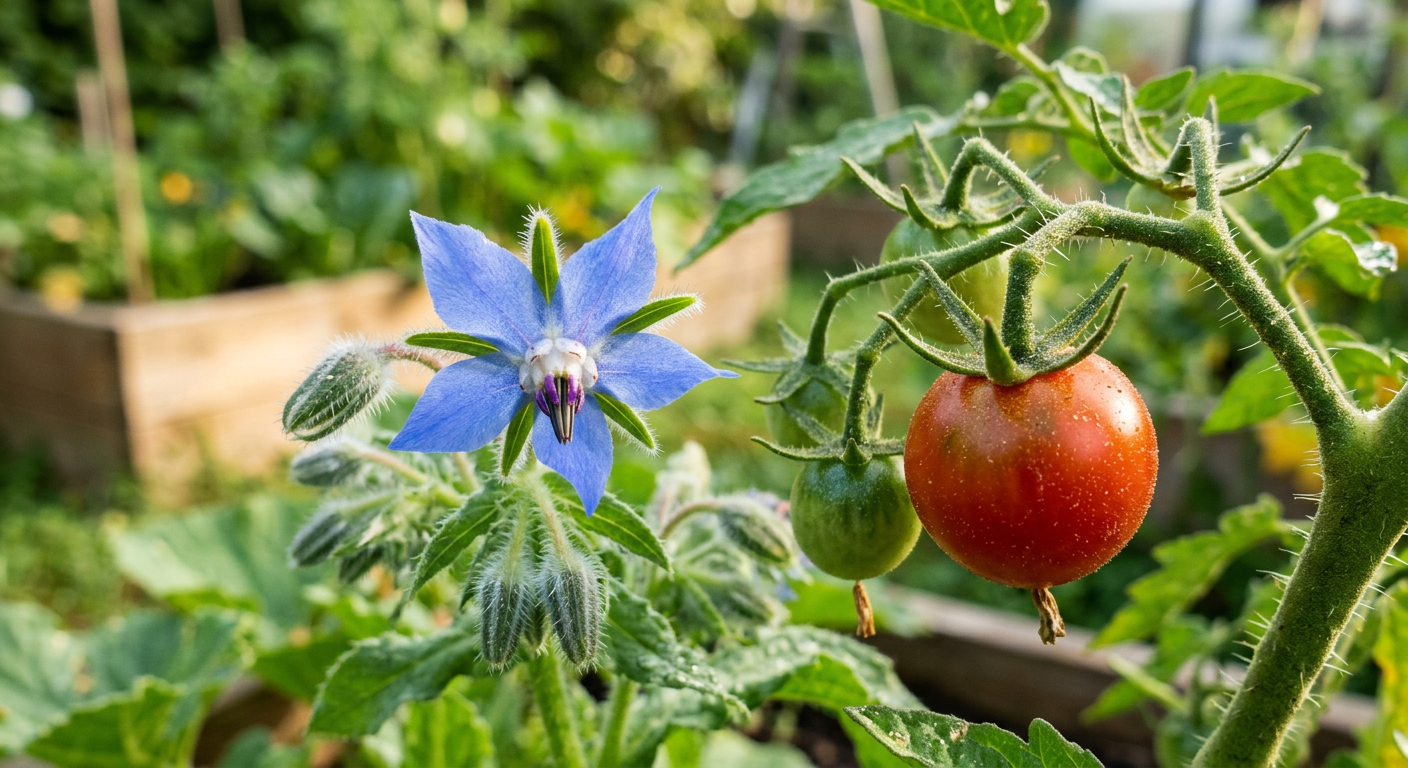
    Explore Free Resources →