Tag: homesteading

  • 5 Essential Skills for a Self-Sufficient Homestead

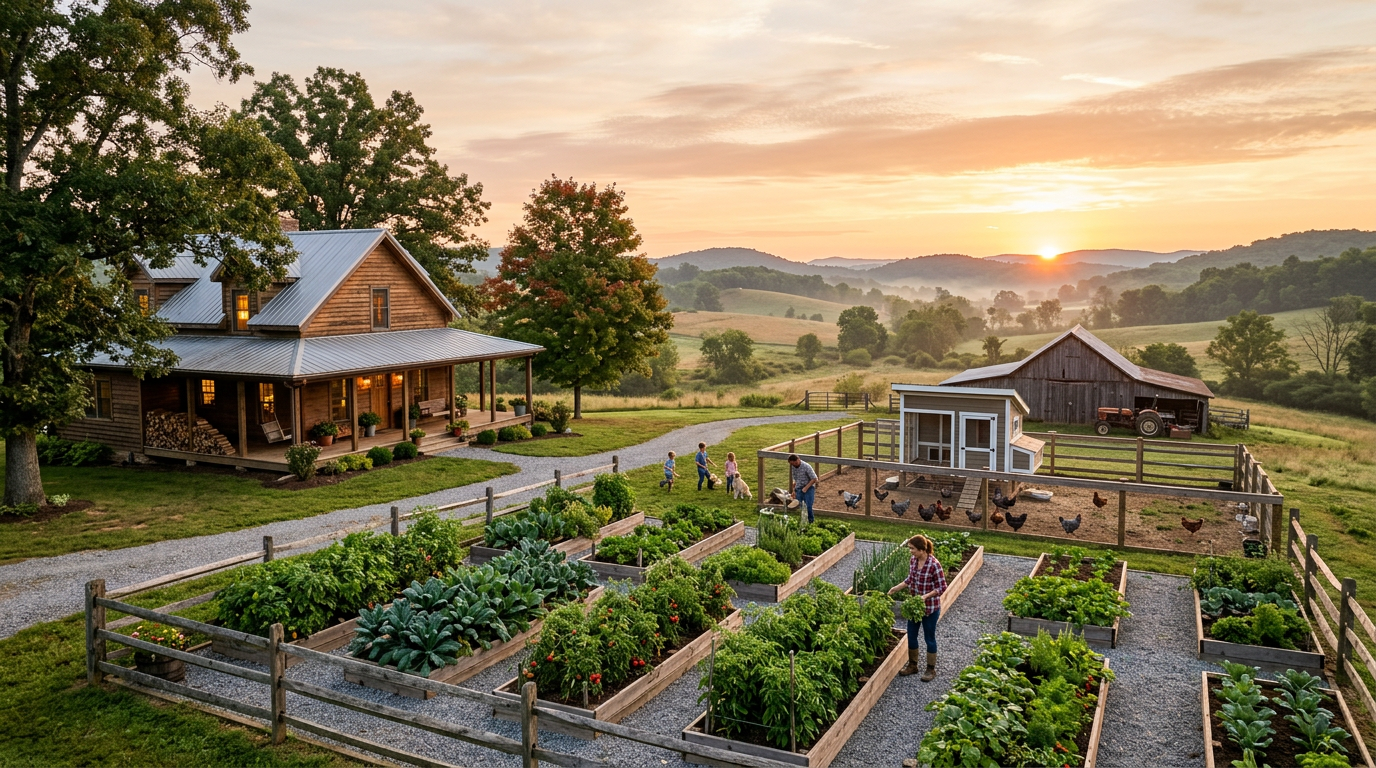
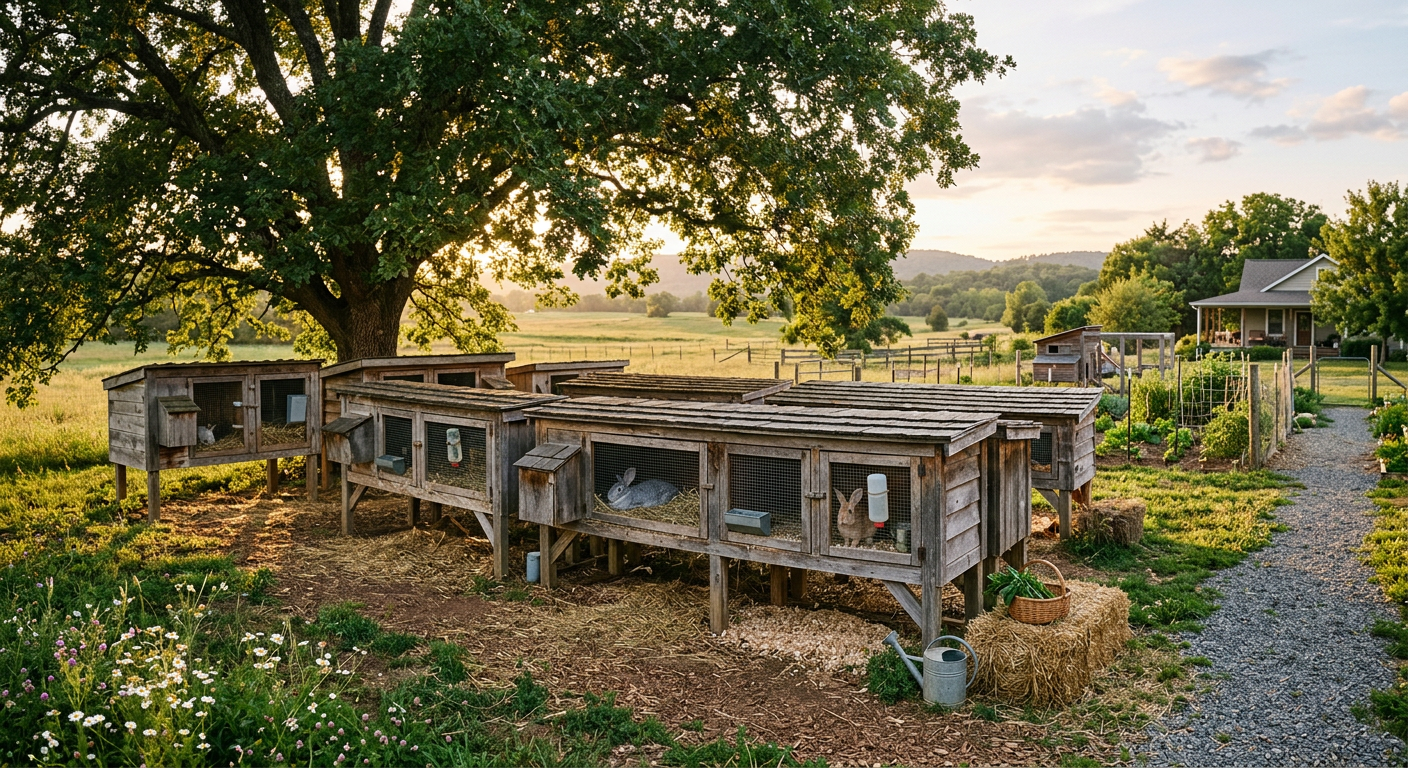
    !A thriving farm showcasing essential skills for basic self-sufficiency homestead life during a golden sunrise.

    I can still feel the sticky kitchen floor under my bare feet. It was 11 p.m., I was covered in strawberry goo, and half of my canning jars were mockingly staring back at me, their lids unsealed. I wanted to cry. That first year, learning the essential skills for basic self-sufficiency homestead life felt less like a romantic dream and more like a series of expensive, exhausting failures.

    🎯 Quick Answer: The most critical skills for a self-sufficient homestead are growing your own food, preserving the harvest, basic animal care (like chickens), simple DIY repairs, and managing resources like water and waste. Master these, and you’re well on your way.

    🔑 Key Takeaways

    * Grow Something, Anything: You don’t need acres. Start with a pot of herbs. The skill is learning the rhythm of soil, water, and sun.

    * Learn to Save Your Food: A garden is useless if you can’t eat from it in February. Canning, freezing, and dehydrating are non-negotiable.

    * Animals are a Responsibility, Not a Prop: Start small. Chickens are a great first step for eggs and pest control, but they require daily care.

    * Fix It Yourself: Fences break. Pipes leak. Learning basic repairs will save you thousands of dollars and endless frustration.

    * It’s a Marathon, Not a Sprint: You won’t learn everything in one season. Focus on one new skill at a time and build from there.

    🌱 Start Your Homestead Plan →

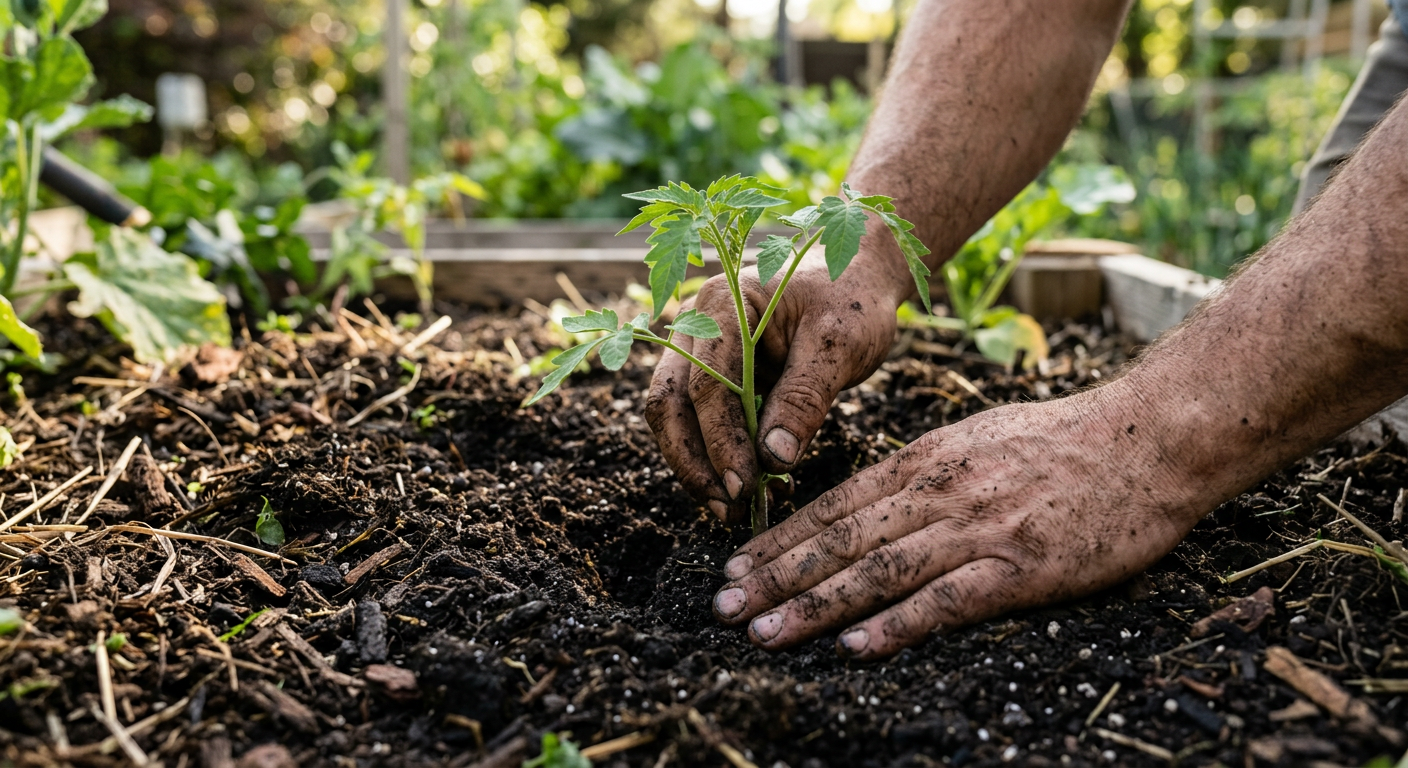
    !Planting seedlings in rich soil, one of the essential skills for basic self-sufficiency homestead success.

    1. Growing Your Own Food (It’s More Than Planting Seeds)

    Everyone thinks homesteading starts with a sprawling, perfect garden. It doesn’t. It starts with dirt. Usually, bad dirt.

    Our first year, we tilled up a 50×50 foot plot, threw in about $200 worth of seeds, and waited for magic. What we got was blight, an army of squash bugs, and maybe three edible zucchini. The problem wasn’t the seeds; it was our complete ignorance of soil health.

    The Real First Step: Soil & Observation

    Before you buy a single seed packet, get a soil test. Our local extension office charged us $15 for a test that told us our soil was horribly acidic and lacked nitrogen. We spent that fall amending with composted manure and lime instead of fantasizing about tomatoes. The next year? We actually had tomatoes.

    Learning to read your land is the real skill. Where does the water pool? Where does the sun hit first? Where does the wind whip through? Observation costs nothing and is more valuable than any book. If you’re serious about getting started, you need a way to track all this. We used a simple notebook at first, but now we rely on a digital system to keep our plans straight. A tool like Homestead OS can be a lifesaver for tracking your garden plots and crop rotations.

    My Battle with Squash Bugs

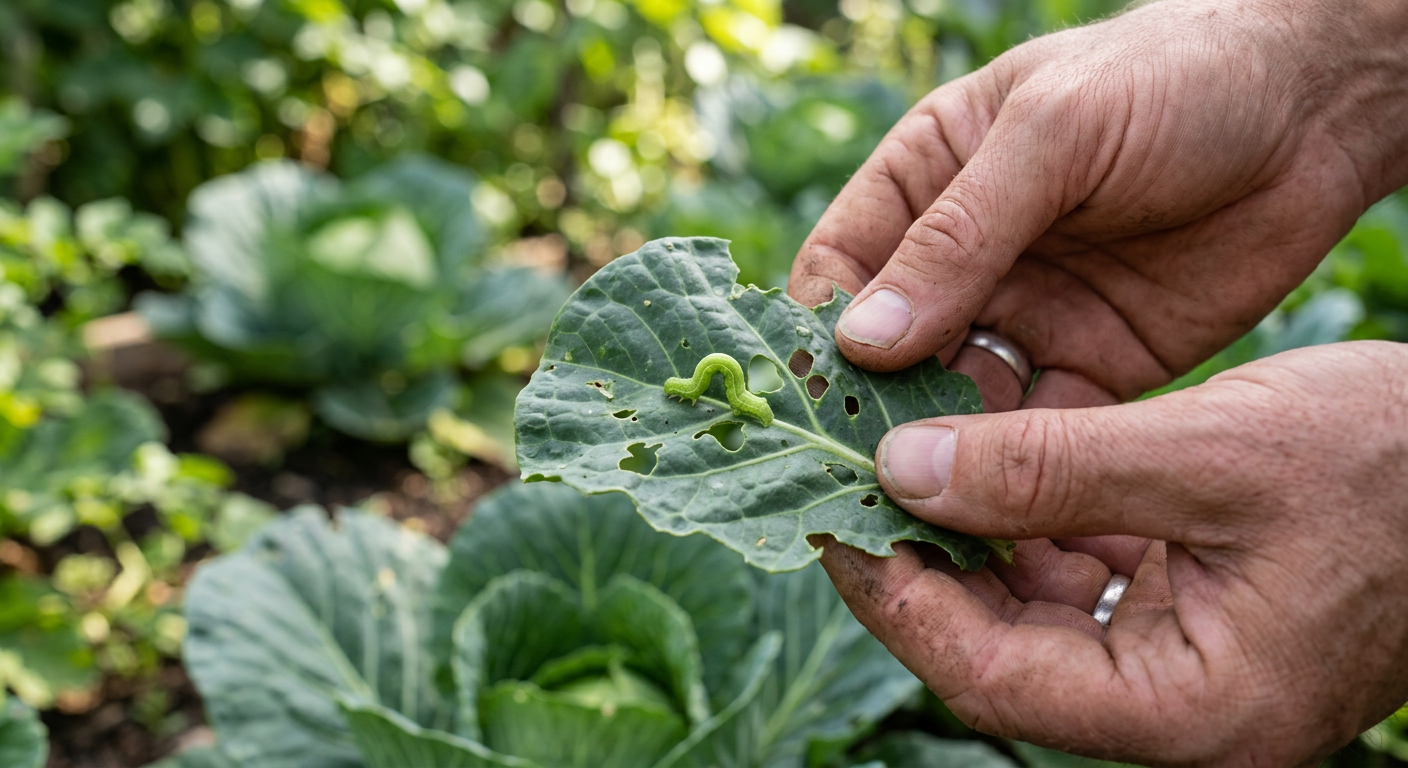
    I’ll never forget going out one morning to find my beautiful pumpkin vines wilting. Under every leaf were clusters of squash bug eggs. I spent hours, every single day, scraping them off with duct tape and dropping the adults into soapy water. It was disgusting, tedious work. That’s the reality. It’s not just planting; it’s pest management, weeding, and protecting your investment.

    We also learned to integrate things like perennial herbs that help repel pests right into our vegetable beds. It’s not about a single solution, but a web of them.

    Next up: what to do when you actually succeed and have too much food.

    2. Preserving the Harvest: Your Future Self Will Thank You

    That sticky strawberry jam disaster? It taught me my most valuable lesson: follow the instructions. Exactly. Food preservation is science, not abstract art. Botulism is real, and you can’t see, smell, or taste it. Don’t mess around.

    The Three Pillars of Preservation

  • Canning (Water Bath & Pressure): Water bath canning is for high-acid foods like pickles, jams, and most fruits. My $40 Granite Ware water bath canner is still going strong after a decade. Pressure canning is for low-acid foods like green beans, meats, and soups. It’s an investment—we paid around $120 for our Presto canner—but it unlocks a new level of food security. The USDA’s National Center for Home Food Preservation is your bible. Do not use random blog recipes for canning.
  • Freezing: Easiest entry point. We freeze shredded zucchini, berries on cookie sheets, and blanched greens. A chest freezer was one of our first big purchases ($300 at a scratch-and-dent sale) and it paid for itself in one season.
  • Dehydrating: Great for herbs, fruit leather, and jerky. We started with a cheap $50 Nesco dehydrator. It’s perfect for making fruit snacks the kids love and preserving our herb harvest.
  • There’s nothing more satisfying than the POP of a sealing jar lid hours after you’ve finished canning. It’s the sound of success. It’s the sound of food for the winter that you grew yourself. It’s the opposite of that sticky, defeated feeling on the kitchen floor.

    But food isn’t just from the ground. Let’s talk about the critters.

    📋 Get the Beginner Checklist →

    3. Basic Animal Husbandry: The Heartbeat of the Homestead

    Getting animals feels like the ultimate homesteading step. Our first flock of eight chickens turned our quiet backyard into a bustling, clucking source of life. And breakfast.

    Start with Chickens

    I always tell beginners to start with chickens. They are relatively low-cost, provide eggs within 6 months, and are incredible at turning kitchen scraps into fertilizer. We wrote a whole guide on the pros and cons of raising backyard chickens if you’re considering it.

    The key skills aren’t complicated:

    * Daily Checks: Food, fresh water, and a quick visual scan for injuries or odd behavior.

    * Coop Management: Keeping it clean to prevent disease and pests. A deep litter method can save a ton of time.

    * Basic Health: Knowing what a healthy chicken looks and acts like. One morning I found a hen completely limp and thought she was dying. Turns out she was just “broody” and wanted to hatch eggs. A day in a separate cage to “break” the broodiness and she was fine. You learn by doing.

    Animals tie you to the land. You can’t just take a spontaneous weekend trip. Someone has to be there every morning and every night. It’s a commitment, but the reward of collecting your own fresh eggs is worth it.

    With animals and gardens comes infrastructure, and that infrastructure breaks.

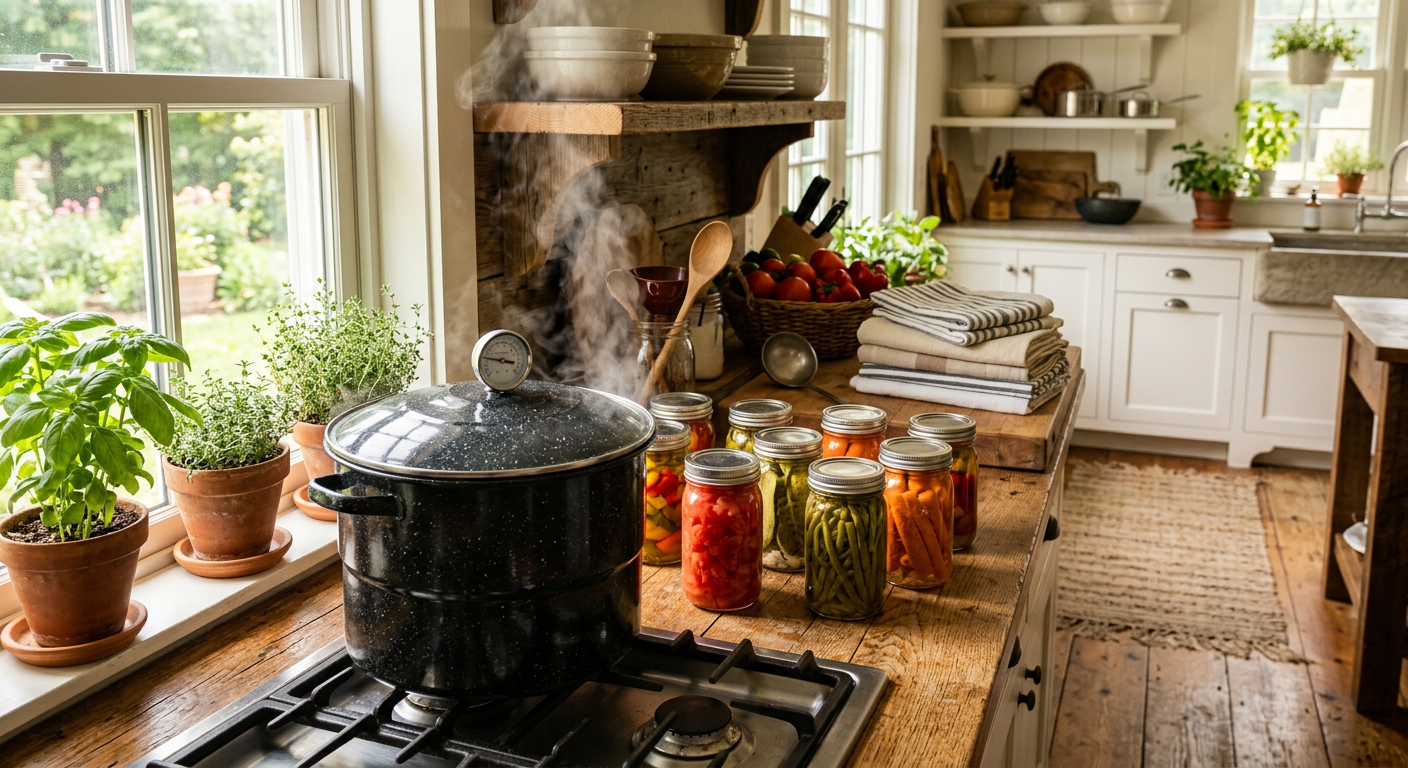
    !Glass canning jars of food, demonstrating essential skills for basic self-sufficiency homestead food preservation.

    4. The Art of “Good Enough” Repair: Fixing It Yourself

    Homesteading is entropy in action. Things break. Fences fall. Gates sag. Hoses spring leaks. If you have to call a professional for every little thing, you will go broke. Fast.

    This is one of the most overlooked essential skills for basic self-sufficiency homestead life. You don’t need to be a master carpenter or plumber, but you do need to be willing to try.

    My Top 3 DIY Skills to Learn

  • Basic Fencing: I’ll never forget trying to stretch woven wire in a downpour to patch a section a deer had smashed. My husband and I were covered in mud, cursing, but we got it done. Learning to stretch wire, set a T-post, and hang a simple gate is non-negotiable.
  • Simple Tool Maintenance: A sharp axe is safer than a dull one. A clean saw cuts better. Learn how to sharpen your own tools, change the oil in small engines (like tillers or mowers), and properly store your gear. Investing in quality essential homesteading tools from the start makes this much easier.
  • Water Line Repair: Knowing how to fix a leaky spigot or patch a cracked PVC pipe with primer and cement can save you from a $200 plumber visit. YouTube is your best friend here.
  • I keep a detailed log of all our infrastructure projects, repairs, and even tool purchases. Knowing what we fixed and when helps us predict future problems. This is another area where a homestead management system comes in clutch, letting us attach notes and photos to specific assets on our property.

    Embracing the “good enough” repair is liberating. It doesn’t have to be perfect, it just has to work.

    💡 Pro Tips

    * Master One Thing a Year: Don’t try to learn canning, raising chickens, and building a barn in your first season. Pick one major skill. Get decent at it. Add another the next year.

    * Your Neighbors Are a Goldmine: The old farmer down the road knows more than any book. Be humble. Ask for help. Offer to help them in return. We learned how to process our first chickens from a neighbor who had been doing it for 50 years.

    * Start Smaller Than You Think: Plant a 10×10 garden, not a 50×50. Get 6 chickens, not 25. Success on a small scale builds confidence. Failure on a large scale leads to burnout.

    * Buy the Best Tools You Can Afford: A cheap shovel with a handle that splinters is miserable to use. We learned the hard way. Buy one good tool instead of three cheap ones.

    🔧 See Recommended Tools →

    ⚠️ Beginner Mistakes to Avoid

    * The Romantic Fallacy: Thinking this life is all sundresses and collecting eggs in a wicker basket. It’s 90% sweat, dirt, and problem-solving. If you don’t enjoy the work itself, you won’t last.

    * Ignoring a Budget: We fell into this trap. A few chicks here, some fancy seeds there… it adds up. A homestead needs a budget just like a household. Track your spending.

    * Analysis Paralysis: Spending two years reading and planning and never actually doing anything. You can’t learn to ride a bike from a book. You have to get on and skin your knees. Plant something, even if it’s in a bucket on your patio. Just start.

    * Buying Too Much, Too Soon: We bought 25 meat chickens our first spring before we even had a proper plucker or processing setup. It was an absolute nightmare of a weekend. We scaled way back the next year.

    Frequently Asked Questions

    ### What is the single most important homesteading skill to learn first?

    Gardening, without a doubt. It teaches the fundamental principles of seasons, patience, observation, and working with nature. Even if it’s just a few herbs in a window box, it’s the gateway to all other homesteading skills.

    ### Can I learn these skills without owning land?

    Absolutely. You can learn canning in a tiny apartment kitchen. You can volunteer at a community garden or a local farm. You can raise quail or rabbits in a small backyard. This is one of the best ways to get homesteading experience before you buy property.

    ### How long does it take to become self-sufficient?

    True 100% self-sufficiency is nearly impossible and, in my opinion, not even the goal. The goal is resilience and interdependence. It takes about 3-5 years to become proficient at the basics and feel like you have a stable system. But you will never stop learning.

    ### What are the essential skills for a basic self-sufficiency homestead on a budget?

    Focus on skills that save money. Learning to cook from scratch, mending clothes, basic home and tool repair, and starting plants from seed instead of buying transplants. These have the highest return on investment for your time.

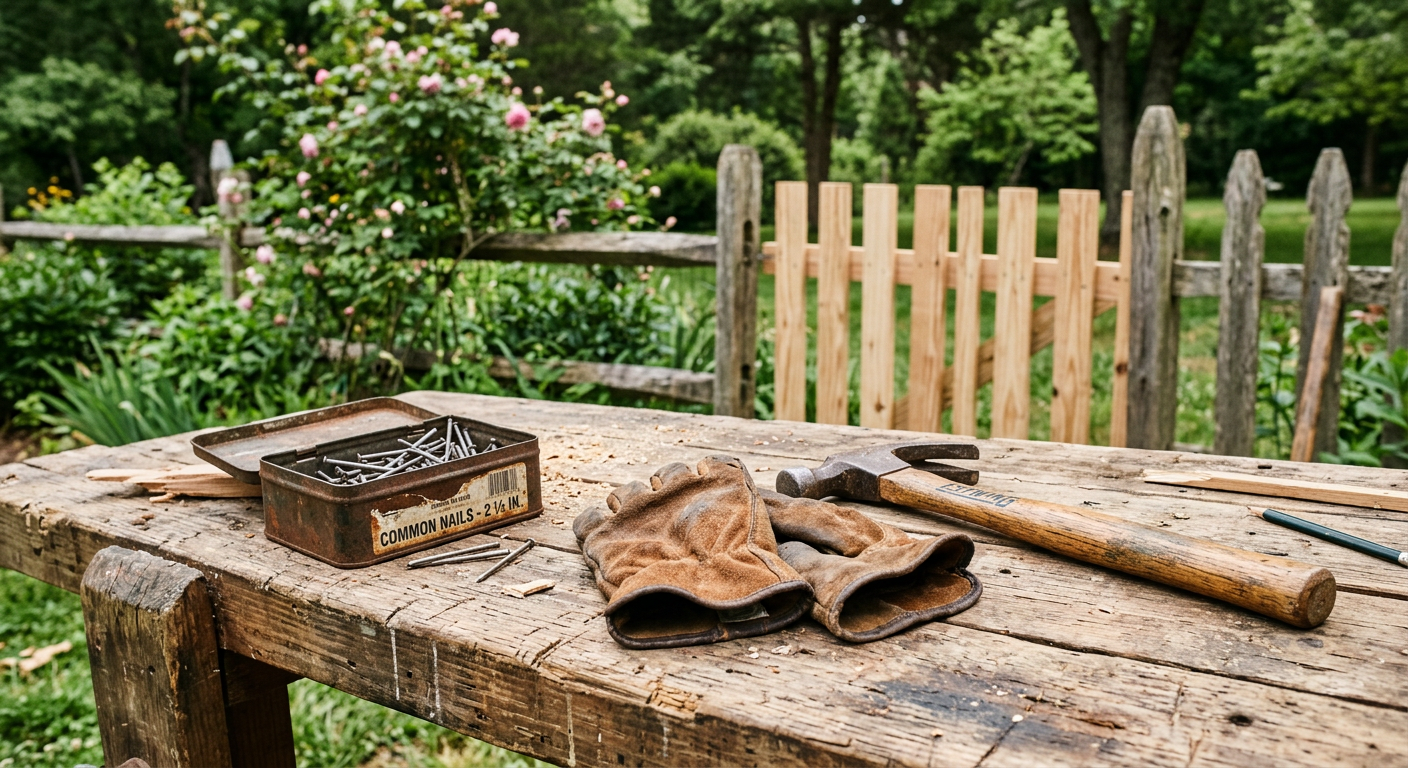
    !DIY repair tools showing essential skills for basic self-sufficiency homestead maintenance and fence building.

    It Starts With a Single Step

    Looking back at that sticky, strawberry-stained kitchen, I don’t feel failure anymore. I feel pride. I didn’t quit. The next weekend, I bought more pectin, re-read the instructions, and successfully canned 12 beautiful jars of jam that we ate all winter.

    This life is a collection of those moments. The failures, the fixes, and the small, hard-won victories. You don’t need to know everything to start. You just need to be willing to learn, get your hands dirty, and not be afraid to end up with a little jam on the floor.

    We share a lot of our day-to-day wins and losses over on our Facebook page if you want to follow along with the real, un-glamorous side of things.

    What’s the one skill you’re most excited (or nervous) to learn? Let me know in the comments below!


    📚 More From Our Homestead

    Ready to Start Your Homestead Journey?

    Free guides, checklists, and tools to help you build your dream homestead.
    Explore Free Resources →

  • Breeding Rabbits for Meat Production: Our Max Yield Guide

    !A sustainable homestead setup for breeding rabbits for maximum meat production in a lush outdoor setting.

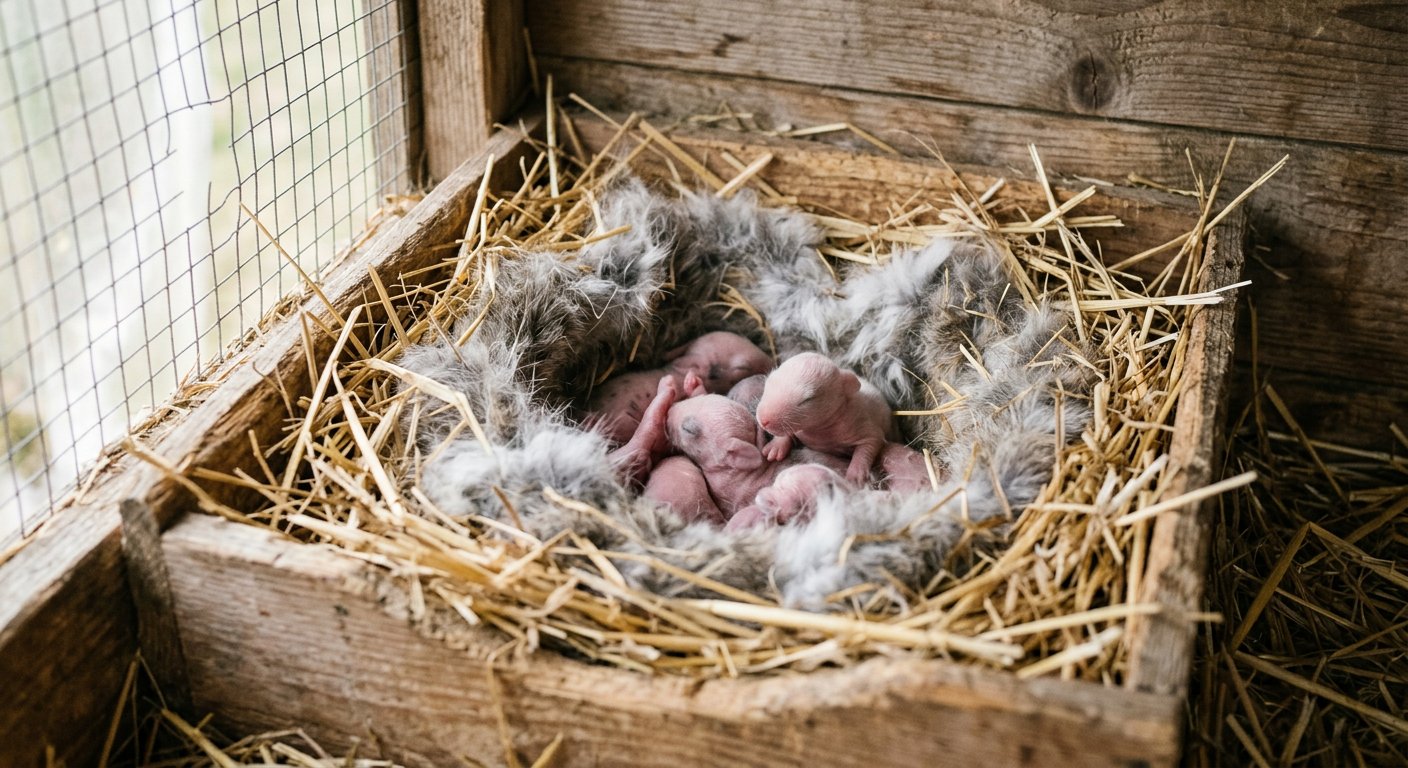
    I’ll never forget the cold morning I reached into that first nesting box. My hands were shaking. All I could feel was a soft, warm mound of fur the doe had pulled, and then, the unmistakable squirm of new life. In that moment, the abstract idea of raising our own meat became real, tangible, and incredibly humbling.

    🎯 Quick Answer: Success in breeding rabbits for maximum meat production hinges on three things: starting with quality meat-stock genetics (like New Zealands or Californians), implementing a strict rebreeding schedule (we re-breed 5-6 weeks after a doe gives birth), and providing unlimited, high-protein (18%) feed and fresh water to your nursing does and their kits.

    🔑 Key Takeaways

    * Genetics First: Choose proven meat breeds like New Zealand Whites or Californians. Don’t try to grow out a Mini Rex.

    * The Schedule is King: A consistent breeding, kindling, and weaning schedule is the engine of your production.

    * Feed for Growth: You cannot skimp on feed. Lactating does and growing kits need high-quality, 18% protein pellets, free choice.

    * Process at Peak: Aim for a processing weight of 5 lbs, which well-fed kits should reach by 8-12 weeks.

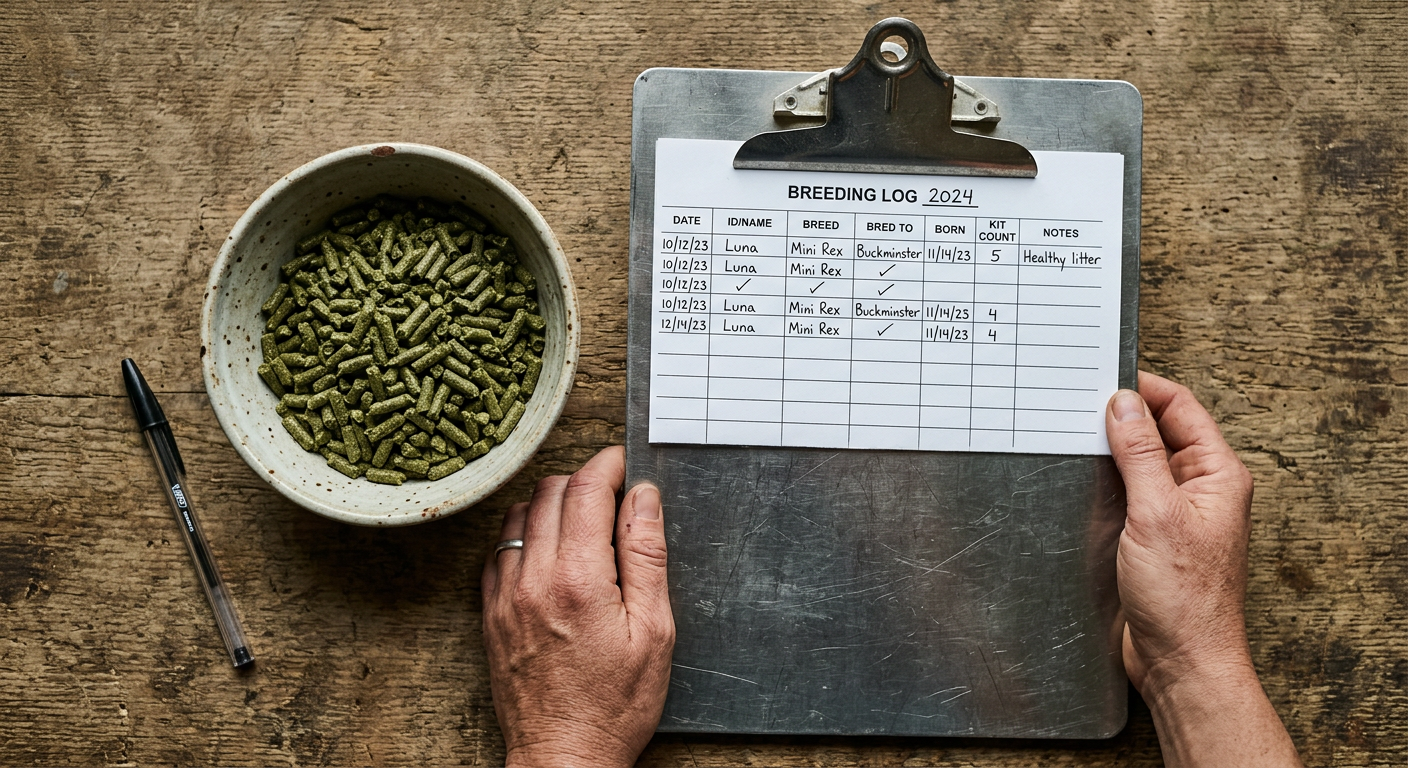
    * Keep Brutally Honest Records: Track everything—breeding dates, litter sizes, weights. Data drives decisions.

    * Heat is the Enemy: Rabbits can’t handle high temperatures. Avoid breeding in the hottest summer months to prevent losing does and entire litters.

    🌱 Start Your Homestead Plan →

    !A warm nesting box with newborn kits, an essential part of breeding rabbits for maximum meat production.

    Choosing Your Powerhouse: The Best Meat Rabbit Breeds

    Your entire operation rises or falls on the genetics you start with. You can do everything else right, but if you start with a slow-growing rabbit, you’ll waste time and money. We learned this the hard way with a beautiful mixed-breed buck who threw the smallest litters.

    New Zealand Whites: The Broiler Chickens of the Rabbit World

    These are the industry standard for a reason. They are thick, meaty, and have a fantastic feed-to-meat conversion ratio. Their bones are lighter than other breeds, meaning more meat per pound. The only downside? Their all-white pelts show every speck of dirt, which is zero fun during muddy spring thaws.

    Californians: The Hardy All-Stars

    Californians are our personal favorite. They have the same great meat qualities as New Zealands but seem, at least on our homestead, to be a bit hardier and have better mothering instincts. That’s just my two cents. They were developed by crossing New Zealands with Chinchilla and Himalayan rabbits, giving them their distinctive dark points and excellent carcass quality.

    Our Homestead Choice & Why

    We started with a trio: one New Zealand buck and two Californian does. This cross gave us phenomenal results. The kits grew like weeds and the hybrid vigor was obvious. We paid $50 each for our initial breeding stock from a reputable local breeder, and it was the best money we ever spent. Don’t bargain-hunt on your foundation animals. Quality stock is an investment, not an expense. This is just one part of a bigger system; we track everything from our garden yields to our rabbitry data in a homesteading planner, which has been a complete game-changer for us. You can check it out here: https://xlvvlujsctgiorcwbtkv.supabase.co/functions/v1/social-redirect?p=homesteados&loc=blog_inline_early.

    Choosing the right animals is a foundational step, just as important as the breeding schedule itself.

    Keep reading — this is where your feed costs can either make or break you.

    The Engine Room: Your Breeding Schedule & Cycle

    Consistency is the name of the game in breeding rabbits for maximum meat production. You need a plan. Winging it leads to forgotten rebreed dates, does getting fat and lazy, and an empty freezer.

    Our 42-Day Production Cycle

    Some commercial operations rebreed a doe just 14 days after she gives birth. We found that too taxing on our does. It burned them out fast. We landed on a more sustainable, yet still highly productive, 42-day cycle.

  • Day 1: Breed Doe A.
  • Day 31: Doe A kindles (gives birth). She nurses her kits.
  • Day 35-42 (5-6 weeks later): Wean the kits from Doe A. They move to a grow-out pen.
  • Same Day: Re-breed Doe A.
  • With just two does on opposite schedules, you can have a litter of kits hitting processing weight every single month. It’s a beautiful, efficient system when it works.

    “Table Breeding” and Confirming Pregnancy

    We always take the doe to the buck’s cage. Always. A territorial doe in her own cage will often fight a buck. We watch for a successful “fall-off” from the buck, which usually signals a good breeding. I write the date on a whiteboard right on the rabbitry wall.

    Fourteen days later, I gently palpate the doe’s belly. This takes practice. You’re feeling for little marble-sized bumps. I’ll never forget the first time I did it correctly—it felt like finding treasure. If I don’t feel anything, I’ll try re-breeding her immediately.

    Don’t skip this. A doe that isn’t pregnant but thinks she is (a false pregnancy) is a 30-day waste of cage space and expensive feed.

    That breeding calendar is the heartbeat of your meat production, but it’s fueled by what you put in their bowls.

    Fueling Growth: Housing and Nutrition Secrets

    This is where your investment pays off. Top-tier genetics and a perfect schedule mean nothing if you don’t feed for growth. This is not the place to try and save a buck by buying cheap feed.

    The Magic Number: 18% Protein Feed

    For lactating does and growing kits (from weaning to processing), you need an 18% protein commercial pellet. We use a brand called Kalmbach, which costs us about $24 for a 50lb bag. A nursing doe with a big litter can empty her feeder daily.

    We tried a 16% protein feed once to save money. Huge mistake. The kits grew slower, their weights were lower at 10 weeks, and the whole cycle was less efficient. We spent more on feed in the long run because they had to be housed and fed for an extra two weeks. Never again. Stick to 18%.

    Bucks and non-lactating does can be maintained on a 16% protein feed to keep them from getting overweight.

    Water Is Everything

    I can’t stress this enough. A doe can’t produce milk without constant access to fresh, clean water. A single hot afternoon with a clogged water bottle nozzle can mean losing a whole litter. Check bottles twice a day. In the winter, we use heated water bases, which cost about $20 each, to prevent freezing. They’re a non-negotiable part of our setup, right up there with the essential homesteading tools we recommend buying first.

    📋 Get the Beginner Checklist →

    Feed and water are the fuel. Next up is the finish line: turning that investment into food for your family.

    !A high-quality New Zealand White doe, a top breed choice for breeding rabbits for maximum meat production.

    From Kit to Kitchen: Grow-Out & Processing

    This is the part that separates want-to-be homesteaders from the real thing. It’s not always easy, but it is deeply rewarding to take full responsibility for your food.

    The 8- to 12-Week Countdown

    Once weaned around 5-6 weeks, the kits move into a communal “grow-out” tractor or a large cage. Here, they have free-choice access to that 18% protein feed and fresh water. We weigh one or two from the litter every week to track their progress.

    Our target is a live weight of 5 lbs. On our feeding program, they consistently hit this between 8 and 10 weeks. If you wait until 12 weeks, you’ll get a slightly larger carcass, but the meat won’t be quite as tender. We find 9 weeks is the sweet spot for us.

    The Reality of Dispatch Day

    My hands trembled the first time. We had watched these animals grow from tiny, blind things into healthy rabbits. But we were raising them for a purpose. My husband and I did it together, quietly and respectfully. We use the cervical dislocation method, which is instantaneous when done correctly.

    Having the right tools makes it less stressful. A sharp knife is critical. We built our own processing station, but the process itself is what matters. It’s a solemn, but not a sad, task. It’s the fulfillment of the cycle. And when you sit down to a meal of roasted rabbit you raised yourself, the sense of pride and gratitude is immense. It’s one of the most important homesteading skills a beginner can master.

    We’ve made all the mistakes so you don’t have to. Pay attention to these next tips.

    💡 Pro Tips

    * Invest in a Digital Scale: Stop guessing. A simple digital kitchen scale that measures in pounds and ounces is invaluable for tracking kit growth and holding yourself accountable. Cost us $15 and it’s one of our most-used tools.

    * Use a Whiteboard: Forget fancy apps. We have a huge whiteboard right on our rabbitry wall. It lists every doe, breeding dates, kindling dates, and scheduled processing day. You can see your entire operation at a glance.

    * Tattoo for Records: If you have more than a few does, you need to identify them. We bought a simple tattoo kit for $60. Each doe gets a unique ID in her ear. It sounds intense, but it makes record-keeping foolproof.

    * Build a Grow-Out Tractor: Instead of just a cage, we built a simple PVC and wire tractor for weaned kits. We move it across the lawn every day. They get fresh greens, it saves on feed costs, and their manure fertilizes our pasture. It’s a win-win-win.

    ⚠️ Beginner Mistakes to Avoid

    * Breeding in High Heat: We lost an entire litter one July when the temperatures soared over 95°F. The doe got stressed and stopped producing milk. We now stop all breeding rabbits for maximum meat production from mid-June to September. It’s just not worth the risk.

    * Starting Too Big: Enthusiasm is great, but don’t buy ten does at once. Start with a trio (one buck, two does). Learn their rhythms. Master the system on a small scale, then expand. I’ve seen so many friends get overwhelmed and quit because they scaled too fast. Planning your growth is critical; laying out your goals early on is a step you can’t skip, and the tools at https://xlvvlujsctgiorcwbtkv.supabase.co/functions/v1/social-redirect?p=homesteados&loc=blog_inline_late can really help you visualize it.

    * Forgetting the Nest Box: A doe needs her nesting box on day 28 of her pregnancy. Not day 27, not day 30. Day 28. We forgot once. She kindled on the wire floor of her cage, and we lost half the kits to the cold before we found them. It was a heartbreaking and completely avoidable mistake.

    * Cheap Cage Wire: Don’t use standard hardware cloth. It will rust in a year, and the ammonia from rabbit urine will eat right through it. Buy proper galvanized-after-welding (GAW) cage wire. It costs more upfront but lasts for a decade.

    🔧 See Recommended Tools →

    Frequently Asked Questions

    How much meat do you get from one rabbit?

    A 5 lb live weight rabbit will typically yield a 2.5 to 3 lb dressed carcass. That’s a dress-out percentage of 50-60%, which is excellent. One fryer rabbit is the perfect size for a family of four for one meal.

    What does rabbit meat taste like?

    If you’re thinking gamey, you’re wrong. Farm-raised rabbit is incredibly mild and tender. It tastes like a richer, more flavorful chicken breast. It’s a lean, all-white meat that takes on marinades and seasonings beautifully.

    Is raising rabbits for meat cost-effective?

    It can be, but maybe not in the way you think. If you factor in your time, it’s not always cheaper than sale-priced chicken. For us, a 50lb bag of feed at $24 raises one litter to processing weight. That gives us about 20-24 lbs of meat. So, the feed cost is roughly $1 per pound of meat. The real value is in the quality, security, and knowing exactly what went into your food. For a more detailed breakdown on starting out, our guide on homesteading on a budget can be a huge help.

    What is the ideal buck to doe ratio?

    For a homestead-scale operation, one good buck can easily service 8-10 does. We keep two bucks just in case one has fertility issues, but one does most of the work. Don’t keep more bucks than you need; they just eat feed without producing anything.

    How do you prevent disease in your rabbitry?

    Cleanliness is 9/10ths of the law. Keep cages clean and ensure good ventilation to reduce ammonia buildup. Never introduce new rabbits directly into your rabbitry; quarantine them for 30 days. And provide clean food and water. For more in-depth info on rabbit health, the Penn State Extension is a fantastic, reliable resource.

    !Record keeping and high-protein feed for breeding rabbits for maximum meat production on a small farm.

    It’s More Than Just Meat

    Raising rabbits has become one of the most vital parts of our homestead. It’s a quiet rhythm of chores, a constant source of healthy protein, and a powerful lesson in self-sufficiency. It’s the sound of the kits starting to rustle in the nest box, the satisfaction of a full freezer, and the peace of mind that comes with providing for your own.

    It’s not for everyone, and it’s not always easy. But if you’re ready for a sustainable, small-footprint meat source, there’s nothing better.

    For more behind-the-scenes looks at our rabbitry and daily homestead life, be sure to follow our journey on our Facebook page!

    What’s holding you back from raising your own meat rabbits? Share your questions or your own experiences in the comments below!

    [CTA] Get our free printable rabbit breeding record sheet to start tracking your production today!


    📚 More From Our Homestead

    Ready to Start Your Homestead Journey?

    Free guides, checklists, and tools to help you build your dream homestead.
    Explore Free Resources →

  • Building a Raised Garden Bed: Our No-Fail Guide

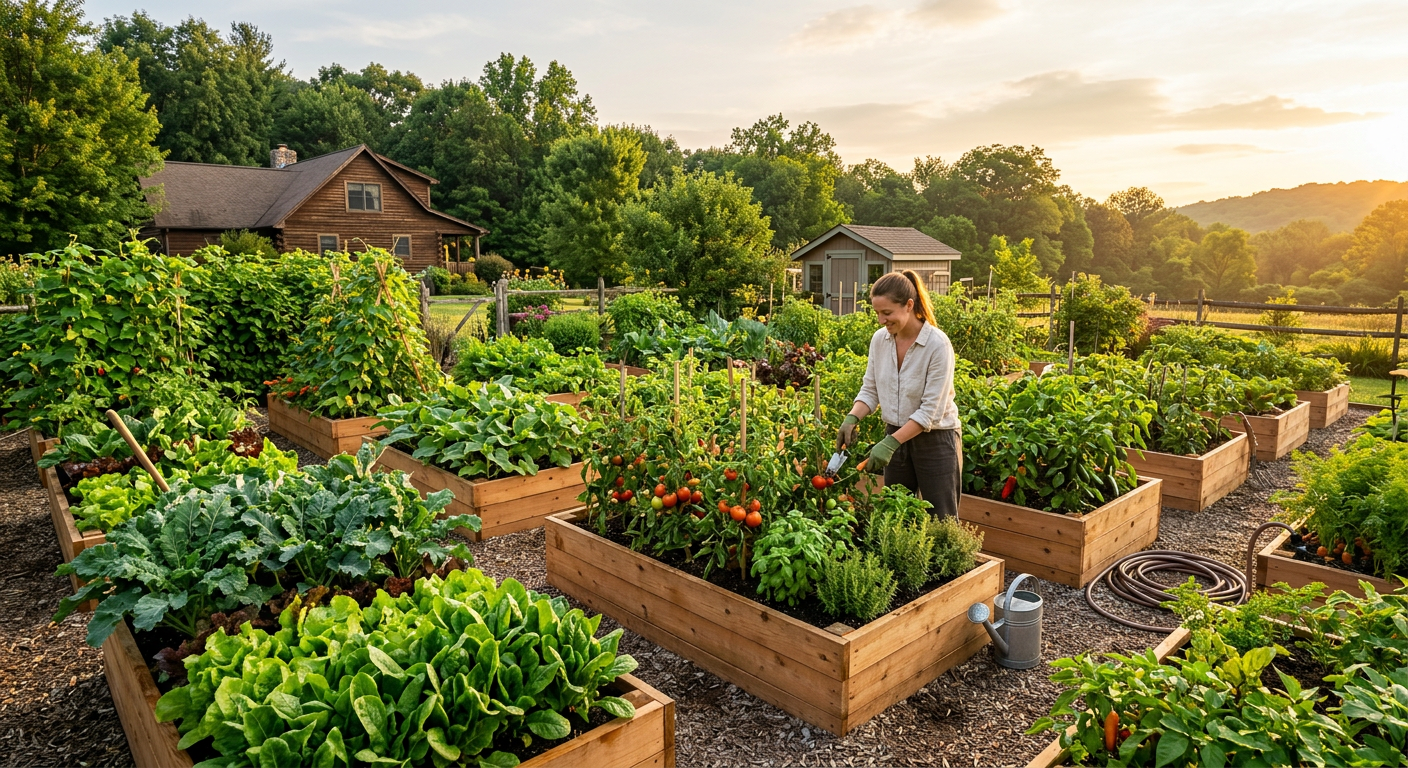
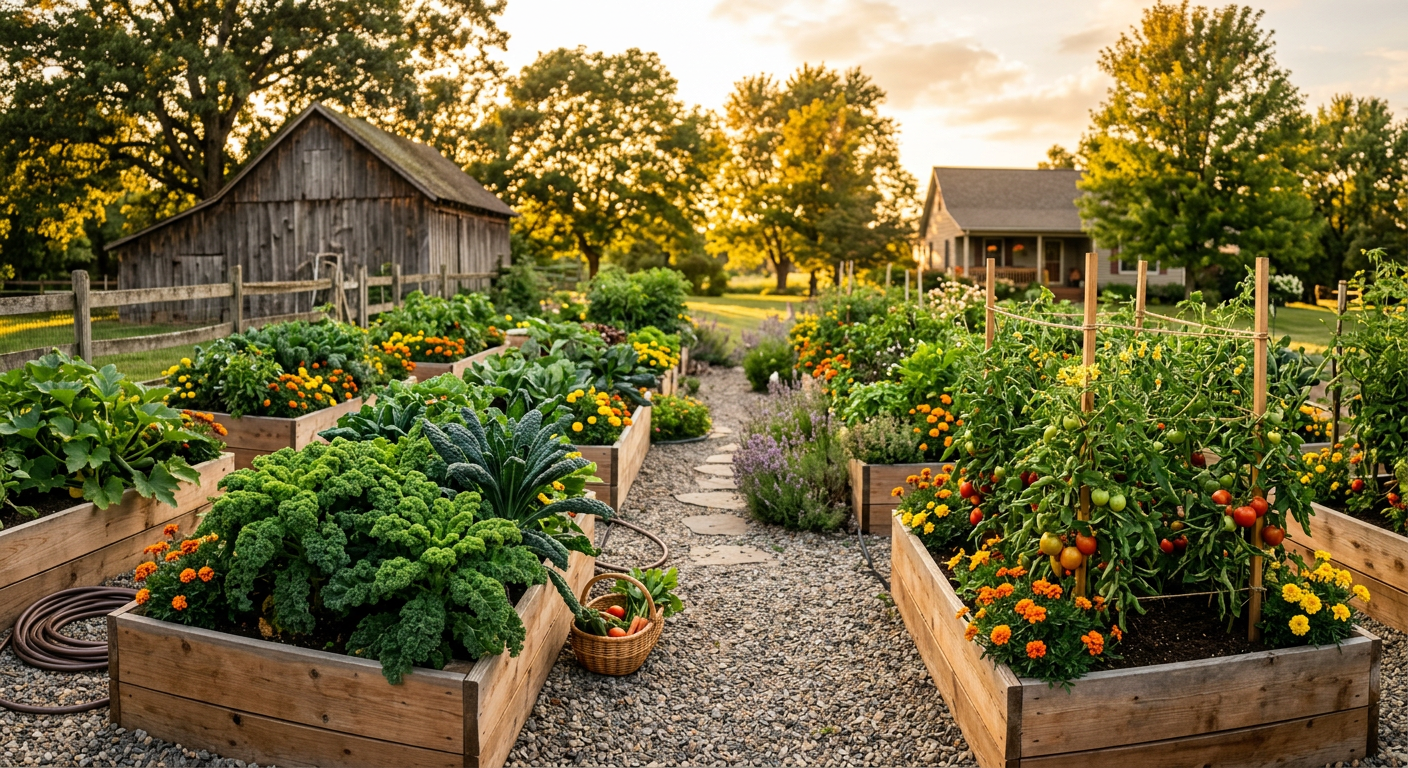
    !A thriving backyard garden showing the results of building a raised garden bed for vegetables in the sunlight.

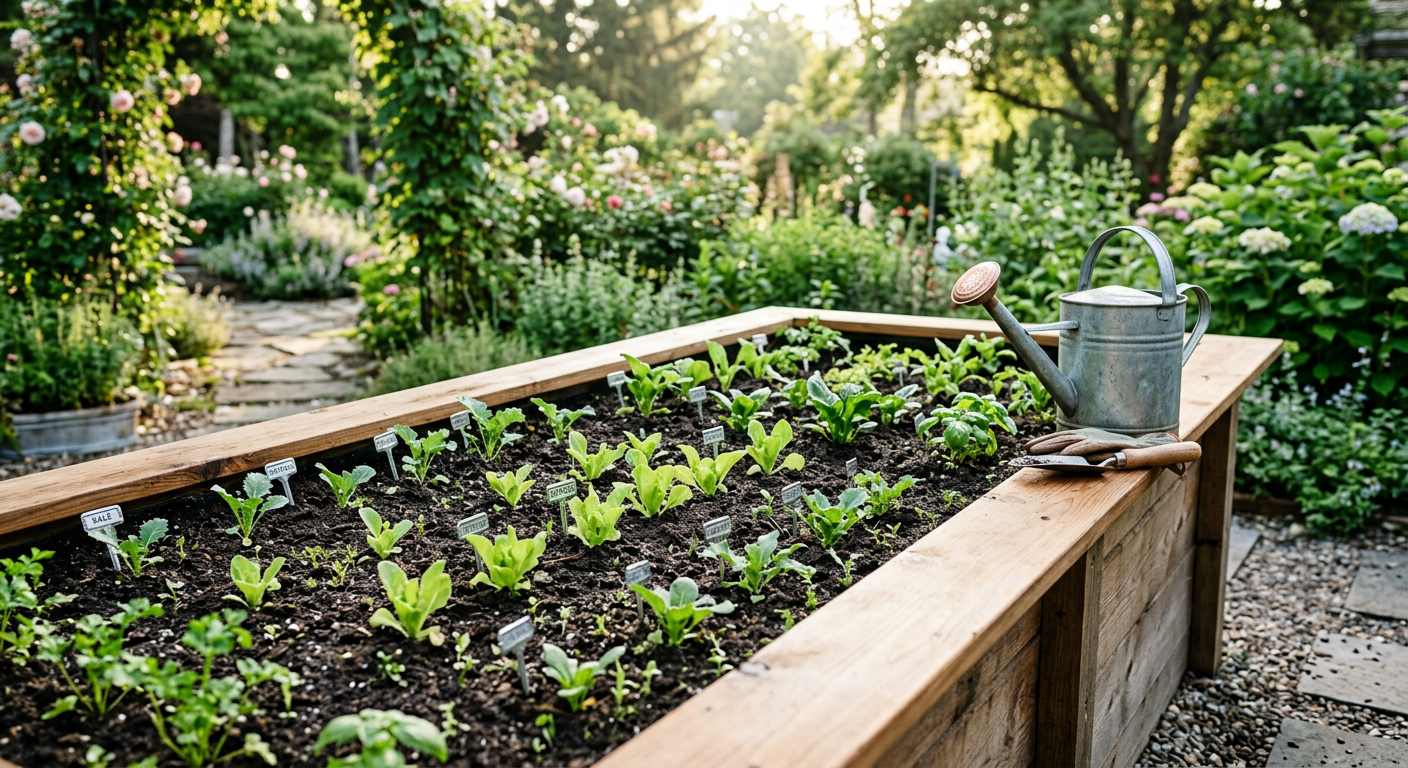
    I’ll never forget the first raised bed we built. I was so proud, standing there with splinters in my hands and sweat dripping down my back. Then, a few weeks later, I realized my mistake: I’d made it five feet wide. Every time I had to weed the middle, I practically had to army-crawl over the zucchini, cursing myself. That single, frustrating experience taught me more about building a raised garden bed for vegetables than any book ever could.

    🎯 Quick Answer: Building a raised garden bed is the best way to control your soil, reduce weeding, and get better harvests. Choose a rot-resistant wood like cedar, keep the width to 4 feet or less for easy access, and fill it with layers of organic matter (like Hugelkultur) for incredible long-term fertility.

    🌱 Start Your Homestead Garden Plan →

    🔑 Key Takeaways

    * Control is Everything: Raised beds let you bypass poor native soil (like our heavy clay) and create the perfect growing medium from scratch.

    * Ergonomics Matter: Building a bed that’s 18-24 inches tall and no more than 4 feet wide saves your back and makes harvesting a joy, not a chore.

    * Material Choice is Crucial: Untreated cedar is the gold standard for longevity and safety, but other options like galvanized steel or even salvaged materials can work if you know the risks.

    * Fill it Smart, Not Hard: The Hugelkultur method (layering wood, leaves, and compost) creates a fertile, water-retentive bed that saves a fortune on purchased soil.

    * Location, Location, Location: Place your bed where it gets at least 6-8 hours of direct sunlight. We learned this the hard way with a sad, shaded patch of tomatoes our first year.

    * Pest Defense Starts at the Bottom: Lining the bottom of your bed with hardware cloth is a non-negotiable step if you have gophers or voles.

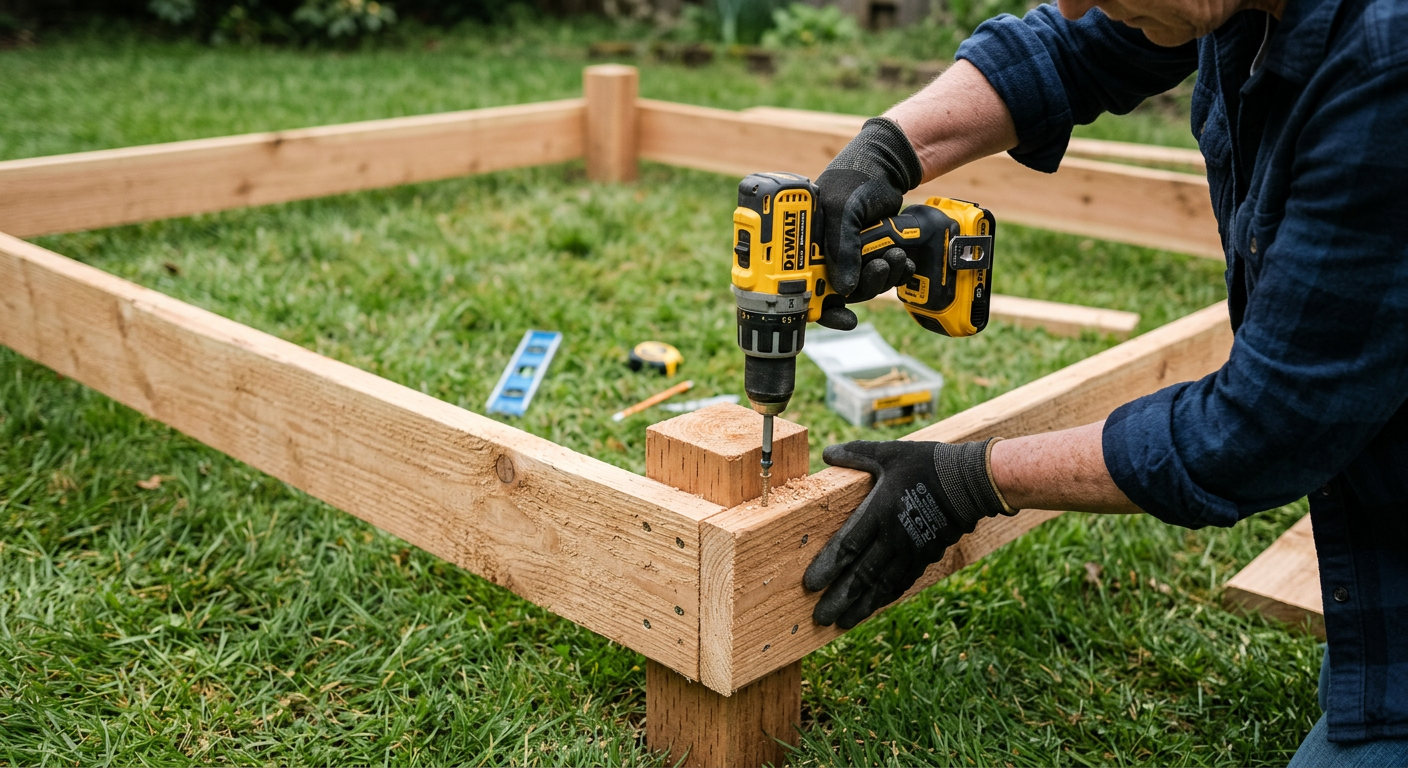
    !A DIY enthusiast building a raised garden bed for vegetables using cedar wood and a power drill.

    Why We Switched to Raised Beds (and Never Looked Back)

    When we first moved out to our property, I had romantic visions of a massive, tilled-in-the-ground garden. The reality? Heavy, red clay that turned to concrete in the summer and a soupy mess in the spring. Our first-year carrots were stubby little nubs that refused to penetrate the soil. It was a disaster.

    Building a raised garden bed for vegetables was our solution. It’s not about being fancy; it’s about being practical. It’s about solving a problem.

    Benefit 1: Perfect Soil from Day One

    You get to be the architect of your soil. Instead of spending years amending clay or sand, you can create the ideal loamy, nutrient-rich mix instantly. This means healthier plants, fewer diseases, and bigger harvests. You control the pH, the drainage, and the fertility. For us, this was the single biggest game-changer.

    Benefit 2: Less Weeding, Less Aching

    Because the beds are filled with clean soil and compost, the weed pressure is dramatically lower. And the weeds that do pop up are easy to pull from the loose soil. Bending over a 2-foot-tall bed is a whole lot easier on the back than kneeling in the mud. I can now weed our six main beds in the time it used to take me to do one row in the old ground-level garden.

    Benefit 3: Better Drainage & Warmer Soil

    Raised beds drain much faster than our clay soil ever could, preventing root rot during our wet springs. They also warm up faster, which means we can plant our cool-weather crops a good two weeks earlier than our neighbors. That’s a huge advantage in our Zone 5 climate. Making a solid plan for your garden layout and other projects is critical for success. We found that using a dedicated system like the one we use on Homestead OS keeps all our plans and records in one place.

    Choosing your materials is the first big decision you’ll make.

    Choosing Materials: Wood, Metal, or Stone?

    This is where you balance budget, longevity, and aesthetics. We’ve used a few different things over the years, but we have our favorites.

    Our Top Pick: Cedar Wood

    Cedar is naturally rot-resistant thanks to its oils. It’s beautiful, easy to work with, and completely food-safe. It’s more expensive upfront, but it lasts. Our first two 4’x8’x18″ cedar beds, built 7 years ago, are still rock solid.

    * Cost: We spent about $220 per bed on cedar planks back then. Prices have gone up, so expect to pay closer to $300-$350 now.

    * Lifespan: 10-15 years, easily.

    * Pro-Tip: Use stainless steel or coated deck screws. Regular screws will rust out long before the cedar rots.

    Budget Option: Untreated Pine/Fir

    If cedar isn’t in the budget, standard untreated framing lumber (like pine or fir) is your next best bet. It’s cheap and available everywhere. The downside? It will only last 3-5 years before it starts to break down. We used pine for a temporary herb bed, and it was mush by year four. This is a great starting point, especially if you’re homesteading on a budget.

    Other Options: Metal & Stone

    * Galvanized Steel: These have become very popular. They are durable, long-lasting, and heat up quickly. Just be aware that the soil on the edges can get hot in southern climates.

    * Cinder Blocks/Stone: Extremely durable and can often be sourced for free. The main drawback is that lime can leach from concrete blocks, raising the soil pH over time. You’ll need to monitor and amend your soil accordingly.

    📋 Get Our Garden Bed Building Checklist →

    Now, let’s grab some tools and actually build this thing.

    Keep reading — this is where we get our hands dirty.

    The Build: A Step-by-Step Guide to Building a Raised Garden Bed for Vegetables

    We’re going to build a standard 4’x8’ bed that’s about 22 inches tall. This requires three tiers of 2×8 boards (which are actually 1.5″ x 7.25″).

    Step 1: Gather Your Materials & Tools

    Materials:

    * (6) 8-foot 2×8 untreated cedar or fir boards

    * (3) 8-foot 4×4 untreated cedar or fir posts

    * (1) box of 3-inch exterior-grade coated or stainless steel screws

    * (Optional) Roll of 1/2 inch hardware cloth for gopher/vole protection

    Tools:

    * Circular saw or miter saw

    * Drill/driver with bits

    * Tape measure & pencil

    * Speed square

    * Level

    * Shovel & rake

    * Check out our list of essential homesteading tools if you’re just starting your collection.

    Step 2: Make Your Cuts

  • Take two of your 8-foot 2×8 boards. Cut them exactly in half to get four 4-foot sections. These will be your short ends. You should now have four 8-foot boards and four 4-foot boards.
  • Take your 4×4 post. Cut it into six pieces, each 22 inches long. These are your corner and center braces.
  • Step 3: Assemble the Frame

    This is easiest with a helper, but I’ve done it solo.

  • Lay two 22″ 4×4 posts on the ground, about 8 feet apart.
  • Place one 8-foot board against them, flush with the top. Pre-drill your holes to prevent splitting, then drive two 3-inch screws through the board into each post.
  • Attach a second 8-foot board below the first, and a third below that, creating one long wall.
  • Repeat this process to build the second 8-foot wall.
  • Now, stand the two long walls up. Attach the 4-foot end boards to the inside of the 4×4 posts to complete the rectangle. Use your speed square to make sure your corners are 90 degrees!
  • Finally, place the two remaining 22″ 4×4 posts in the middle of the long 8-foot sides for extra support. This prevents the boards from bowing out under the weight of the soil.
  • Step 4: Prepare the Site & Place the Bed

  • Clear and level the spot where your bed will live. This is CRITICAL. A wobbly bed will fail.
  • Lay down a layer of plain brown cardboard to suppress weeds.
  • If you have burrowing pests, now is the time to lay your hardware cloth down, overlapping the edges and stapling it to the bottom of your frame.
  • Move your assembled frame into place.
  • Filling your bed correctly is just as important as building it well.

    !Layering logs and organic matter when building a raised garden bed for vegetables to improve soil fertility.

    Filling Your Bed: The Lasagna (Hugelkultur) Method

    Do NOT just go buy 2 cubic yards of expensive bagged garden soil. You’ll spend a fortune ($300+) and the soil is often lifeless. We use a layering method called Hugelkultur that builds incredible soil for a fraction of the cost.

    Here’s how we fill our 4x8x22″ beds:

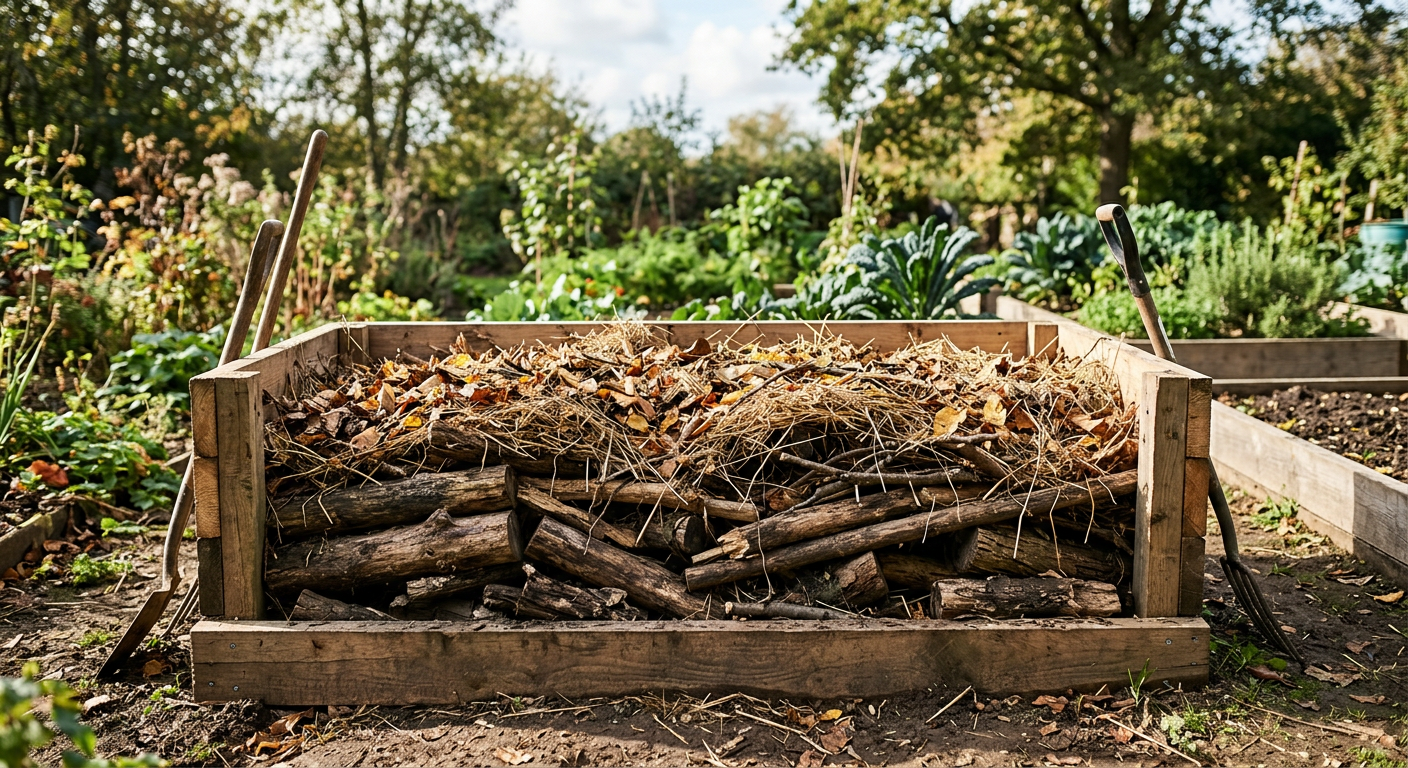
  • Bottom Layer (8-10 inches): Wood. We use old, rotting logs, thick branches, and untreated wood scraps from our property. This acts like a sponge, holding water and slowly breaking down to release nutrients for years. Avoid walnut or cedar here.
  • Second Layer (4-6 inches): Green & Brown. Here, we pile in grass clippings, shredded leaves, straw, and kitchen scraps (no meat/dairy). This is your nitrogen and carbon source.
  • Third Layer (2-4 inches): Compost. This is the powerhouse. We use our own homemade compost, but you can buy it in bulk from a local landscape supply company. It’s much cheaper than bagged.
  • Top Layer (4-6 inches): Topsoil Mix. The final layer is a mix of high-quality topsoil and more compost. We buy a 50/50 mix from a local supplier. According to the Penn State Extension, a good mix ensures proper drainage and nutrient availability.
  • This method, managing all the different layers and inputs, might seem complex. That’s why keeping good records is vital. We track what goes into each bed in our homestead management system, so we know what works best for future builds.

    Once filled, water it all down thoroughly. The level will sink over time, and you can just top it off with more compost each spring. Now you’re ready to plant! Some of our favorite first-year plants in new beds are zucchini, tomatoes, and easy perennial herbs.

    💡 Pro Tips

    * Don’t Go Wider Than 4 Feet. I learned this the hard way. You must be able to reach the middle of the bed from either side without stepping in it. 3 feet is even more comfortable.

    * Level the Ground First. I know I said it before, but it’s the most skipped step. A bed on unlevel ground will rack, warp, and fall apart. Use a long level and a shovel. It’s 30 minutes of work that saves you years of frustration.

    * Install Drip Irrigation. Before you even plant, lay down soaker hoses or drip lines. It’s a pain to retrofit later. This saves water, time, and keeps moisture off the plant leaves, reducing fungal diseases.

    * Add a Center Brace. For any bed 8 feet or longer, screw a 2×4 brace across the middle (from one long side to the other). This absolutely prevents the sides from bowing out from the immense pressure of wet soil.

    ⚠️ Beginner Mistakes to Avoid

    * Using Pressure-Treated Wood: Please, don’t do this for a vegetable garden. The chemicals used to treat the wood (historically arsenic, now copper-based compounds) can leach into your soil and be taken up by your food. It’s not worth the risk.

    * Not Filling it Deep Enough: The soil level will sink by 25-50% in the first year as the organic matter decomposes. Mound the soil high when you first fill it, a good 4-6 inches above the frame. It will settle to the perfect level.

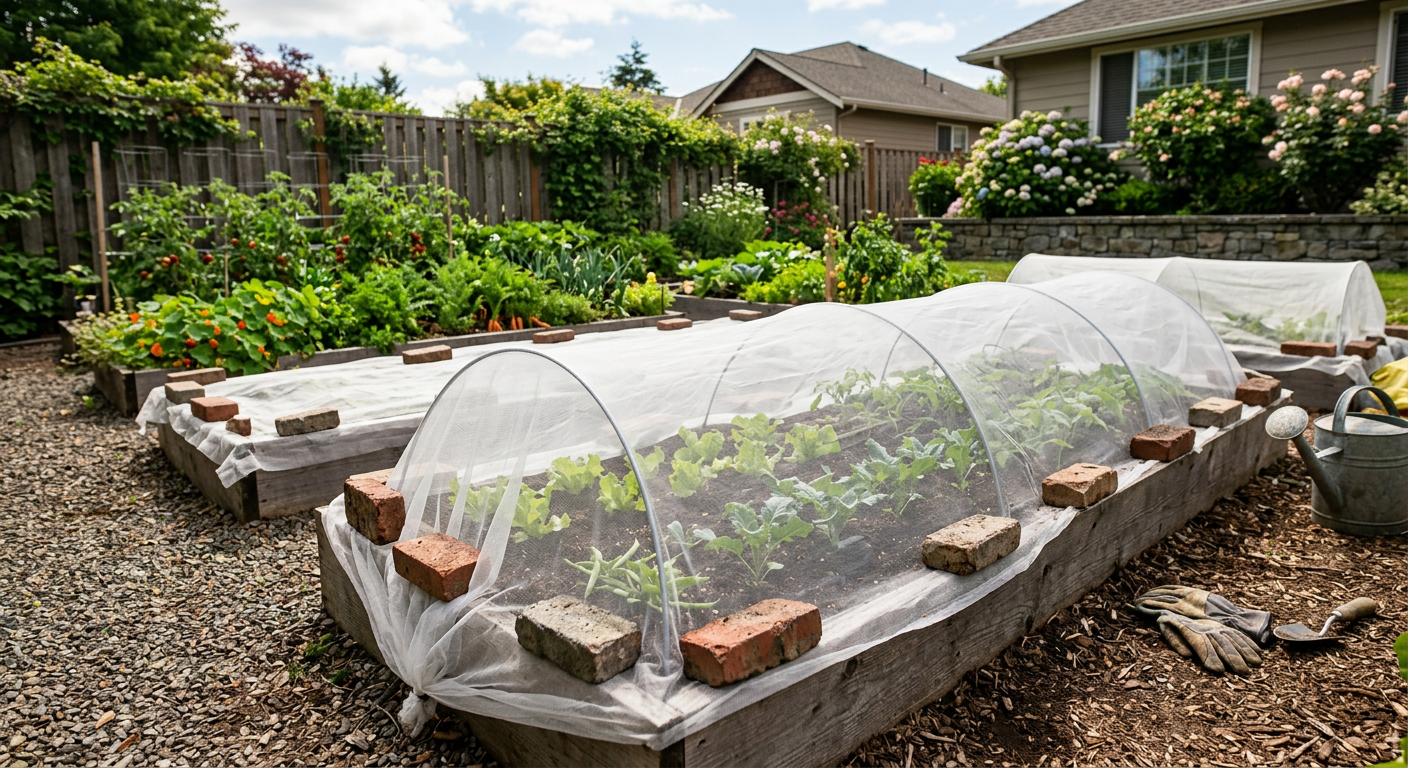
    * Forgetting Pest Barriers: We built two beautiful beds, filled them, and planted them… only to have gophers pull every single seedling down from below. We had to dig everything out and install hardware cloth. Do it from the start.

    * Skimping on Screws: Use more screws than you think you need. We put two screws at the end of every single board, connecting it to the 4×4 post. This creates a super rigid frame that won’t pull apart.

    Frequently Asked Questions

    H3: How deep should a raised garden bed be for vegetables?

    A good minimum depth is 12 inches. This gives most plant roots enough room. However, we prefer 18-24 inches. This extra depth allows for a larger Hugelkultur base, better drainage, and means you barely have to bend over to tend the garden. Root vegetables like carrots and parsnips will especially thank you for the extra depth.

    H3: What is the cheapest way to fill a raised garden bed?

    The cheapest way is the Hugelkultur/lasagna method described above. Source your materials for free! Use fallen logs from your property or ask tree-trimming services for wood chips. Collect leaves from your neighborhood in the fall. Make your own compost. The only thing you may need to purchase is the final topsoil/compost layer.

    H3: What should I put on the bottom of a raised garden bed?

    Start with a layer of plain brown cardboard (remove all tape and labels). This will smother the grass and weeds underneath and will decompose over time. If you have burrowing pests like gophers, voles, or moles, you MUST put a layer of 1/2-inch hardware cloth (metal mesh) down on top of the cardboard before filling.

    H3: Can I build a raised garden bed on concrete?

    Yes, you can. Just make sure it’s at least 12-18 inches deep to provide enough soil volume for the roots. Also, ensure there are some drainage gaps at the bottom, or drill holes along the bottom edge of the frame to let excess water escape, as it won’t be able to drain into the ground.

    !A completed project of building a raised garden bed for vegetables ready for the spring planting season.

    That First Perfect Tomato

    Building that first raised bed is a true homesteading milestone. It’s hard work, yes. You’ll be sore. But the moment you pull a perfectly straight carrot from that deep, dark soil you created, or eat a sun-warmed tomato grown in a bed you built with your own hands… it’s a feeling of satisfaction that’s hard to beat. You’re not just growing food; you’re building a more resilient, productive life, one board at a time.

    We share more of our day-to-day building projects and garden progress over on our Facebook page – we’d love to see you there!

    What’s the first thing you would plant in your new raised garden bed? Let me know in the comments below!

    🔧 See Our Recommended Garden Tools →


    📚 More From Our Homestead

    Ready to Start Your Homestead Journey?

    Free guides, checklists, and tools to help you build your dream homestead.
    Explore Free Resources →

  • Apartment Vertical Gardens: Our Tiny Balcony Wins

    !A lush balcony layout utilizing vertical gardening systems small apartments for urban food production.

    I can still feel the grit of potting soil under my nails, kneeling on the cold concrete of our third-floor apartment balcony. It was maybe 40 square feet, tops. That first year, we spent $50 on cheap plastic planters and tried to grow tomatoes that just… sat there, sad and green, until the first frost claimed them. It felt like a failure, another sign that our homesteading dream was just that—a dream.

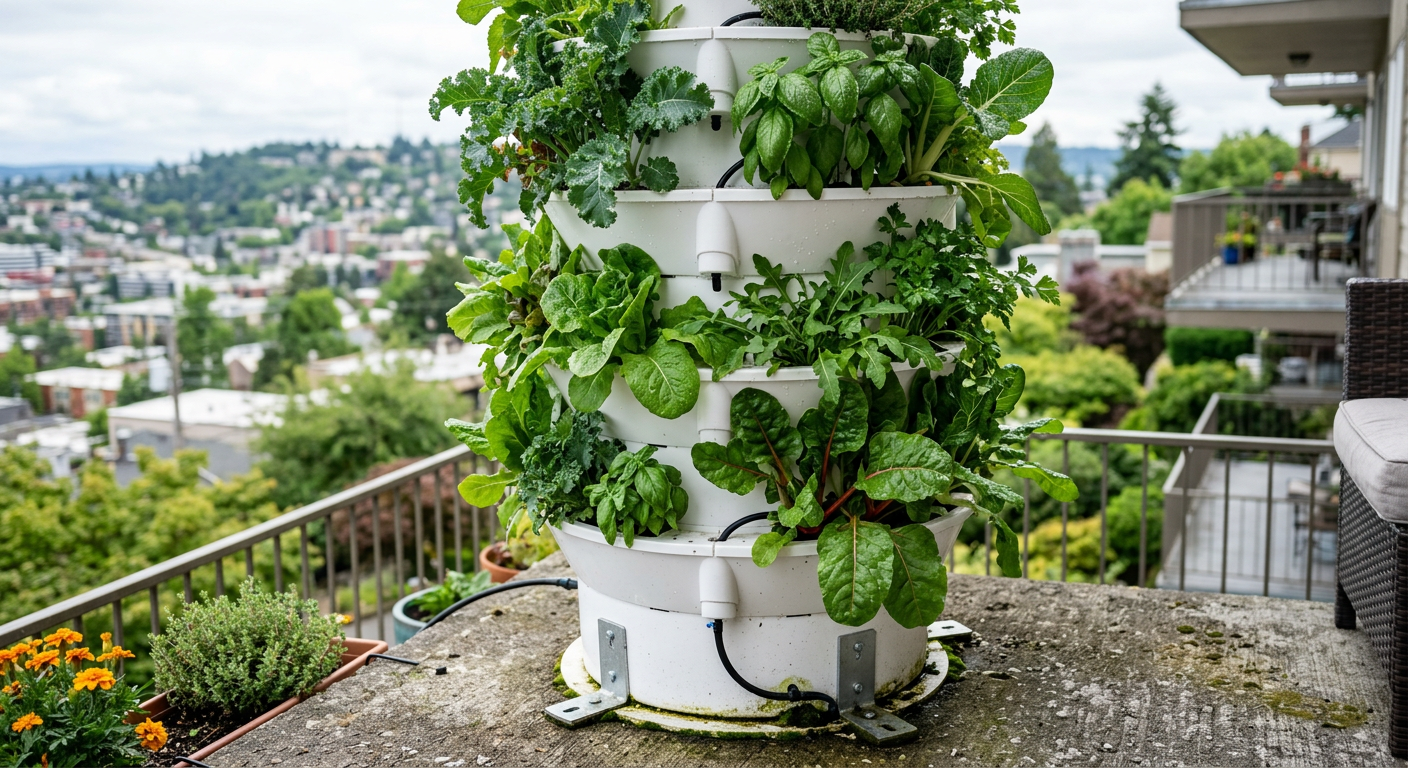
    🎯 Quick Answer: Vertical gardening systems for small apartments are a game-changer, letting you grow up when you can’t grow out. Tiered towers like the GreenStalk and simple wall-mounted fabric pockets are the most effective because they maximize a tiny footprint, turning a sterile balcony or sunny window into a productive food source.

    🔑 Key Takeaways

    • Space is a mindset. Vertical systems transform unused wall or corner space into a mini-farm.
    • Not all systems are equal. Tiered towers are great for fruiting plants, while pockets work best for herbs and greens.
    • Weight is a REAL factor. A fully watered 5-tier tower can weigh over 150 pounds. You have to plan for that.
    • Plant choice is critical. Don’t try to grow sprawling squash. Focus on compact, high-yield plants like lettuce, herbs, strawberries, and bush beans.
    • Start small. Master one system with a few plants before you turn your entire balcony into a jungle. One of our neighbors went all-in and got overwhelmed in a month.

    🌱 Start Your Homestead Plan →

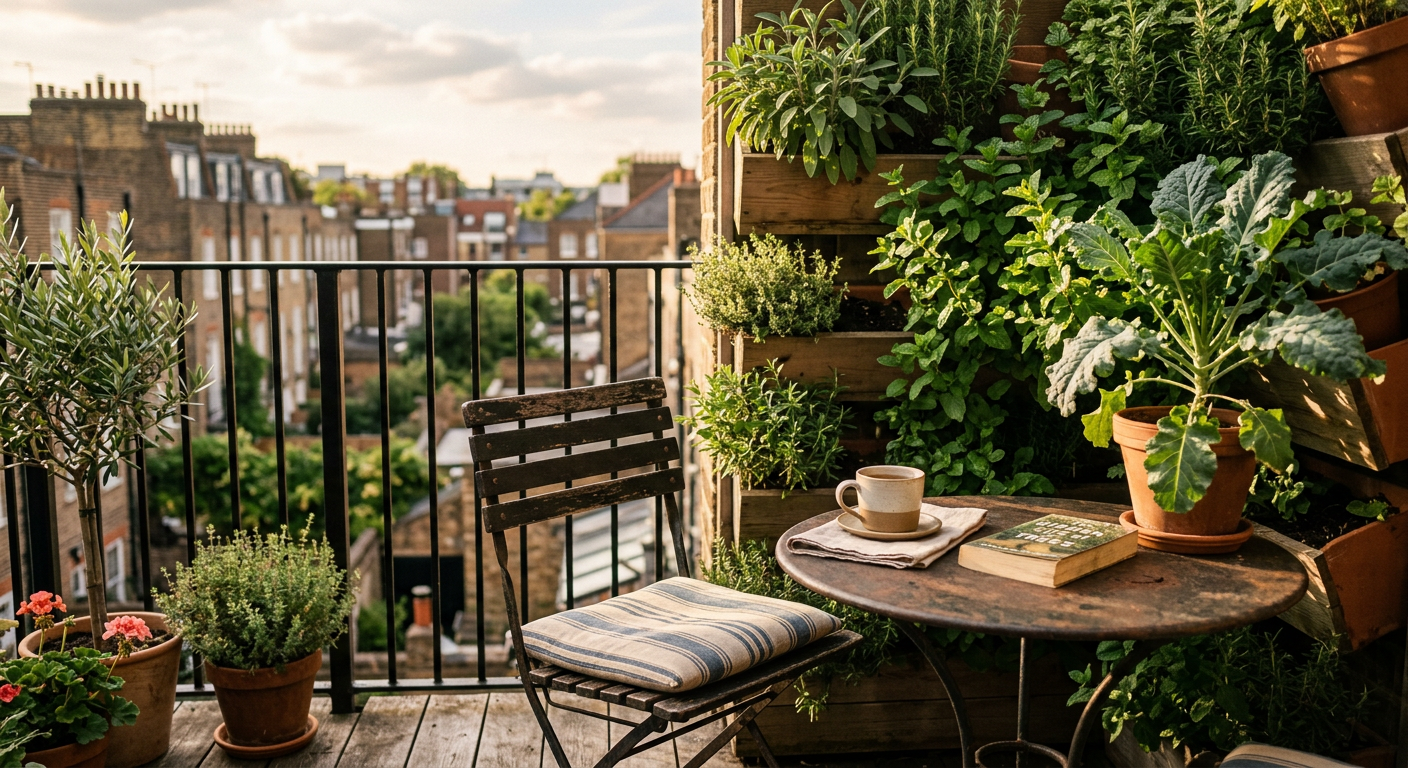
    !Wall-mounted fabric pockets filled with greens exemplify vertical gardening systems small apartments.

    Why We Went Vertical (And Why You Should, Too)

    After that first failed tomato season, we knew we couldn’t just keep buying wider pots. We had no more floor space. The only space left was up. That’s the obvious reason for using vertical gardening systems in small apartments. But it’s not the only one.

    I quickly learned that getting plants off the ground had other perks. Our strawberries, which were constantly being devoured by slugs on my parents’ farm, were perfectly safe four feet in the air on our balcony. Air circulation was better, which meant less powdery mildew on the cucumber leaves. And honestly, it was easier on my back not having to bend all the way to the floor to water or harvest.

    This is the first step in learning to start homesteading with no land. You learn to see resources where others see limitations. That tiny, overlooked balcony became our first real homestead classroom.

    Moving your garden skyward solves more problems than just square footage.

    Our Top Vertical Gardening Systems for Small Apartments

    We’ve tried a few, and we’ve watched friends in the city try even more. Here’s the honest breakdown of what’s worked for us and what hasn’t.

    The Tiered Tower: Our Workhorse

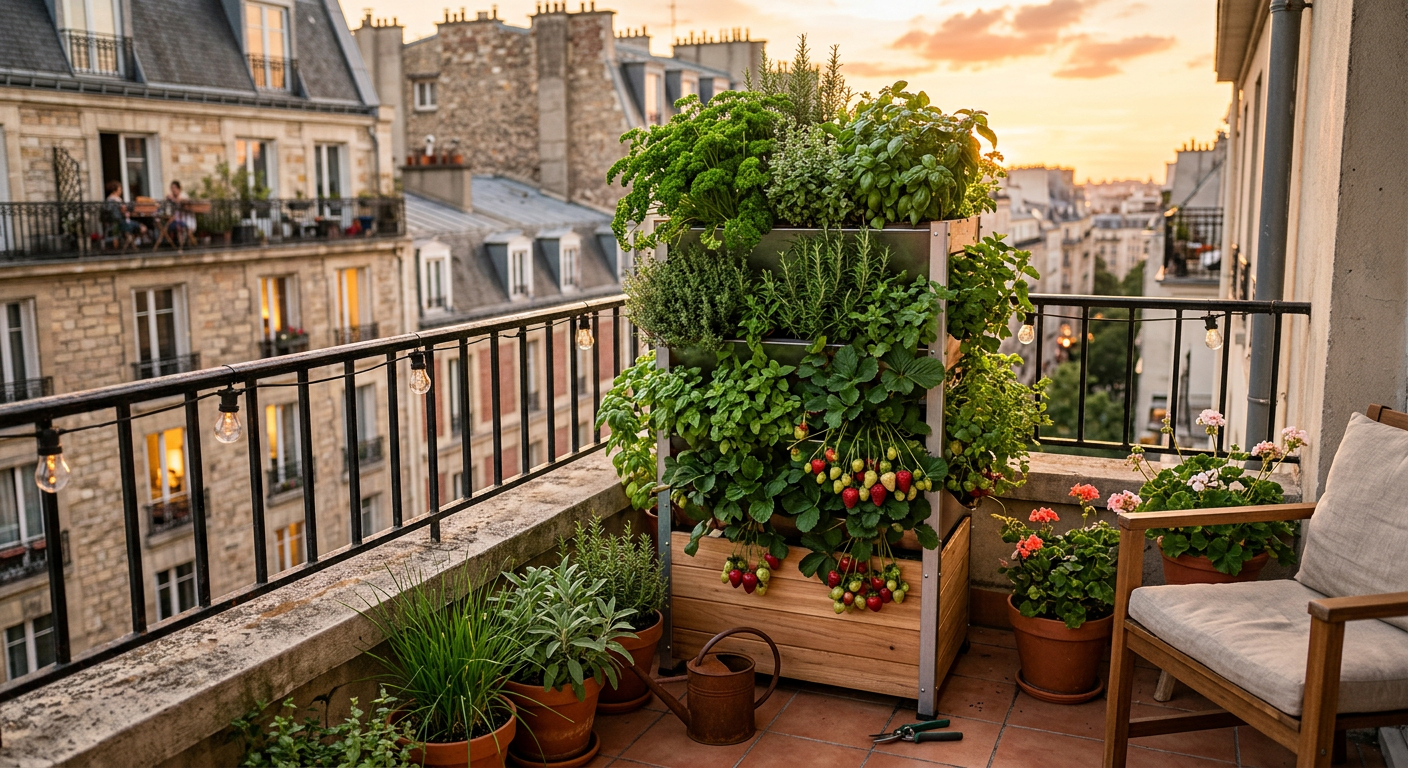
    This is the king of balcony gardens. We saved up and bought a 5-Tier GreenStalk Original for about $160. It felt like a massive investment at the time, but it paid for itself in one season of salads and strawberries. It has a patented watering system where you pour water in the top, and it trickles down to every single pocket. Genius.

    * Best For: Strawberries, lettuce, spinach, beets, carrots, bush beans, and even smaller pepper varieties.

    * My Story: The first time I harvested enough mixed lettuce greens from our tower to make a salad for two, I almost cried. It was a Tuesday night. The lettuce was crisp and so flavorful – nothing like the bagged stuff. It was real food we grew ourselves, surrounded by city noise. That’s a feeling you can’t buy.

    Wall-Mounted Fabric Pockets: The Herb Haven

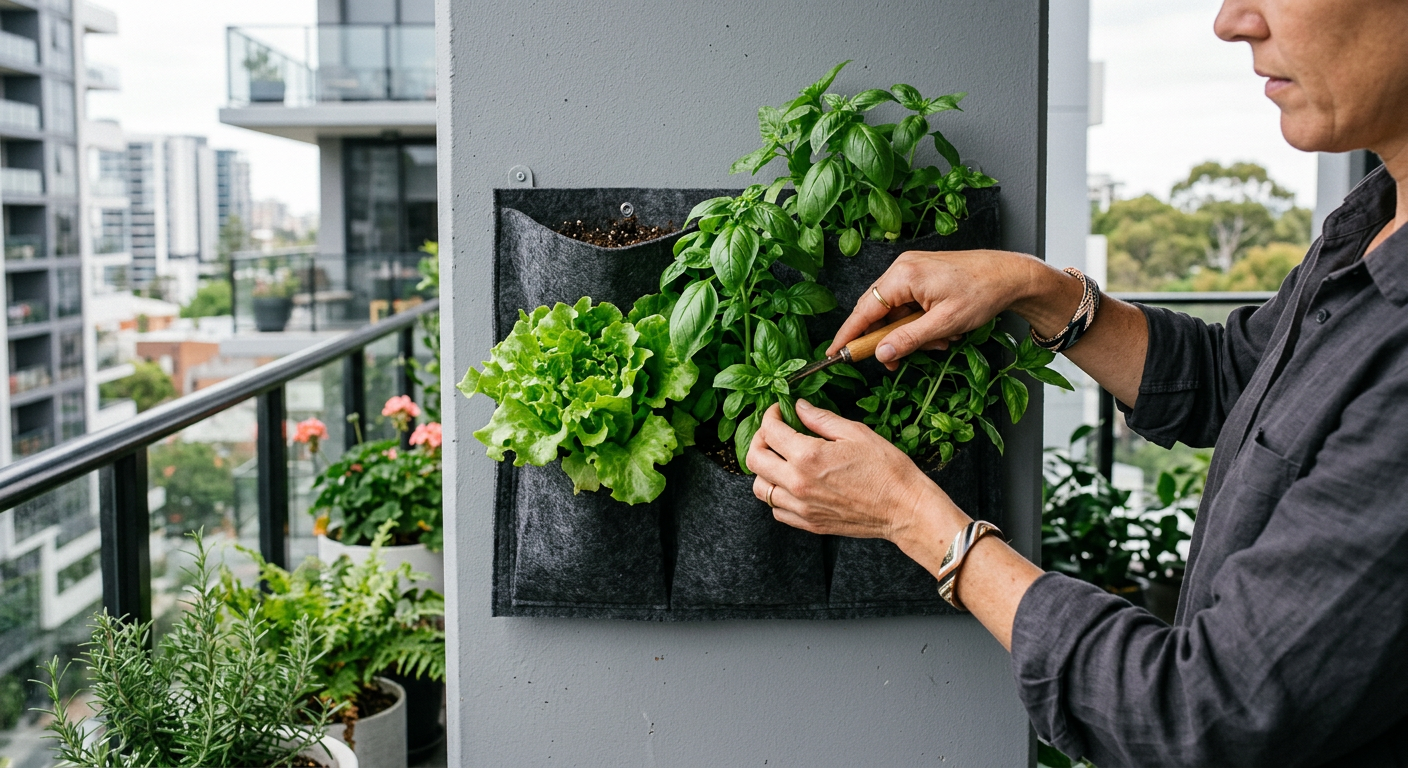
    These are exactly what they sound like: heavy-duty fabric sheets with pockets sewn onto them. You can get them for as little as $20 on Amazon. You just hang it on a sunny wall or railing and fill the pockets with soil.

    * Best For: Herbs, herbs, and more herbs. Their shallow roots are perfect for the smaller pockets. Think basil, thyme, oregano, mint (be careful, it spreads!), and chives. It’s a great way to grow some of the best perennial herbs for your homestead, even in a small space.

    * Word of Warning: These dry out FAST, especially on a hot, windy day. You really need to check the soil moisture daily. We lost a whole row of basil one July weekend because we forgot.

    The DIY Ladder Planter: A Budget-Friendly Start

    Feeling handy? You can build one of these. We made our first one from an old wooden step ladder we found on the curb. We just added some pine boards to create shelves for pots. The total cost was about $15 for screws and sealant.

    * Best For: Holding individual pots of various sizes. This gives you more flexibility than a fixed-pocket system. Perfect if you’re homesteading on a budget.

    * How We Did It: We simply cut 1×6″ boards to fit across the ladder rungs and steps, creating flat surfaces. It wasn’t pretty, but it was functional. It let us grow a determinate (bush) tomato plant in a bigger pot next to smaller pots of marigolds to deter pests. Getting a solid plan together before you start buying tools or materials is crucial, which is where a dedicated homestead management platform like Homestead OS can be a lifesaver, even for small-scale projects.

    Keep reading — this is where most people mess up.

    No matter which system you choose, the real secret is what you put in it.

    📋 Get the Beginner Checklist →

    What Can You Actually Grow in Apartment Systems?

    Forget the pictures of giant zucchini and sprawling pumpkins in vertical gardens. That’s marketing. For vertical gardening systems in small apartments, you need to be strategic. The goal is maximum yield in minimum space.

    Here’s our go-to list:

    * Leafy Greens: Loose-leaf lettuce, spinach, kale, arugula. These are cut-and-come-again, so you can harvest from them for weeks.

    * Herbs: Basil, mint, parsley, cilantro, chives, thyme, and oregano are almost foolproof.

    * Strawberries: Ever-bearing varieties will give you a steady trickle of berries all summer. The taste of a sun-warmed strawberry you grew yourself is pure joy.

    * Root Veggies (in deeper pockets): We’ve had great success with short varieties of carrots (like ‘Paris Market’), radishes, and even small beets in our GreenStalk tower.

    * Legumes & Fruits: Bush beans (not pole beans!), peas, and determinate (bush) varieties of cherry tomatoes and peppers.

    One summer, we lived almost entirely off salads made from our balcony. A mix of red and green lettuce, a handful of spicy arugula, chopped chives, and a few sliced cherry tomatoes. That’s a success.

    Choosing the right plants from the start is half the battle.

    !A sturdy five-tier tower setup showing how vertical gardening systems small apartments maximize space.

    Nitty Gritty Details: Soil, Water, and Light

    This is where the dream meets the dirt. You can have the best system in the world, but if these three things aren’t right, you’ll get nothing.

    🌱 Soil Matters (A Lot)

    You can’t just use dirt from your local park. I tried. It compacts into a brick and your plants suffocate. You need a high-quality, lightweight potting mix. We use Pro-Mix, but any brand with plenty of perlite or vermiculite (the little white specks) for drainage and aeration will work.

    It’s lighter, which is critical for balcony weight limits, and it holds moisture without becoming waterlogged. According to the Penn State Extension, this balance is key for healthy root development in containers.

    💧 The Watering Challenge

    Vertical gardens dry out faster than in-ground beds. The top tiers, exposed to more sun and wind, will dry out quickest. We learned to water our wall pockets every single day in the summer. For our tiered tower, we water deeply from the top reservoir every 3-4 days.

    My best advice: don’t guess. Stick your finger two inches into the soil. If it comes out dry, it’s time to water. Investing in tools that make these daily chores easier is always worth it. Finding a system to track everything, from your watering schedule to your harvest logs, is what separates a hobby from a real productive system. We manage our entire homestead now, from garden to livestock, using the tools and trackers inside Homestead OS.

    ☀️ Don’t Fake the Sun

    Most food plants need at least 6-8 hours of direct sunlight. No exceptions. Before you spend a dime, spend a day tracking the sun across your balcony or window. If you only get 3-4 hours of direct sun, you’ll be limited to shade-tolerant greens like spinach and lettuce.

    If you have a corner with no sun, don’t give up—get a grow light. We used a simple clip-on LED grow light (I think it was a SANSI bulb) for our indoor herb garden one winter. It cost about $30 and kept us in fresh basil until spring.

    Get these three things right, and you’re already ahead of the game.

    💡 Pro Tips

    Location First, System Second: We once bought a beautiful railing planter system… only to realize our balcony railing was an odd shape and it wouldn’t fit securely. Always measure and check your space before* you buy.

    * Don’t Skimp on Potting Mix: I know it’s tempting to buy the cheapest $5 bag. Don’t. Good soil is the foundation of your garden. You’ll spend more money on sad, dying plants if you start with poor soil.

    * Rotate Your Tower: If you have a tiered tower, give it a quarter turn every few days so all the plants get equal sun exposure. We learned this the hard way when one side of our tower was lush and the other was pale and leggy.

    * Start with Easy Wins: Grow lettuce and herbs first. Seriously. They grow fast and give you a quick, rewarding harvest. This builds your confidence for tackling things like tomatoes next season.

    ⚠️ Beginner Mistakes to Avoid

    * Ignoring Weight Limits: I can’t say this enough. Soil and water are HEAVY. Check your balcony’s weight limit. A 5-tier tower can easily top 150 lbs. Two of those, plus you, might be pushing it.

    * Overcrowding: The tag says 6″ spacing for a reason. If you cram too many seeds or seedlings into one pocket, they will compete for light and nutrients, and none of them will thrive. We did this with carrots and got a bunch of green tops with no carrot underneath.

    * Forgetting HOA/Landlord Rules: Before you drill a single hole to hang a wall planter, check your lease or HOA rules. Some have strict rules about what you can hang on railings or walls.

    * Planting Vining Plants in Small Pockets: Don’t plant an indeterminate ‘Brandywine’ tomato in a 1-gallon pocket. It wants to be 8 feet tall! Stick to bush or determinate varieties that are bred for small spaces.

    !A cozy balcony retreat featuring integrated vertical gardening systems small apartments for fresh herbs.

    Frequently Asked Questions

    How much do vertical gardening systems for small apartments cost?

    We’ve spent anywhere from $15 on a DIY project to $160 on a high-quality tiered tower like the GreenStalk. You can start with simple fabric pockets for around $20-$30. The biggest cost after the system is good quality potting soil, which can be $15-$25 per large bag.

    Can you have a vertical garden without direct sunlight?

    For most food, no. You need 6+ hours of direct sun. However, if you have a bright spot with no direct sun, you can successfully grow leafy greens like lettuce, spinach, and many herbs. For deep shade or indoors, you absolutely need a full-spectrum LED grow light.

    What is the best system for a tiny balcony?

    For a truly tiny, narrow balcony, I’d recommend wall-mounted fabric pockets or railing planters. They use zero floor space. If you have a corner with a 2-foot by 2-foot area, a tiered tower garden is by far the most productive option per square foot.

    How do you water a tall vertical garden?

    It depends on the system. For towers like the GreenStalk, you just pour water into the top reservoir and it self-distributes. For wall pockets or stacked crates, you have to water each pocket/pot individually, starting from the top and letting the excess drain down.

    This journey doesn’t start with 40 acres and a barn. It starts with one seed in a pot on a windowsill. It starts with the decision to create instead of just consume. Growing food in our apartment taught us more about self-reliance than any book ever could.

    It taught us to be resourceful and to find abundance in small spaces. That’s a skill every homesteader needs, whether you’re on the 13th floor or 13 acres. For more stories from our journey and tons of practical tips, follow our homestead on Facebook.

    What’s the one thing you’d love to grow in your own small space?

    Drop a comment below — I read and reply to every one!

    🔧 See Recommended Tools →


    📚 More From Our Homestead

    Ready to Start Your Homestead Journey?

    Free guides, checklists, and tools to help you build your dream homestead.
    Explore Free Resources →

  • Selling Garden Produce at a Farmers Market (Our First Year)

    !A vibrant stall for selling excess garden produce at a farmers market during a sunny morning.

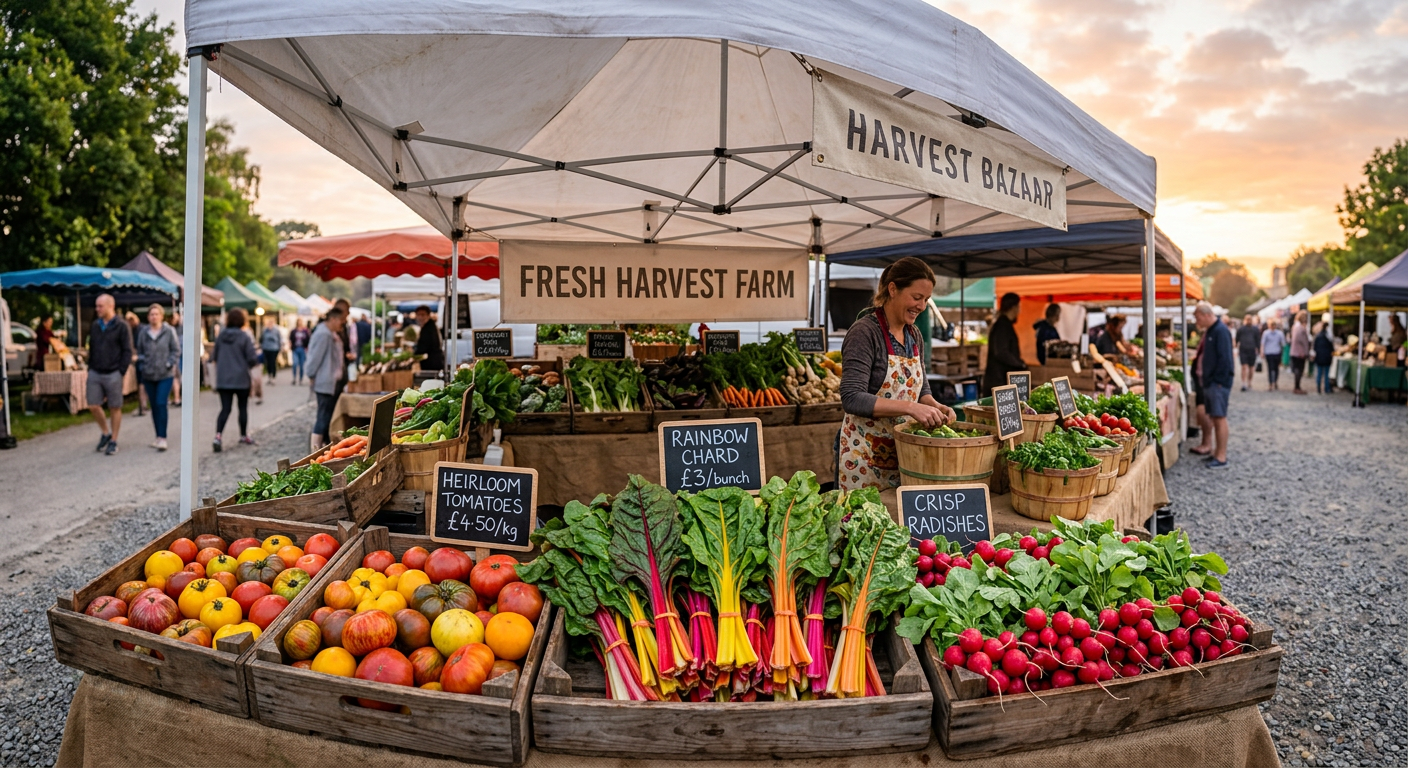
    I’ll never forget the feeling of that first crumpled five-dollar bill being pressed into my hand. It was 7:30 AM, the sun was just starting to warm the pavement, and a kind woman had just bought a bunch of our rainbow chard. That $5 felt more valuable than any paycheck I’d ever received because we grew it from a tiny seed with our own hands. My boots were still caked in mud from the pre-dawn harvest, but in that moment, our homestead felt like a real business.

    🎯 Quick Answer: Successfully selling excess garden produce at a farmers market involves understanding local regulations, choosing high-demand crops, pricing competitively, and creating an attractive display. Start small, focus on quality, and be prepared for long days that are incredibly rewarding.

    🔑 Key Takeaways

    * Do Your Homework First: Before you harvest a single carrot, contact your local market manager and health department. Rules vary wildly by county and state.

    * Grow for Profit, Not Just Passion: Focus on high-value, fast-growing crops. Think salad greens, cherry tomatoes, and herbs, not just massive zucchini.

    * Presentation Sells: A beautiful stall with clean produce, clear pricing, and a friendly face will outsell a messy table every time. People buy with their eyes first.

    * Price It Right: Don’t undervalue your hard work. Scope out other vendors, but factor in your time, seed costs, and amendments. Your homegrown quality is worth a premium.

    * Be Prepared for the Grind: A market day is a 12+ hour affair, from harvesting and packing to selling and cleaning up. It’s physically demanding work.

    * Start Small and Scale: You don’t need a huge commercial plot. Our first year, we made over $1,200 just from two 30-foot raised beds.

    !Close-up of a transaction while selling excess garden produce farmers market stalls.

    Getting Your Ducks in a Row: Permits and Markets

    Before we ever thought about selling excess garden produce at a farmers market, we thought it was as simple as throwing vegetables on a table. Wrong. So, so wrong. The first thing I did was call our county extension office. They were a goldmine of information and pointed me toward the market manager for the town-square market we were eyeing.

    I learned we needed a temporary food establishment permit, which cost us $75 for the season. We also had to pay the market fee, which was $25 per weekend. So, before we sold a single tomato, we were out $100. That lit a fire under us to take it seriously. I highly recommend keeping meticulous records from day one; it’s a habit that pays off. We found a ton of helpful templates for this on a great homesteading resource site that really helped us think like a business right from the start. Trust me, it made everything easier down the road.

    Finding the Right Market

    Not all markets are created equal. We visited three different ones as customers before we committed.

  • The Big City Market: Huge foot traffic, but the vendor fees were $100/day and the competition was professional and fierce.
  • The Hippie Market: Very chill vibe, barter-friendly, but not a lot of cash was changing hands.
  • The Small Town Market: This was our sweet spot. About 20 vendors, a steady stream of local families, and a $25 fee. The manager, a farmer named Dale, walked us through the application and even gave us tips on what sold well.
  • Don’t be afraid to talk to the market manager and other vendors. Ask them about foot traffic, average sales, and what customers are looking for. They are your best source of intel.

    🌱 Start Your Homestead Plan →

    The process took about three weeks from my first call to getting our official approval. Plan ahead!

    Keep reading — this is where we discuss the most profitable crops to grow.

    What Sells? Choosing Profitable Produce

    In our garden, we grow what we love to eat. But for the market, you have to grow what other people love to buy. Our first market day was a brutal lesson in this. We brought beautiful, but odd-looking, heirloom ‘Dragon Tongue’ beans. People were curious, but nobody bought them. Meanwhile, the simple basil bunches and pints of Sungold cherry tomatoes sold out in 90 minutes.

    That first season, we made a chart. We tracked what sold, how fast, and for how much. The winners were clear:

    * Salad Mix: We sold 1/2 lb bags for $5. It’s quick to grow and you can get multiple harvests.

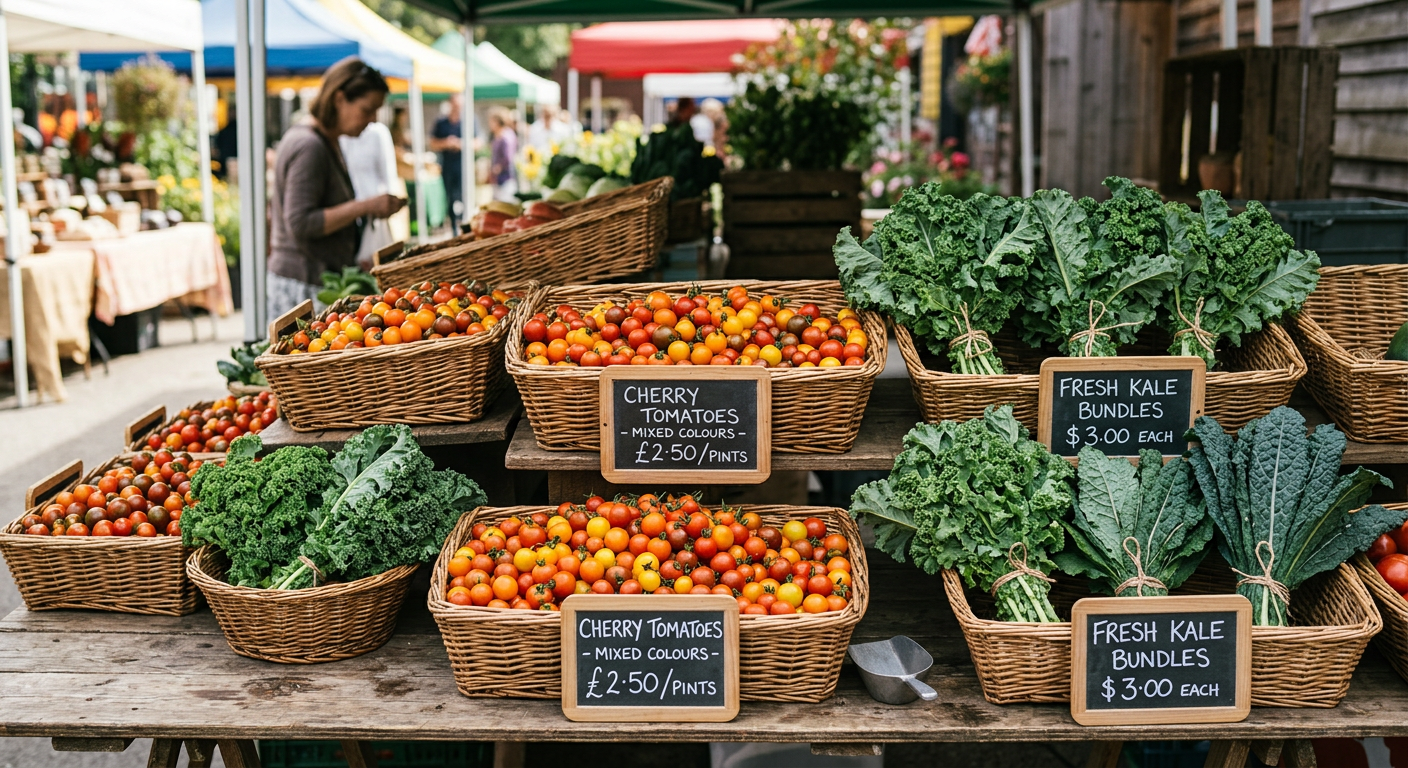
    * Cherry Tomatoes: Pints for $4. Everyone loves them.

    * Garlic: We sold braids of 5 heads for $10. Cures well, stores forever, and has a high perceived value.

    * Herbs: Small bunches of perennial herbs like thyme, oregano, and mint for $3 each. They take up almost no space to grow and are pure profit.

    Focus on things with a quick turnover and a high value per square foot. One bed of salad greens can make you more money over a season than a dozen sprawling pumpkin plants.

    Think Beyond Just Veggies

    If your local laws allow (check your state’s Cottage Food Laws), you can add value-added products. A neighbor at our market sells beautiful bouquets of zinnias and cosmos for $15 each from a tiny 10×10 foot plot. Another sells small jars of herb-infused salts. My friend, Sarah, even started managing her farm tasks more effectively using the guides over at `https://xlvvlujsctgiorcwbtkv.supabase.co/functions/v1/social-redirect?p=homesteados&loc=blog_inline_early`. It helped her find time to make jams, which now outsell her fresh produce!

    Next, let’s talk money—how to price your goods without feeling guilty or getting ripped off.

    Pricing, Presentation, and People Skills

    This was the hardest part for me. I felt weird asking neighbors for money for something I grew. But my husband, John, put it bluntly: “This isn’t a hobby today. This is a business. Your time is worth something.” He was right.

    How We Set Our Prices

  • Recon Mission: We walked the market a week before our first sale with a notepad and wrote down everyone’s prices for similar items.
  • Calculate Your Costs (Loosely): We didn’t go crazy, but we factored in seeds, compost, the market fee, and gas. It helped us establish a baseline. If a pint of cherry tomatoes cost us ~$0.50 to produce, selling it for $1.00 wasn’t a business.
  • Price for Quality: Our stuff was picked that morning. It wasn’t shipped across the country. It was organic, fresh, and tasted better. We priced our items about 10-15% higher than the supermarket, but right in line with (or slightly under) the other high-quality growers at the market.
  • Our first-day total: $187. After the $25 fee, it was $162 for about 5 hours of selling… and 6 hours of prep and harvesting. It’s not get-rich-quick, but it was real money that paid for all our homesteading supplies that year.

    📋 Get the Beginner Checklist →

    Your Stall is Your Storefront

    Our first setup was embarrassing. A wobbly card table with a stained sheet and vegetables in old plastic bowls. People walked right by. The next week, we invested $50. We bought a new, clean tablecloth, some woven baskets from a craft store ($4 each), and made a simple hand-painted wooden sign. Sales literally doubled.

    Your display should be abundant, clean, and easy to understand. Use small crates or baskets to create different heights. It makes your table look full and draws the eye. Clean your vegetables! A little dirt says ‘fresh,’ but caked-on mud is just messy.

    Now you know what to sell and how to price it. But how do you survive the actual market day?

    !Organized crates of vegetables for selling excess garden produce farmers market customers love.

    The Market Day Grind: From Dawn to Dusk

    Let me be real: selling excess garden produce at a farmers market is exhausting. Our market day starts at 4:30 AM.

    * 4:30 AM: Alarm goes off. Coffee. Head out to the garden with headlamps. This is when we harvest delicate greens, lettuces, and herbs, before the sun can wilt them.

    * 5:30 AM: Washing and packing. Everything gets a dunk in cold water, checked for bugs, and carefully packed into coolers. Using the right harvest knives and bins from our list of essential homesteading tools makes this part so much faster.

    * 6:45 AM: Load the car. It’s a game of Tetris. Coolers, table, tent, sign, cash box, baskets.

    * 7:15 AM: Arrive at the market. Set up as quickly as possible. Make it look pretty.

    * 8:00 AM – 1:00 PM: Showtime. Smiling, talking to customers, making change, restocking from the coolers. It’s constant motion.

    * 1:00 PM: Teardown. Pack up what’s left. Clean our space.

    * 2:00 PM: Home. Unpack. Put away supplies. Deal with leftover produce (often becomes chicken treats or gets canned).

    * 3:00 PM: Collapse on the couch.

    It’s a long, hard day, but the feeling of driving home with an empty cooler and a full cash box is unbeatable.

    💡 Pro Tips

    * Bring a Float. Go to the bank the day before and get $100 in small bills. At least two rolls of quarters, lots of $1s, and some $5s. Nothing is worse than losing a sale because you can’t make change for a $20.

    * Bundle and Bunch. Don’t sell single carrots or loose herbs. Bunch them with a rubber band or twist-tie. Offer deals like “3 bunches of herbs for $8.” It increases your average sale value.

    * Start an Email List. Get a clipboard and a pen. Offer a weekly email with what you’ll be bringing to the market. This builds a loyal customer base who will seek you out.

    * Have a “Freebie” for Kids. We always had a little basket of ‘ugly’ cherry tomatoes or mini cucumbers. Letting a kid pick one for free makes the parents happy, and they almost always buy something.

    * Use Technology. We started taking credit cards using a simple Square reader on our phone in our second year. Our sales went up 30%. The small fee is absolutely worth it.

    ⚠️ Beginner Mistakes to Avoid

    * Forgetting the Essentials: One sweltering day in July, we forgot to pack water. By 11 AM, we were dehydrated and miserable. Now we have a dedicated “Market Box” with water, snacks, sunscreen, a hat, and a first-aid kit.

    * Pricing Out of Fear: In the beginning, I priced our beautiful kale at $1 a bunch because I was scared no one would buy it. It sold out instantly. I was basically giving it away. Don’t undervalue your labor.

    * Not Bringing Bags: We ran out of bags by 10 AM on our busiest day. I watched at least three people walk away because they couldn’t carry what they wanted. Now we buy recycled paper bags in bulk. It was a painful lesson that we improved on by using some of the planning resources available from `https://xlvvlujsctgiorcwbtkv.supabase.co/functions/v1/social-redirect?p=homesteados&loc=blog_inline_late`.

    * Hiding Behind the Table: In the beginning, I would sit in a chair and read a book, waiting for people to come to me. It doesn’t work. Stand up. Say hello. Offer a sample. Engage with people. Your personality is part of your brand.

    🔧 See Recommended Tools →

    !Harvesting from raised beds for selling excess garden produce farmers market style.

    Frequently Asked Questions

    H3: How much money can you realistically make selling produce at a farmers market?

    It varies wildly. Our first year, we averaged about $150 per market, going twice a month for four months, so roughly $1,200 for the season. We know other small-scale growers who clear $500+ on a good weekend. It depends on your products, pricing, and the market’s foot traffic. A solid start can be as simple as following a guide for homesteading on a budget.

    H3: Do I need a special license for selling excess garden produce at a farmers market?

    Almost certainly, yes. At a minimum, you’ll likely need approval from the market manager. Most require a business registration with your state and/or a permit from the local health department. It’s your responsibility to find out. Start by calling your local farmers market or your county extension office.

    H3: Can I sell baked goods, jams, or eggs?

    This falls under “value-added products” and is regulated differently from fresh produce. Most states have “Cottage Food Laws” that specify what you can and can’t sell from a home kitchen. Eggs are another category, often requiring candling licenses or specific labeling. Check with your state’s Department of Agriculture.

    H3: What do I do with leftovers?

    Plan for them! We have a hierarchy: 1) What can we eat this week? 2) What can be preserved (canned, frozen, dehydrated)? 3) What can be fed to the chickens? 4) What goes to the compost pile? Some markets also have relationships with local food banks for donations.

    H3: How do you accept credit cards at a farmers market?

    It’s easy! Services like Square or PayPal offer small card readers that plug into your smartphone. They take a small percentage of the sale (usually around 2.5-3%), but we found we more than made up for it with increased sales from people who weren’t carrying cash.

    That first summer of selling at the market changed everything for us. It wasn’t just about the money; it was about connecting with our community, sharing the food we were proud of, and proving to ourselves that this homesteading dream could help support itself. It’s hard work, you’ll be tired, and you’ll make mistakes. But it’s absolutely worth it.

    We share a lot more of our day-to-day successes and failures over on our Facebook page, come say hi!

    What’s the one crop you’re most excited to sell, or what’s your biggest fear about starting? Let me know in the comments below!


    📚 More From Our Homestead

    Ready to Start Your Homestead Journey?

    Free guides, checklists, and tools to help you build your dream homestead.
    Explore Free Resources →

  • Homestead Water Independence Planning: Our Guide

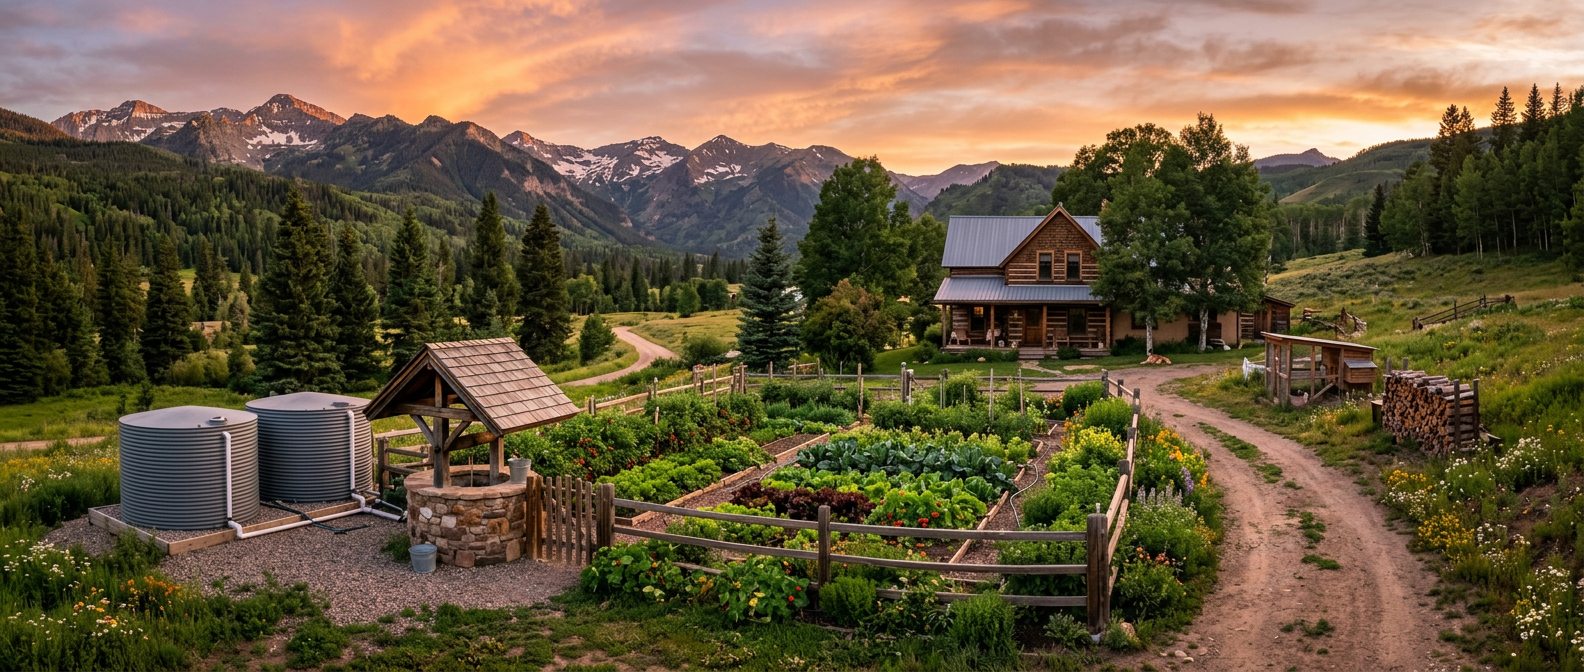
    !A sustainable farm layout focused on developing water independence homestead planning during sunset.

    I’ll never forget the sound. A low, groaning hum from the well house, followed by absolute, deafening silence. It was mid-August, our second year on the homestead, and the well pump had just died, leaving us with a hundred thirsty chickens, a half-watered garden, and two very panicked people.

    🎯 Quick Answer: Developing water independence on your homestead means creating redundant, reliable water systems before you desperately need them. This involves assessing your property’s resources (groundwater, rainfall), choosing primary and backup systems like a well and rainwater harvesting, and implementing proper storage and filtration. It’s the absolute bedrock of self-sufficiency.

    🔑 Key Takeaways

    * Water is Foundation: Before you buy a single chicken or seed, your water plan must be solid. Everything else depends on it.

    * Assess, Don’t Guess: Understand your average rainfall, local water table depth, and property’s water flow. This knowledge is gold.

    * Redundancy is Security: Never rely on a single water source. A well can fail, a creek can dry up. Have a Plan B, and even a Plan C.

    * Storage is King: Your ability to weather a drought or a pump failure is directly tied to how many gallons you can store.

    * Test and Filter: Raw water is rarely drinkable water. Regular testing and a multi-stage filtration system are non-negotiable for your family’s health.

    * Budget Realistically: Drilling a well or installing a large cistern is a major expense. Don’t let it be a surprise.

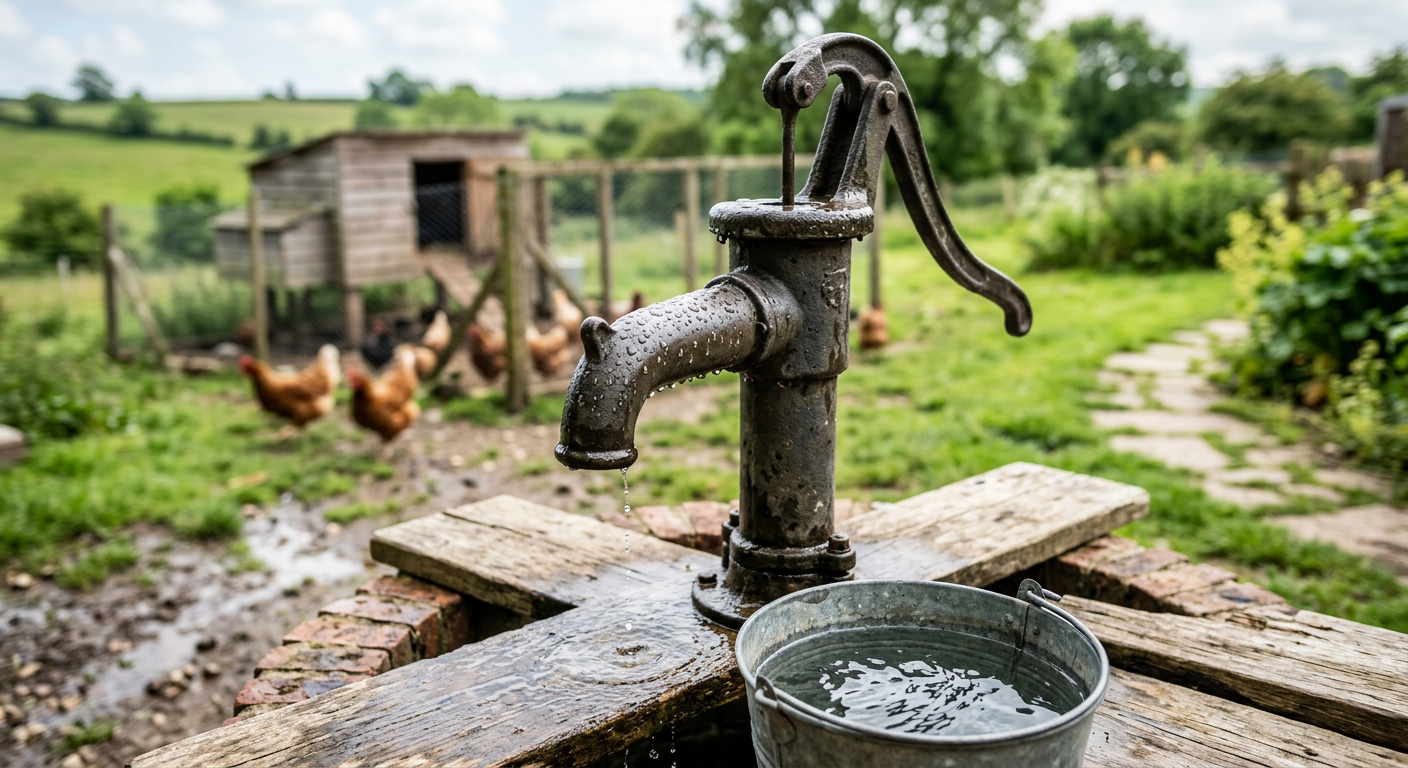
    !Manual hand pump for developing water independence homestead planning and backup water systems.

    Why Water Is More Than Just a Utility

    When we first moved out here, we had county water. It was easy. Too easy. We felt like homesteaders, but we were still tethered to the grid in the most fundamental way. The first time the water main broke a mile down the road and we were dry for 36 hours, it was a cold, hard wake-up call. We couldn’t water the animals, wash dishes, or even flush the toilet. That’s not independence; that’s just living in the country with a longer driveway.

    That one incident kicked off our entire journey into developing water independence homestead planning. It became an obsession. We realized that true self-reliance doesn’t come from a big garden; it comes from controlling the resources that make the garden possible.

    🌱 Start Your Homestead Water Plan →

    It’s about security. It’s knowing that if the power goes out, or the county has another issue, your family, your animals, and your food supply are all safe. It’s the difference between thriving and just surviving.

    Now, let’s get into how we actually did it.

    Keep reading — this is where the real work begins.

    Step 1: Auditing Your Homestead’s Water Potential

    Before you can capture water, you have to know where it is. We spent a full month just observing our land. We walked it after heavy rains to see where water pooled and flowed. We used a simple online calculator to figure out that our 1,500-square-foot roof could theoretically harvest over 30,000 gallons of water a year with our region’s rainfall.

    Calculating Your Needs

    First, do the math. How much water do you actually use? Track it for a week. A common estimate is 75-100 gallons per person, per day for household use. But on a homestead, that number explodes.

    * Livestock: A milk cow can drink 30 gallons a day. A flock of 20 chickens needs about 2 gallons. Don’t guess! The University of Georgia Extension has great tables for livestock water needs.

    * Garden: In the heat of summer, our half-acre garden can easily soak up 500 gallons a day.

    Our family of four, plus our animals and garden, needs about 700 gallons on a hot summer day. That number was terrifying, but it was real. It’s the number our systems had to be built to handle.

    Mapping Your Sources

    Your property has three potential water sources:

  • Groundwater (Wells): The most reliable, but also the most expensive to access. We had to hire a dowser (yes, really!) who helped us pinpoint a good spot. Professional surveyors can do this with more scientific methods.
  • Surface Water (Ponds, Creeks): Great for irrigation and livestock, but requires significant filtration and caution for household use. Our creek is seasonal, so we learned not to count on it year-round.
  • Rainwater (Harvesting): An excellent, renewable source. The potential is determined by your roof area and annual rainfall. This became our critical backup and our primary garden water source.
  • Understanding these sources is the first step in any serious developing water independence homestead planning process. Don’t skip it.

    Step 2: Designing Your Water Systems

    This is where you start spending money. Our approach was a one-two punch: a drilled well for our primary household and animal needs, and a large-scale rainwater harvesting system for the garden and as a whole-homestead backup.

    The Well: Your Bedrock

    Drilling our well was the single most expensive project on our homestead. The total bill came to $9,450 in 2019. The driller charged by the foot, and we had to go down 280 feet to hit a good vein. Then came the cost of the pump, pressure tank, and trenching the line to the house.

    I’ll never forget the relief of seeing that gush of clear, cold water for the first time. We installed a high-quality Grundfos submersible pump after our first cheap hardware store model failed within a year. Don’t cheap out on the pump; it’s the heart of your entire system. If you’re planning this out, the tools and infrastructure are just as important as the water itself, something we cover in our guide to essential homesteading tools.

    Rainwater Harvesting: The Ultimate Backup

    Our rainwater system is my pride and joy. We started small, with a few 55-gallon barrels. It was a joke. They’d fill in 10 minutes and be empty after one good garden watering.

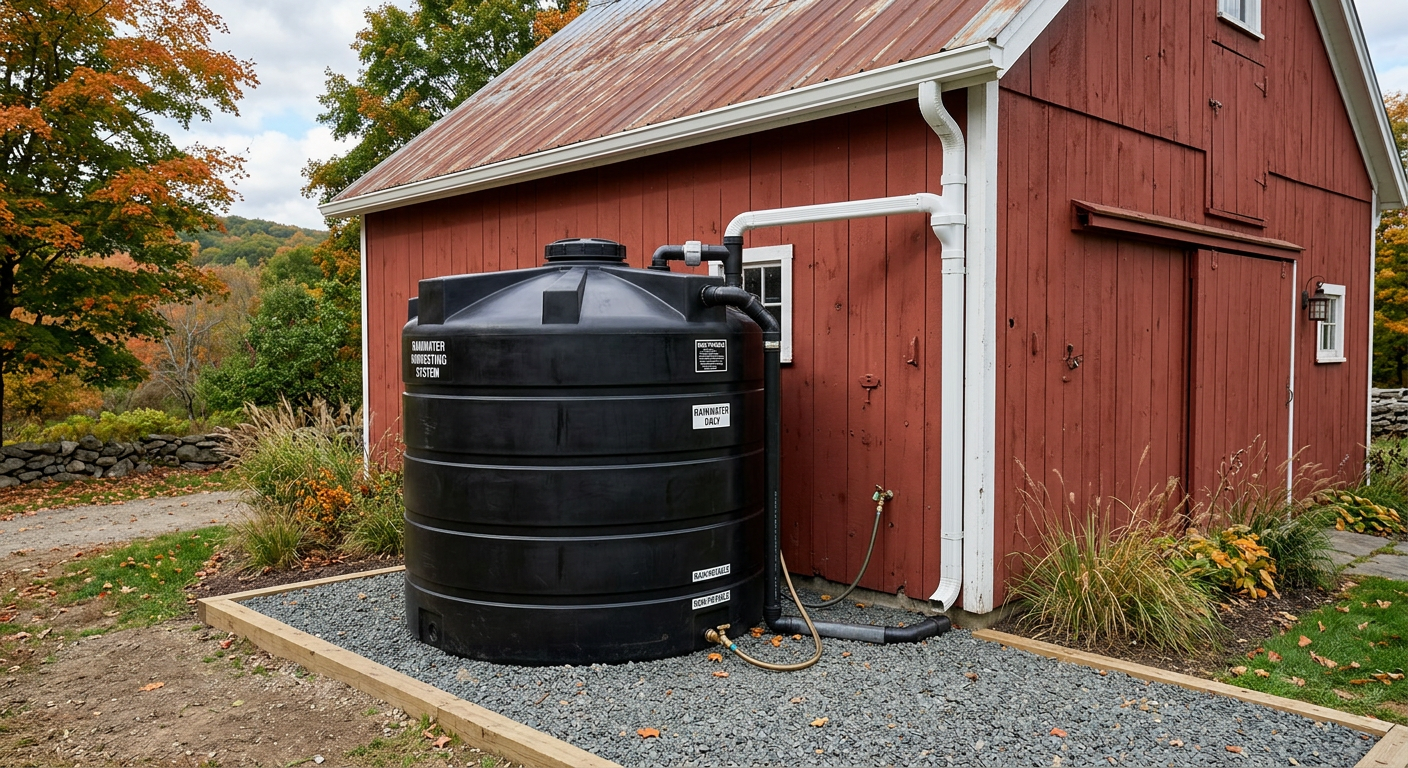
    We got serious and invested in a 2,500-gallon polyethylene cistern (a ‘bushman’ tank). We spent about $1,800 on the tank and another $500 on plumbing, first-flush diverters, and leaf guards. It’s hooked up to our barn roof, and one good spring storm can fill it completely. This water is primarily for the garden, but it’s also plumbed with a secondary pump to be switched over to the house in an emergency. It’s a key part of how we ensure self-sufficiency, a major theme in our 10 beginner homesteading tips. The detailed planning for this is a big component of the resources we offer at Homestead OS, which helps you organize these big projects.

    📋 Get Our Water System Checklist →

    Creating these systems feels like a huge undertaking, but making your water safe is just as vital.

    Don’t stop now — making water drinkable is the most important part.

    !Large rainwater storage tank as part of developing water independence homestead planning.

    Step 3: Storage, Filtration, and Safety

    Having thousands of gallons of water is useless if it’s not where you need it or if it makes you sick. This part of developing water independence homestead planning is all about logistics and health.

    Your Filtration Train

    Never assume any raw water source is safe to drink without filtration. Not even a deep well. We use a multi-stage approach:

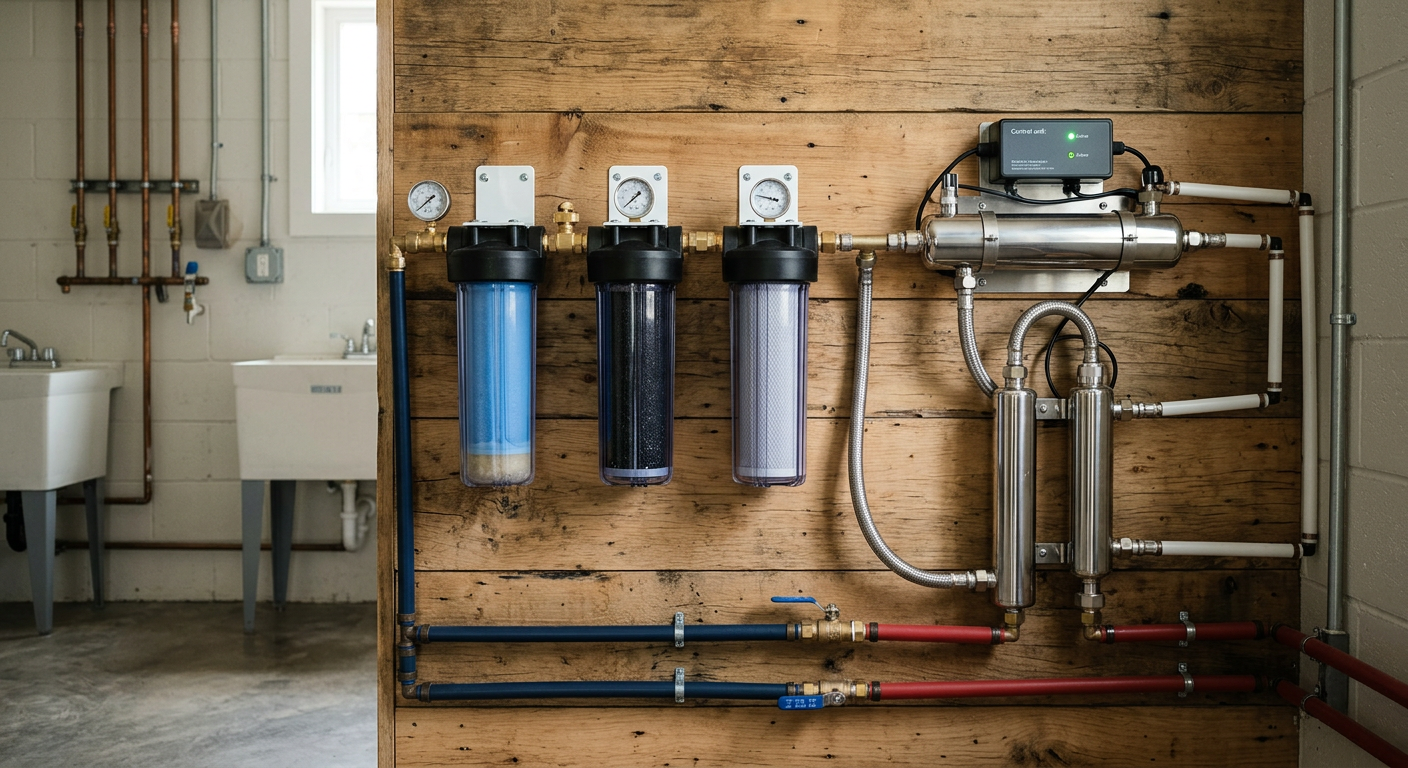
  • Sediment Filter: A simple whole-house spin-down filter catches sand and grit from the well. This protects our pipes and other filters. Cost: about $150.
  • Carbon Block & UV: For the house, we have a 2-stage cartridge filter (sediment and carbon block) followed by a UV light sterilizer. The carbon block removes chemicals and improves taste, and the UV light kills any bacteria or viruses. This setup ran us about $700.
  • Gravity Filter: For our drinking water, we still run everything through a Big Berkey filter on the countertop. It’s slow, but it’s our final line of defense and works even if the power is out. It’s our ultimate peace of mind.
  • Annual Water Testing

    This is non-negotiable. Every spring, we send a sample of our well water to a state-certified lab. It costs about $120. They test for coliform bacteria, nitrates, pH, and heavy metals. It’s the only way to know for sure that your water is safe. One year, our test came back positive for coliform bacteria. It was terrifying. We tracked the source to a faulty well cap seal, shocked the well with chlorine, fixed the seal, and re-tested. Without that annual test, we would have been drinking contaminated water for months.

    Smart management of your systems, including regular maintenance and testing, is a core homesteading skill. Having a solid framework for tracking these tasks is invaluable. We built Homestead OS to manage exactly these kinds of repeating, critical homestead chores.

    💡 Pro Tips

    * Invest in a Manual Pump: We have a Simple Pump hand pump installed alongside our electric submersible in the well. If the grid goes down for an extended period, we can still hand-pump 5 gallons a minute. It was an extra $1,600, and worth every single penny for the peace of mind.

    * Gravity is Your Friend: Design your systems to use gravity whenever possible. Our main cistern is on a gravel pad on a slight incline above the garden. This allows us to water with decent pressure without even turning on a pump.

    * Oversize Your Storage: Whatever you think you need for water storage, double it. Seriously. That 2,500-gallon tank felt huge until we had three dry weeks in a row. Our next tank will be 5,000 gallons.

    * Know Your Frost Line: When trenching water lines, make sure they are buried below your local frost line. Our line is 48 inches deep. A frozen, burst pipe in January is a catastrophe you don’t want to experience.

    ⚠️ Beginner Mistakes to Avoid

    * Underestimating Your Needs: Using city-dweller math for your water needs will leave you high and dry. Factor in every animal and every square foot of garden space.

    * Buying Cheap Pumps: A homestead is no place for cheap equipment, especially a water pump. A failed pump is not an inconvenience; it’s an emergency. Buy the best you can afford. Our first $300 pump lasted 11 months. Our current $1,200 Grundfos has been running for 5 years without a hiccup.

    * Ignoring a Backup Plan: Relying solely on your well is a rookie mistake. A single point of failure. A rainwater system, access to a creek, or even just having 200 gallons in stored food-grade barrels in the barn is better than nothing.

    * Forgetting About Pressure: Getting water out of the ground is only half the battle. You need a properly sized pressure tank to provide consistent pressure to your house and prevent your pump from cycling on and off constantly, which will burn it out.

    Frequently Asked Questions

    How much does it cost to drill a well?

    Drilling costs vary wildly by region and depth. Expect to pay $25-$65 per foot. A complete system (drilling, casing, pump, pressure tank, wiring) can run anywhere from $5,000 to over $15,000. Our total cost in rural Appalachia was just under $10,000.

    Is rainwater safe to drink?

    It can be, but only with proper filtration. Rainwater is naturally soft and pure, but it picks up contamination from your roof (bird droppings, dust, roofing materials). A first-flush diverter and a multi-stage filtration system including a UV sterilizer are essential to make it potable.

    How much water storage do I need for a homestead?

    Calculate your daily use in the driest, hottest month of the year, and multiply that by the number of days you want to be secure. We aim for a minimum of 14 days of storage. For our 700-gallon-a-day summer usage, that means we need at least 9,800 gallons of stored water to feel truly secure.

    Can I have a well if I’m still on the grid?

    Absolutely! Many homesteaders drill a well for irrigation and livestock long before they’re ready to disconnect their house from municipal water. It’s a great way to transition and build resilience while saving money on your water bill.

    🔧 See Our Recommended Pumps & Filters →

    !Multi-stage filtration system used when developing water independence homestead planning.

    Your Foundation for Everything

    Look, developing water independence isn’t the most glamorous part of homesteading. It’s not as fun as collecting your first egg or harvesting a basket of ripe tomatoes. But it’s the most important. It’s the silent, steady heartbeat of your entire operation.

    That day our pump died was a moment of pure panic, but it taught us the most valuable lesson: you don’t mess with water. You plan for it, you respect it, and you build resilient systems to manage it. Now, the silence from the well house is a comforting one, and the sound of rain on the barn roof sounds like money in the bank.

    We share a lot more of these hard-won lessons in our Facebook community—we’d love to have you join us and share your own stories.

    What’s your biggest fear when it comes to water on your homestead? Let me know in the comments below!


    📚 More From Our Homestead

    Ready to Start Your Homestead Journey?

    Free guides, checklists, and tools to help you build your dream homestead.
    Explore Free Resources →

  • Housing for Meat Rabbits: Don’t Make Our Mistakes

    !Proper housing requirements for meat rabbits including elevated hutches with protective roofing and ventilation.

    I’ll never forget the sound. A soft, wet thump on the concrete floor of our barn at 3 AM. I ran out with a headlamp to find a newborn kit, stone cold, that had fallen through the wire floor because the first-time doe hadn’t pulled enough fur for her nest. That gut-wrenching moment taught me more about the real housing requirements for meat rabbits than any book ever could.

    🎯 Quick Answer: The fundamental housing requirements for meat rabbits include secure, predator-proof cages with adequate space (at least 1 square foot per pound of rabbit), protection from sun, wind, and rain, excellent ventilation to prevent respiratory illness, and a solid resting area to prevent sore hocks.

    🔑 Key Takeaways

    * Size Matters: A breeding doe needs a minimum of 30″ x 36″ of cage space. Bucks can have slightly less, around 30″ x 30″. Overcrowding is a recipe for stress, disease, and failure.

    * Wire Floors are a Trade-Off: 1/2″ x 1″ wire flooring is the standard for sanitation, letting waste fall through. However, you MUST provide a solid resting board (a piece of untreated plywood or a plastic mat) to prevent painful sore hocks.

    * Predator-Proofing is Not Optional: Your setup must be secure from dogs, raccoons, weasels, and hawks. We use 1/2″ hardware cloth on any open sides of our rabbitry, and it’s saved our stock more than once.

    * Ventilation > Insulation: Rabbits handle cold far better than heat. A structure that blocks wind and rain but allows for constant, fresh airflow is more important than an insulated, airtight building.

    * Plan for Manure: A single breeding trio can produce a surprising amount of waste. A plan for managing it (like composting or a worm farm) is a non-negotiable part of your housing setup.

    🌱 Start Your Homestead Plan →

    !A rabbit on a resting board meeting housing requirements for meat rabbits to prevent sore hocks.

    Cages vs. Colonies: What We Chose and Why

    When we first got into rabbits, the idea of a colony was so romantic. Little bunnies hopping around a big, beautiful pen in a natural setting. We tried it. We spent a weekend building a 10×10 tractor with a hardware cloth floor and a wooden shelter.

    It was a disaster.

    Within a month, the bucks were fighting viciously. We couldn’t keep track of who was bred to whom. When the first litter was kindled, another doe killed half the kits. It was pure chaos, and it makes it nearly impossible to run a clean, productive meat rabbit operation. Some people make it work, but for beginners, I’ll say this: start with cages.

    Cages give you complete control. You know exactly what each rabbit is eating, how their manure looks (a key health indicator!), and when they are due. We switched to an all-wire cage system from Klubertanz, and our productivity and the animals’ health improved overnight. They aren’t as pretty, but they are far more functional and humane when managed correctly. For us, rabbits are one of the best low maintenance farm animals for small homesteads, but only with the right systems in place.

    Keep reading — this is where most people mess up.

    Now, let’s talk about the exact cage specs you need.

    The Nitty-Gritty on Cage Sizing and Materials

    This is where you can’t afford to cut corners. A proper cage is an investment that pays off in healthy rabbits and less work for you. The standard for meat breeds like New Zealands or Californians is a cage that is 30″ deep, 36″ wide, and 18″ tall for a doe and her litter. A buck or a doe without a litter can do well in a 30″ x 30″ x 18″ cage.

    The Wire You Absolutely Need

    Don’t even think about using chicken wire. It’s a death trap. Rabbits will chew through it, and predators will tear it open in a second.

    * Floor: Use 14-gauge, 1/2″ x 1″ galvanized wire. This lets droppings fall through but is small enough that baby rabbit feet don’t get stuck.

    * Sides & Top: 16-gauge, 1″ x 2″ galvanized wire works perfectly for the rest of the cage. It’s lighter and cheaper but still strong enough.

    We built our first set of cages ourselves to save money. We bought a 100-foot roll of wire, a set of J-clip pliers, and a thousand J-clips for about $120. It took a full weekend of scratched hands and cursing, but we did it. If you’re building your own systems, it helps to have a good set of tools. We found that having the right essential homesteading tools makes all the difference. Or, you can buy pre-made cages for about $80-$150 each, which is what we do now to save time.

    📋 Get the Beginner Checklist →

    Cages are just one part of the equation; where you put them is just as critical.

    Essential Housing Requirements for Meat Rabbits: Beyond the Cage

    Your cages need to be housed in something. You can’t just leave them out in the yard. Rabbits need protection from the elements, especially direct sun, wind, and driving rain.

    Our Three-Sided Shed Solution

    We built a simple 8′ x 16′ three-sided shed against the north side of our barn. The back faces the prevailing winter wind, and the open front faces south, getting gentle morning sun but blocking the harsh afternoon heat. The roof is just corrugated metal on a 2×4 frame. This setup cost us about $400 in materials and provides the two most important things: shade and ventilation.

    Heat is a bigger killer than cold. A rabbit in direct sun with no shade can die from heatstroke in under an hour. In the summer, we freeze 2-liter soda bottles full of water and put one in each cage on hot afternoons. It’s a lifesaver. Good airflow is also non-negotiable for meeting the housing requirements for meat rabbits, as stagnant, ammonia-filled air leads to respiratory infections—a common and deadly problem. According to the University of California’s guide on rabbit production, proper ventilation is key to herd health. If you are struggling with your homestead layout, using a system like Homestead OS can help you plan your spaces effectively from the start.

    In the winter, we staple heavy-duty construction tarps over the open front of the shed, leaving a 6-inch gap at the top for air exchange. This blocks the wind and snow but prevents the air from getting stale. The rabbits, with their thick winter coats, are perfectly happy even when it’s 10°F outside.

    Now for the gear that goes inside those cages.

    !Secure predator-proof mesh used to meet safety and housing requirements for meat rabbits.

    Don’t Forget Feeders, Waterers, and Nest Boxes!

    Your housing system isn’t complete without the right accessories. We made the mistake of using ceramic bowls for food and water at first. HUGE mistake. The rabbits tipped them over constantly, pooped in them, and wasted so much food.

    Our Recommended Setup:

    * Feeders: Get all-metal, sifting J-feeders that mount to the outside of the cage. You fill them from the outside, they hold a 2-3 day supply of food, and the sifting bottom gets rid of fine dust that rabbits won’t eat.

    * Waterers: An automated nipple watering system is a game-changer. We ran a simple PVC pipe system from a 5-gallon bucket that gravity-feeds water to each cage. It cost about $50 and saves us an hour of work each day. No more frozen water bottles in winter or slimy bowls in summer. If you need inspiration for your own projects, searching for a good resource full of homestead plans is a great step. The plans inside Homestead OS helped us build our first chicken coop and we adapted the concepts for our rabbitry.

    * Nest Boxes: For your does, you need a nest box they can kindle in. A simple box made of scrap wood or metal works fine. Ours are about 18″ long, 10″ wide, and 10″ tall. We give it to the doe on day 28 of her pregnancy, fill it with clean pine shavings, and she does the rest, pulling fur to make a warm nest for her babies.

    Getting the details right is what makes this sustainable.

    💡 Pro Tips

    * Always Use Resting Boards. We use 12″x12″ pieces of untreated 1/2″ plywood. We lost a doe to a leg infection from sore hocks before we learned this lesson. The boards cost pennies and prevent suffering.

    * Install Urine Guards. Seriously. Rabbit urine is incredibly corrosive and will destroy wooden hutch legs or a barn wall in a year. We use 4″ strips of corrugated plastic zip-tied to the back and sides of the cages to direct everything straight down.

    * Start a Worm Bin Underneath. The best thing we ever did was put a large worm farm directly under the cages. The worms process the manure and bedding, eliminating cleanup work and producing the best garden compost you’ve ever seen. It turns a waste product into a valuable resource.

    * Overbuild Your Predator-Proofing. We thought our first latch system was good enough. Then a raccoon figured out how to open it. We came out to two dead rabbits. Now we use two redundant latches on every door. Don’t learn that lesson the way we did.

    🔧 See Recommended Tools →

    ⚠️ Beginner Mistakes to Avoid

  • Using Chicken Wire. I’m saying it again because it’s that important. It’s for chickens, not rabbits. A determined rabbit will chew out of it, and a weasel will slip right through it.
  • Not Planning for Manure. That pile will grow faster than you can imagine. We spent our first three months moving it around with a wheelbarrow before we got smart and built the worm bin. Have a plan from day one.
  • No Shade or Airflow. This is the number one killer of backyard rabbits in the summer. A cheap tarp for shade and a $20 box fan for air movement on still, hot days makes all the difference.
  • Buying Pet Store Cages. Those cute little plastic-bottom hutches from the pet store are not suitable for meat rabbits. They are too small, difficult to clean, and will be destroyed in months. You need heavy-duty wire cages built for the job.
  • !Well-ventilated barn setup showing essential housing requirements for meat rabbits and waste management.

    Frequently Asked Questions

    What is the best flooring for meat rabbits?

    The best and most sanitary flooring is 1/2″ x 1″ 14-gauge galvanized wire. It allows droppings to fall through, keeping the rabbit clean and reducing the risk of disease. However, you MUST also provide a solid resting mat or board (wood, hard plastic, or rubber) to prevent sore hocks.

    Can meat rabbits live on the ground in a tractor?

    Yes, but it’s more complicated. A rabbit tractor moved daily provides fresh forage but increases exposure to parasites like coccidia from the ground. You also have a much higher risk of predators digging under. We find cage systems are more sanitary and secure for a consistent meat supply.

    How much does it cost to build a meat rabbit cage?

    Building a DIY cage for a single doe (30″x36″x18″) will cost about $40-$60 in materials (wire, J-clips) if you buy in bulk. Buying a single pre-made cage of the same size will typically cost $80-$150. Your tools (J-clip pliers, wire cutters) are an additional one-time cost.

    Do meat rabbits need a heat lamp in the winter?

    No. As long as they are protected from wind, rain, and snow and have a dry place to be, adult rabbits grow thick winter coats and tolerate cold very well. A well-enclosed nest box filled with straw and the doe’s fur is enough to keep kits warm even in freezing temperatures. Heat lamps are a major fire hazard in a barn full of hay and shavings.

    Getting the housing requirements for meat rabbits right from the start saves you so much money, time, and heartache. We learned through trial and error, but you don’t have to. Build it right, build it securely, and you’ll be on your way to raising a healthy, sustainable source of protein for your family.

    For more daily stories from our homestead and to see our rabbit setup in action, be sure to follow our family’s page on Facebook!

    What’s the one thing holding you back from raising your own meat rabbits? Let us know in the comments below!


    📚 More From Our Homestead

    Ready to Start Your Homestead Journey?

    Free guides, checklists, and tools to help you build your dream homestead.
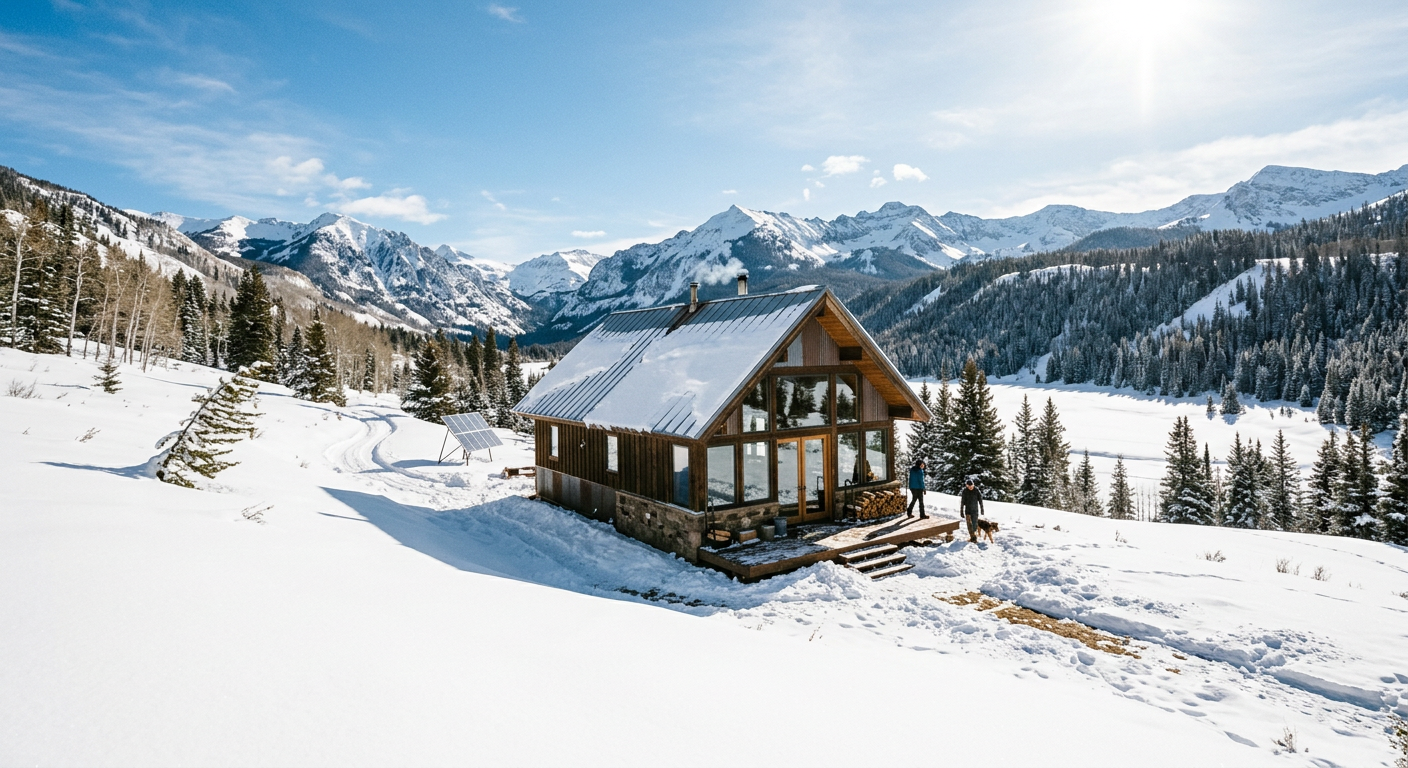
    Explore Free Resources →

  • Homesteading for Beginners on One Acre: The Ultimate Guide

    !An organized backyard farm showing homesteading for beginners on one acre with gardens and a coop.

    Most people think you need a hundred-acre ranch in Montana to live your dreams, but the truth is your suburban backyard is a goldmine waiting to be tapped. I remember looking at my modest one-acre lot and feeling like it wasn’t enough, until I realized that one acre, managed well, can actually produce more food than a large farm left to go wild. Homesteading for beginners on one acre isn’t just possible—it’s the most efficient way to start.

    🎯 Quick Answer: Homesteading for beginners on one acre is about maximizing vertical space and intensive gardening to create a self-sufficient ecosystem. By focusing on high-yield crops, small livestock like chickens or rabbits, and smart layout design, a single acre can provide up to 75% of a family’s food needs.

    🌱 Start Your One-Acre Layout Plan →

    🔑 Key Takeaways

    * Learn how to zone your property for maximum efficiency and less walking.

    * Discover which high-yield crops provide the most calories per square foot.

    * Identify the best small-scale livestock for a one-acre footprint.

    * Understand the importance of intensive gardening techniques like permaculture.

    * Master the art of “stacking functions” to save time and money.

    !Close-up of a Zone 1 herb garden for homesteading for beginners on one acre near the house.

    The Secret Sauce: Zoning Your One Acre for Success

    When you’re working with limited space, you can’t just throw things wherever they fit. In the world of permaculture, we talk about “Zones.” Zone 0 is your house, and Zone 1 is the area right outside your door. This is where your most high-maintenance plants go—like herbs and salad greens—because if you have to walk to the back of the property to grab a pinch of basil, you simply won’t do it.

    As you move further out, you place your vegetable garden, then your chicken coop, and finally your fruit trees or woodlot on the perimeter. This flow ensures that the things needing daily attention are closest to you, making homesteading for beginners on one acre feel like a hobby rather than a grueling chore. If you’re feeling overwhelmed, you can use a homestead planning tool to map out your zones before you ever pick up a shovel.

    Keep reading — this is where most people mess up by overcomplicating their layout.

    But once your layout is set, you need to decide what’s actually going into the ground, and that’s where the magic of intensive production happens.

    Intensive Gardening: Growing More in Less Space

    You don’t need long, tractor-width rows on a one-acre plot. In fact, rows are a waste of space! Instead, look into raised beds or no-dig gardening. These methods allow you to plant crops closer together, which shades the soil (reducing weeds) and maximizes your harvest per square inch.

    Consider “Vertical Gardening” as your best friend. Trellis your cucumbers, squash, and even small melons. By growing up instead of out, you free up floor space for root crops like carrots and beets. Using these methods, a tiny 1,000 square foot garden can easily feed a family of four for the entire summer.

    Before you run to the nursery, though, there’s one specific animal every one-acre homesteader needs to consider—I’ll show you why in the next section.

    Livestock for the Small-Scale Homestead

    You might not have room for a herd of cattle, but you have plenty of room for “micro-livestock.” For anyone tackling homesteading for beginners on one acre, chickens are the gateway animal. A small flock of six hens provides plenty of eggs and, more importantly, high-quality nitrogen for your compost pile.

    If you want to level up, think about rabbits or dairy goats. Rabbits are incredibly space-efficient and produce some of the best fertilizer on the planet. Nigerian Dwarf goats are another favorite because they provide delicious milk but only require a fraction of the space a standard cow would need.

    📋 Get the Small Livestock Checklist →

    This next part? Nobody talks about it, but it changed everything for us.

    Having the animals is great, but managing the waste and turn-around is what separates a messy yard from a productive homestead.

    !Small livestock integration as part of homesteading for beginners on one acre.

    Water and Soil: The Invisible Engines

    You can have the best seeds and the cutest goats, but if your soil is dead, your homestead will struggle. On one acre, you have a closed-loop opportunity. Your animal bedding goes into the compost, the compost feeds the garden, the garden waste feeds the animals.

    Soil health is the foundation of self-sufficiency. Don’t strip-mine your land; nourish it. Using a digital management system can help you track your soil amendments and rotation schedules so you never forget when you last fertilized. Water catchment is equally vital. Installing rain barrels on your gutters can save you hundreds of dollars in utility bills and provide chlorine-free water for your sensitive plants.

    Now that you’ve got the basics, let’s look at how to avoid the common traps that burn people out by their second year.

    💡 Pro Tips

    * Start Small: Don’t buy the goats, the chickens, and the bees in the same month. Master one before adding another.

    * Plant Perennials Early: Fruit trees and berry bushes take years to produce. Get them in the ground during your first season.

    * Focus on Calories: Greens are great, but potatoes, squash, and beans are what actually fill the pantry and provide security.

    * Observe Before Acting: Spend a full season watching where the sun hits and where water pools before building permanent structures.

    ⚠️ Beginner Mistakes to Avoid

    * Over-Buying Gear: You don’t need a $30,000 sub-compact tractor for one acre. Most jobs can be done with a good wheelbarrow and a broadfork.

    * Neglecting the Soil: If you spend $500 on plants and $0 on soil health, you’re essentially throwing money away.

    * Ignoring Local Laws: Always check your zoning ordinances for livestock restrictions before you bring home those “quiet” ducks.

    * Skipping the Plan: A homestead without a map becomes a chaotic mess of projects that never quite get finished.

    !Abundant vegetable harvest from a successful layout of homesteading for beginners on one acre.

    Frequently Asked Questions

    Can one acre really feed a family?

    Yes! While it’s difficult to be 100% self-sufficient (growing your own grains takes a lot of space), you can easily produce all your vegetables, eggs, and a significant portion of your meat on a single acre.

    How much time does a one-acre homestead take daily?

    Expect to spend about 30-60 minutes a day on basic chores like feeding animals and watering. During planting or harvest season, this will increase, but good systems make it much faster.

    What is the most profitable thing to grow on one acre?

    High-value crops like garlic, mushrooms, or microgreens often provide the best return on investment for small-scale physical labor.

    Do I need a tractor for one acre?

    Generally, no. One acre is small enough to manage with hand tools, a good lawnmower, and perhaps a heavy-duty garden cart. Save that money for better seeds and fencing!

    What’s your biggest challenge with starting your homestead? I’d love to hear your story in the comments below!

    Homesteading isn’t about the size of your land; it’s about the size of your commitment to a better way of living. Even on a single acre, you can find a level of peace and productivity that most people only dream of. Just take it one garden bed at a time, and don’t be afraid to get your hands dirty. We’re all learning as we go!

    If you want to simplify the process and keep all your records, maps, and tasks in one place, check out our favorite tools to get started.

    🔧 See Recommended Homesteading Tools →

    For daily tips on maximizing your small-scale farm and staying inspired, follow our Facebook page here: https://xlvvlujsctgiorcwbtkv.supabase.co/functions/v1/social-redirect?p=facebook&loc=blog_conclusion


    📚 More From Our Homestead

    Ready to Start Your Homestead Journey?

    Free guides, checklists, and tools to help you build your dream homestead.
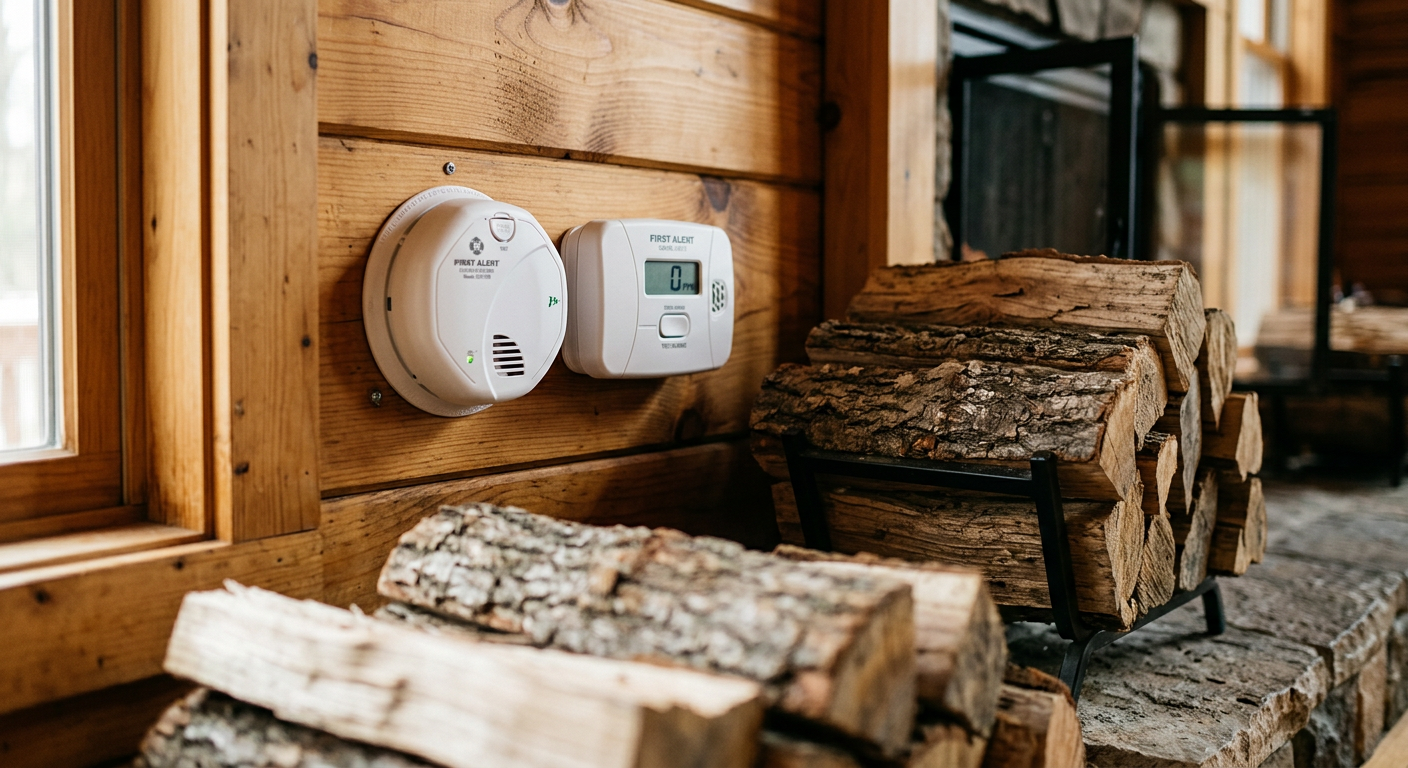
    Explore Free Resources →

  • Build a Cheap Chicken Coop: My $87 Plan That Works

    !A sturdy backyard setup showing how to build cheap chicken coop plans using reclaimed pallet wood.

    I’ll never forget the sick feeling in my stomach, standing in the pre-dawn chill. A rogue windstorm had ripped half the roofing felt off our very first chicken coop, and the inside was a soggy, miserable mess. We’d spent over $400 on a kit, and it folded like a wet napkin in the first real test. That expensive failure taught me a hard lesson: you don’t need fancy, you need tough. And tough doesn’t have to be expensive.

    🎯 Quick Answer: The best way to build a cheap chicken coop is to source free or salvaged materials like pallets and scrap lumber, focus on non-negotiable safety features (predator-proofing, ventilation), and use simple, functional designs like an A-frame or a reinforced pallet structure. Forget aesthetics; focus on what keeps your flock safe and dry.

    🔑 Key Takeaways

    * Scavenge First, Buy Later: Your best materials are often free. Pallets, construction site off-cuts, and old sheds are gold mines for a budget build.

    * Function Over Form: A beautiful coop that doesn’t breathe is a death trap. Prioritize ventilation, predator protection, and ease of cleaning over fancy trim.

    * Hardware Cloth is Non-Negotiable: Chicken wire keeps chickens in, but hardware cloth keeps raccoons, weasels, and hawks out. This is not the place to save a few dollars.

    * Simpler is Stronger: Complicated plans have more points of failure. A basic A-frame or a simple shed-style coop is easier to build, easier to reinforce, and just as effective.

    * Build Bigger Than You Need: Chicken math is real. You’ll always end up with more birds than you planned. A little extra space now saves you from building a second coop later.

    🌱 Start Your Homestead Plan →

    !Finding free pallet wood and lumber for how to build cheap chicken coop plans on a budget.

    Scrounging for Gold: How to Find Materials for Free

    Our second coop, the one that’s still standing strong after six years, cost us exactly $87. The cost was for screws, hinges, and a roll of hardware cloth. The rest? All scavenged. Learning how to find free building materials is one of the most vital beginner homesteading tips you can master.

    Here’s where we looked:

    * Facebook Marketplace & Craigslist: Look in the “Free” section. People are constantly giving away old sheds, playhouses, and leftover lumber just to get it off their property. We found a dismantled child’s playhouse that formed the core of our current coop.

    * Pallets: Look behind warehouses or industrial parks (always ask permission!). Make sure you get the ones stamped with “HT” for heat-treated, not “MB” for methyl bromide, which is toxic.

    * Construction Sites: Drive by new home builds on a Friday afternoon. With the site manager’s permission, you can often grab a truckload of off-cuts and scrap plywood from their dumpster that are perfect for coop walls and nesting boxes.

    My biggest score was a stack of 12 untreated pallets from a local garden center. They were happy to see them go. Those pallets became the entire frame and most of the walls for our coop. It’s not pretty, but it’s a fortress.

    Don’t just build a coop; build a resilient homestead. That starts with knowing what materials you have and what you need.

    The “Good Enough” Coop: 4 Non-Negotiable Features

    You can skimp on a lot, but you absolutely cannot skimp on these four things. Believe me, I’ve paid the price for getting these wrong. The goal isn’t just learning how to build cheap chicken coop plans; it’s learning how to build safe ones.

    1. Ventilation (But Not Drafts)

    Chickens produce a ton of moisture and ammonia. Without good ventilation up high, that moisture builds up and causes frostbite in the winter and respiratory infections year-round. You need vents near the roofline that are covered to prevent rain from getting in. A draft at roost level is bad, but stale air is deadly.

    2. Absolute Predator-Proofing

    I’ll say it again: chicken wire is not predator-proof. A raccoon will rip through it like tissue paper. You must use 1/2-inch or 1/4-inch hardware cloth on ALL openings, including vents. We lost two of our best hens to a weasel who squeezed through a one-inch gap we overlooked. Every window, every vent, every single opening needs to be covered and secured with screws and washers, not just staples.

    3. Roosting Bars

    Chickens sleep on roosts, not on the floor. It keeps them clean and safe. Use a 2×4 with the wide side up, or even just sturdy, rounded branches. Give them about 8-10 inches of roost space per bird. Make them higher than the nesting boxes, or the birds will sleep (and poop) in the boxes.

    4. Dark, Cozy Nesting Boxes

    For every 3-4 hens, you need one nesting box (about 12x12x12 inches). They want a dark, safe, quiet place to lay. We built ours out of scrap plywood and put a hinged lid on the outside of the coop for easy egg collection. This saves you from having to go inside the coop every day. The hens feeling safe to lay is just as important as all the logistics of raising backyard chickens.

    Focusing on these essentials is how you build a coop that lasts for years, not just a season.

    📋 Get My Free Coop Checklist →

    No-Frills Cheap Chicken Coop Plans You Can Build

    Forget downloading complicated 50-page blueprints. The best plans are the ones you can draw on the back of a napkin and adapt to the materials you have on hand. Here are two designs we’ve used that are perfect for beginners.

    The A-Frame Tractor

    This is the ultimate beginner’s coop, especially for a small flock (2-4 birds). It’s basically a triangle on wheels.

    * Frame: Build two large wooden triangles out of 2x4s. Connect them at the top and with cross-braces along the bottom.

    * Housing: The top third of the A-frame is the enclosed coop. Use scrap plywood to box in this area, creating a triangular space for them to sleep. Include a small roost and one nesting box.

    * Run: The bottom two-thirds is the open-air run. Cover this area completely with hardware cloth. Don’t forget the bottom, or diggers will get in.

    * Benefit: It’s a complete coop and run in one. You can move it around your yard every few days to give chickens fresh grass and control pests. We have a whole guide on how to build a movable chicken tractor if you want to dive deeper.

    The Pallet Palace

    This is what we have now for our main flock of 15. It’s a small shed-style coop built almost entirely from free pallets.

    * Foundation: We laid four pallets flat on leveled concrete blocks to create a raised floor. This keeps it dry and deters rodents.

    * Walls: We stood pallets up vertically on the floor platform and screwed them together at the corners to form the walls. Then, we covered the inside and outside with scrap plywood and salvaged tin roofing to make them solid and weatherproof.

    * Roof: A simple, sloped roof made from 2×4 rafters and covered in free tin from an old barn. The slope is crucial for shedding rain and snow.

    For a project like this, it helps to keep track of your materials and steps. When we first started, everything was a chaotic mess of notes. Now, we use a simple digital system to map out projects from start to finish. If you’re tackling multiple projects, a planner like Homestead OS can make the difference between a finished project and a pile of wood.

    Keep reading—this is where I tell you how to avoid my biggest time-wasting mistakes.

    !Installing predator-proof hardware cloth while following how to build cheap chicken coop plans.

    💡 Pro Tips

    These are the little things you learn after your third build and second predator attack. Learn from my scars.

    * Build a Human-Sized Door. My back still aches thinking about shoveling out our first coop, bent over double because the door was only four feet high. Make the door big enough for you to walk in and out comfortably with a shovel or wheelbarrow.

    * Paint is Your Friend. Even if you use cheap scrap wood or pallets, a few thick coats of exterior paint (use low-VOC or barn paint) will add years to your coop’s life. It seals the wood against moisture and rot.

    * Deep Litter Method Saves Time. Instead of cleaning the coop weekly, we use the deep litter method. Start with 4-6 inches of pine shavings. As it gets soiled, just turn it over with a pitchfork and add a fresh layer on top. Twice a year, you clean it all out and have incredible compost for your garden.

    * Put Your Coop on Blocks. Even if it’s not a pallet coop, elevating your structure a few inches off the ground on concrete blocks prevents the base from rotting and makes it harder for rodents to chew their way in. It’s a simple step that adds longevity. You can review some great plans from university extensions like this one from the University of Georgia Extension.

    ⚠️ Beginner Mistakes to Avoid

    I cringe when I see new chicken keepers making these mistakes because I made almost all of them myself.

    * Using Chicken Wire for Runs. I know I’ve said it twice, but it’s the single biggest (and most heartbreaking) mistake. A raccoon took three of our first flock of pullets through chicken wire. Use hardware cloth. Period.

    * Forgetting a “Chicken Ramp.” If your coop is elevated, your chickens need a textured ramp to get in and out. A smooth piece of plywood will be too slippery, especially when wet or icy. We just screwed small wood strips cross-wise every few inches on our ramp to give them grip.

    * No Easy Way to Collect Eggs. Don’t build a coop where you have to go inside, move chickens, and dig through bedding to get the eggs. Build external nesting boxes with a lid on the outside. It’s a game-changer.

    * Building It Too Small. I promise you, six chickens will become ten, and ten will become fifteen. It’s called chicken math. Build your coop for at least 50% more chickens than you plan to get. It’s so much easier than adding an extension later. Keeping project specs and future plans organized is tough, which is why having a central place to track everything is so critical. A simple digital tool like Homestead OS helps you plan for this kind of expansion from day one.

    Frequently Asked Questions

    H3: How much space do chickens need in a coop?

    A good rule of thumb is 3-4 square feet per bird inside the coop if they have an outdoor run, and about 10 square feet per bird in the run. If they are permanently confined, you need much more. Overcrowding leads to stress, pecking, and disease.

    H3: Can I use pressure-treated wood for a chicken coop?

    I avoid it, especially for any interior surfaces the chickens might peck at. The chemicals used for treating the wood (like arsenate) can be toxic. If you must use it for foundational parts that touch the ground, make sure it is completely sealed with paint and doesn’t come into contact with the birds or their bedding.

    H3: What is the absolute cheapest way to build a chicken coop?

    The cheapest way is to convert an existing structure. An old dog house, a plastic garden shed, or a corner of a garage can be fortified and converted into a coop for next to nothing. Just ensure it has ventilation and is predator-proof.

    H3: How do I predator-proof a cheap coop on a budget?

    Hardware cloth over every opening is #1. For latches, don’t use simple hook-and-eye closures. A raccoon can open those easily. Use a two-step latch, like a carabiner clip through a deadbolt, that requires opposable thumbs to operate.

    !A finished rustic structure demonstrating simple how to build cheap chicken coop plans for $87.

    It’s More Than Just a Box for Birds

    Building that second coop from scraps and sweat wasn’t just about saving money. It was about resiliency. It was about looking at a pile of what someone else considered trash and seeing a safe, warm home for our animals. It was proof that we could provide for our homestead without a big budget.

    You don’t need a thousand dollars or professional plans. You need a little creativity, a lot of sweat, and the knowledge of what actually matters: safety, health, and security for your flock.

    For more behind-the-scenes stories and daily tips from our homestead, come follow along on our Facebook page. We share the wins, the failures, and everything in between.

    What’s the most clever material you’ve scavenged and repurposed for a project? Share your scores in the comments below!

    🔧 See My Recommended Building Tools →


    📚 More From Our Homestead

    Ready to Start Your Homestead Journey?

    Free guides, checklists, and tools to help you build your dream homestead.

    Explore Free Resources →

  • Companion Planting Guide That Doubled Our Yields

    !A thriving garden showing how a companion planting guide increased yields through diverse plant placement.

    I can still feel the sick twist in my stomach from that first summer on the homestead. My beautiful tomato plants, which I’d started from seed on our freezing windowsill, were getting skeletonized overnight. Big, fat, green hornworms were feasting, and I was losing the battle. It wasn’t until my neighbor, a homesteader of 40 years, handed me a six-pack of borage starts and said, “Plant these, child,” that everything changed.

    🎯 Quick Answer: Companion planting is the strategic placement of different plants together to increase growth, deter pests, and improve soil health. Following a good companion planting guide for increased yields isn’t an old wives’ tale; it’s a proven ecological strategy that creates a resilient garden that produces more food with less work.

    🔑 Key Takeaways

    * It’s Science, Not Magic: Companion planting works by attracting beneficial insects, repelling pests, improving soil nutrients (like legumes fixing nitrogen), and providing ground cover or support.

    * Start Simple: You don’t need to memorize a thousand combinations. Start with a classic trio like Tomatoes, Basil, and Marigolds. The synergy is powerful.

    * More Than Veggies: Flowers and herbs are your garden’s workhorses. They are essential for pest control and attracting the pollinators you need for squash, cucumbers, and fruit.

    * Observe Your Land: What works for us in Zone 5b might need tweaking for you. The best guide is your own garden journal.

    * Bigger Harvests, Less Spraying: The goal is a balanced ecosystem. We haven’t used a chemical pest spray in over seven years, and our pantry is fuller than ever.

    * It’s a Long Game: The benefits accumulate. Each year you companion plant, your soil gets healthier and your beneficial insect population grows.

    🌱 Start Your Homestead Plan →

    !Borage and tomatoes growing together as part of a companion planting guide increased yields strategy.

    What is Companion Planting REALLY? (And Why It’s Not Magic)

    When we first started, I thought companion planting was just about which plants “liked” each other. It’s so much more than that. It’s creating a team of plants that help each other out. Some plants are the muscle, some are the defenders, and some are the medics.

    Here’s the breakdown of how it actually works:

    Pest Deterrence & Confusion

    Some plants, like marigolds or alliums (onions, garlic), release scents or compounds that pests just hate. That sharp marigold smell actually messes with the ability of insects like nematodes and tomato hornworms to find their target. We plant a border of French Marigolds around our tomato beds every single year. It’s non-negotiable.

    Attracting an Army of Helpers

    Other plants act like a giant welcome sign for beneficial insects. Ladybugs, lacewings, parasitic wasps, and pollinators are your best friends. Last spring, I watched our dill plants become covered in ladybug larvae. Just two weeks later, the aphid problem I was starting to see on my kale was completely gone. Those little predators did all the work for me. You can learn more about identifying these helpers from resources like the Penn State Extension.

    Improving the Soil

    This is the secret weapon of companion planting. Legumes—like bush beans and peas—have a superpower. They work with bacteria in the soil to pull nitrogen from the air and “fix” it onto their roots. When you plant them next to heavy feeders like corn, which desperately needs nitrogen, the beans provide a slow-release-fertilizer right at the root zone. It’s genius.

    Now you see why this isn’t just about good vibes; it’s about good science. It’s one of the key skills we talk about in our 10 Beginner Homesteading Tips a must-read if you’re just starting out.

    Keep reading — this is where we get into the exact combinations that work for us.

    The “Three Sisters” and Beyond: Classic Combos That Work

    The most famous companion planting guild is the Native American method known as the Three Sisters: corn, beans, and squash.

    It’s a perfect example of plant synergy:

  • Corn: Provides the tall stalk for the beans to climb.
  • Beans: Climb the corn (so you don’t need a trellis) and fix nitrogen in the soil to feed the hungry corn.
  • Squash: Sprawls out with its big, prickly leaves, acting as a living mulch to keep the soil cool and moist while deterring pests like raccoons.
  • My first attempt at the Three Sisters was a bit of a mess. I planted everything at the same time. The squash grew so fast it swamped the corn seedlings. Lesson learned: Plant the corn first. Wait until it’s about a foot tall, then plant the beans and squash. It took us two seasons to get the timing right, but when we did, the results were incredible.

    But you don’t have to start with something that complex. The easiest and most rewarding combo we use is Tomatoes + Basil + Marigolds. The basil is said to improve the tomato’s flavor and repels hornworms. The marigolds ward off root-knot nematodes in the soil. It’s a powerhouse trio that works in garden beds and even in large containers.

    Understanding these basic guilds makes the whole process less intimidating. Now, let’s dig into the specifics.

    My Ultimate Companion Planting Guide for Increased Yields

    Alright, grab a cup of coffee. This is the list I wish I had when I started. These are the combos we use every single year on our homestead. No theory, just dirt-under-the-fingernails results. We keep track of all our planting experiments and successes using a simple garden planner, which is a key part of the Homestead OS system we rely on.

    The All-Stars: Tomatoes, Peppers & Eggplant (Nightshades)

    * ✅ Friends: Basil, Carrots, Onions, Garlic, Marigolds, Borage, Nasturtiums. Borage is my secret weapon; it attracts pollinators and deters hornworms better than anything else I’ve tried. Planting basil nearby has legitimately made our tomatoes taste sweeter.

    * ❌ Foes: Anything in the brassica family (cabbage, broccoli, kale), Fennel, Corn. Potatoes are also risky because they are susceptible to the same blight, and planting them close can cause it to spread like wildfire.

    📋 Get the Beginner Planting Checklist →

    The Leafy Greens: Lettuce, Spinach & Kale (Brassicas)

    * ✅ Friends: Onions, Garlic, Mint (in a pot!), Dill, Rosemary, Nasturtiums. The strong smells of aromatic herbs are fantastic for confusing cabbage moths. Nasturtiums are my favorite “trap crop” for aphids—they’ll go for the nasturtiums first, saving my kale. Seriously, it’s a game-changer.

    * ❌ Foes: Tomatoes, Peppers, Beans (some say they inhibit growth), Strawberries.

    The Vining Crops: Cucumbers & Squash

    * ✅ Friends: Corn, Beans, Peas (The Three Sisters!), Radishes, Marigolds, Nasturtiums, Borage, Oregano. Borage is a superstar here for bringing in bees. Our zucchini and cucumber pollination rates skyrocketed the year we started interplanting borage. We went from maybe 5-6 zucchini per plant to well over a dozen.

    * ❌ Foes: Potatoes and aromatic herbs like Sage (can stunt squash growth).

    The Root Veggies: Carrots, Radishes & Beets

    * ✅ Friends: Lettuce (provides ground cover), Rosemary, Sage, Onions, Leeks. The onion family helps repel the dreaded carrot rust fly. We always plant a row of carrots, then a row of onions, and repeat.

    * ❌ Foes: Dill (can attract pests that harm carrots), Fennel, Celery.

    Many of these beneficial plants are perennial herbs, which are a must-have on any homestead. We have a whole guide on the best perennial herbs for cold climates if you want to plant once and reap the benefits for years.

    Next, we’ll talk about how to supercharge this guide with flowers and dedicated herbs.

    !Tomatoes, basil, and marigolds demonstrating how a companion planting guide increased yields in a raised bed.

    Beyond Vegetables: Integrating Flowers and Herbs

    Your vegetable garden should not be a monoculture of just vegetables. The most productive and resilient gardens look a little wild, buzzing with life. That life is driven by flowers and herbs.

    Forget neat, single-variety rows. We tuck these everywhere.

    * Marigolds (Tagetes sp.): I’ve mentioned them a dozen times for a reason. They’re cheap, they’re easy, and they work. They release a substance that kills root-knot nematodes, one of the most destructive soil pests. We spent about $15 on seeds five years ago and have been saving our own ever since.

    * Nasturtiums: The ultimate sacrificial plant. Aphids LOVE them. I plant them at the ends of my brassica and squash rows. The aphids flock to them, leaving my food crops alone. Plus, the leaves and flowers are edible with a peppery kick—great in salads! 🔥

    * Borage: The pollinator magnet. The fuzzy blue flowers are like a buffet for bees. If your squash, cucumbers, or melons aren’t setting fruit, you probably have a pollination problem. Borage will fix it. We went from hand-pollinating our squash to having more than we could eat in one season.

    * Aromatic Herbs: Think Rosemary, Thyme, Oregano, Sage, and Dill. Their strong scents act like a “smokescreen” in the garden, making it hard for pests to find their preferred plants. We plant pots of mint around the garden (NEVER in the ground) to repel ants and flea beetles.

    This is the core of Integrated Pest Management (IPM). You’re creating an entire ecosystem, not just planting vegetables. It takes a bit more planning upfront, but the payoff is a massive reduction in pests and an increase in harvests.

    🔧 See Our Recommended Garden Tools →

    💡 Pro Tips

    * Think in Guilds, Not Pairs. Instead of just planting basil with your tomatoes, plant a guild: A tomato plant, surrounded by a few basil plants, with a marigold at the corner and maybe some carrots in between. You’re creating a small, self-sufficient neighborhood.

    Keep a Journal. Seriously. I can’t stress this enough. Every year, I jot down what I planted where, what worked, and what was a total disaster. That journal is now the most valuable gardening book I own. It’s how I know that borage works better than basil for hornworms in my specific garden*.

    * Go Vertical and Horizontal. Use vining companions (like pole beans on corn) to maximize vertical space. Use sprawling companions (like squash or oregano) as a living mulch to shade the soil and suppress weeds.

    * Don’t Be Afraid to Move Things. If a combination isn’t working, or a plant is getting swamped, move it! A garden is a living, changing thing. A little bit of planning goes a long way, and a tool like the Homestead OS garden planner can save you a season of headaches.

    ⚠️ Beginner Mistakes to Avoid

    I’ve made every single one of these. Learn from my pain.

  • Planting Mint (or any aggressive perennial) in the ground. I did this our second year. I thought, “Oh, fresh mint for tea!” By year four, it was staging a military coup in three of my garden beds. It took me an entire spring of diligent, back-breaking digging to eradicate it. Plant mint, lemon balm, and oregano in containers. Always.
  • Ignoring Spacing. Companion plants still need to breathe. If you crowd a tomato plant with a dozen other things right at its base, nothing will thrive. Respect the final spacing recommendations on the seed packet, even for the companions.
  • Planting All Your Brassicas Together. Grouping all your kale, broccoli, and cabbage into one big block is like putting out a giant neon sign for cabbage moths and flea beetles. It’s better to intersperse them throughout the garden, separated by non-brassicas like onions or lettuce, to confuse the pests.
  • Expecting Overnight Miracles. Companion planting is an investment in your garden’s ecosystem. You’ll see some benefits the first year, but the real magic happens in years two, three, and beyond as your soil biology improves and populations of beneficial insects establish themselves on your land.
  • Frequently Asked Questions

    H3: Does companion planting really work for pests?

    Absolutely. It works in two ways: repelling and trap cropping. I’ll never forget the year I planted nasturtiums at the end of my kale row. The nasturtiums were covered in black aphids, but my kale, just two feet away, was almost completely clean. The nasturtiums sacrificed themselves. It’s a strategy we use every single year now.

    H3: What should you not plant with tomatoes?

    The big no-no’s are fennel (it inhibits the growth of most plants), corn (they attract the same worms), and brassicas like broccoli and cabbage (they can stunt each other’s growth). Also, avoid planting potatoes nearby. They are both in the nightshade family and highly susceptible to early and late blight, which can spread between them and wipe out both crops.

    H3: What is the easiest companion planting combo for beginners?

    Hands down, it’s Tomatoes, Basil, and Marigolds. It is a tried-and-true trio. You get three benefits: the marigolds protect the roots from nematodes, the basil repels hornworms and improves flavor, and you get to harvest delicious tomatoes and basil for fresh sauce and pesto. It’s a win-win-win.

    H3: Can you companion plant in containers or raised beds?

    Yes, and it’s arguably even more important in a small space! In a container, you can easily tuck a marigold or a basil plant in with your patio tomato. In our 4×8 raised beds, we almost never plant in monoculture rows. We’ll have a row of carrots, a row of onions, and some lettuce tucked in between. It maximizes space and builds a healthier, more resilient little ecosystem.

    !A bountiful vegetable harvest proving that a companion planting guide increased yields naturally.

    It’s Your Garden’s Turn to Thrive

    The first time you walk out to your garden and see it humming with bees, ladybugs crawling on the leaves, and your plants looking healthier than ever… that’s a feeling of satisfaction that’s hard to beat. It’s the feeling of working with nature, not against it. It’s less work, less worry, and a whole lot more food in the pantry.

    This companion planting guide should give you the confidence to start building those plant teams in your own garden for increased yields and a healthier homestead. Don’t be afraid to experiment and find what works for you.

    For more behind-the-scenes stories and daily tips from our homestead, come say hi and follow us on Facebook!

    What’s the one companion planting pair you swear by, or are you excited to try for the first time this year? Let me know in the comments below!


    📚 More From Our Homestead

    Ready to Start Your Homestead Journey?

    Free guides, checklists, and tools to help you build your dream homestead.

    Explore Free Resources →