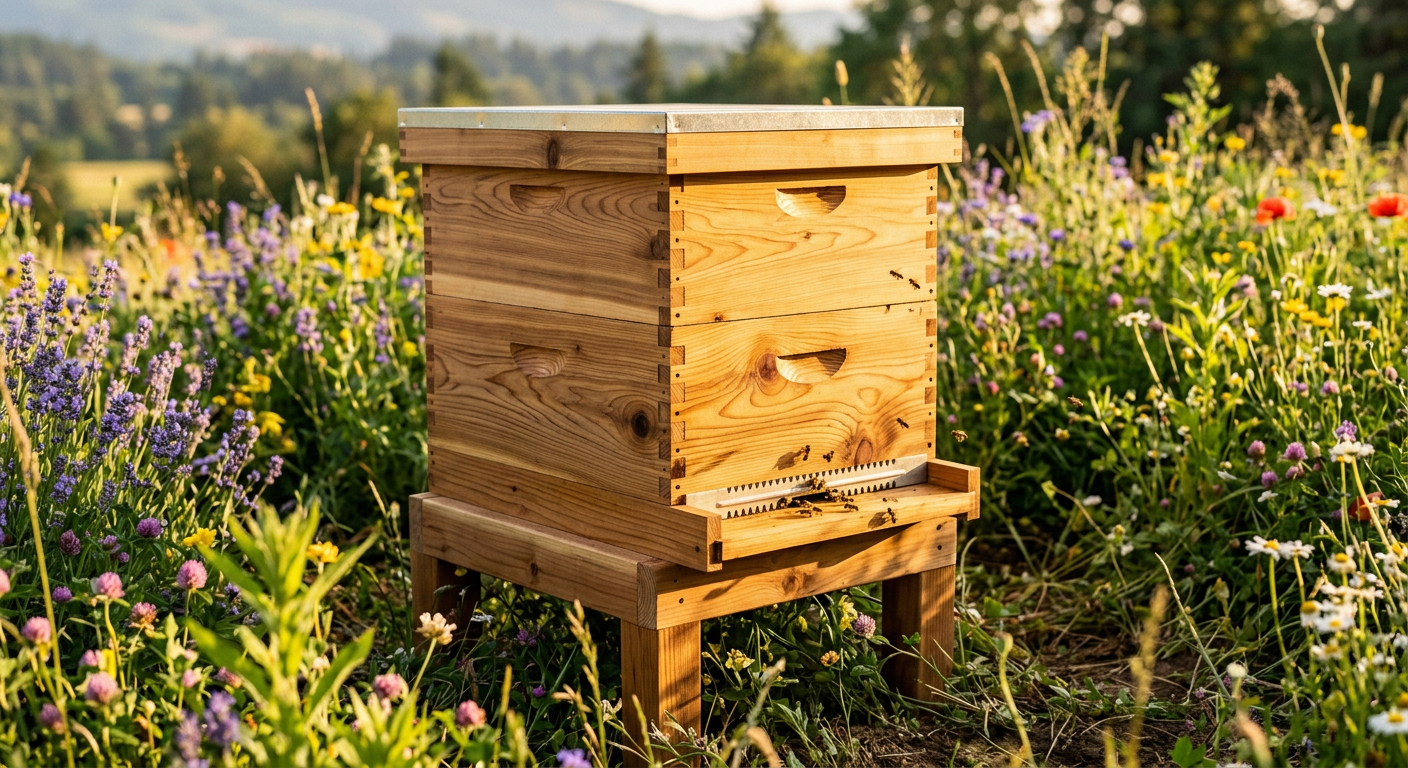
!A new cedar Langstroth beehive in a field for a first year beekeeping equipment checklist.
I’ll never forget the buzzing. It wasn’t just a sound; you feel it in your chest, a low hum of a thousand tiny engines vibrating through the wooden box. My hands were sweating inside brand new leather gloves, and the sweet, waxy smell of the hive mixed with the sharp scent of pine from the smoker was overwhelming. That first hive inspection, I was terrified and totally in love all at once.
🎯 Quick Answer: For your first year, you need a full bee suit with a veil, gloves, a smoker, and a hive tool. You also need two complete Langstroth hives (bottom board, two deep brood boxes, two honey supers, inner/outer covers, and frames/foundation for all). Don’t start with just one hive.
🔑 Key Takeaways
* Safety First: Don’t ever cheap out on your protective gear. A good veil and suit are the difference between a learning experience and a trip to the ER.
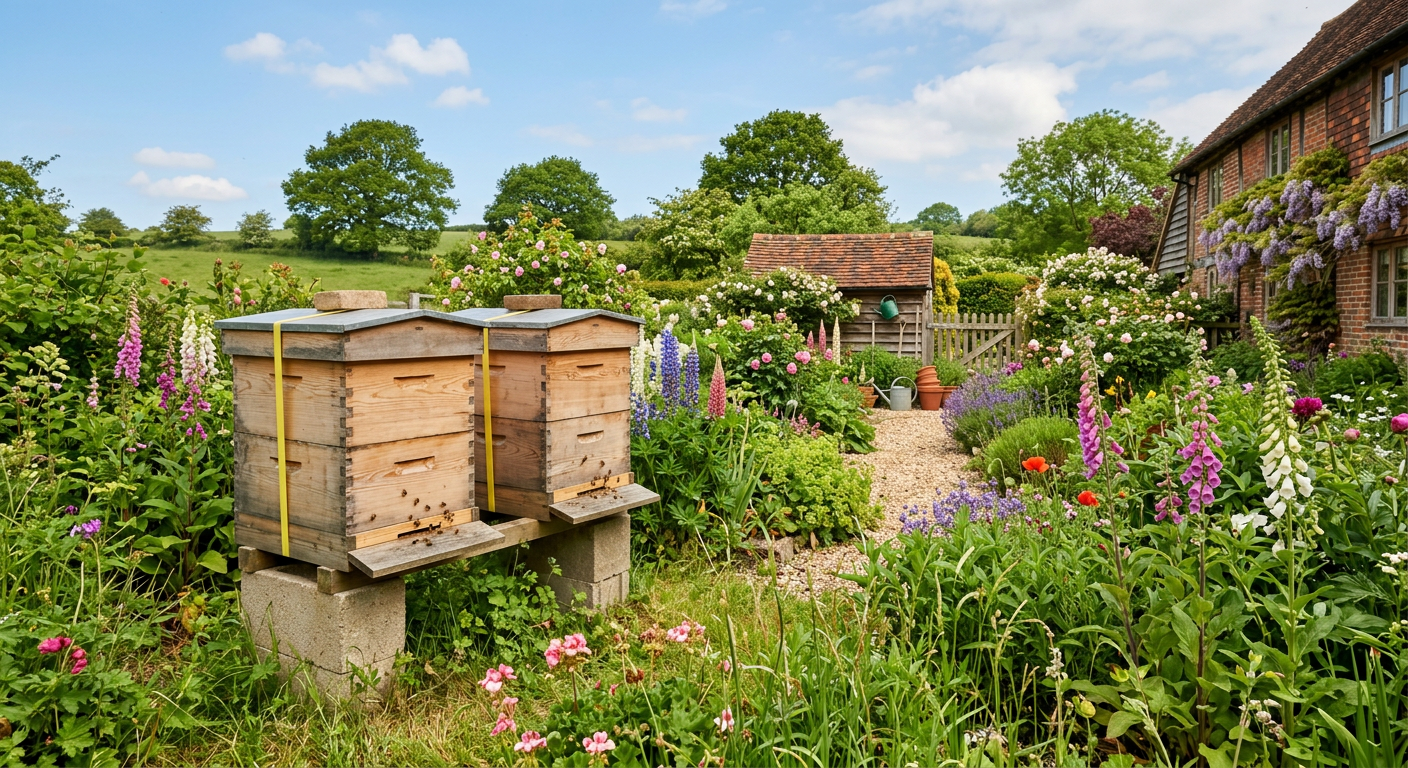
* Start with Two Hives: This is non-negotiable. It allows you to compare colony strength and gives you options if one hive becomes weak or queenless.
* Langstroth is King (for Beginners): It’s the most common hive type. This means parts are easy to find and most online advice applies to it.
* Focus on Health, Not Honey: Your goal in the first year is to build two strong, healthy colonies that can survive the winter. Any honey you get is a bonus.
* Budget Accordingly: Plan to spend between $500 and $800 for two hives, bees, and all the necessary gear. We spent about $650 our first year.
* Buy Early: Order your gear in the winter. This gives you time to assemble hives before your bees arrive in the spring.
—
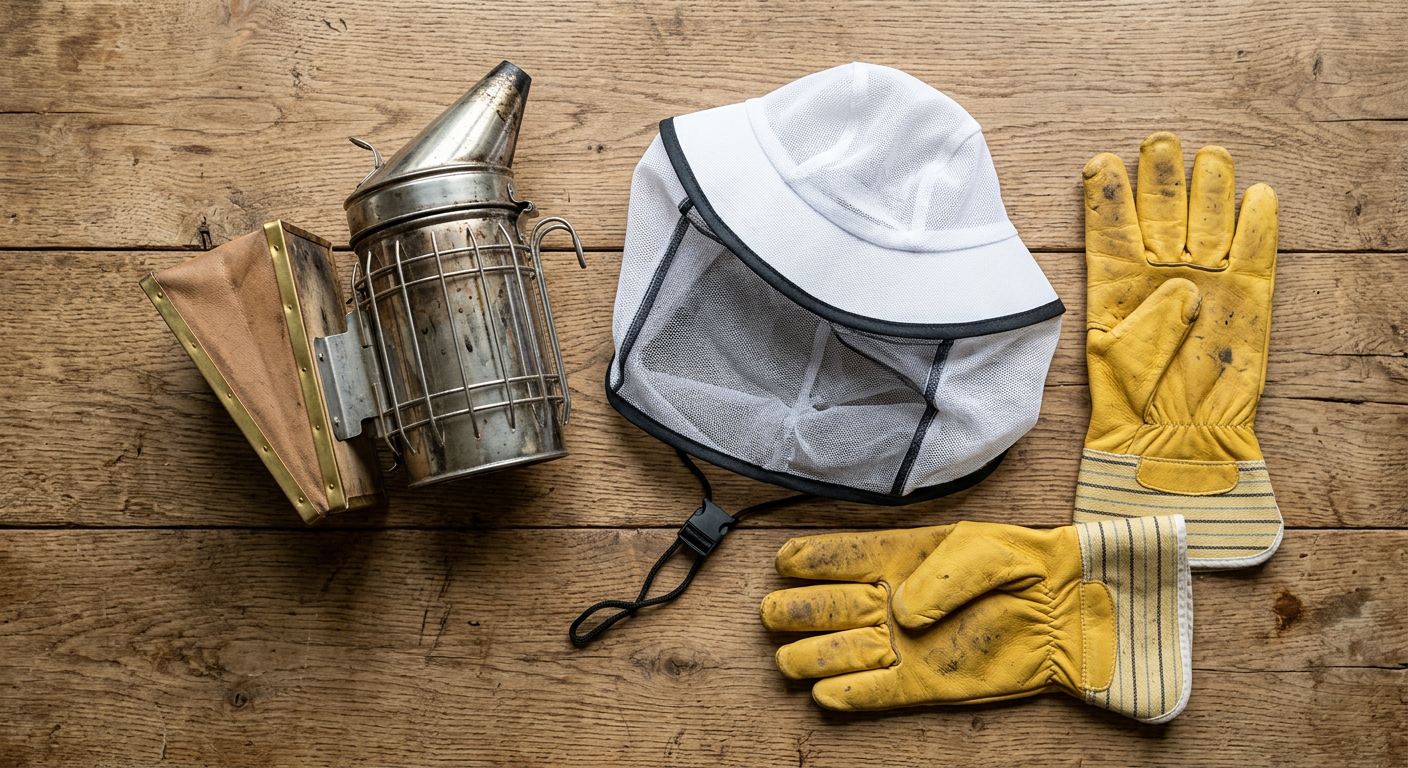
!Essential safety gear including a smoker and veil for a first year beekeeping equipment checklist.
The Absolute Bare Minimum: My First Year Beekeeping Equipment Checklist
When we decided to add bees to our homestead, I went down a rabbit hole of catalogs and websites. Gadgets everywhere. It was paralyzing. What do you actually need? Forget the fancy stuff. This is the rock-solid, first year beekeeping equipment checklist we stick to when we help new beeks get started.
It Starts with The Bees (and their house)
First, you need bees. We started with two “nucs,” which are small nucleus colonies with a laying queen and a few frames of brood. They cost us $175 each from a local apiary. Don’t worry about the bees just yet—you need to have their house ready first.
Here’s the basic shopping list:
* Two Complete Hives: We use standard 10-frame Langstroth hives.
* Protective Gear: A full suit is best for confidence.
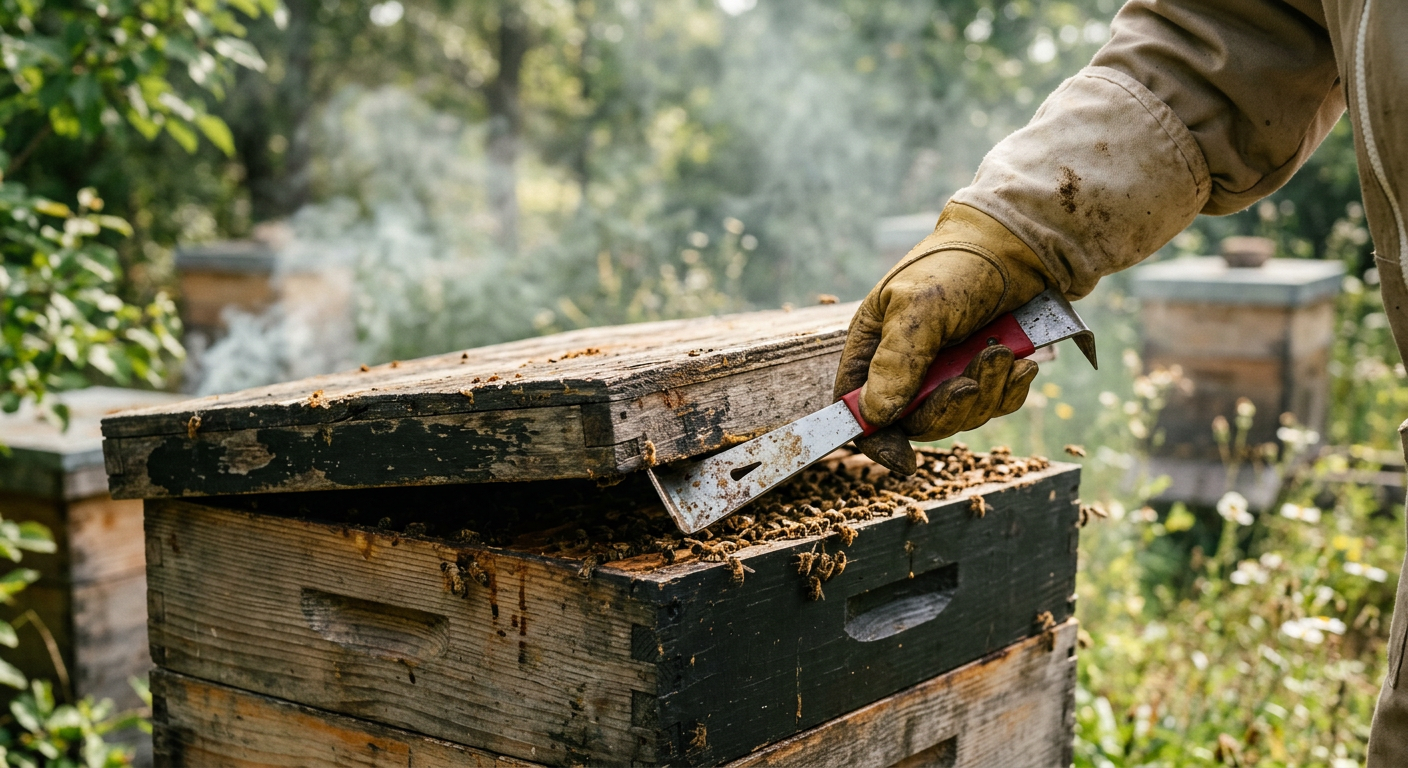
* Essential Tools: Smoker, hive tool, bee brush.
That’s it. That’s the core. Everything else is either for a later season or a “nice-to-have” that you can add as you go. Honestly, keeping the list of essential homesteading tools minimal is a skill in itself.
I remember seeing a “Beginner Kit” online for $189 that had everything. Seemed perfect. But the suit was just a flimsy jacket and the hive was only a single box. It wouldn’t have been enough for a colony to even get started properly. We ended up buying components, which saved us money and got us better quality where it counted.
Now, let’s break down exactly what “a complete hive” means.
—
Keep reading — this is where most people mess up by buying the wrong parts.
—
Breaking Down the Beehive: What Parts Do You Actually Need?
Langstroth hives are like building blocks. You add or remove boxes (called “supers”) as the colony grows or shrinks. For your first year, you need enough to give them room to grow a family and store food for winter.
Here’s what a single complete hive setup looks like:
* Hive Stand: Cinder blocks work perfectly. Gets the hive off the damp ground. Cost us $8 for four.
* Screened Bottom Board: This is the floor of the hive. The screen helps with ventilation and mite control.
* Two Deep Hive Bodies (Brood Boxes): These are the big boxes. This is where the queen lays her eggs and the baby bees are raised. You need two.
* Twenty Deep Frames & Foundation: Ten for each brood box. The foundation is a sheet of beeswax or plastic that guides the bees to build straight comb.
* Two Medium Hive Bodies (Honey Supers): These are the smaller, lighter boxes that go on top. This is where the bees will (hopefully) store extra honey.
* Twenty Medium Frames & Foundation: Ten for each honey super.
* Inner Cover: This sits on top of the uppermost box and provides ventilation and an insulating air gap.
* Telescoping Outer Cover: The roof. It telescopes down over the top of the hive to protect it from the elements.
Personal Story: We bought our first two hives as unassembled kits from Mann Lake to save about $50 per hive. It took my husband and I a full Saturday, a lot of wood glue, and a nail gun to put them together. I’ll be honest, the first one was a little crooked. But it taught us every single piece of the hive inside and out. It’s one of those fundamental homesteading skills beginners need, getting your hands dirty and building things yourself.
You need this full setup for EACH hive. So, double everything on this list if you’re following our advice to start with two.
Next, let’s talk about keeping those thousands of bees from stinging you.
Protective Gear: Don’t Learn This Lesson the Hard Way
I can’t say this enough: your confidence as a beekeeper is directly tied to how protected you feel. If you’re scared, you’ll be clumsy. If you’re clumsy, bees get angry. It’s a bad cycle.
Here’s what we use and recommend for your first year beekeeping equipment checklist for protection:
* Veil: The most important piece. We love the round-style veils because they keep the mesh far away from your face. I cheaped out on my first one—a flimsy pop-up veil attached to a jacket—and a determined bee managed to sting my eyelid through the mesh when I bent over. It swelled shut for two days. I spent $80 on a better ventilated suit with a structured veil the next week and have never regretted it.
* Suit or Jacket: For your first year, get a full suit. It’s hot, yes. But it provides total peace of mind. Jackets are fine, but you run the risk of a bee crawling up your back if you don’t tuck it in right. Our vented suits from Humble Bee are amazing and worth the investment.
Gloves: We started with thick goatskin leather gloves. They give great protection but you lose a lot of dexterity. After a year, we switched to nitrile gloves (two pairs, layered) for most inspections. You feel everything, but you will* get stung through them occasionally. Start with leather.
* Boots: Any pair of work boots that cover your ankles is fine. Just make sure to pull your suit legs down over them.
My husband, ever the tough guy, tried to do a quick inspection once with just a veil and t-shirt. He came running back to the house 30 seconds later with five stings on his arms. Lesson learned. Respect the bees, wear the gear.
Now you’ve got the house and the armor. What else?
—
!Two Langstroth beehives side-by-side as recommended in a first year beekeeping equipment checklist.
Tools of the Trade: Beyond the Hive & Suit
These are the tools you’ll have in your hand every time you visit the bee yard. Getting the right ones makes the job smoother and less stressful for you and the bees.
The Essentials You Can’t Live Without
We track all our homestead tasks, from building hives to planting dates, in a central place. Having a system is crucial when things get busy. We actually built one for ourselves, and it’s turned into the core of how we run our homestead now; you can check out how we organize our entire operation here. A good system prevents mistakes.
With these tools, you can perform 99% of the tasks you’ll need to do in your first year. Everything else is just an accessory.
💡 Pro Tips
We’ve made just about every mistake in the book. Here’s what we wish we knew from day one.
* Join a Local Bee Club BEFORE You Buy Anything. They’ll have recommendations for local suppliers and, most importantly, you can find a mentor. Having a real person to call is invaluable. Find a local club through the American Beekeeping Federation.
* Assemble & Paint in Winter. Unassembled kits save money, but they take time. Build them in January, then put 2-3 coats of good quality exterior paint on them. This protects the wood and makes them last for years. We learned this after our unpainted hives looked terrible after just one season.
* Light Your Smoker Correctly. Don’t just stuff it and light it. Start with a small bit of newspaper, get it burning, then slowly add your fuel (we use pine needles or wood shavings). Puff the bellows until you have cool, white smoke. Hot, black smoke just makes bees mad.
* Your First Year Harvest is a Strong Winter Cluster. Don’t get greedy. It’s tempting to pull honey, but the hive needs that food to survive its first winter. A hive that survives is worth way more than 20 pounds of honey.
* Plan Your Apiary Location. Bees need sun, especially in the morning, but appreciate some afternoon shade in hot climates. They also need a windbreak and to not be right on a main walking path. We made that mistake and had to move our hives mid-season. It was not fun.
⚠️ Beginner Mistakes to Avoid
* Buying Used Equipment. It’s tempting to save money, but old woodenware can harbor diseases like American Foulbrood, which can devastate your apiary and is impossible to get rid of without burning everything. Just don’t.
* Not Treating for Varroa Mites. This is the #1 killer of honeybee colonies. Varroa are parasitic mites that feed on bees and spread viruses. You MUST have a mite treatment plan. We lost our first-ever hive because we thought they were “fine” and didn’t test or treat. It was a silent, heartbreaking death over winter.
* Only Buying One Hive. I’ve said it three times, so you know it’s important. When one hive is struggling, you have no way to know if it’s your fault or just a weak hive. With two, you can compare and even give a frame of eggs from the strong hive to the weak one to help them raise a new queen.
* Over-inspecting. It’s exciting, but every time you open the hive, you set them back. In the spring, we inspect every 7-10 days. Once the honey flow starts, we might stretch it to 2-3 weeks. Don’t go in just to look. Have a purpose.
* Following a Homesteading On a Budget mindset for your bees. While frugality is a virtue on the homestead, bees are livestock. Trying to cut corners on their health or safety gear often costs way more in the long run. Proper management, like we constantly track with our digital homestead planner, is cheap insurance.
—
!Close-up of a hive tool being used, a key item on a first year beekeeping equipment checklist.
Frequently Asked Questions
How much does it cost to start beekeeping?
Real talk: plan on $500-$800. Our first year, it was about $650. This broke down to: $350 for two nucs (bees), $200 for two unassembled hive kits, and about $100 for a decent suit, gloves, and tools. You can find cheaper options, but this is a realistic budget for quality gear that will last.
What’s better: Langstroth, Top Bar, or Warre hives?
We tell all beginners to start with Langstroth. Why? They are standardized. Parts are everywhere. Almost all books and YouTube videos are about them. Top Bar and Warre hives are great, but they are a different management style and it’s harder to find resources and mentors.
When is the best time to buy my beekeeping equipment?
Order your woodenware (the hive boxes) in November or December. Companies often have sales, and it gives you plenty of time to assemble and paint everything before your bees arrive in April or May. Order your protective gear at the same time.
Can I get away with just a jacket and veil instead of a full suit?
You can, but we don’t recommend it for your first year. A single sting getting under the jacket can ruin your confidence. A full suit lets you relax, move slowly, and learn without fear. After a year or two, you can decide if you want to downgrade your protection.
Is it cheaper to build my own beehives?
If you have a woodshop and woodworking skills, yes, you can save money by building your own hives from plans. But for a beginner, the precision required is high. We find that buying unassembled kits is the best balance of cost savings and guaranteed-to-fit parts.
—
Getting into beekeeping felt like unlocking a new level of our homestead. It’s not just about the honey, which is an incredible bonus. It’s about participating in the rhythm of the seasons, watching this superorganism thrive, and seeing your fruit trees and garden explode with pollination. It’s a challenge, but one of the most rewarding we’ve ever taken on.
We post a lot of our day-to-day beekeeping moments and other homestead wins (and failures!) over on our Facebook page, come say hello!
What’s the one thing holding you back from starting with bees? Share it in the comments below, we’ve probably felt the same way!
📚 More From Our Homestead
- Start Urban Homesteading on a Small Balcony (Our Story)
- Start Homesteading with No Land? Here’s How We Did It
- Rural vs Urban Homesteading: A Real-World Guide
- How to Start Homesteading in a Suburban Backyard
- Homestead Budget: Plan From Scratch & Thrive!
Ready to Start Your Homestead Journey?
Free guides, checklists, and tools to help you build your dream homestead.
Leave a Reply