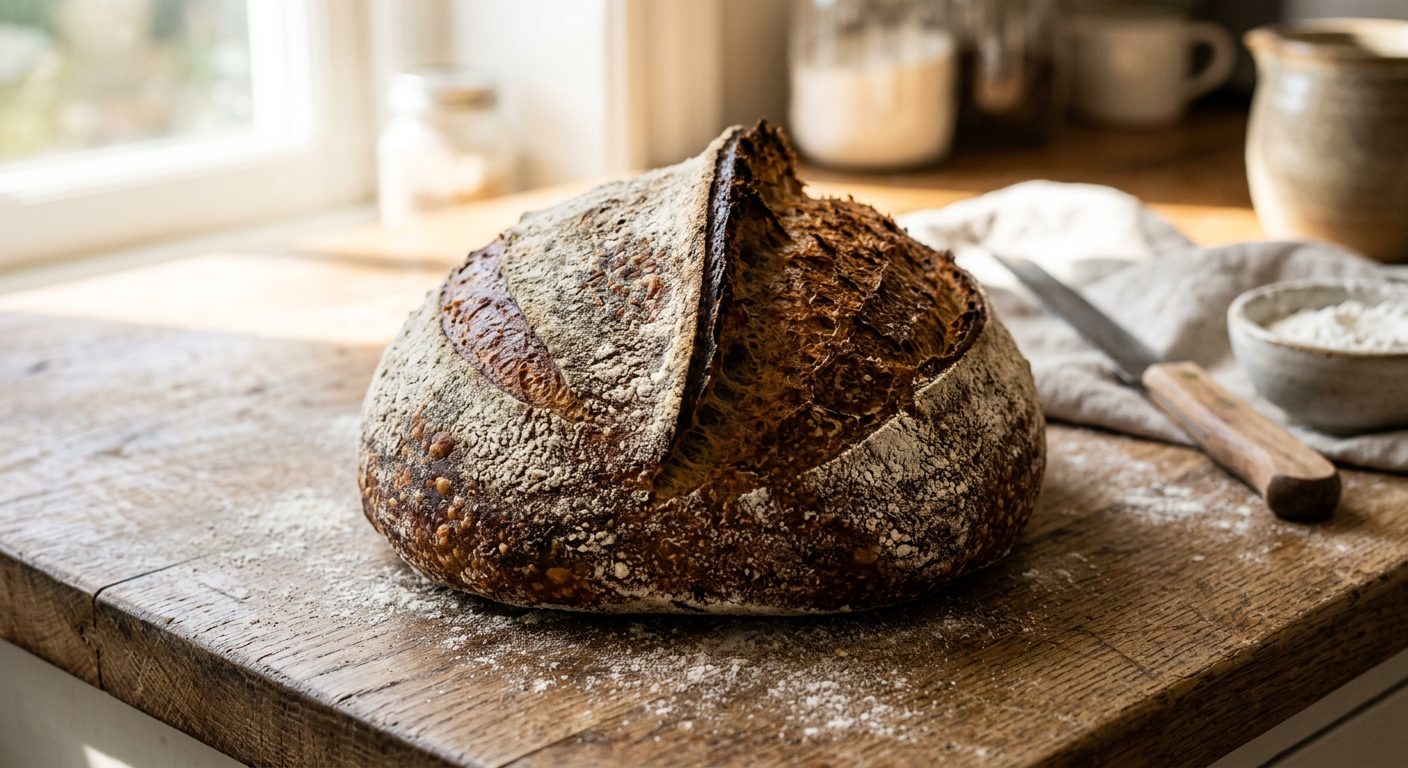
Tag: bees

  • My First Year Beekeeping Equipment Checklist (What We Used)

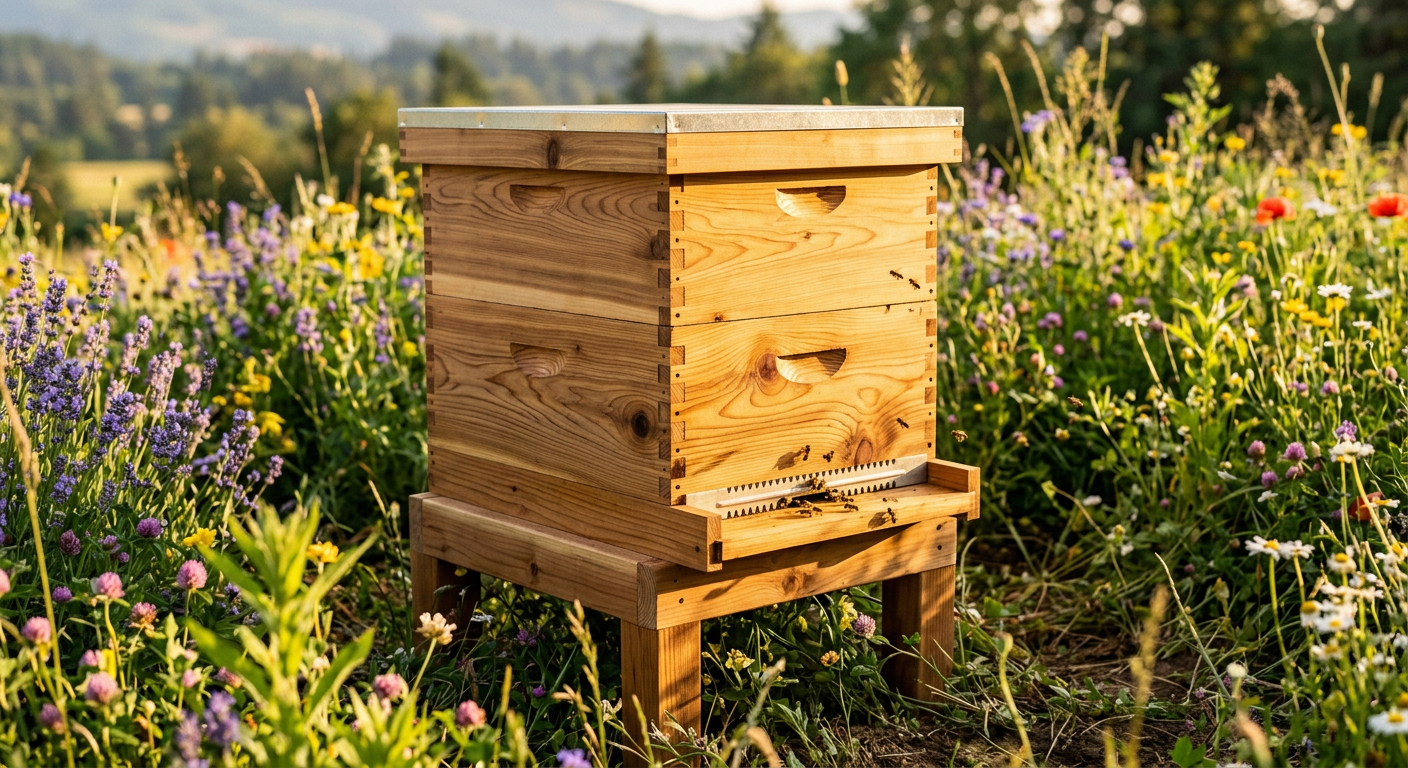
    !A new cedar Langstroth beehive in a field for a first year beekeeping equipment checklist.

    I’ll never forget the buzzing. It wasn’t just a sound; you feel it in your chest, a low hum of a thousand tiny engines vibrating through the wooden box. My hands were sweating inside brand new leather gloves, and the sweet, waxy smell of the hive mixed with the sharp scent of pine from the smoker was overwhelming. That first hive inspection, I was terrified and totally in love all at once.

    🎯 Quick Answer: For your first year, you need a full bee suit with a veil, gloves, a smoker, and a hive tool. You also need two complete Langstroth hives (bottom board, two deep brood boxes, two honey supers, inner/outer covers, and frames/foundation for all). Don’t start with just one hive.

    🔑 Key Takeaways

    * Safety First: Don’t ever cheap out on your protective gear. A good veil and suit are the difference between a learning experience and a trip to the ER.

    * Start with Two Hives: This is non-negotiable. It allows you to compare colony strength and gives you options if one hive becomes weak or queenless.

    * Langstroth is King (for Beginners): It’s the most common hive type. This means parts are easy to find and most online advice applies to it.

    * Focus on Health, Not Honey: Your goal in the first year is to build two strong, healthy colonies that can survive the winter. Any honey you get is a bonus.

    * Budget Accordingly: Plan to spend between $500 and $800 for two hives, bees, and all the necessary gear. We spent about $650 our first year.

    * Buy Early: Order your gear in the winter. This gives you time to assemble hives before your bees arrive in the spring.

    🌱 Start Your Homestead Plan →

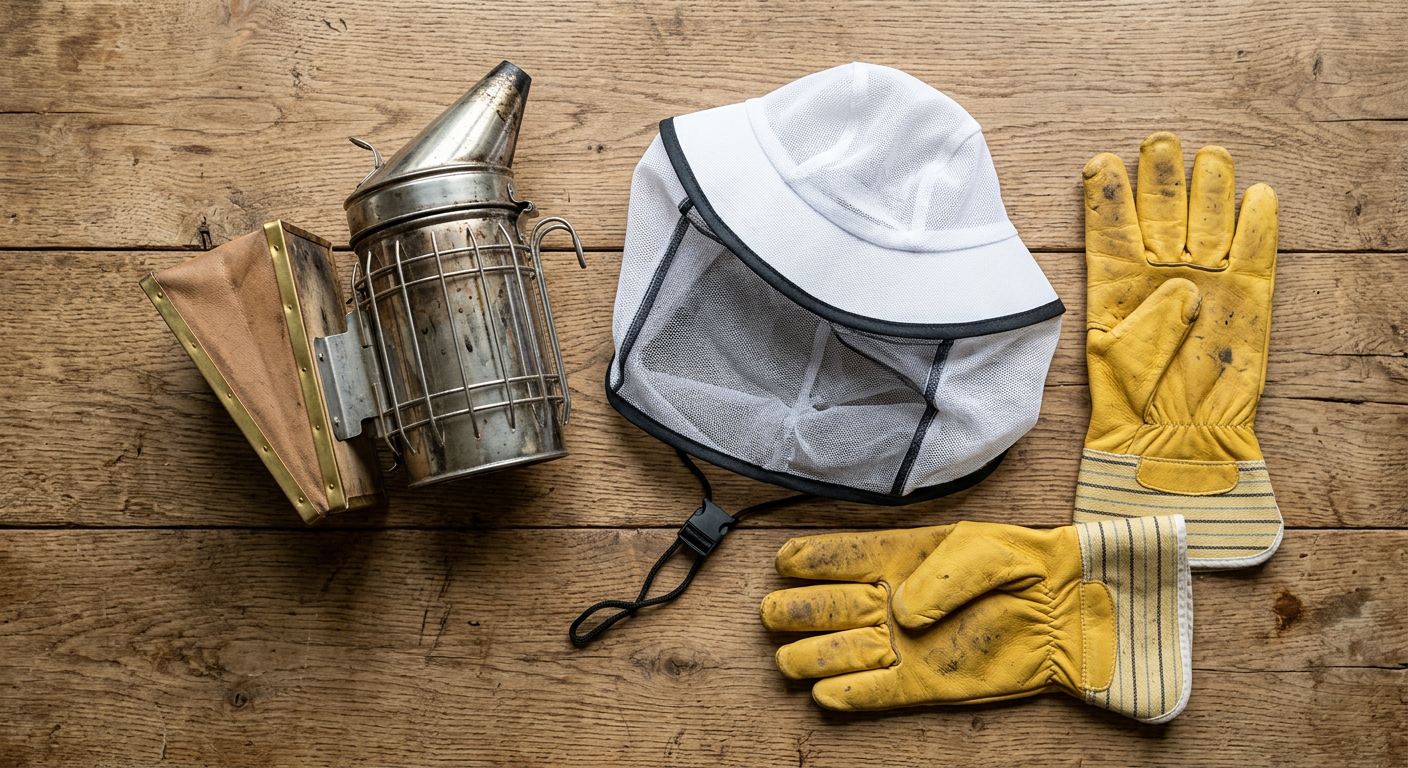
    !Essential safety gear including a smoker and veil for a first year beekeeping equipment checklist.

    The Absolute Bare Minimum: My First Year Beekeeping Equipment Checklist

    When we decided to add bees to our homestead, I went down a rabbit hole of catalogs and websites. Gadgets everywhere. It was paralyzing. What do you actually need? Forget the fancy stuff. This is the rock-solid, first year beekeeping equipment checklist we stick to when we help new beeks get started.

    It Starts with The Bees (and their house)

    First, you need bees. We started with two “nucs,” which are small nucleus colonies with a laying queen and a few frames of brood. They cost us $175 each from a local apiary. Don’t worry about the bees just yet—you need to have their house ready first.

    Here’s the basic shopping list:

    * Two Complete Hives: We use standard 10-frame Langstroth hives.

    * Protective Gear: A full suit is best for confidence.

    * Essential Tools: Smoker, hive tool, bee brush.

    That’s it. That’s the core. Everything else is either for a later season or a “nice-to-have” that you can add as you go. Honestly, keeping the list of essential homesteading tools minimal is a skill in itself.

    I remember seeing a “Beginner Kit” online for $189 that had everything. Seemed perfect. But the suit was just a flimsy jacket and the hive was only a single box. It wouldn’t have been enough for a colony to even get started properly. We ended up buying components, which saved us money and got us better quality where it counted.

    Now, let’s break down exactly what “a complete hive” means.

    Keep reading — this is where most people mess up by buying the wrong parts.

    Breaking Down the Beehive: What Parts Do You Actually Need?

    Langstroth hives are like building blocks. You add or remove boxes (called “supers”) as the colony grows or shrinks. For your first year, you need enough to give them room to grow a family and store food for winter.

    Here’s what a single complete hive setup looks like:

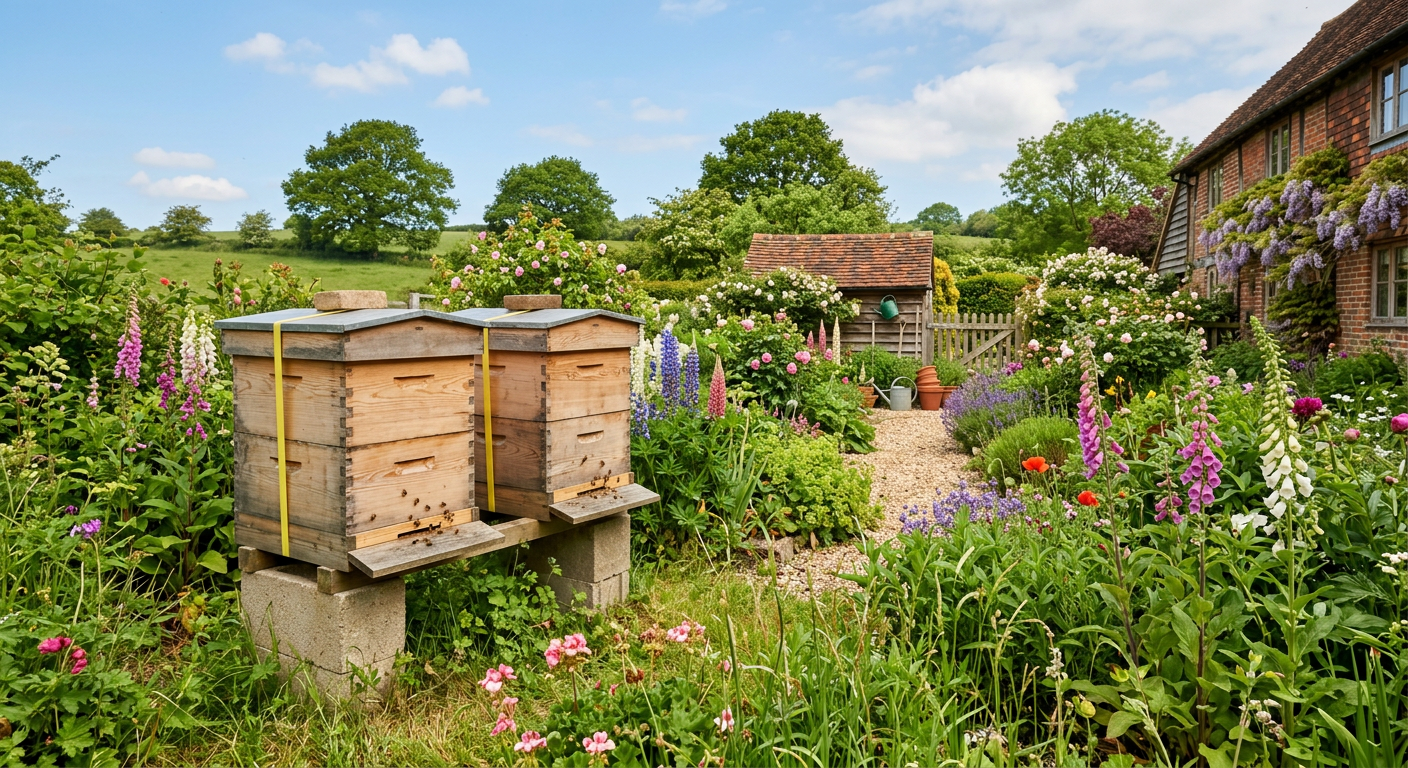
    * Hive Stand: Cinder blocks work perfectly. Gets the hive off the damp ground. Cost us $8 for four.

    * Screened Bottom Board: This is the floor of the hive. The screen helps with ventilation and mite control.

    * Two Deep Hive Bodies (Brood Boxes): These are the big boxes. This is where the queen lays her eggs and the baby bees are raised. You need two.

    * Twenty Deep Frames & Foundation: Ten for each brood box. The foundation is a sheet of beeswax or plastic that guides the bees to build straight comb.

    * Two Medium Hive Bodies (Honey Supers): These are the smaller, lighter boxes that go on top. This is where the bees will (hopefully) store extra honey.

    * Twenty Medium Frames & Foundation: Ten for each honey super.

    * Inner Cover: This sits on top of the uppermost box and provides ventilation and an insulating air gap.

    * Telescoping Outer Cover: The roof. It telescopes down over the top of the hive to protect it from the elements.

    Personal Story: We bought our first two hives as unassembled kits from Mann Lake to save about $50 per hive. It took my husband and I a full Saturday, a lot of wood glue, and a nail gun to put them together. I’ll be honest, the first one was a little crooked. But it taught us every single piece of the hive inside and out. It’s one of those fundamental homesteading skills beginners need, getting your hands dirty and building things yourself.

    You need this full setup for EACH hive. So, double everything on this list if you’re following our advice to start with two.

    Next, let’s talk about keeping those thousands of bees from stinging you.

    📋 Get the Beginner Checklist →

    Protective Gear: Don’t Learn This Lesson the Hard Way

    I can’t say this enough: your confidence as a beekeeper is directly tied to how protected you feel. If you’re scared, you’ll be clumsy. If you’re clumsy, bees get angry. It’s a bad cycle.

    Here’s what we use and recommend for your first year beekeeping equipment checklist for protection:

    * Veil: The most important piece. We love the round-style veils because they keep the mesh far away from your face. I cheaped out on my first one—a flimsy pop-up veil attached to a jacket—and a determined bee managed to sting my eyelid through the mesh when I bent over. It swelled shut for two days. I spent $80 on a better ventilated suit with a structured veil the next week and have never regretted it.

    * Suit or Jacket: For your first year, get a full suit. It’s hot, yes. But it provides total peace of mind. Jackets are fine, but you run the risk of a bee crawling up your back if you don’t tuck it in right. Our vented suits from Humble Bee are amazing and worth the investment.

    Gloves: We started with thick goatskin leather gloves. They give great protection but you lose a lot of dexterity. After a year, we switched to nitrile gloves (two pairs, layered) for most inspections. You feel everything, but you will* get stung through them occasionally. Start with leather.

    * Boots: Any pair of work boots that cover your ankles is fine. Just make sure to pull your suit legs down over them.

    My husband, ever the tough guy, tried to do a quick inspection once with just a veil and t-shirt. He came running back to the house 30 seconds later with five stings on his arms. Lesson learned. Respect the bees, wear the gear.

    Now you’ve got the house and the armor. What else?

    !Two Langstroth beehives side-by-side as recommended in a first year beekeeping equipment checklist.

    Tools of the Trade: Beyond the Hive & Suit

    These are the tools you’ll have in your hand every time you visit the bee yard. Getting the right ones makes the job smoother and less stressful for you and the bees.

    The Essentials You Can’t Live Without

  • A Smoker: This is not optional. Smoke doesn’t calm the bees; it makes them think there’s a forest fire. They gorge on honey in preparation to flee, which makes them less likely to fly out and sting you. We have a 4″x7″ stainless steel smoker. Spend the extra $10 to get one with a heat shield cage around it. I have the burn scars on my wrist from grabbing our first, cheaper one without thinking.
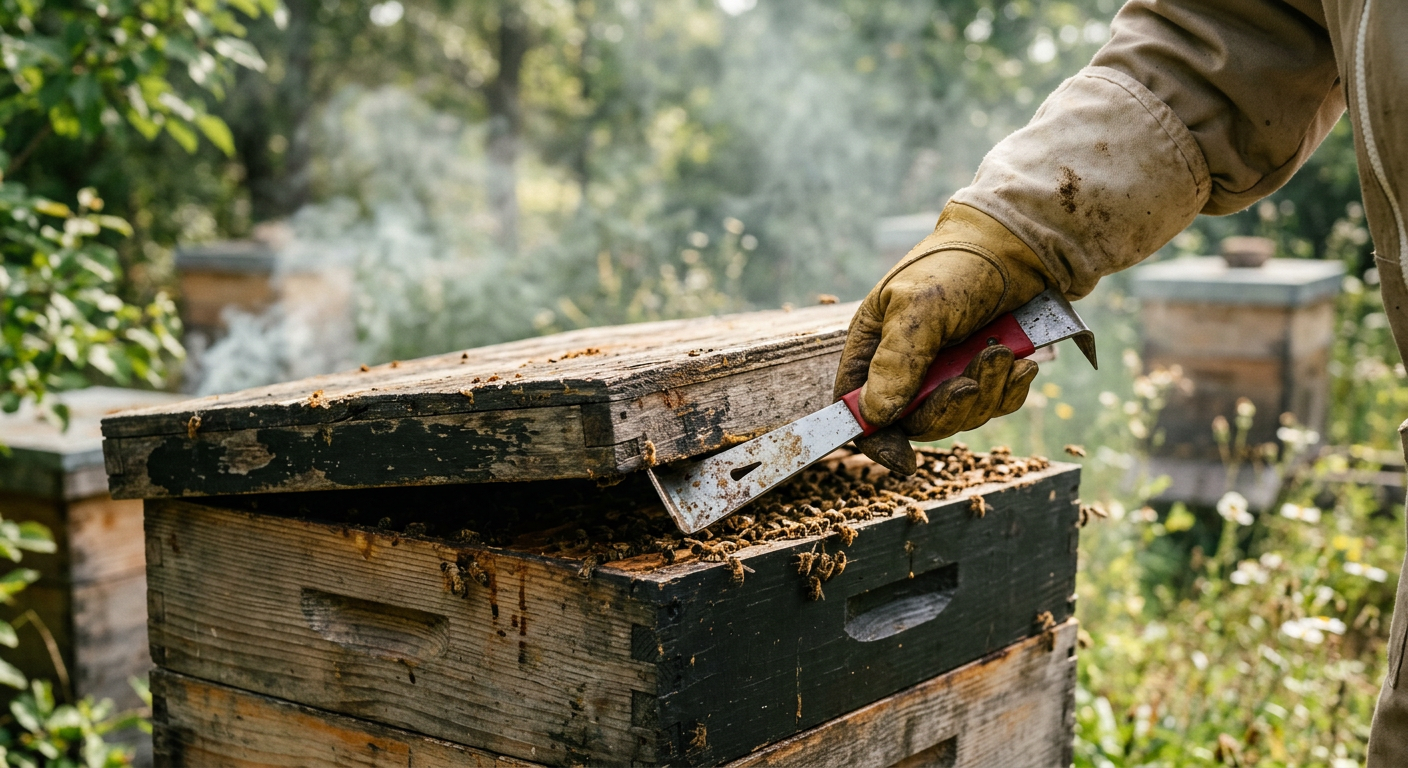
  • Hive Tool: It’s a mini crowbar for beekeepers. Bees seal everything in their hive with a sticky substance called propolis. You need a hive tool to pry open the hive, separate boxes, and lift out frames. Get two. You will lose one in the grass. I promise.
  • Bee Brush: A very soft-bristled brush used to gently move bees off a frame. You need this when you’re looking for the queen or getting ready to harvest honey. Don’t use your glove—you’ll crush bees and make the others angry.
  • We track all our homestead tasks, from building hives to planting dates, in a central place. Having a system is crucial when things get busy. We actually built one for ourselves, and it’s turned into the core of how we run our homestead now; you can check out how we organize our entire operation here. A good system prevents mistakes.

    With these tools, you can perform 99% of the tasks you’ll need to do in your first year. Everything else is just an accessory.

    💡 Pro Tips

    We’ve made just about every mistake in the book. Here’s what we wish we knew from day one.

    * Join a Local Bee Club BEFORE You Buy Anything. They’ll have recommendations for local suppliers and, most importantly, you can find a mentor. Having a real person to call is invaluable. Find a local club through the American Beekeeping Federation.

    * Assemble & Paint in Winter. Unassembled kits save money, but they take time. Build them in January, then put 2-3 coats of good quality exterior paint on them. This protects the wood and makes them last for years. We learned this after our unpainted hives looked terrible after just one season.

    * Light Your Smoker Correctly. Don’t just stuff it and light it. Start with a small bit of newspaper, get it burning, then slowly add your fuel (we use pine needles or wood shavings). Puff the bellows until you have cool, white smoke. Hot, black smoke just makes bees mad.

    * Your First Year Harvest is a Strong Winter Cluster. Don’t get greedy. It’s tempting to pull honey, but the hive needs that food to survive its first winter. A hive that survives is worth way more than 20 pounds of honey.

    * Plan Your Apiary Location. Bees need sun, especially in the morning, but appreciate some afternoon shade in hot climates. They also need a windbreak and to not be right on a main walking path. We made that mistake and had to move our hives mid-season. It was not fun.

    ⚠️ Beginner Mistakes to Avoid

    * Buying Used Equipment. It’s tempting to save money, but old woodenware can harbor diseases like American Foulbrood, which can devastate your apiary and is impossible to get rid of without burning everything. Just don’t.

    * Not Treating for Varroa Mites. This is the #1 killer of honeybee colonies. Varroa are parasitic mites that feed on bees and spread viruses. You MUST have a mite treatment plan. We lost our first-ever hive because we thought they were “fine” and didn’t test or treat. It was a silent, heartbreaking death over winter.

    * Only Buying One Hive. I’ve said it three times, so you know it’s important. When one hive is struggling, you have no way to know if it’s your fault or just a weak hive. With two, you can compare and even give a frame of eggs from the strong hive to the weak one to help them raise a new queen.

    * Over-inspecting. It’s exciting, but every time you open the hive, you set them back. In the spring, we inspect every 7-10 days. Once the honey flow starts, we might stretch it to 2-3 weeks. Don’t go in just to look. Have a purpose.

    * Following a Homesteading On a Budget mindset for your bees. While frugality is a virtue on the homestead, bees are livestock. Trying to cut corners on their health or safety gear often costs way more in the long run. Proper management, like we constantly track with our digital homestead planner, is cheap insurance.

    !Close-up of a hive tool being used, a key item on a first year beekeeping equipment checklist.

    Frequently Asked Questions

    How much does it cost to start beekeeping?

    Real talk: plan on $500-$800. Our first year, it was about $650. This broke down to: $350 for two nucs (bees), $200 for two unassembled hive kits, and about $100 for a decent suit, gloves, and tools. You can find cheaper options, but this is a realistic budget for quality gear that will last.

    What’s better: Langstroth, Top Bar, or Warre hives?

    We tell all beginners to start with Langstroth. Why? They are standardized. Parts are everywhere. Almost all books and YouTube videos are about them. Top Bar and Warre hives are great, but they are a different management style and it’s harder to find resources and mentors.

    When is the best time to buy my beekeeping equipment?

    Order your woodenware (the hive boxes) in November or December. Companies often have sales, and it gives you plenty of time to assemble and paint everything before your bees arrive in April or May. Order your protective gear at the same time.

    Can I get away with just a jacket and veil instead of a full suit?

    You can, but we don’t recommend it for your first year. A single sting getting under the jacket can ruin your confidence. A full suit lets you relax, move slowly, and learn without fear. After a year or two, you can decide if you want to downgrade your protection.

    Is it cheaper to build my own beehives?

    If you have a woodshop and woodworking skills, yes, you can save money by building your own hives from plans. But for a beginner, the precision required is high. We find that buying unassembled kits is the best balance of cost savings and guaranteed-to-fit parts.

    Getting into beekeeping felt like unlocking a new level of our homestead. It’s not just about the honey, which is an incredible bonus. It’s about participating in the rhythm of the seasons, watching this superorganism thrive, and seeing your fruit trees and garden explode with pollination. It’s a challenge, but one of the most rewarding we’ve ever taken on.

    We post a lot of our day-to-day beekeeping moments and other homestead wins (and failures!) over on our Facebook page, come say hello!

    What’s the one thing holding you back from starting with bees? Share it in the comments below, we’ve probably felt the same way!

    🔧 See Recommended Tools →


    📚 More From Our Homestead

    Ready to Start Your Homestead Journey?

    Free guides, checklists, and tools to help you build your dream homestead.
    Explore Free Resources →

  • How to Start Homesteading in a Suburban Backyard

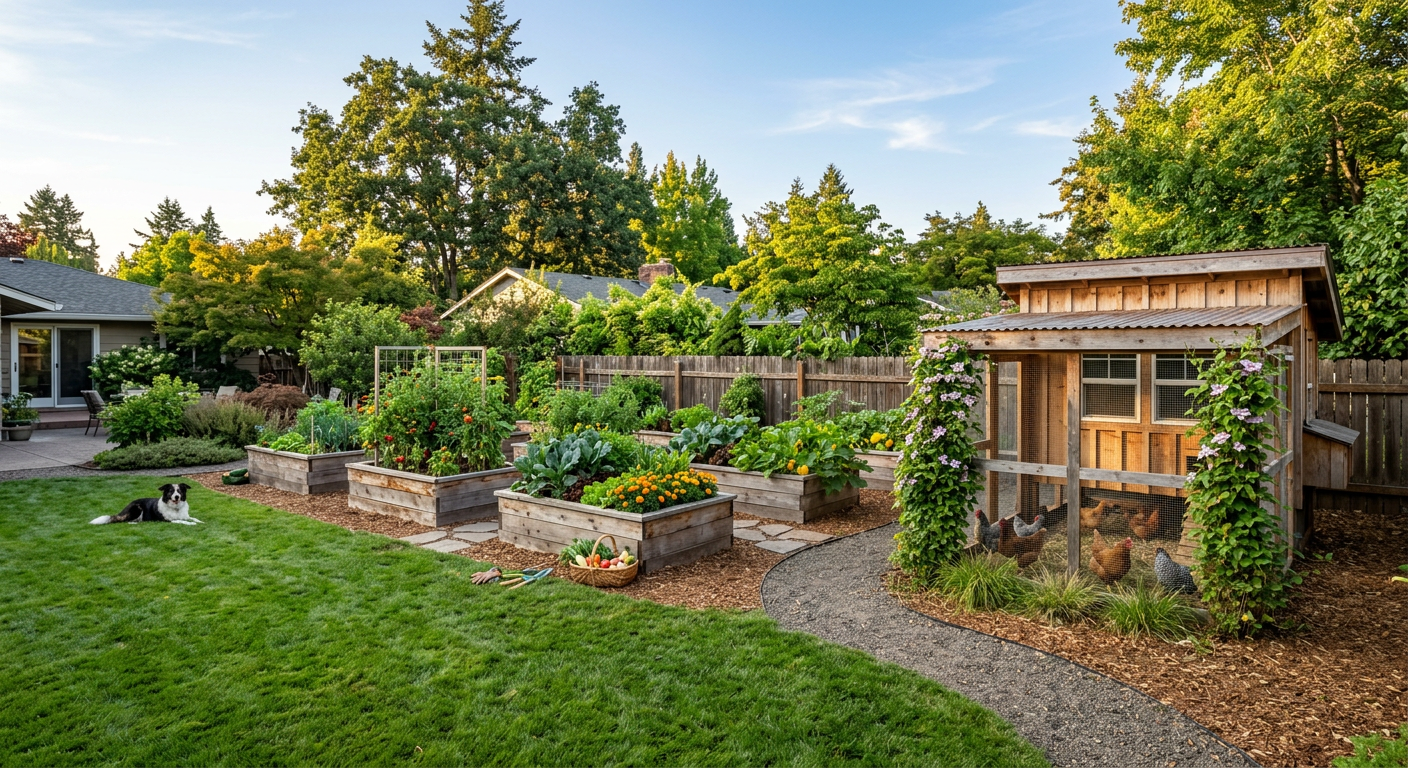
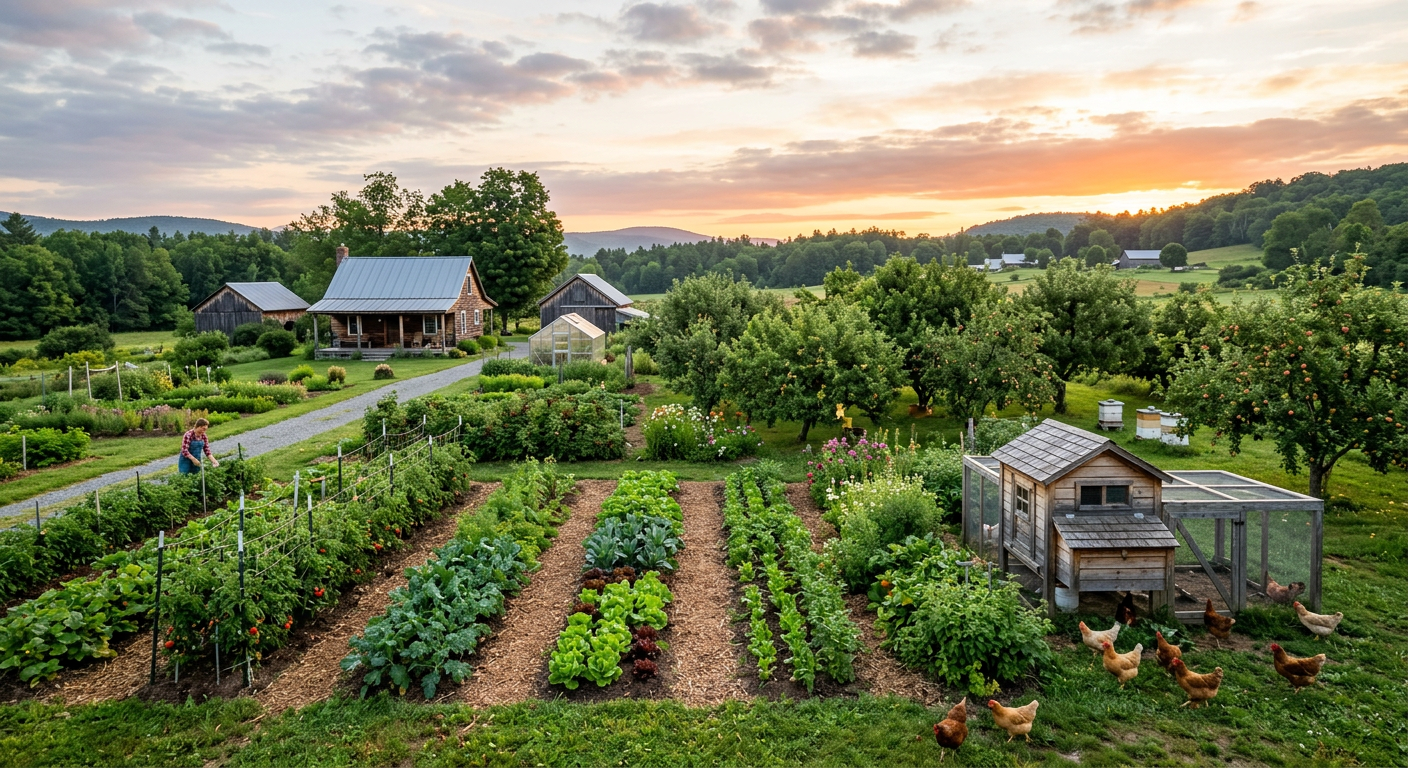
    !A lush garden showing how to start homesteading in a suburban backyard with raised beds and a chicken coop.

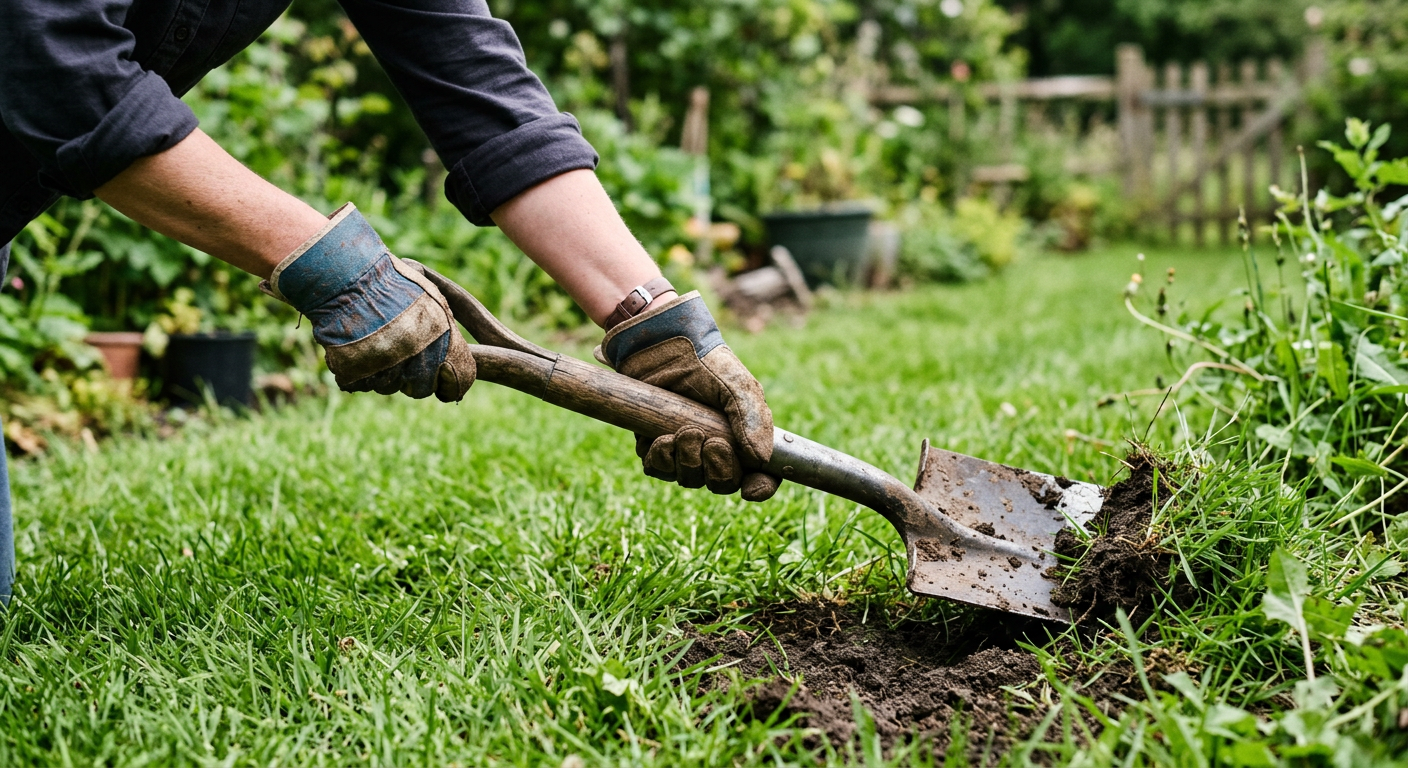
    I remember staring out at our perfect, green, quarter-acre of Kentucky bluegrass. It cost us about $60 a month to water and fertilize, and all it produced was… more grass for my husband to mow. That’s the sunny afternoon I grabbed a shovel, walked to the middle of the yard, and plunged it into the sod, much to his confusion. That perfectly useless lawn was about to become our first real step toward self-reliance.

    🎯 Quick Answer: The best way to learn how to start homesteading in a suburban backyard is to start small and focus on high-impact projects. Replace lawn with raised garden beds, check local laws for keeping small livestock like chickens or quail, and master one preservation skill like canning or dehydrating. It’s about using what you have, right where you are.

    🔑 Key Takeaways

    * Laws First, Shovel Second: Before you buy a single seed or chick, you MUST understand your local ordinances and any HOA rules. This is non-negotiable.

    * Start with Soil: The success of your garden hinges entirely on the quality of your soil. Investing in good compost is more important than anything else.

    * Think Small & Dense: Choose plants and animals that produce a lot in a small footprint. Vertical gardening and smaller livestock breeds are your best friends.

    * Master One Skill at a Time: Don’t try to learn gardening, chicken-keeping, and cheesemaking all in one season. You’ll burn out. Pick one, get good at it, then add another.

    * Focus on Food: A suburban homestead is about productivity. Every project should contribute to your pantry, reduce your grocery bill, or improve your land.

    🌱 Start Your Homestead Plan →

    !A person using a shovel to learn how to start homesteading in a suburban backyard by removing lawn.

    Step 1: The Legal Lowdown (Don’t Get Fined!)

    I can’t stress this enough: your journey into suburban homesteading begins at your town hall’s website, not the garden center. When we decided to get chickens, I was so excited I built the coop before I read the fine print. I discovered our coop had to be 25 feet from any property line, not the 15 I had planned for. We had to move the entire thing. It was a sweaty, frustrating, and completely avoidable weekend of work.

    Where to Look for Rules

  • City/Town Ordinances: Go to your municipality’s website and search for terms like “zoning code,” “animal ordinances,” or “fowl.” Look for rules on setbacks (how far structures must be from property lines), a maximum number of animals, and whether roosters are allowed (they usually aren’t).
  • Homeowner’s Association (HOA): If you have an HOA, this is your first and most important stop. They have rules about everything from garden bed appearance to clotheslines to sheds. Get a copy of the covenants and read them. A friend of ours spent $1,500 on a beautiful greenhouse only to get a letter from his HOA demanding he tear it down because it wasn’t an “approved structure.”
  • Don’t be discouraged by this step. Knowing the rules gives you a framework to be creative within. For great general guidance, check out university extension resources like Penn State Extension’s articles on urban agriculture.

    Knowing your boundaries is the first step to building something incredible within them.

    Step 2: Your First Garden – Small But Mighty

    Forget plowing up your entire yard. Your first garden should be manageable. We started with two 4×8 foot raised beds. We spent about $160 on untreated pine boards, screws, and hardware cloth for the bottom to keep out the gophers. The biggest expense, and our biggest mistake, was the soil. We bought cheap, bagged “garden soil” and our first year’s harvest was pathetic.

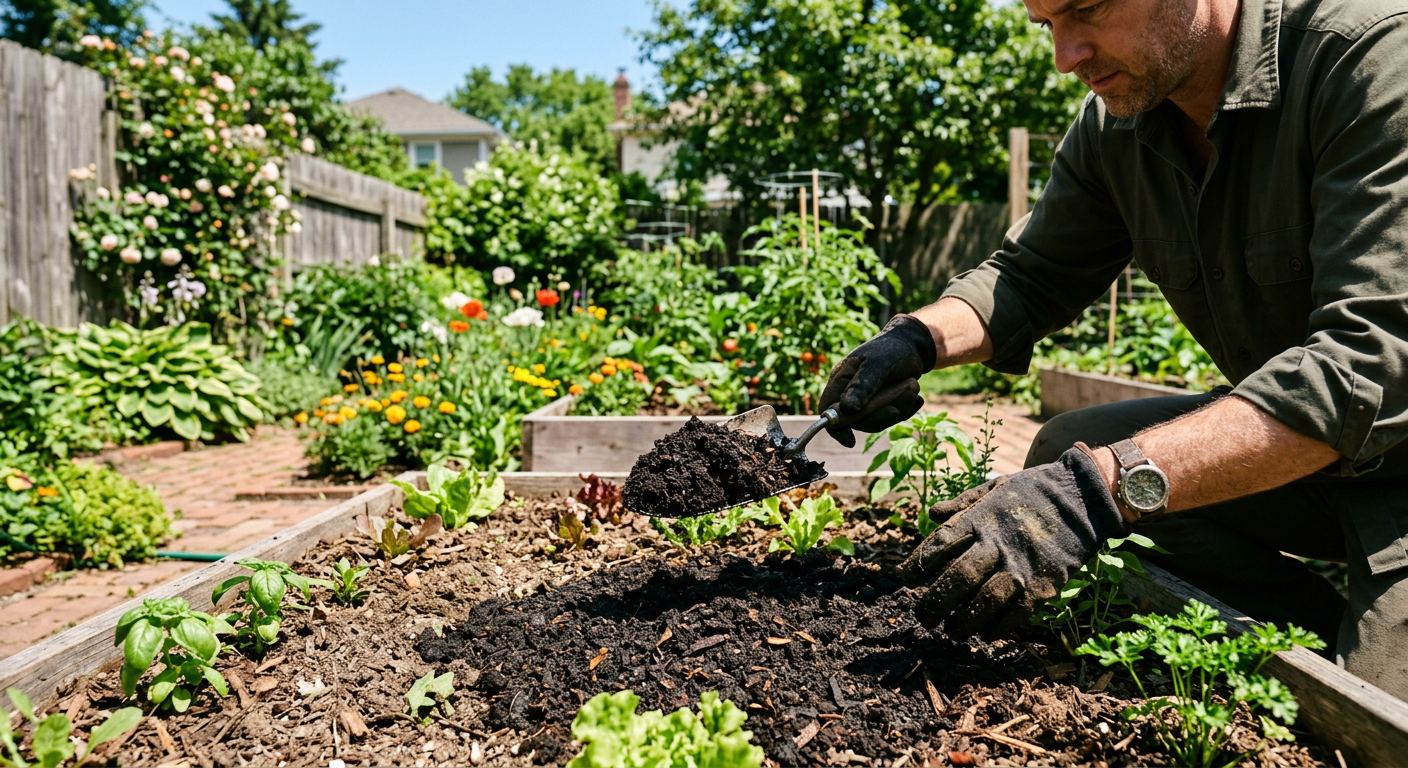
    The lesson: Your plants don’t eat dirt; they eat the nutrients in the dirt. Now, we make our own compost and supplement with high-quality organic compost from a local landscape supply. It costs more upfront—about $70 per cubic yard—but the return in produce is tenfold.

    What to Plant First

    Learning how to start a vegetable garden in a small backyard for beginners is a core skill. It’s also where you see the first tangible results of your efforts. Even if you just have a patio, a few well-managed pots can provide a surprising amount of food. Thinking through these details is so important, which is why a solid plan makes all the difference. We built our homestead plan over many winter nights, sketching out ideas and making lists; you can see how we structure our homesteading plans to stay organized and focused.

    Focus on what your family actually eats. Planting 10 kale plants is useless if nobody likes kale. Start there.

    📋 Get the Beginner Checklist →

    Step 3: Considering Small Livestock (Yes, in the ‘Burbs!)

    This is where many people think, “No way I can do that.” You absolutely can. How to start homesteading in a suburban backyard often includes a small flock or herd! It’s the step that makes your little ecosystem feel truly alive. For most suburbs, your best bets are chickens or quail.

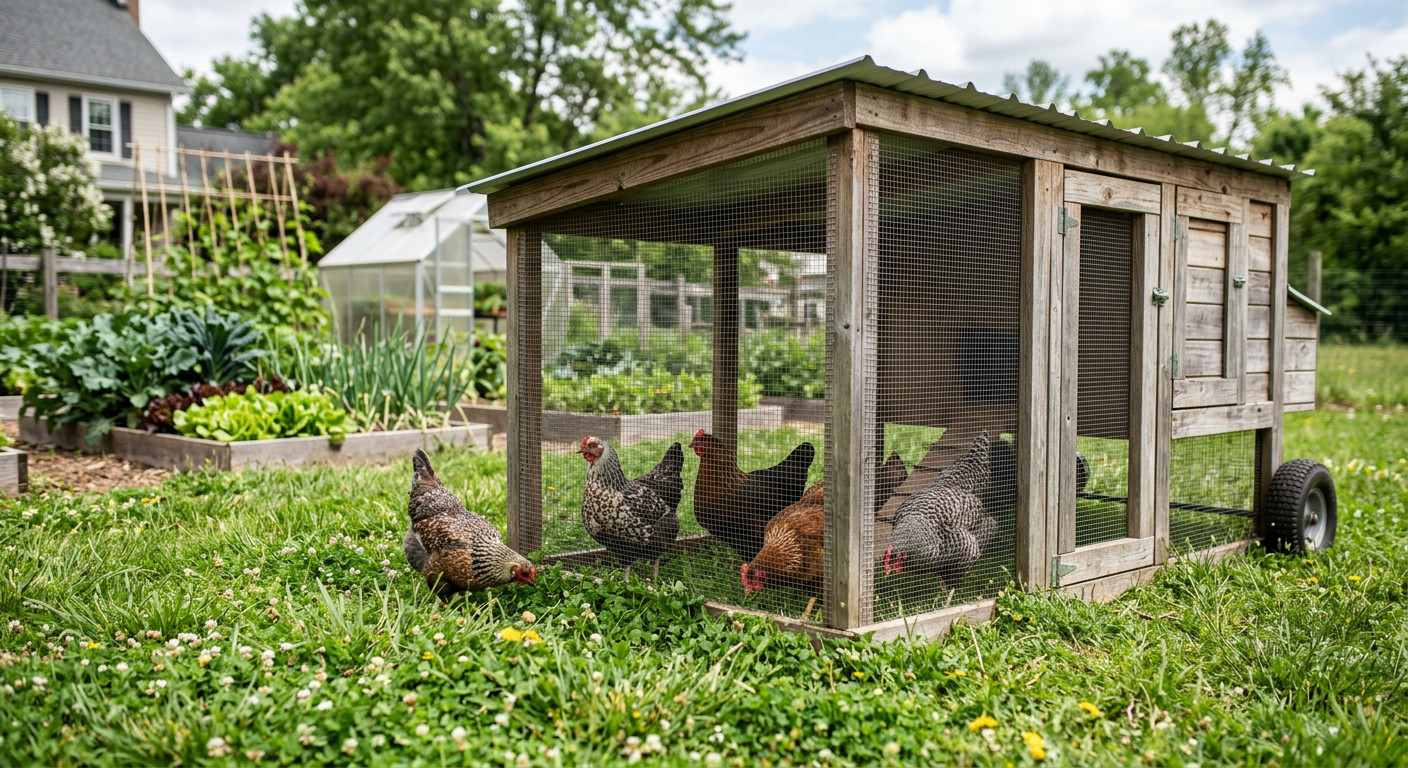
    We started with six Buff Orpington chicks from the local Tractor Supply. They cost about $4 each. Our first real coop was a $350 kit that we assembled and reinforced. That first warm egg I collected on a chilly spring morning… it was a game-changer. Suddenly, we weren’t just gardeners; we were providing our own protein.

    Chickens vs. Quail

    * Chickens: The classic choice. They provide eggs and fantastic fertilizer. They’re personable and great for pest control. The downside: they need more space, can be noisier, and are more heavily regulated. Dig into the pros and cons of raising backyard chickens before you commit.

    * Coturnix Quail: The silent ninjas of suburban livestock. They are quiet, require very little space (you can keep a dozen in a large rabbit hutch), and start laying tiny, delicious eggs at just 8 weeks old. They are often exempt from “poultry” rules because they are considered game birds.

    Whichever you choose, start with a small number. You can always grow your flock later.

    Keep reading — this next part is what separates a garden hobbyist from a true homesteader.

    !Rich brown soil and compost in a garden for those learning how to start homesteading in a suburban backyard.

    Step 4: Level Up with Homestead Skills

    Growing food is only half the battle. A zucchini plant doesn’t care if you’re on vacation; it’s going to produce an avalanche of zucchini in August whether you’re ready or not. Learning what to do with that abundance is the key.

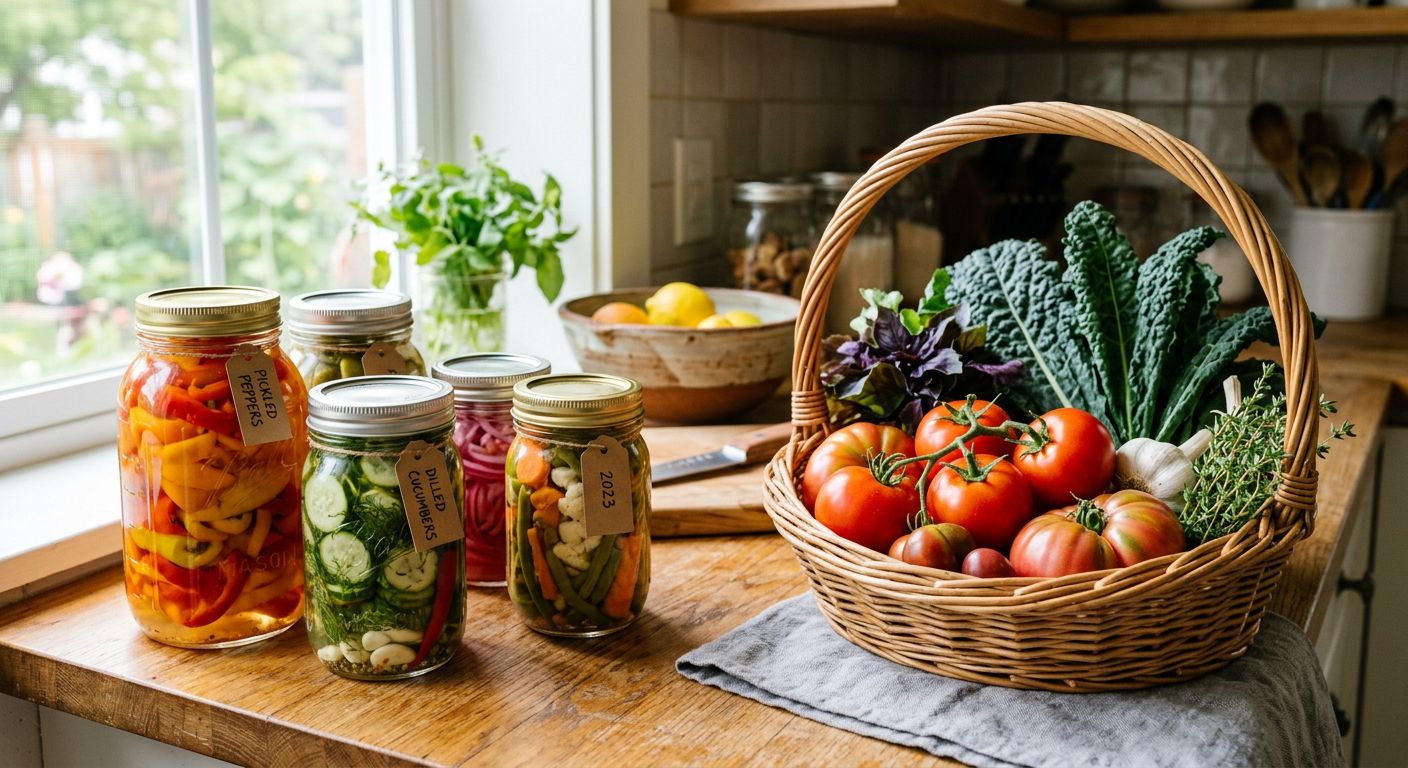
    This is where you learn skills that truly build resilience. Our first year, we were so overwhelmed with tomatoes that we gave buckets of them away. The next year, I learned to can. I’ll never forget the satisfying pop of the first 12 jars of pasta sauce sealing on the counter. We had just captured summer in a jar. That sauce, which we ate in the dead of winter, tasted like pure victory. It was a tangible result of all our hard work.

    Key Skills for the Suburban Homesteader:

  • Composting: Turn your kitchen scraps and yard waste into black gold for your garden. It’s the heart of a closed-loop system.
  • Food Preservation: Start with one method. Freezing is easiest. Water-bath canning is great for high-acid foods like pickles and tomatoes. Dehydrating is perfect for herbs and fruit.
  • Basic DIY Repairs: Things break. Coops, trellises, tools. Knowing how to make simple repairs with a drill and a saw will save you a ton of money and frustration. For us, building a homestead isn’t just a list of projects; it’s a complete mindset shift, a whole system of thinking. This is why we rely on tools like the Homestead OS to manage everything from our planting schedule to our winter pantry inventory.
  • These skills are what transform your backyard from a food production space into a functioning homestead.

    🔧 See Recommended Tools →

    💡 Pro Tips

    * Go Vertical. Use trellises, cattle panels, and wall planters. We grow 50+ pounds of cucumbers on a single 8-foot-long arched cattle panel trellis that we walk under. It doubles your growing space for vining plants.

    * Befriend Your Neighbors. The first time we harvested eggs, we walked a half-dozen over to our neighbors on each side. Now, instead of complaining about the occasional clucking, they ask when we’ll have more eggs to spare. A little generosity goes a long way.

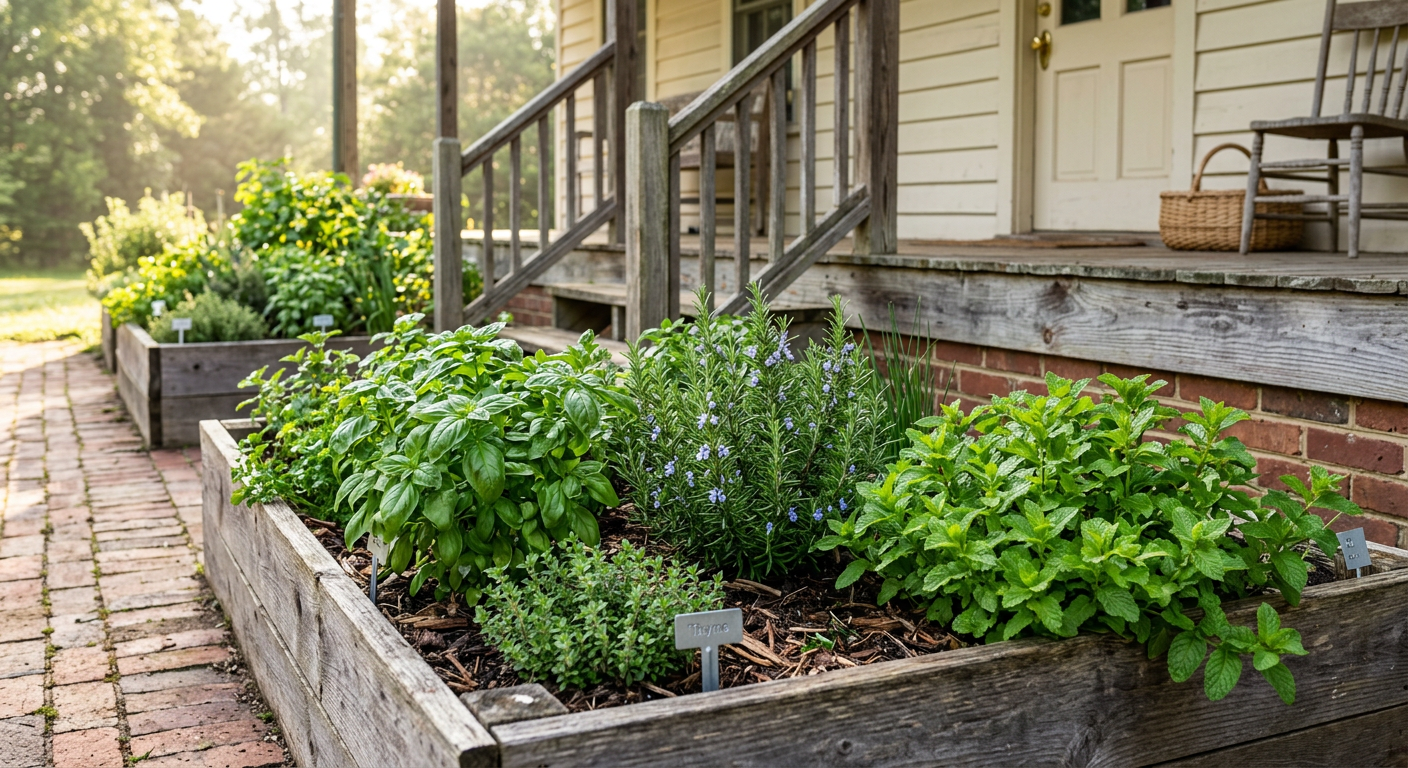
    * Observe Your Land. Don’t just work it, watch it. Where does the morning sun hit first? Where does water pool after a rain? That shady spot behind the garage is perfect for growing mushrooms. The hot, dry strip by the driveway is where your rosemary will thrive. Your yard will tell you what it needs.

    * Plant Perennials. Plant things that come back year after year. Asparagus, rhubarb, fruit trees, and berry bushes are an investment that pays dividends for a decade or more.

    ⚠️ Beginner Mistakes to Avoid

    The “All-In” Burnout: We tried it. Our second spring, we decided to get bees, double our garden space, and* get meat rabbits all at once. We were exhausted, stressed, and by July, we were failing at all three. Pick ONE new big project per year. That’s it.

    * Ignoring the HOA (Again): A friend of mine got a violation notice for his compost pile, which was deemed “unslightly.” He had to spend $200 on a fancy tumbler-style bin to appease the board. Read the rules.

    * Buying Cheap Tools: Our first shovel was a $15 piece of junk from a big box store. The handle snapped the first time I tried to pry a rock out of our clay soil. A good tool feels like an extension of your body. We have a post on the few essential homesteading tools you should actually buy first.

    * Forgetting to Mulch: Leaving your soil bare is an invitation for weeds and evaporation. We lost a whole bed of carrots one year during a hot week because we didn’t mulch. A thick layer of straw, wood chips, or shredded leaves is like a blanket for your soil.

    !Canned vegetables and fresh produce from a project on how to start homesteading in a suburban backyard.

    Frequently Asked Questions

    How much land do you need for a suburban homestead?

    You can start homesteading on a balcony with a few pots of herbs. We’re on a 1/4 acre lot, and much of that is the house and driveway. It’s not about acreage; it’s about a mindset of production and resourcefulness. Don’t let your lot size stop you.

    Is homesteading in a suburban backyard expensive?

    It can be, but it doesn’t have to. You can start a container garden for under $50. Our first two raised beds cost about $250 total (lumber and quality soil). Our first chicken setup was about $400 (coop, feeders, chicks). The key is that these are investments that pay you back in food and lower grocery bills. It’s a shift from being a consumer to a producer.

    What are the easiest things to grow for beginners?

    Herbs (mint, oregano, chives), loose-leaf lettuce, radishes, bush beans, and zucchini (be careful, you’ll have more than you know what to do with!). These all provide quick, rewarding harvests and build your confidence.

    Can I have chickens in my suburban backyard?

    Often, yes! Many cities allow a small number of hens (typically 3-6) but no roosters. Check your local ordinances. Some cities have specific requirements for coop placement and cleanliness. Chickens are surprisingly quiet, with their gentle clucking being much softer than a barking dog.

    Homesteading isn’t an all-or-nothing deal defined by owning 40 acres and a milk cow. It’s a spectrum.

    It’s choosing to plant a tomato plant where there was once a useless shrub. It’s the quiet satisfaction of cracking your own eggs into a skillet. It’s about taking one small piece of your world and making it more productive, more resilient, and more your own.

    You can do this. Start with one thing. A pot of basil. A single raised bed. The journey starts with that first shovelful of dirt.

    For more behind-the-scenes stories and day-to-day life on our little homestead, be sure to follow us on Facebook!

    What’s the ONE thing you’d love to start producing in your own backyard? Let me know in the comments below!


    📚 More From Our Homestead

    Ready to Start Your Homestead Journey?

    Free guides, checklists, and tools to help you build your dream homestead.
    Explore Free Resources →

  • How to Start Urban Homesteading Small Balcony: 5 Steps

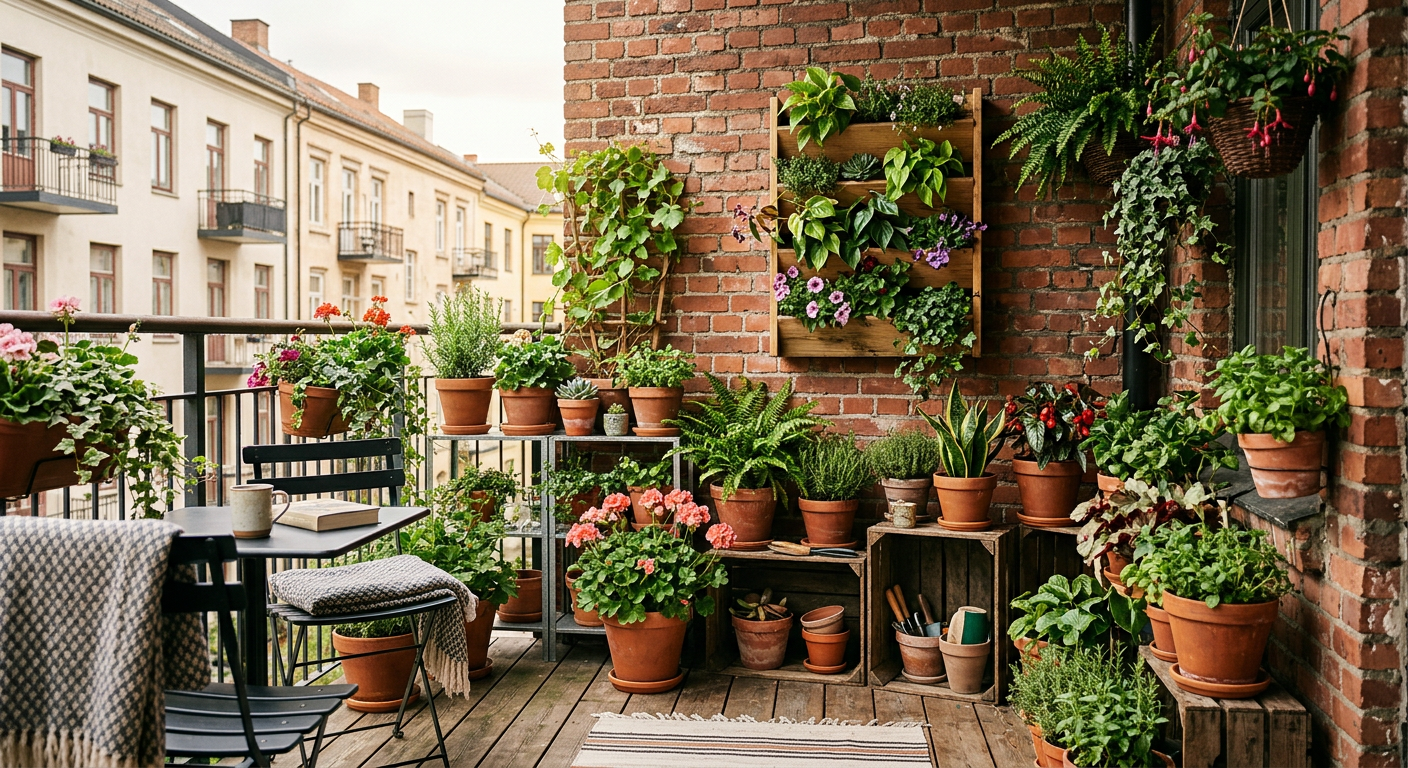
    !A lush apartment balcony showing how to start urban homesteading small balcony gardening with many plants.

    You don’t need a 100-acre ranch to call yourself a homesteader; sometimes, all you need is a couple of pots and a sunny railing. I remember staring at my tiny third-floor concrete slab thinking it was impossible to grow anything, but six months later, I was harvesting fresh salads every single night. The truth is, self-sufficiency isn’t about the size of your land, it’s about the size of your ambition.

    🎯 Quick Answer: To learn how to start urban homesteading small balcony spaces, focus on vertical gardening, high-yield container crops like greens and herbs, and small-scale solutions like worm composting. Start with just three pots and expand as you master the unique microclimate of your balcony.

    🌱 Start Your Urban Homestead Plan →

    🔑 Key Takeaways

    * Maximize Vertical Space: Use walls and railings to double your growing area.

    * Choose High-Value Crops: Focus on plants that are expensive at the store but easy to grow.

    * Master the Microclimate: Understand how wind, sun, and heat reflect off your apartment walls.

    * Scale Sustainably: Learn why starting with two plants is better than starting with twenty.

    * Circular Systems: Incorporate small-scale composting to eliminate waste and feed your soil.

    Assess Your Balcony’s Unique Microclimate

    Before you buy a single bag of soil, you have to play detective. Urban balconies are strange beasts—they are often significantly hotter than the ground level because concrete and brick soak up solar heat all day and radiate it back at night.

    First, track your sun exposure. Most vegetables need at least 6 hours of direct sunlight, but if you have a north-facing balcony, don’t panic! You can still thrive with leafy greens and herbs like mint or parsley that tolerate shade.

    Keep reading — this is where most people mess up.

    Wind is the silent killer of the urban garden. On higher floors, the wind can dry out a pot in a matter of hours or even snap delicate stems. If you’re on a high floor, consider installing a mesh windbreak or choosing sturdier, low-profile plants.

    Now that you know your environment, let’s talk about the gear that actually fits in a 4×8 space.

    Choosing the Right Containers and Soil

    When you’re learning how to start urban homesteading small balcony gardens, weight is a major factor. You can’t just throw heavy clay pots and farm dirt onto a balcony without considering structural limits and drainage.

    Go for lightweight materials like resin, fabric grow bags, or high-quality plastic. Fabric bags are a personal favorite because they prevent ‘root circling’ and allow the soil to breathe, which is vital in humid city summers.

    Never use ‘topsoil’ from the ground. It’s too heavy and doesn’t drain well in pots. Instead, invest in a high-quality organic potting mix. Look for ingredients like coco coir or peat moss, perlite for drainage, and a bit of compost for nutrients.

    But here’s the secret: even the best soil won’t help if your water runs straight onto your neighbor’s patio below. Always use saucers or a self-watering system to keep the peace with the folks downstairs.

    📋 Get the Beginner Checklist →

    Vertical Gardening: The Ultimate Space Hack

    If you only grow on the floor, you’re missing out on 70% of your potential harvest. Vertical gardening is the backbone of the urban homestead. Look at your walls and railings as prime real estate.

    Wall-mounted planters, pockets, and trellises allow you to grow ‘up’ instead of ‘out.’ You can grow cucumbers, snap peas, and even small melons on a sturdy trellis leaning against the building wall.

    Don’t skip this — it’ll save you hours (and money).

    Railings are perfect for ‘saddlebags’ or hanging planters. I love using these for strawberries and trailing herbs like thyme. Just make sure everything is securely fastened; a falling pot is a homesteader’s worst nightmare.

    Once your plants are climbing the walls, you’ll need a way to keep them fed without buying chemical fertilizers. That’s where the ‘hidden’ homesteading comes in.

    Small-Scale Composting and Sustainability

    Yes, you can compost on a balcony without the smell! A traditional pile won’t work, but a worm bin (vermicomposting) or a Bokashi bucket is perfect for apartment dwellers.

    Vermicomposting uses red wiggler worms to turn your kitchen scraps into ‘black gold.’ A small, ventilated plastic bin under a bench can process several pounds of scraps a week. It’s silent, odorless when done right, and provides the best fertilizer on earth.

    Bokashi is another great option. It’s a fermentation process that allows you to compost almost anything—including meat and dairy—which aren’t usually allowed in standard composting. It happens in a sealed bucket, making it a dream for small spaces.

    This next part? Nobody talks about it, but it changed everything for us.

    By closing the loop and turning your waste into soil, you’re creating a miniature ecosystem. You’re no longer just a consumer; you’re a producer. Now, let’s make sure you don’t fall into the common traps that break most beginners.

    💡 Pro Tips

    * Use ‘Cut and Come Again’ Greens: Instead of harvesting a whole head of lettuce, snip the outer leaves. The plant will keep growing, providing food for months.

    * Automate Your Watering: A simple drip irrigation kit with a battery-powered timer is a lifesaver if you travel or get busy.

    * Pot in Groups: Putting pots closer together creates a humid ‘micro-microclimate’ that helps plants survive extreme heat waves.

    * Label Everything: You think you’ll remember what kind of tomato that is, but three months later, it’s a mystery. Use permanent markers on wooden stakes.

    ⚠️ Beginner Mistakes to Avoid

    * Overwatering: More balcony plants die from ‘kindness’ (too much water) than from neglect. Wait until the top inch of soil is dry.

    * Buying ‘Big’ Varieties: Look for ‘Bush’ or ‘Patio’ labels on seeds. Growing a standard 8-foot beefsteak tomato on a balcony is a recipe for frustration.

    * Ignoring Pests: Aphids and spider mites love city balconies. Check the undersides of leaves once a week so you can catch issues early.

    * Forgetting the Bees: If you’re high up, pollinators might not find you. Plant some lavender or marigolds to invite them to the party.

    Frequently Asked Questions

    Can I really grow enough food to make a difference?

    While you likely won’t grow 100% of your calories, you can absolutely grow 100% of your herbs and a significant portion of your fresh greens. The nutritional value of ‘picked 5 minutes ago’ produce is also much higher than store-bought.

    Is it expensive to start a balcony homestead?

    It doesn’t have to be! You can upcycle food-grade buckets, start plants from seeds instead of buying starts, and make your own fertilizer with a worm bin. Start small and reinvest your savings into better gear over time.

    How do I handle the wind on a high-floor balcony?

    Use heavy pots (like glazed ceramic) for the base and secure lightweight pots to the railing with zip ties. Use ‘living windbreaks’ like tall, sturdy grasses to protect more delicate herbs.

    Do I need to worry about the weight on my balcony?

    Generally, modern balconies can handle about 50-100 lbs per square foot. Use lightweight potting soil and plastic/fabric pots to stay safe. Avoid heavy stone statuary or massive wooden raised beds.

    Your balcony is a blank canvas waiting to be turned into a lush, productive sanctuary. There is a deep, quiet thrill in eating a sandwich with tomatoes and basil you grew just three feet from your kitchen door. Don’t wait for ‘someday’ when you have land—start where you are.

    What’s your biggest challenge with starting an urban garden? I’d love to hear your story in the comments!

    🔧 See Recommended Urban Tools →


    📚 More From Our Homestead

    Ready to Start Your Homestead Journey?

    Free guides, checklists, and tools to help you build your dream homestead.
    Explore Free Resources →

  • How to Make Money From a Small Homestead

    !A thriving [backyard farm showing how to make money from a small homestead with raised garden beds.](https://xlvvlujsctgiorcwbtkv.supabase.co/storage/v1/object/public/blog-images/how-to-make-money-from-a-small-homestead/featured-1776530900600.png)

    Most people think you need 100 acres and a tractor the size of a house to turn a profit, but I’ve seen families clear five figures from a literal backyard. The truth is, your small plot of land is a goldmine waiting to be tapped if you stop thinking like a hobbyist and start thinking like a micro-entrepreneur.

    🎯 Quick Answer: The fastest way how to make money from a small homestead is to focus on high-margin, fast-turnaround products like microgreens, heirloom seedlings, or value-added goods like herbal salves rather than bulk commodities. By niche-marketing to your local community through CSAs or farm stands, you can turn a half-acre into a meaningful revenue stream.

    🌱 Build Your Profitable Homestead Strategy →

    🔑 Key Takeaways

    • Focus on High-Value Crops: Learn why leafy greens and herbs beat corn and potatoes every time.
    • Diversification is King: How to layer multiple income streams so you aren’t reliant on one harvest.
    • Value-Added Secret: Why a $2 jar of jam is worth more than the $0.50 worth of berries inside it.
    • Local Marketing: How to find customers who will pay premium prices for your hard work.
    • Scalability: Starting small ensures you don’t burn out before the profit starts rolling in.

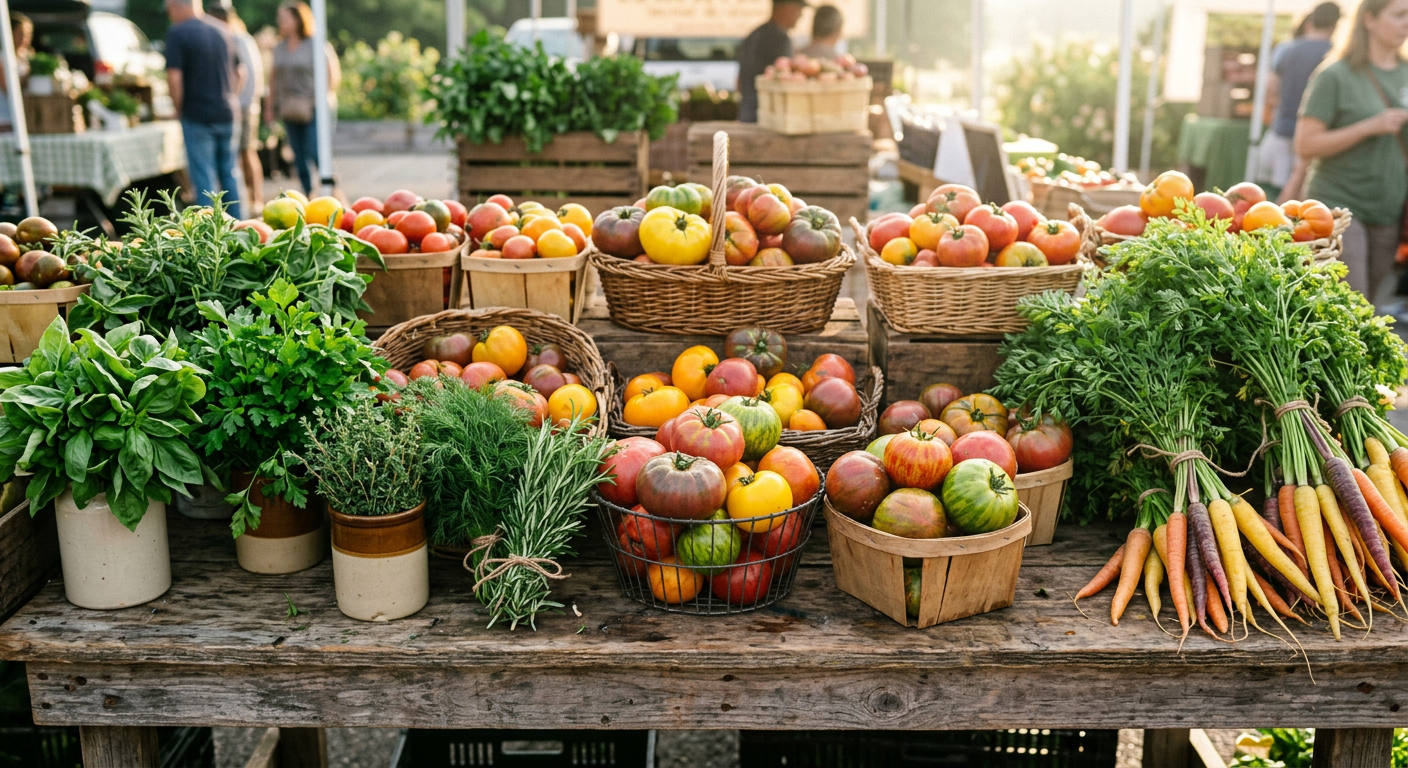
    !Local produce at a farm stand, a great way how to make money from a small homestead.

    The High-Margin Garden: Microgreens and Specialty Herbs

    When you are learning how to make money from a small homestead, space is your most limited resource. You simply cannot compete with industrial farms on volume, so you have to compete on quality and specialty. This is where microgreens and rare culinary herbs come in.

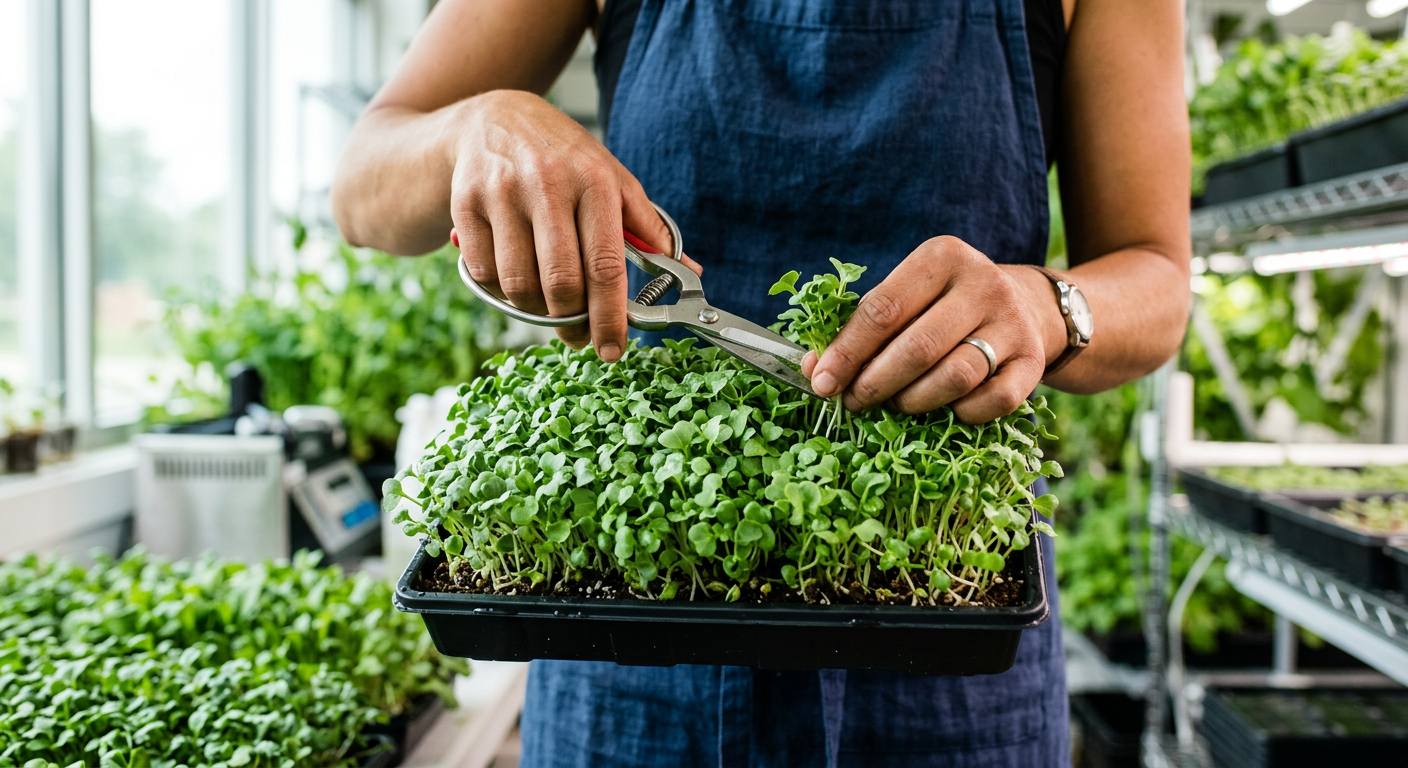
    Microgreens can be grown on vertical racks in a spare room or a small shed. They go from seed to harvest in about 10 to 14 days, allowing for a weekly paycheck. Local chefs rave about fresh pea shoots and radish greens because the grocery store versions are usually wilted and flavorless. If you can deliver them within hours of cutting, you can charge a premium.

    Don’t forget about perennial herbs like rosemary, lavender, and mint. Once these are established, they require almost zero effort but sell for $3-$5 per small bundle at a Saturday market.

    Now that you’ve mastered the soil, let’s talk about the feathered employees that can double your income.

    Keep reading — this next part is where most people skip the math and lose money.

    Ethical Egg Sales and Poultry Profits

    Everyone loves farm-fresh eggs, but if you want to know how to make money from a small homestead with chickens, you have to look beyond the carton. Selling eating eggs usually just covers your feed bill. To actually see a profit, you need to think about “breeding sets” or “hatching eggs.”

    High-end heritage breeds like Marans (who lay chocolate-colored eggs) or Ameraucanas (who lay blue eggs) are in high demand. A dozen eating eggs might sell for $5, but a dozen fertile hatching eggs from a rare breed can fetch $40 to $60.

    If you have the space, consider “chicken tractors” to raise meat birds. Pasture-raised poultry is a completely different product than what is found in a plastic wrap at the store. Your customers will taste the difference, and they’ll be happy to pay for the transparency of knowing how that animal was raised.

    📋 Get the Small Farm Profitability Checklist →

    But wait, what if you don’t want to sell raw products at all? There’s a way to triple your margins through “value-added” goods.

    The Power of Value-Added Products

    This is the secret sauce of successful small-scale farming. A “value-added” product is simply taking a raw material—like a tomato—and turning it into something else—like salsa.

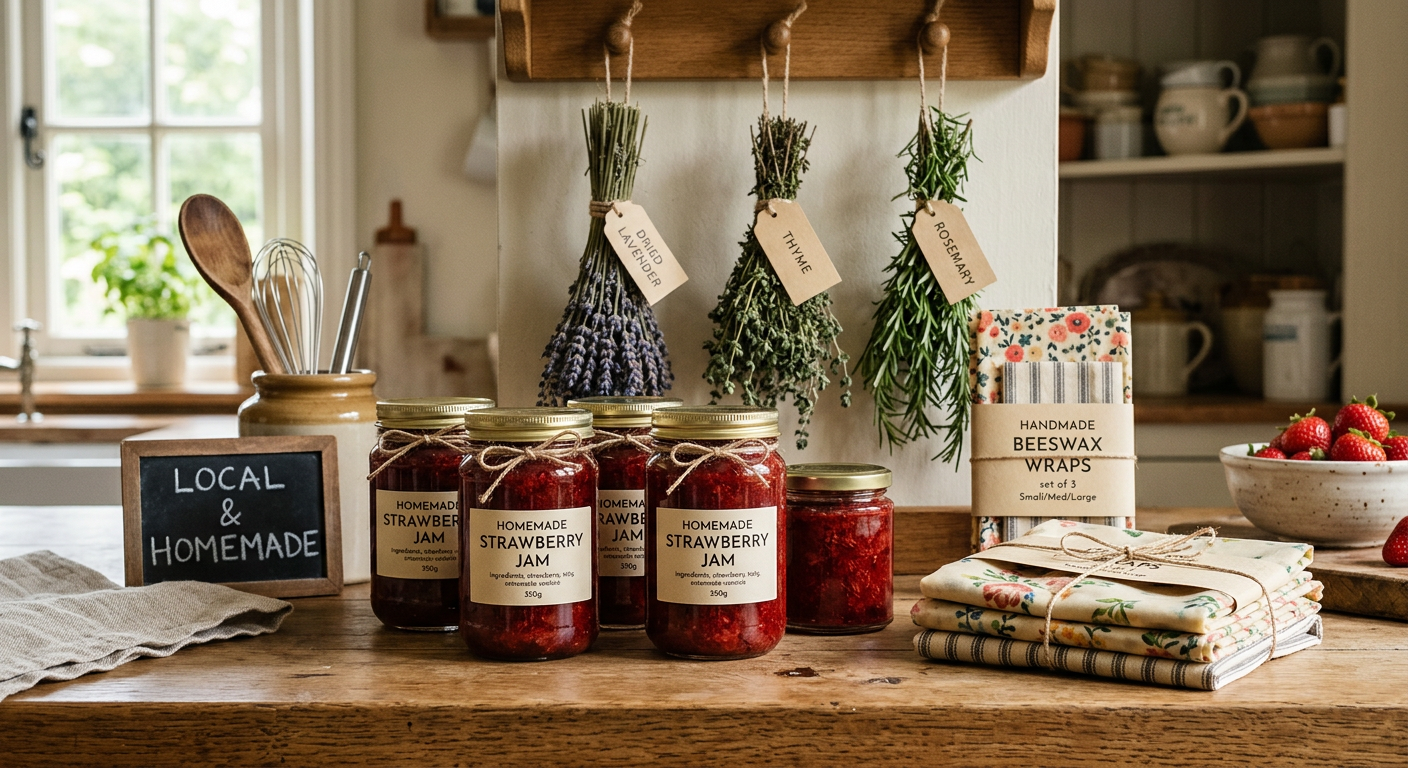
    Think about it: a pound of tomatoes might sell for $3. But a small jar of organic, home-grown sun-dried tomato pesto can sell for $12. You are selling your time and your brand, not just the produce.

    Pro-tip: Check your local “Cottage Food Laws.” In many places, you can sell baked goods, jams, and dried herbs directly from your kitchen without a commercial license. This allows you to turn a surplus of summer berries into a shelf-stable product you can sell all winter long.

    This next part? Nobody talks about it, but it changed everything for our neighbors.

    !Growing microgreens as a high-margin method for how to make money from a small homestead.

    Agritourism: Selling the Experience

    You don’t just have to sell things; you can sell access. People living in the city are hungry for a connection to the land. They want to show their kids where food comes from. This is a massive opportunity for the small homesteader.

    Consider hosting “U-Pick” days for strawberries or pumpkins. You save on the labor of harvesting, and families pay you for the privilege of doing the work for you. Or, try hosting a workshop. If you know how to bake sourdough, make soap, or prune apple trees, you can charge $50 per person for a two-hour class.

    Your homestead isn’t just a farm; it’s a classroom and a sanctuary. Leveraging that atmosphere is a high-profit way to diversify your income without needing more acreage.

    But before you start, there’s one mistake that ruins everything — I’ll cover it next.

    💡 Pro Tips

    • Master Your Packaging: People eat with their eyes first; a professional label makes a $5 product look like a $15 product. ✅
    • Build a Mailing List: Don’t rely on Facebook algorithms. Get your customers’ emails so you can tell them exactly when the tomatoes are ripe. 🔥
    • Track Your Hours: If a product takes 20 hours to make but only profits $10, it’s a hobby, not a business. 💡
    • Focus on One Thing First: Don’t try to sell eggs, honey, soap, and veggies all in year one. Master one, then add the next. 🚀

    ⚠️ Beginner Mistakes to Avoid

    • Underpricing: Don’t try to match grocery store prices. Your quality is higher, so your price should be too.
    • Ignoring Local Laws: Always check zoning and health department rules before selling processed items.
    • Spending Before Earning: Avoid buying that brand-new expensive poultry plucker until you’ve actually sold your first batch of birds.

    !Value-added products like jam and herbs show how to make money from a small homestead.

    Frequently Asked Questions

    Can I really make money on just one acre?

    Absolutely. One acre is plenty for high-intensity vegetable production or a specialized flower farm. Many profitable market gardens operate on less than half an acre.

    What is the most profitable animal for a small homestead?

    Usually, rabbits or honeybees have the best ROI (Return on Investment) for small spaces because they require very little land and produce high-value products like meat, pelts, or honey and wax.

    Do I need a business license to sell at a farmers market?

    It depends on your state and what you are selling. Generally, raw produce requires less paperwork than processed foods or meat. Always check with your local Department of Agriculture.

    How do I find customers for my homestead products?

    Start with local Facebook groups, the Nextdoor app, and your local farmers market. Word of mouth is your most powerful tool in a small community.

    Turning your backyard into a business is one of the most rewarding things you’ll ever do. It turns a “cost center” into a “profit center” and helps you build a more resilient life for your family. Start small, stay consistent, and don’t be afraid to ask for what your hard work is worth.

    What’s your biggest challenge with knowing how to make money from a small homestead? Are you worried about the marketing or the physical work? I’d love to hear your story in the comments!

    🔧 See Our Recommended Homestead Tools →


    📚 More From Our Homestead

    Ready to Start Your Homestead Journey?

    Free guides, checklists, and tools to help you build your dream homestead.
    Explore Free Resources →

  • Top Homesteading Books for Beginners 2026: Start Today

    Top Homesteading Books for Beginners 2026: Start Today

    Starting a homestead can feel like standing at the foot of a massive mountain. Whether you have a tiny balcony in the city or forty acres in the country, the transition to self-sufficiency is a journey of a thousand skills. As we move into the mid-2020s, the resources available to new growers and builders have evolved. If you are looking for the best homesteading books for beginners 2026, you are in the right place to build your ultimate reference library.

    In this guide, we will explore the essential literature that defines modern homesteading. These books bridge the gap between traditional wisdom and contemporary technology, helping you live a more sustainable life.

    Why Books are Essential for Modern Homesteaders

    While the internet is full of quick tutorials and social media snippets, homesteading requires deep, foundational knowledge. When your internet goes out during a storm or you are deep in the garden with muddy hands, a physical book is your most reliable tool. The curated list of homesteading books for beginners 2026 focuses on comprehensive manuals that cover everything from soil health to food preservation.

    Reading a full-length book allows you to understand the “why” behind the “how.” It builds a cohesive mindset rather than a fragmented collection of life hacks. For the 2026 homesteader, these books also integrate modern sustainability practices like greywater systems and smart-tech composting.

    The Must-Have Manuals for 2026

    1. The All-in-One Encyclopedia

    Every beginner needs a “Bible” of homesteading. These massive volumes cover the widest range of topics. Look for titles that include updated sections on renewable energy and climate-resilient gardening. A primary resource should teach you how to plan your layout, manage a budget, and understand the seasonal cycles of a working farm.

    2. High-Yield Small-Space Gardening

    Not everyone starts with a massive plot of land. In 2026, urban and suburban homesteading is more popular than ever. Books focused on intensive gardening—such as square-foot gardening or vertical hydroponics—are vital. These resources teach you how to maximize every square inch of your soil to feed your family year-round.

    3. Modern Livestock Management

    Raising animals is a significant step up from growing carrots. The best homesteading books for beginners 2026 offer practical, humane, and efficient ways to raise chickens, goats, or bees. Look for guides that emphasize preventative health care and natural feeding systems to keep your livestock thriving without constant chemical intervention.

    Skill-Specific Guides for Self-Sufficiency

    Once you have your general manual, you need to dive deep into specific crafts. Homesteading is a collection of dozens of different hobbies that work together as one lifestyle.

    Food Preservation and Fermentation

    Growing the food is only half the battle; keeping it is the other. Modern preservation books go beyond simple canning. The 2026 beginner should look for guides on freeze-drying, advanced fermentation, and root cellar construction. Understanding food safety is paramount, so ensure your chosen books follow the latest USDA safety guidelines.

    Off-Grid Power and Water Systems

    True independence means managing your utilities. As technology becomes more accessible, beginners are now installing their own small-scale solar arrays and rainwater harvesting systems. Books that simplify these complex engineering tasks into beginner-friendly projects are worth their weight in gold.

    Creating Your 2026 Study Plan

    If you are just starting, don’t try to read every book at once. It leads to information overload. Follow this tiered approach to building your knowledge base:

  • Phase One (The Dream): Read general homesteading philosophy and planning books to decide what kind of life you want.
  • Phase Two (The Soil): Focus on gardening and soil health books. This is the foundation of almost every successful homestead.
  • Phase Three (The Animals): Once your garden is established, buy books on small livestock.
  • Phase Four (The Kitchen): Study preservation and cooking from scratch.
  • Digital vs. Physical: Which Should You Buy?

    While we love the convenience of E-readers, homesteading books for beginners 2026 are often better as physical copies. Many of these books contain intricate diagrams, planting charts, and maps that are difficult to view on a small screen. Furthermore, a physical book can be used as a reference in the field where a tablet might be easily damaged by dirt or moisture.

    Conclusion: Your Journey Starts Here

    Building a homestead is a lifelong learning process. By investing in the right homesteading books for beginners 2026, you are not just buying paper and ink; you are investing in your future independence and security. Start with one or two core manuals, master the skills within them, and then expand your library as your homestead grows.

    Remember, the best time to start learning was ten years ago; the second best time is today. Happy reading and happy farming!


    📚 More From Our Homestead

    Ready to Start Your Homestead Journey?

    Free guides, checklists, and tools to help you build your dream homestead.
    Explore Free Resources →

  • Best Perennial Herbs for Cold Climate Homesteads

    Best Perennial Herbs for Cold Climate Permaculture Homesteads

    Designing a permaculture homestead in a cold climate (USDA Zones 3, 4, or 5) presents a unique set of challenges. Short growing seasons, late spring frosts, and deep winter freezes can decimate a garden full of delicate annuals.

    However, the secret to a resilient, low-maintenance food forest or kitchen garden lies in perennial herbs. Unlike annuals that require tilling and replanting every year, perennials establish deep root systems, improve soil structure, and emerge earlier in the spring than anything you could plant from seed.

    In this guide, we will explore the best perennial herbs for cold climates, focusing on species that are hardy down to at least -30°F (-34°C).

    Why Perennial Herbs are Essential for Permaculture

    In permaculture, we aim for systems that produce more energy than they consume. Perennials are the ultimate “return on investment” plants. Once established, they provide:

    * Early Forage: Many herbs like Chives and Sorrel emerge while the ground is still thawing, providing early nectar for pollinators.

    * Soil Protection: Deep roots prevent erosion during snowmelt.

    * Nutrient Cycling: Dynamic accumulators like Comfrey pull minerals from the subsoil to the surface.

    * Pest Management: Strong aromatic oils in herbs like Mint and Sage confuse pests that would otherwise target your fruit trees.

    1. The Culinary Powerhouses (Hardy to Zone 3 & 4)

    Chives (Allium schoenoprasum)

    * Hardiness: Zone 3

    * Role: Pest repellent, edible flower, culinary staple.

    Chives are nearly indestructible. They are the first to emerge in the spring, often pushing through the last layers of snow. In a permaculture setting, plant them in the “drip line” of fruit trees to deter borers and fungal diseases.

    French Tarragon (Artemisia dracunculus)

    * Hardiness: Zone 4

    * Role: Gourmet flavoring.

    Unlike Russian Tarragon, the French variety has a superior anise-like flavor. It requires well-drained soil during the winter; “wet feet” in freezing temperatures will kill the roots. Mulch heavily with straw in late autumn.

    Lovage (Levisticum officinale)

    * Hardiness: Zone 3

    * Role: Vertical structure, celery substitute.

    Lovage is a giant, reaching heights of 6 feet. Just one plant is enough for an entire homestead. It tastes like concentrated celery and is a fantastic addition to soups and stews. Because of its height, use it in the center of a herb guild.

    2. Medicinal & Multi-Functional Herbs

    Comfrey (Symphytum officinale)

    * Hardiness: Zone 3

    * Role: Dynamic accumulator, medicinal poultices.

    Comfrey is the backbone of cold-climate permaculture. Its taproot can reach 10 feet deep. In spring/summer, perform “chop and drop” mulching to provide potassium-rich fertilizer to neighboring plants. Caution: Plant it where you want it forever; the smallest root fragment will grow into a new plant.

    Bee Balm / Monarda (Monarda didyma)

    * Hardiness: Zone 4

    * Role: Pollinator magnet, medicinal tea.

    Also known as Wild Bergamot, this plant is essential for attracting bumblebees and hummingbirds. The leaves and flowers make a tea that helps with digestive issues and sore throats. It is prone to powdery mildew, so ensure good air circulation.

    Echinacea (Echinacea purpurea)

    * Hardiness: Zone 3

    * Role: Immune support, ornamental.

    Coneflowers are as beautiful as they are useful. The roots and petals are used in tinctures to support the immune system. They are incredibly drought-tolerant once established and thrive in the lean soils often found on North American homesteads.

    3. The Low-Growing Groundcovers

    Creeping Thyme (Thymus serpyllum)

    * Hardiness: Zone 4

    * Role: Living mulch, culinary.

    Instead of using wood chips, use creeping thyme. It creates a dense mat that suppresses weeds and survives being stepped on. When crushed, it releases oils that deter flying pests.

    Winter Savory (Satureja montana)

    * Hardiness: Zone 5 (Zone 4 with protection)

    * Role: Peppery seasoning.

    While Summer Savory is an annual, Winter Savory is a semi-evergreen sub-shrub. It provides a peppery bite to bean dishes and holds its flavor well when dried. It requires gritty, fast-draining soil.

    4. Herbs for Tea and Fragrance

    Peppermint and Spearmint (Mentha spp.)

    * Hardiness: Zone 3

    * Role: Tea, groundcover.

    Mints are notoriously invasive, but in a cold climate, this vigor is an asset. Use them in a confined area or as a groundcover in a shaded orchard where nothing else will grow. They can withstand heavy snow loads and spring flooding.

    Lemon Balm (Melissa officinalis)

    * Hardiness: Zone 4

    * Role: Stress relief, antiviral.

    A member of the mint family, Lemon Balm smells divine and makes a calming evening tea. It self-seeds readily, so deadhead the flowers if you don’t want a carpet of lemon balm babies next year.

    Designing Your Cold Climate Herb Guild

    In permaculture, we don’t plant in isolated rows. We plant in guilds—mutually beneficial communities. Here is a sample layout for a Cold Climate Herb Guild centered around an Apple Tree:

  • Central Element: Apple Tree (semi-dwarf).
  • Suppressors: Plant Chives and Garlic Chives around the trunk to deter grass and voles.
  • Accumulators: Place Comfrey on the sunny southern side of the tree to be chopped for mulch.
  • Attractors: Scatter Echinacea and Bee Balm to bring in pollinators for the apple blossoms.
  • Repellents: Use Lemon Balm and Mint on the periphery to confuse the codling moth.
  • Maintenance Tips for Extreme Cold

    To ensure your perennial herbs survive a brutal winter (minus 30 degrees or more), follow these homesteading hacks:

    * The 6-Inch Rule: Leave at least 4-6 inches of dead stems on your plants throughout the winter. These stems trap snow, which act as an insulator for the crown of the plant.

    * Mulch after the Freeze: Wait until the ground is frozen solid before applying a heavy layer of straw or shredded leaves. This prevents rodents from nesting in the warm mulch and eating your herb roots.

    * Siting for Success: Plant tender perennials (like Sage or Winter Savory) near the south-facing wall of a stone building. The “thermal mass” of the stones will radiate heat during the night.

    Conclusion

    Building a cold-climate permaculture homestead doesn’t mean you are limited to kale and potatoes. By integrating these resilient perennial herbs, you create a landscape that is both productive and permanent.

    Start with the “Big Three”—Chives, Comfrey, and Mint—and gradually expand your collection as you observe the microclimates of your land. Within a few seasons, your homestead will boast a self-sustaining pharmacy and spice rack that returns year after year, regardless of how deep the snow falls.


    📚 More From Our Homestead

    Ready to Start Your Homestead Journey?

    Free guides, checklists, and tools to help you build your dream homestead.
    Explore Free Resources →

  • How to Make Money From a Small Homestead

    !A thriving [backyard farm showing how to make money from a small homestead with raised garden beds.](https://xlvvlujsctgiorcwbtkv.supabase.co/storage/v1/object/public/blog-images/how-to-make-money-from-a-small-homestead/featured-1776530900600.png)

    Most people think you need 100 acres and a tractor the size of a house to turn a profit, but I’ve seen families clear five figures from a literal backyard. The truth is, your small plot of land is a goldmine waiting to be tapped if you stop thinking like a hobbyist and start thinking like a micro-entrepreneur.

    🎯 Quick Answer: The fastest way how to make money from a small homestead is to focus on high-margin, fast-turnaround products like microgreens, heirloom seedlings, or value-added goods like herbal salves rather than bulk commodities. By niche-marketing to your local community through CSAs or farm stands, you can turn a half-acre into a meaningful revenue stream.

    🌱 Build Your Profitable Homestead Strategy →

    🔑 Key Takeaways

    • Focus on High-Value Crops: Learn why leafy greens and herbs beat corn and potatoes every time.
    • Diversification is King: How to layer multiple income streams so you aren’t reliant on one harvest.
    • Value-Added Secret: Why a $2 jar of jam is worth more than the $0.50 worth of berries inside it.
    • Local Marketing: How to find customers who will pay premium prices for your hard work.
    • Scalability: Starting small ensures you don’t burn out before the profit starts rolling in.

    !Local produce at a farm stand, a great way how to make money from a small homestead.

    The High-Margin Garden: Microgreens and Specialty Herbs

    When you are learning how to make money from a small homestead, space is your most limited resource. You simply cannot compete with industrial farms on volume, so you have to compete on quality and specialty. This is where microgreens and rare culinary herbs come in.

    Microgreens can be grown on vertical racks in a spare room or a small shed. They go from seed to harvest in about 10 to 14 days, allowing for a weekly paycheck. Local chefs rave about fresh pea shoots and radish greens because the grocery store versions are usually wilted and flavorless. If you can deliver them within hours of cutting, you can charge a premium.

    Don’t forget about perennial herbs like rosemary, lavender, and mint. Once these are established, they require almost zero effort but sell for $3-$5 per small bundle at a Saturday market.

    Now that you’ve mastered the soil, let’s talk about the feathered employees that can double your income.

    Keep reading — this next part is where most people skip the math and lose money.

    Ethical Egg Sales and Poultry Profits

    Everyone loves farm-fresh eggs, but if you want to know how to make money from a small homestead with chickens, you have to look beyond the carton. Selling eating eggs usually just covers your feed bill. To actually see a profit, you need to think about “breeding sets” or “hatching eggs.”

    High-end heritage breeds like Marans (who lay chocolate-colored eggs) or Ameraucanas (who lay blue eggs) are in high demand. A dozen eating eggs might sell for $5, but a dozen fertile hatching eggs from a rare breed can fetch $40 to $60.

    If you have the space, consider “chicken tractors” to raise meat birds. Pasture-raised poultry is a completely different product than what is found in a plastic wrap at the store. Your customers will taste the difference, and they’ll be happy to pay for the transparency of knowing how that animal was raised.

    📋 Get the Small Farm Profitability Checklist →

    But wait, what if you don’t want to sell raw products at all? There’s a way to triple your margins through “value-added” goods.

    The Power of Value-Added Products

    This is the secret sauce of successful small-scale farming. A “value-added” product is simply taking a raw material—like a tomato—and turning it into something else—like salsa.

    Think about it: a pound of tomatoes might sell for $3. But a small jar of organic, home-grown sun-dried tomato pesto can sell for $12. You are selling your time and your brand, not just the produce.

    Pro-tip: Check your local “Cottage Food Laws.” In many places, you can sell baked goods, jams, and dried herbs directly from your kitchen without a commercial license. This allows you to turn a surplus of summer berries into a shelf-stable product you can sell all winter long.

    This next part? Nobody talks about it, but it changed everything for our neighbors.

    !Growing microgreens as a high-margin method for how to make money from a small homestead.

    Agritourism: Selling the Experience

    You don’t just have to sell things; you can sell access. People living in the city are hungry for a connection to the land. They want to show their kids where food comes from. This is a massive opportunity for the small homesteader.

    Consider hosting “U-Pick” days for strawberries or pumpkins. You save on the labor of harvesting, and families pay you for the privilege of doing the work for you. Or, try hosting a workshop. If you know how to bake sourdough, make soap, or prune apple trees, you can charge $50 per person for a two-hour class.

    Your homestead isn’t just a farm; it’s a classroom and a sanctuary. Leveraging that atmosphere is a high-profit way to diversify your income without needing more acreage.

    But before you start, there’s one mistake that ruins everything — I’ll cover it next.

    💡 Pro Tips

    • Master Your Packaging: People eat with their eyes first; a professional label makes a $5 product look like a $15 product. ✅
    • Build a Mailing List: Don’t rely on Facebook algorithms. Get your customers’ emails so you can tell them exactly when the tomatoes are ripe. 🔥
    • Track Your Hours: If a product takes 20 hours to make but only profits $10, it’s a hobby, not a business. 💡
    • Focus on One Thing First: Don’t try to sell eggs, honey, soap, and veggies all in year one. Master one, then add the next. 🚀

    ⚠️ Beginner Mistakes to Avoid

    • Underpricing: Don’t try to match grocery store prices. Your quality is higher, so your price should be too.
    • Ignoring Local Laws: Always check zoning and health department rules before selling processed items.
    • Spending Before Earning: Avoid buying that brand-new expensive poultry plucker until you’ve actually sold your first batch of birds.

    !Value-added products like jam and herbs show how to make money from a small homestead.

    Frequently Asked Questions

    Can I really make money on just one acre?

    Absolutely. One acre is plenty for high-intensity vegetable production or a specialized flower farm. Many profitable market gardens operate on less than half an acre.

    What is the most profitable animal for a small homestead?

    Usually, rabbits or honeybees have the best ROI (Return on Investment) for small spaces because they require very little land and produce high-value products like meat, pelts, or honey and wax.

    Do I need a business license to sell at a farmers market?

    It depends on your state and what you are selling. Generally, raw produce requires less paperwork than processed foods or meat. Always check with your local Department of Agriculture.

    How do I find customers for my homestead products?

    Start with local Facebook groups, the Nextdoor app, and your local farmers market. Word of mouth is your most powerful tool in a small community.

    Turning your backyard into a business is one of the most rewarding things you’ll ever do. It turns a “cost center” into a “profit center” and helps you build a more resilient life for your family. Start small, stay consistent, and don’t be afraid to ask for what your hard work is worth.

    What’s your biggest challenge with knowing how to make money from a small homestead? Are you worried about the marketing or the physical work? I’d love to hear your story in the comments!

    🔧 See Our Recommended Homestead Tools →


    📚 More From Our Homestead

    Ready to Start Your Homestead Journey?

    Free guides, checklists, and tools to help you build your dream homestead.
    Explore Free Resources →


    👉 Related: Homesteading Hacks: Save Serious Money on Groceries!

    👉 Related: Basic Food Preservation for Beginners: Our Family’s Go-To Methods

  • Top Homesteading Books for Beginners 2026: Start Today

    Top Homesteading Books for Beginners 2026: Start Today

    Starting a homestead can feel like standing at the foot of a massive mountain. Whether you have a tiny balcony in the city or forty acres in the country, the transition to self-sufficiency is a journey of a thousand skills. As we move into the mid-2020s, the resources available to new growers and builders have evolved. If you are looking for the best homesteading books for beginners 2026, you are in the right place to build your ultimate reference library.

    In this guide, we will explore the essential literature that defines modern homesteading. These books bridge the gap between traditional wisdom and contemporary technology, helping you live a more sustainable life.

    Why Books are Essential for Modern Homesteaders

    While the internet is full of quick tutorials and social media snippets, homesteading requires deep, foundational knowledge. When your internet goes out during a storm or you are deep in the garden with muddy hands, a physical book is your most reliable tool. The curated list of homesteading books for beginners 2026 focuses on comprehensive manuals that cover everything from soil health to food preservation.

    Reading a full-length book allows you to understand the “why” behind the “how.” It builds a cohesive mindset rather than a fragmented collection of life hacks. For the 2026 homesteader, these books also integrate modern sustainability practices like greywater systems and smart-tech composting.

    The Must-Have Manuals for 2026

    1. The All-in-One Encyclopedia

    Every beginner needs a “Bible” of homesteading. These massive volumes cover the widest range of topics. Look for titles that include updated sections on renewable energy and climate-resilient gardening. A primary resource should teach you how to plan your layout, manage a budget, and understand the seasonal cycles of a working farm.

    2. High-Yield Small-Space Gardening

    Not everyone starts with a massive plot of land. In 2026, urban and suburban homesteading is more popular than ever. Books focused on intensive gardening—such as square-foot gardening or vertical hydroponics—are vital. These resources teach you how to maximize every square inch of your soil to feed your family year-round.

    3. Modern Livestock Management

    Raising animals is a significant step up from growing carrots. The best homesteading books for beginners 2026 offer practical, humane, and efficient ways to raise chickens, goats, or bees. Look for guides that emphasize preventative health care and natural feeding systems to keep your livestock thriving without constant chemical intervention.

    Skill-Specific Guides for Self-Sufficiency

    Once you have your general manual, you need to dive deep into specific crafts. Homesteading is a collection of dozens of different hobbies that work together as one lifestyle.

    Food Preservation and Fermentation

    Growing the food is only half the battle; keeping it is the other. Modern preservation books go beyond simple canning. The 2026 beginner should look for guides on freeze-drying, advanced fermentation, and root cellar construction. Understanding food safety is paramount, so ensure your chosen books follow the latest USDA safety guidelines.

    Off-Grid Power and Water Systems

    True independence means managing your utilities. As technology becomes more accessible, beginners are now installing their own small-scale solar arrays and rainwater harvesting systems. Books that simplify these complex engineering tasks into beginner-friendly projects are worth their weight in gold.

    Creating Your 2026 Study Plan

    If you are just starting, don’t try to read every book at once. It leads to information overload. Follow this tiered approach to building your knowledge base:

  • Phase One (The Dream): Read general homesteading philosophy and planning books to decide what kind of life you want.
  • Phase Two (The Soil): Focus on gardening and soil health books. This is the foundation of almost every successful homestead.
  • Phase Three (The Animals): Once your garden is established, buy books on small livestock.
  • Phase Four (The Kitchen): Study preservation and cooking from scratch.
  • Digital vs. Physical: Which Should You Buy?

    While we love the convenience of E-readers, homesteading books for beginners 2026 are often better as physical copies. Many of these books contain intricate diagrams, planting charts, and maps that are difficult to view on a small screen. Furthermore, a physical book can be used as a reference in the field where a tablet might be easily damaged by dirt or moisture.

    Conclusion: Your Journey Starts Here

    Building a homestead is a lifelong learning process. By investing in the right homesteading books for beginners 2026, you are not just buying paper and ink; you are investing in your future independence and security. Start with one or two core manuals, master the skills within them, and then expand your library as your homestead grows.

    Remember, the best time to start learning was ten years ago; the second best time is today. Happy reading and happy farming!


    📚 More From Our Homestead

    Ready to Start Your Homestead Journey?

    Free guides, checklists, and tools to help you build your dream homestead.
    Explore Free Resources →


    👉 Related: Raising Backyard Chickens: Pros, Cons & What to Expect

    👉 Related: Homesteading on a Budget: Our Smart Start Guide

    👉 Related: Mastering: What Essential Homesteading Skills Beginners Need