Tag: goats

  • My First Year Beekeeping Equipment Checklist (What We Used)

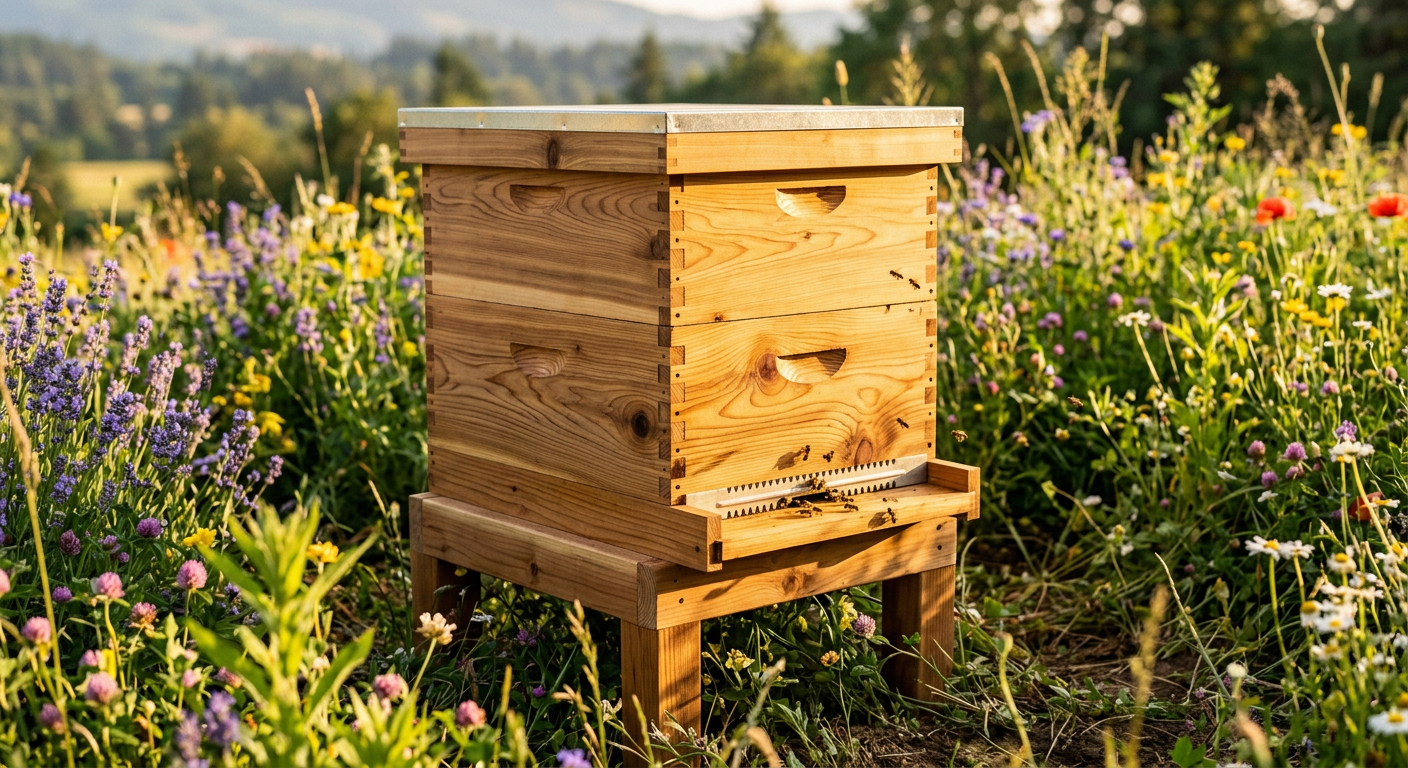
    !A new cedar Langstroth beehive in a field for a first year beekeeping equipment checklist.

    I’ll never forget the buzzing. It wasn’t just a sound; you feel it in your chest, a low hum of a thousand tiny engines vibrating through the wooden box. My hands were sweating inside brand new leather gloves, and the sweet, waxy smell of the hive mixed with the sharp scent of pine from the smoker was overwhelming. That first hive inspection, I was terrified and totally in love all at once.

    🎯 Quick Answer: For your first year, you need a full bee suit with a veil, gloves, a smoker, and a hive tool. You also need two complete Langstroth hives (bottom board, two deep brood boxes, two honey supers, inner/outer covers, and frames/foundation for all). Don’t start with just one hive.

    🔑 Key Takeaways

    * Safety First: Don’t ever cheap out on your protective gear. A good veil and suit are the difference between a learning experience and a trip to the ER.

    * Start with Two Hives: This is non-negotiable. It allows you to compare colony strength and gives you options if one hive becomes weak or queenless.

    * Langstroth is King (for Beginners): It’s the most common hive type. This means parts are easy to find and most online advice applies to it.

    * Focus on Health, Not Honey: Your goal in the first year is to build two strong, healthy colonies that can survive the winter. Any honey you get is a bonus.

    * Budget Accordingly: Plan to spend between $500 and $800 for two hives, bees, and all the necessary gear. We spent about $650 our first year.

    * Buy Early: Order your gear in the winter. This gives you time to assemble hives before your bees arrive in the spring.

    🌱 Start Your Homestead Plan →

    !Essential safety gear including a smoker and veil for a first year beekeeping equipment checklist.

    The Absolute Bare Minimum: My First Year Beekeeping Equipment Checklist

    When we decided to add bees to our homestead, I went down a rabbit hole of catalogs and websites. Gadgets everywhere. It was paralyzing. What do you actually need? Forget the fancy stuff. This is the rock-solid, first year beekeeping equipment checklist we stick to when we help new beeks get started.

    It Starts with The Bees (and their house)

    First, you need bees. We started with two “nucs,” which are small nucleus colonies with a laying queen and a few frames of brood. They cost us $175 each from a local apiary. Don’t worry about the bees just yet—you need to have their house ready first.

    Here’s the basic shopping list:

    * Two Complete Hives: We use standard 10-frame Langstroth hives.

    * Protective Gear: A full suit is best for confidence.

    * Essential Tools: Smoker, hive tool, bee brush.

    That’s it. That’s the core. Everything else is either for a later season or a “nice-to-have” that you can add as you go. Honestly, keeping the list of essential homesteading tools minimal is a skill in itself.

    I remember seeing a “Beginner Kit” online for $189 that had everything. Seemed perfect. But the suit was just a flimsy jacket and the hive was only a single box. It wouldn’t have been enough for a colony to even get started properly. We ended up buying components, which saved us money and got us better quality where it counted.

    Now, let’s break down exactly what “a complete hive” means.

    Keep reading — this is where most people mess up by buying the wrong parts.

    Breaking Down the Beehive: What Parts Do You Actually Need?

    Langstroth hives are like building blocks. You add or remove boxes (called “supers”) as the colony grows or shrinks. For your first year, you need enough to give them room to grow a family and store food for winter.

    Here’s what a single complete hive setup looks like:

    * Hive Stand: Cinder blocks work perfectly. Gets the hive off the damp ground. Cost us $8 for four.

    * Screened Bottom Board: This is the floor of the hive. The screen helps with ventilation and mite control.

    * Two Deep Hive Bodies (Brood Boxes): These are the big boxes. This is where the queen lays her eggs and the baby bees are raised. You need two.

    * Twenty Deep Frames & Foundation: Ten for each brood box. The foundation is a sheet of beeswax or plastic that guides the bees to build straight comb.

    * Two Medium Hive Bodies (Honey Supers): These are the smaller, lighter boxes that go on top. This is where the bees will (hopefully) store extra honey.

    * Twenty Medium Frames & Foundation: Ten for each honey super.

    * Inner Cover: This sits on top of the uppermost box and provides ventilation and an insulating air gap.

    * Telescoping Outer Cover: The roof. It telescopes down over the top of the hive to protect it from the elements.

    Personal Story: We bought our first two hives as unassembled kits from Mann Lake to save about $50 per hive. It took my husband and I a full Saturday, a lot of wood glue, and a nail gun to put them together. I’ll be honest, the first one was a little crooked. But it taught us every single piece of the hive inside and out. It’s one of those fundamental homesteading skills beginners need, getting your hands dirty and building things yourself.

    You need this full setup for EACH hive. So, double everything on this list if you’re following our advice to start with two.

    Next, let’s talk about keeping those thousands of bees from stinging you.

    📋 Get the Beginner Checklist →

    Protective Gear: Don’t Learn This Lesson the Hard Way

    I can’t say this enough: your confidence as a beekeeper is directly tied to how protected you feel. If you’re scared, you’ll be clumsy. If you’re clumsy, bees get angry. It’s a bad cycle.

    Here’s what we use and recommend for your first year beekeeping equipment checklist for protection:

    * Veil: The most important piece. We love the round-style veils because they keep the mesh far away from your face. I cheaped out on my first one—a flimsy pop-up veil attached to a jacket—and a determined bee managed to sting my eyelid through the mesh when I bent over. It swelled shut for two days. I spent $80 on a better ventilated suit with a structured veil the next week and have never regretted it.

    * Suit or Jacket: For your first year, get a full suit. It’s hot, yes. But it provides total peace of mind. Jackets are fine, but you run the risk of a bee crawling up your back if you don’t tuck it in right. Our vented suits from Humble Bee are amazing and worth the investment.

    Gloves: We started with thick goatskin leather gloves. They give great protection but you lose a lot of dexterity. After a year, we switched to nitrile gloves (two pairs, layered) for most inspections. You feel everything, but you will* get stung through them occasionally. Start with leather.

    * Boots: Any pair of work boots that cover your ankles is fine. Just make sure to pull your suit legs down over them.

    My husband, ever the tough guy, tried to do a quick inspection once with just a veil and t-shirt. He came running back to the house 30 seconds later with five stings on his arms. Lesson learned. Respect the bees, wear the gear.

    Now you’ve got the house and the armor. What else?

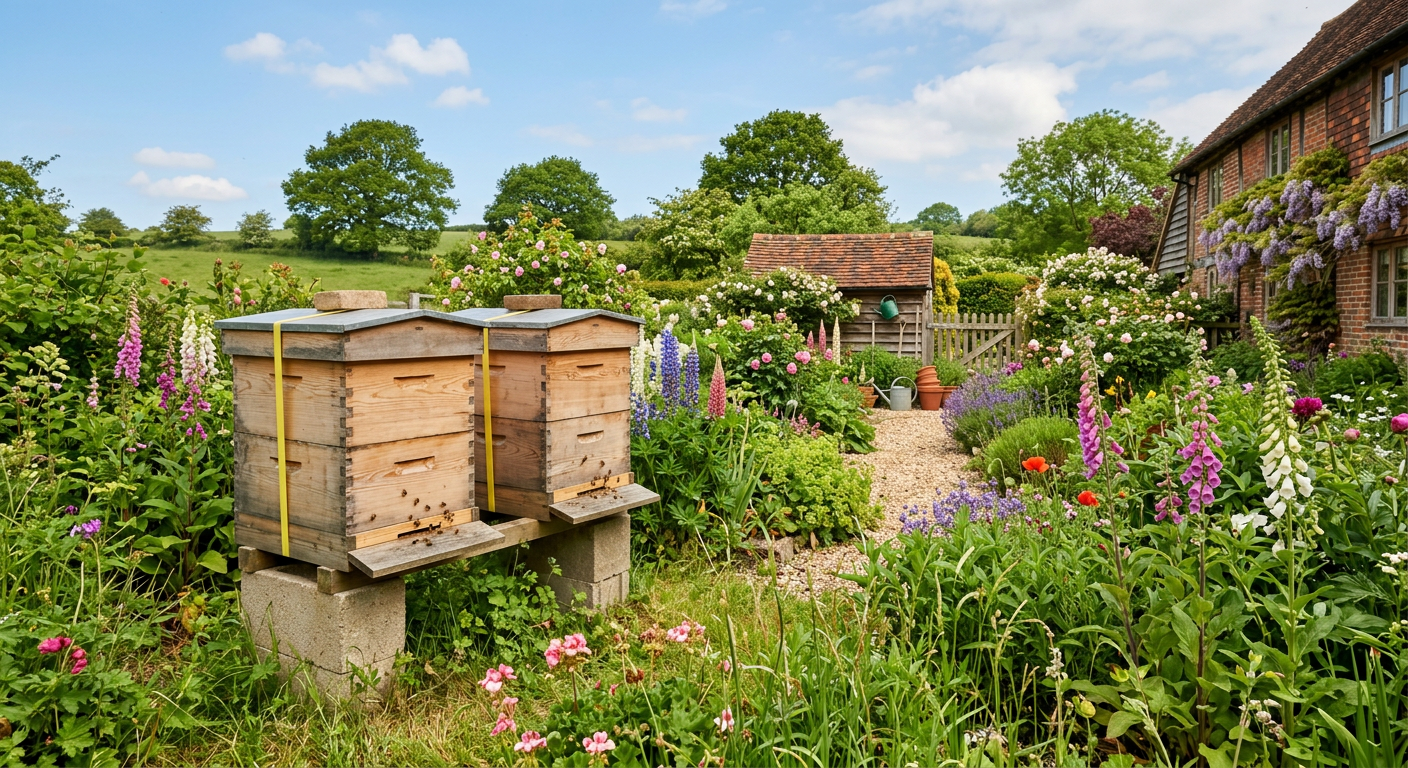
    !Two Langstroth beehives side-by-side as recommended in a first year beekeeping equipment checklist.

    Tools of the Trade: Beyond the Hive & Suit

    These are the tools you’ll have in your hand every time you visit the bee yard. Getting the right ones makes the job smoother and less stressful for you and the bees.

    The Essentials You Can’t Live Without

  • A Smoker: This is not optional. Smoke doesn’t calm the bees; it makes them think there’s a forest fire. They gorge on honey in preparation to flee, which makes them less likely to fly out and sting you. We have a 4″x7″ stainless steel smoker. Spend the extra $10 to get one with a heat shield cage around it. I have the burn scars on my wrist from grabbing our first, cheaper one without thinking.
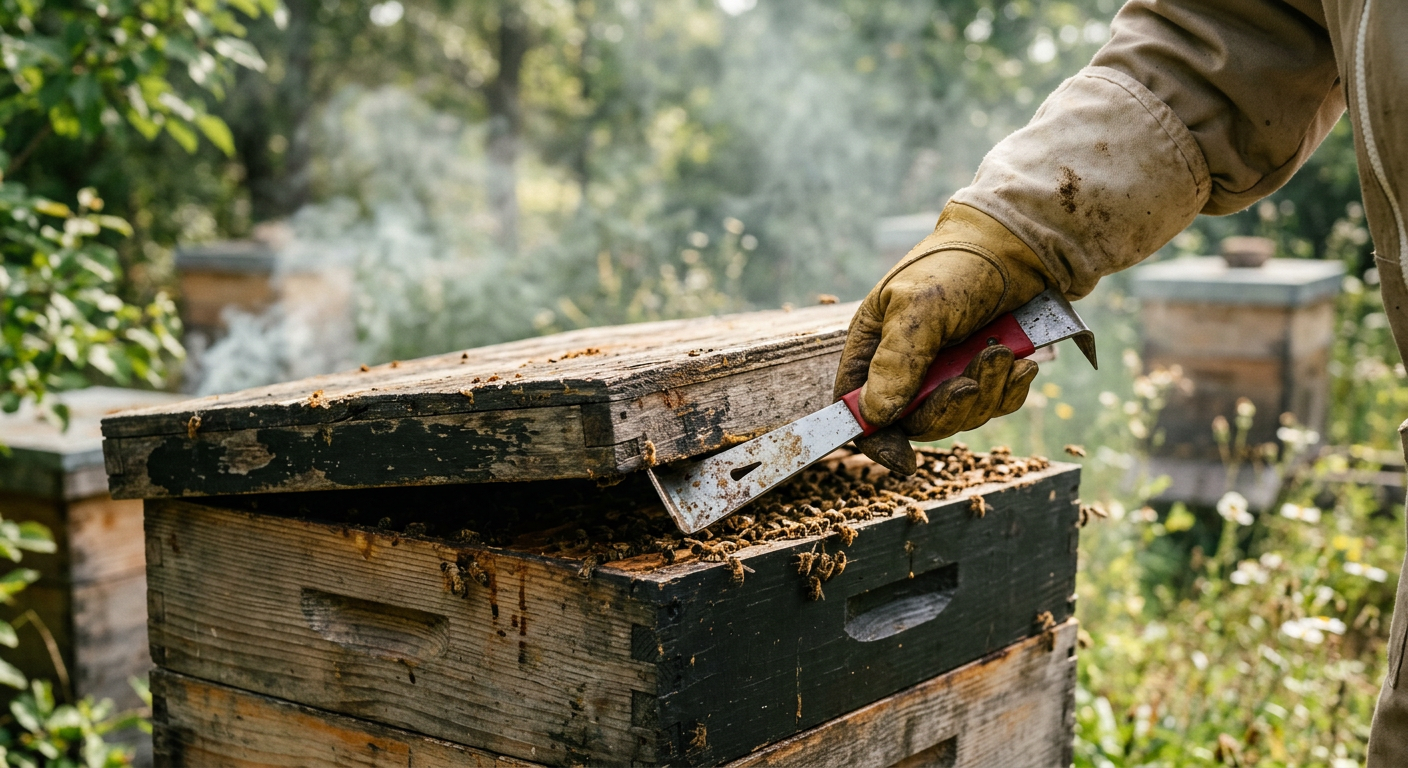
  • Hive Tool: It’s a mini crowbar for beekeepers. Bees seal everything in their hive with a sticky substance called propolis. You need a hive tool to pry open the hive, separate boxes, and lift out frames. Get two. You will lose one in the grass. I promise.
  • Bee Brush: A very soft-bristled brush used to gently move bees off a frame. You need this when you’re looking for the queen or getting ready to harvest honey. Don’t use your glove—you’ll crush bees and make the others angry.
  • We track all our homestead tasks, from building hives to planting dates, in a central place. Having a system is crucial when things get busy. We actually built one for ourselves, and it’s turned into the core of how we run our homestead now; you can check out how we organize our entire operation here. A good system prevents mistakes.

    With these tools, you can perform 99% of the tasks you’ll need to do in your first year. Everything else is just an accessory.

    💡 Pro Tips

    We’ve made just about every mistake in the book. Here’s what we wish we knew from day one.

    * Join a Local Bee Club BEFORE You Buy Anything. They’ll have recommendations for local suppliers and, most importantly, you can find a mentor. Having a real person to call is invaluable. Find a local club through the American Beekeeping Federation.

    * Assemble & Paint in Winter. Unassembled kits save money, but they take time. Build them in January, then put 2-3 coats of good quality exterior paint on them. This protects the wood and makes them last for years. We learned this after our unpainted hives looked terrible after just one season.

    * Light Your Smoker Correctly. Don’t just stuff it and light it. Start with a small bit of newspaper, get it burning, then slowly add your fuel (we use pine needles or wood shavings). Puff the bellows until you have cool, white smoke. Hot, black smoke just makes bees mad.

    * Your First Year Harvest is a Strong Winter Cluster. Don’t get greedy. It’s tempting to pull honey, but the hive needs that food to survive its first winter. A hive that survives is worth way more than 20 pounds of honey.

    * Plan Your Apiary Location. Bees need sun, especially in the morning, but appreciate some afternoon shade in hot climates. They also need a windbreak and to not be right on a main walking path. We made that mistake and had to move our hives mid-season. It was not fun.

    ⚠️ Beginner Mistakes to Avoid

    * Buying Used Equipment. It’s tempting to save money, but old woodenware can harbor diseases like American Foulbrood, which can devastate your apiary and is impossible to get rid of without burning everything. Just don’t.

    * Not Treating for Varroa Mites. This is the #1 killer of honeybee colonies. Varroa are parasitic mites that feed on bees and spread viruses. You MUST have a mite treatment plan. We lost our first-ever hive because we thought they were “fine” and didn’t test or treat. It was a silent, heartbreaking death over winter.

    * Only Buying One Hive. I’ve said it three times, so you know it’s important. When one hive is struggling, you have no way to know if it’s your fault or just a weak hive. With two, you can compare and even give a frame of eggs from the strong hive to the weak one to help them raise a new queen.

    * Over-inspecting. It’s exciting, but every time you open the hive, you set them back. In the spring, we inspect every 7-10 days. Once the honey flow starts, we might stretch it to 2-3 weeks. Don’t go in just to look. Have a purpose.

    * Following a Homesteading On a Budget mindset for your bees. While frugality is a virtue on the homestead, bees are livestock. Trying to cut corners on their health or safety gear often costs way more in the long run. Proper management, like we constantly track with our digital homestead planner, is cheap insurance.

    !Close-up of a hive tool being used, a key item on a first year beekeeping equipment checklist.

    Frequently Asked Questions

    How much does it cost to start beekeeping?

    Real talk: plan on $500-$800. Our first year, it was about $650. This broke down to: $350 for two nucs (bees), $200 for two unassembled hive kits, and about $100 for a decent suit, gloves, and tools. You can find cheaper options, but this is a realistic budget for quality gear that will last.

    What’s better: Langstroth, Top Bar, or Warre hives?

    We tell all beginners to start with Langstroth. Why? They are standardized. Parts are everywhere. Almost all books and YouTube videos are about them. Top Bar and Warre hives are great, but they are a different management style and it’s harder to find resources and mentors.

    When is the best time to buy my beekeeping equipment?

    Order your woodenware (the hive boxes) in November or December. Companies often have sales, and it gives you plenty of time to assemble and paint everything before your bees arrive in April or May. Order your protective gear at the same time.

    Can I get away with just a jacket and veil instead of a full suit?

    You can, but we don’t recommend it for your first year. A single sting getting under the jacket can ruin your confidence. A full suit lets you relax, move slowly, and learn without fear. After a year or two, you can decide if you want to downgrade your protection.

    Is it cheaper to build my own beehives?

    If you have a woodshop and woodworking skills, yes, you can save money by building your own hives from plans. But for a beginner, the precision required is high. We find that buying unassembled kits is the best balance of cost savings and guaranteed-to-fit parts.

    Getting into beekeeping felt like unlocking a new level of our homestead. It’s not just about the honey, which is an incredible bonus. It’s about participating in the rhythm of the seasons, watching this superorganism thrive, and seeing your fruit trees and garden explode with pollination. It’s a challenge, but one of the most rewarding we’ve ever taken on.

    We post a lot of our day-to-day beekeeping moments and other homestead wins (and failures!) over on our Facebook page, come say hello!

    What’s the one thing holding you back from starting with bees? Share it in the comments below, we’ve probably felt the same way!

    🔧 See Recommended Tools →


    📚 More From Our Homestead

    Ready to Start Your Homestead Journey?

    Free guides, checklists, and tools to help you build your dream homestead.
    Explore Free Resources →

  • Rural vs Urban Homesteading: A Real-World Guide

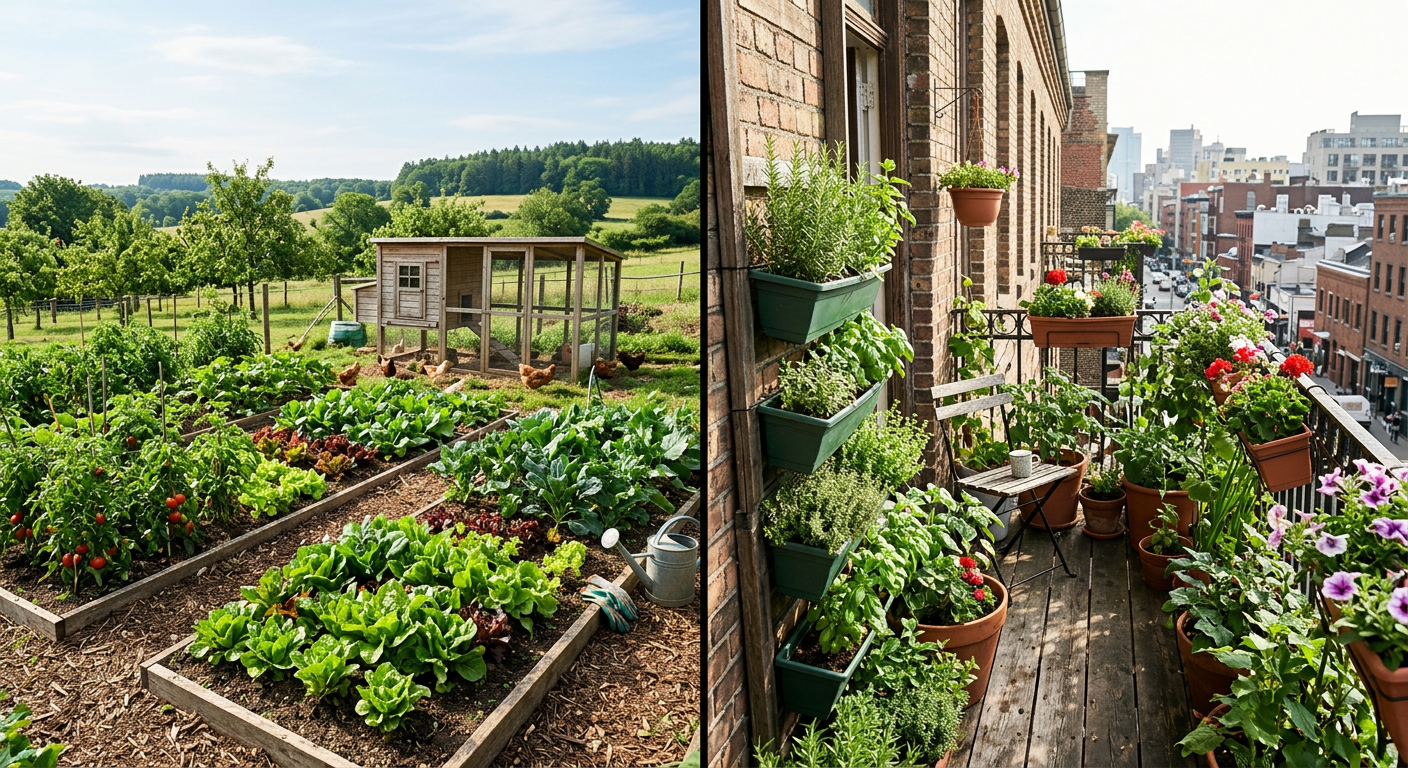
    !A visual showing what is difference between rural and urban homesteading in terms of space.

    I’ll never forget the smell of our neighbor’s two-stroke leaf blower mixing with exhaust fumes on our tiny city patio. I was trying to feel connected to the basil I was growing in a cracked terracotta pot, but the noise was a constant reminder of how little space we really had. Now, the loudest sound at 6 AM is a rooster clearing his throat two hundred yards away, and the air smells like damp earth and pine. People always ask what is the difference between rural and urban homesteading, and for me, it’s all in that memory.

    🎯 Quick Answer: The core difference between rural and urban homesteading is scale, dictated by space and local regulations. Rural homesteading allows for larger animals, bigger gardens, and more infrastructure like wells and septic, while urban homesteading focuses on maximizing small spaces with skills like container gardening, preserving, and raising small livestock like quail or chickens where permitted.

    🌱 Start Your Homestead Plan →

    🔑 Key Takeaways

    • Space is the Game Changer: Rural offers acres; urban offers square feet. This single factor dictates almost every other choice you make.
    • Regulations Rule Everything: Urban homesteaders live by city ordinances (chickens, composting, water barrels). Rural homesteaders face zoning, land use codes, and water rights.
    • Cost Varies Wildly: Urban homesteading has lower entry costs but can be expensive per square foot. Rural homesteading requires massive upfront investment in land and infrastructure.
    • Animal Choices Are Drastically Different: A few hens or quail might be possible in the city. Goats, pigs, and cattle are strictly a rural option.
    • Community Looks Different: Urban homesteaders often find tight-knit online groups and local meetups. Rural communities can be more spread out, requiring deliberate effort to connect.
    • The Goal is the Same: Both paths are about building resilience, producing more than you consume, and learning valuable skills.

    !Urban homesteader harvesting basil on a city balcony to show what is difference between rural and urban homesteading.

    The Soul of Urban Homesteading: A Haven in the City

    Before we bought our land, we spent five years learning on a 1/8th acre lot in the suburbs. It was our laboratory. It wasn’t about total self-sufficiency; it was about learning the rhythm of the seasons on a small, manageable scale.

    Your Biggest Puzzle: Space

    Our first “farm” was a 10×12 foot concrete patio. I was obsessed. We built vertical planters out of scavenged pallets and grew lettuce and strawberries. We had five-gallon buckets filled with potatoes and tomatoes. It’s amazing what you can do when you stop thinking about acreage and start thinking in cubic feet. We learned more about soil composition and intensive planting in that tiny space than we did in our first year on acres because every inch mattered.

    Our journey into Urban Homesteading with Kids was a fantastic way to teach them where food actually comes from, even with sirens in the background.

    The Legal Maze: Know Your Code

    I’ll never forget the thrill and terror of researching our city’s ordinances on chickens. I spent a week scrolling through the municipal code, a dry and confusing document. The verdict? We could have six hens, no rooster. They had to be 25 feet from any neighboring dwelling. Our coop plan had to be submitted for approval. It was a lesson: urban homesteading is a partnership with your local government, whether you like it or not.

    A great place to start your own search is the American Legal Publishing Corporation’s Code Library, which hosts municipal codes for thousands of towns and cities. Don’t guess—know the rules before you invest a dime.

    Ultimately, urban homesteading is an exercise in creativity and optimization. You’re not taming the wilderness; you’re carving out a productive paradise within it.

    Keep reading — this is where most people mess up.

    The Reality of Rural Homesteading: Big Dreams, Big Work

    Moving to our five acres was like stepping onto another planet. The silence was the first thing we noticed. And then, the sheer amount of work hit us like a physical blow. The difference between rural and urban homesteading became crystal clear that first spring.

    Acres of Opportunity (and Weeds)

    The first time I stood in the middle of our field, I was paralyzed. Where do you even start? In the city, the garden was a defined project. Here, the project was… everywhere. We spent our first six months just clearing brush, pulling invasive blackberries, and trying to understand the flow of water on the land. That year, we spent over $800 on a heavy-duty Stihl brush cutter, a tool we’d never even conceived of needing in the city.

    Finding the right piece of land is its own challenge. We spent a year looking before we found our spot, and our Beginner’s Property Guide covers the mistakes we almost made.

    Freedom From Rules… Sort Of

    Yes, I can build a greenhouse without asking a committee. I can have a rooster (we have three). I can dig a pond. But that freedom comes with a new set of responsibilities. We had to learn about septic systems—a breakdown is a multi-thousand-dollar disaster. We had to understand our well—when the power went out for 72 hours last winter, we had no water. That’s a lesson that hits hard and fast. Every homesteading choice you make is affected by your initial planning, and using a framework like the one from HomesteadOS can mean the difference between thriving and just surviving.

    Rural living isn’t lawless; the laws are just written by nature and physics instead of a city council.

    📋 Get the Beginner Checklist →

    What is the Difference Between Rural and Urban Homesteading Costs?

    This is the question that trips everyone up. The financial realities are polar opposites. One is a slow burn; the other is a series of massive financial hits.

    Urban: Death by a Thousand Cuts

    In the city, the land itself is your biggest expense (via mortgage or rent). After that, it’s a constant stream of smaller costs. You have to buy everything. Good organic compost? $10 a bag. Raised bed kits? $150 each. Specialized, compact tools cost a premium. Our first-year urban garden setup, with four raised beds and all the soil, cost us around $1,200. It wasn’t one big check, but it added up fast.

    Rural: Big Ticket Shock

    On our rural homestead, the land purchase was just the entry fee. The real costs came after.

    • Used Kubota Tractor: $14,500
    • Fencing for 1 Acre: $6,200 (and we installed it ourselves over 11 weekends)
    • Emergency Well Pump Replacement: $2,800
    • Barn Roof Repair: $4,500

    You aren’t just buying land; you’re buying infrastructure. And if it’s not there, you’re paying to build it. Our guide on Homesteading on a Budget started with lessons learned from these exact expenses.

    Deciding what animals to bring onto the homestead is the next big financial and logistical hurdle you’ll face.

    Don’t skip this next part—these mistakes cost us time and money.

    !Chickens in a rural setting explaining what is difference between rural and urban homesteading animal options.

    The Animal Question: Chickens, Goats, and Ordinances

    Your location directly dictates your livestock options. This is a non-negotiable part of understanding what is the difference between rural and urban homesteading.

    Urban Livestock: Small and Stealthy

    In the city, we had four Buff Orpington hens. They were wonderful pets that gave us breakfast. But managing them was an art. We built a coop that was more like a piece of fine furniture to keep the neighbors happy. We dealt with pests like rats drawn to the feed. We had to have a plan for what to do with an ailing chicken since vets who treat them are rare in cities. It’s totally doable, but it’s high-management. Many urban homesteaders turn to quail, which are quiet, take up very little space, and are often not regulated like chickens.

    Rural Livestock: The Dream and the Nightmare

    The day we brought home our first two Nigerian Dwarf goats was one of the best days on the homestead. The reality check came a week later when one of them found a single, tiny flaw in our very expensive fencing and got out. Rural homesteading means you are fully responsible for the safety, health, and containment of your animals. There’s no one to call. You become the vet, the fence-mender, and the herdsman. It requires a completely different level of knowledge you often have to gain on the fly. The systems for managing your whole operation, from animals to gardens, need to be robust, which is why we’ve come to rely on the dedicated tools found at HomesteadOS to keep it all straight.

    💡 Pro Tips

    • Start Right Where You Are. Don’t wait for acres. Learn to bake bread, ferment vegetables, or mend clothing in your apartment right now. These skills are portable and foundational.
    • Soil is Everything. We learned the hard way that you must get a soil test, urban or rural. We wasted an entire season and hundreds of dollars on amendments because our rural soil was incredibly acidic. A $30 test from your local University Extension Office would have saved us a year.
    • Master One Thing at a Time. Don’t try to get chickens, start a giant garden, and learn to make cheese in the same season. You’ll burn out. Pick one project, master it, then add another. Slow is smooth, and smooth is fast.
    • Redefine “Community”. In the city, community was easy to find. In the country, we had to build it. It meant showing up at the Grange meetings, shopping at the local feed store and actually talking to people, and offering to help a neighbor when a storm knocked down their fence. It takes more effort but can be incredibly deep.

    ⚠️ Beginner Mistakes to Avoid

    • Romanticizing Rural Life: Thinking it’s all peaceful sunrises and cute goats. It’s also frozen pipes, predator attacks, and physical exhaustion.
    • Ignoring City Code (Urban): A friend in a nearby town had to get rid of her beloved flock of four hens because a new neighbor complained and she was, technically, in violation of a setback rule. It was heartbreaking and totally avoidable.
    • Buying Too Much Land (Rural): Our five acres is plenty. I’ve seen friends buy 20+ acres and become slaves to mowing it, paying taxes on it, and worrying about it. Start smaller than you think you need.
    • Using the Wrong Tools: A cheap, plastic wheelbarrow from a big box store will last one season on a rural homestead. A city hand trowel will bend in rocky country soil. Invest in the right tools for your specific environment. See our list of Essential Homesteading Tools to Buy First.

    !Preserved food and garden harvest showing what is difference between rural and urban homesteading lifestyles.

    Frequently Asked Questions

    Can you really be self-sufficient on an urban homestead?

    No, not completely. True self-sufficiency (food, water, energy) is nearly impossible in a city. The goal of urban homesteading is increased self-reliance. This means growing a significant portion of your own produce, preserving food, reducing waste, and maybe producing your own eggs or honey. It’s about dependence on the system, not complete independence from it.

    What is the minimum land for rural homesteading?

    This depends entirely on your goals. For a large garden, a small flock of chickens, and a couple of dairy goats, you can do a surprising amount on just 1-2 acres. If you want to raise larger livestock like cattle for meat or have space for woodlot management, 5-10 acres is a more realistic minimum. We feel our 5 acres is the perfect balance of manageable work and productive space.

    Is rural or urban homesteading cheaper?

    Urban homesteading is cheaper to start. The barrier to entry is much lower. Rural homesteading is vastly more expensive upfront due to the cost of land and infrastructure (wells, septic, barns, tractors). Over a 30-year timeline, the costs might even out, but the initial financial shock of going rural is significant.

    What’s a better way to start, rural or urban?

    I am a huge advocate for starting in an urban or suburban environment first, even if your dream is rural. Use a small space to learn the basic skills: gardening, food preservation, basic tool use. Making mistakes on a small patio garden is a cheap lesson. Making those same mistakes on a 2-acre market garden can be a financial disaster.

    Ultimately, the difference between rural and urban homesteading isn’t about which one is better. It’s about which one is right for you, right now. Both paths are valid. Both are hard work. Both are incredibly rewarding.

    It’s a mindset, not a zip code. It’s about turning your home, wherever it is, into a place of production.

    For more daily stories from our homestead and to connect with others on this path, be sure to follow our journey on Facebook.

    What’s the one homesteading skill you’re most excited to learn, regardless of where you live? Let me know in the comments below!

    🔧 See Our Recommended Tools →


    📚 More From Our Homestead

    Ready to Start Your Homestead Journey?

    Free guides, checklists, and tools to help you build your dream homestead.

    Explore Free Resources →

  • Homesteading Hacks: Save Serious Money on Groceries!

    !A lush backyard garden showing how to save money on groceries homesteading by growing produce.

    I remember staring at our grocery bill just five years ago, my jaw practically on the floor. It was over $1200 for a family of four, and we weren’t even buying fancy stuff! That’s when we knew something had to change — saving money on groceries was going to be a non-negotiable part of our homesteading journey.

    🎯 Quick Answer: Saving money on groceries through homesteading involves a multi-pronged approach: grow what you can, preserve your harvests, buy in bulk directly from producers, cook from scratch, and strategically reduce waste. Our family cut our grocery bill by over 60% using these methods.

    🌱 Start Your Homestead Plan →

    🔑 Key Takeaways

    * Garden for Savings: Growing even a small portion of your produce can drastically reduce your grocery expenses, especially for high-cost items like fresh herbs and berries.

    * Preserve Your Harvest: Canning, freezing, dehydrating, and fermenting extends the life of your bounty, making seasonal savings last all year.

    * Strategic Bulk Buying: Purchasing staples, meat, and dairy directly from farmers or co-ops in large quantities offers significant price breaks.

    * Cook from Scratch: Eliminating processed foods means fewer expensive ready-meals and more control over ingredients and costs.

    * Waste Not, Want Not: Smart meal planning and creative use of leftovers prevent food waste, directly impacting your budget.

    * Animal Contributions: Raising chickens for eggs or a few dairy goats can provide fresh, often ‘free,’ protein and dairy, further reducing grocery needs.

    !Fresh harvested vegetables on a table illustrating how to save money on groceries homesteading.

    Our Journey to Saving Money on Groceries Homesteading

    When we first moved onto our little patch of land, we had grand visions of self-sufficiency. But honestly, the initial push wasn’t just about the romantic idea of ‘living off the land’; it was about necessity. That $1200 bill was a wake-up call, and we started looking at how to save money on groceries homesteading as our first major project.

    Our first year, we only managed to shave off about 15% from our grocery expenses. We were enthusiastic but a bit disorganized. We grew too many zucchinis and not enough of what we actually ate frequently. Over the years, refining our methods and focusing on high-impact areas, we now consistently keep our monthly grocery spending under $450 for the same family of four. That’s a savings of over $750 every single month!

    This transformation didn’t happen overnight, but it was incredibly rewarding. The peace of mind knowing where our food comes from, and the extra money in our pockets, has been truly life-changing. Now, let’s dive into exactly how we did it. But before you start, there’s one mistake that ruins everything — I’ll cover it next.

    Grow Your Own: The Ultimate Grocery Hacker

    If you want to know how to save money on groceries homesteading, growing your own food is hands down the most impactful step. We started with a tiny 4×8 raised bed, and it quickly expanded.

    Prioritize High-Cost or High-Consumption Crops

    Don’t try to grow everything at once. Focus on items that are expensive at the store or that your family eats a lot of. For us, that meant.

    * Berries: Fresh raspberries and blueberries are pricey, especially organic ones. Our small patch of everbearing raspberries gives us fresh fruit for months.

    * Herbs: A small herb garden saves a fortune. A bunch of fresh basil can be $3-4; growing it costs pennies. We’ve got rosemary, thyme, oregano, and mint flourishing.

    * Salad Greens: Lettuce, spinach, and kale grow quickly and can be harvested repeatedly. We found that a continuous harvest of greens saved us about $20-30/month in buying pre-washed bags.

    * Tomatoes & Peppers: We go through a lot of these in sauces, salads, and cooking. Growing our own means fresh produce all summer and plenty for canning.

    Start Small, Learn, Then Expand

    We didn’t plant an acre overnight. Our first garden was modest, and we learned a ton about our soil, sunlight, and what thrives here. Each year, we’d add another bed or expand a patch. This gradual scaling prevented overwhelm and helped us enjoy the process. Read our guide on How to Start a Small Backyard Vegetable Garden: Beginner Guide for a great starting point.

    Consider Yield and Space Efficiency

    Some crops give you more bang for your buck. For instance, a single zucchini plant can produce more squash than you know what to do with! But also consider vertical gardening for space-saving. Pole beans, cucumbers, and even small melons can climb, maximizing your harvest in a small footprint.

    Keep reading — this is where most people mess up.

    Preserve the Bounty: Extending Your Savings

    What’s the point of growing all that food if it goes bad? Preserving is crucial for how to save money on groceries homesteading year-round. It means enjoying summer’s sweetness in the dead of winter without paying premium prices.

    Canning for Shelf Stability

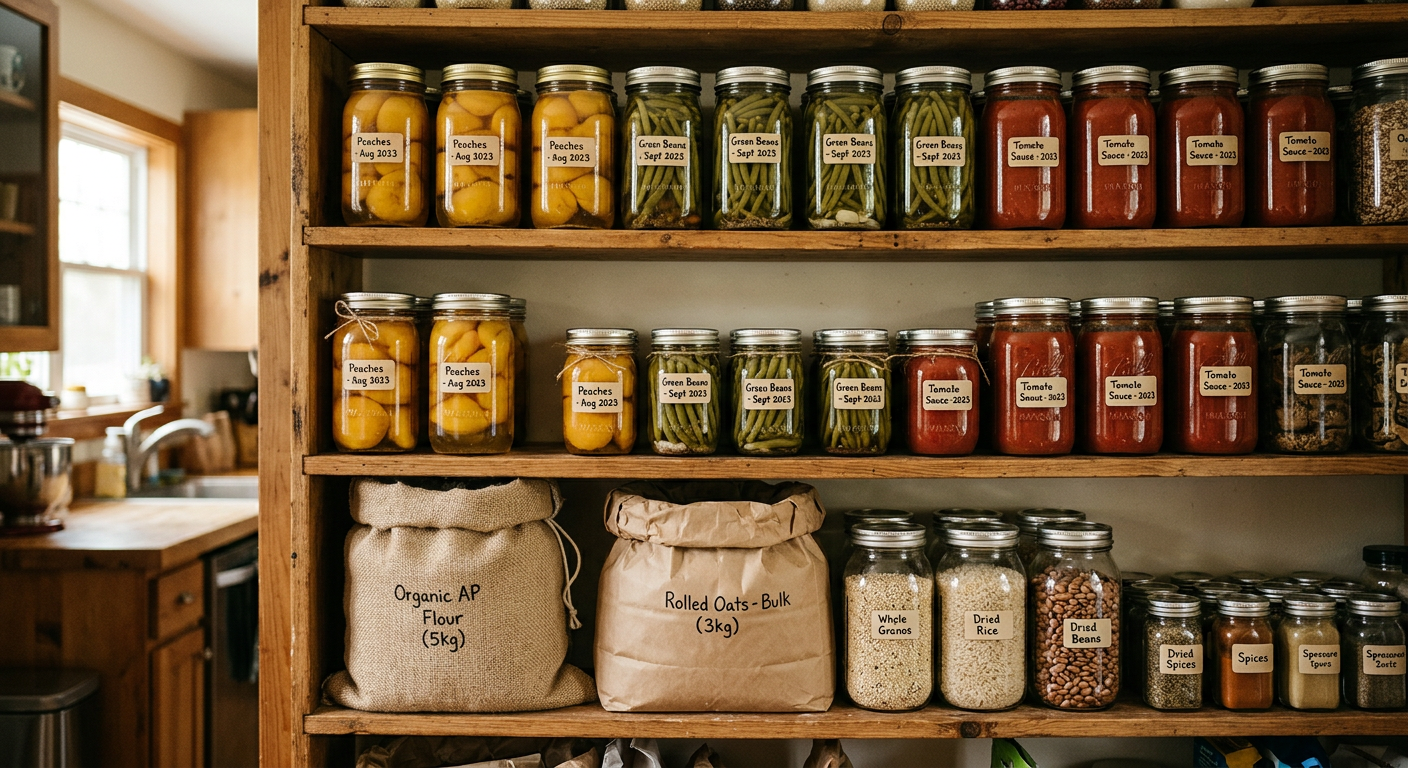
    We started with water bath canning for high-acid foods like jams, jellies, pickles, and tomato sauce. Later, we invested in a pressure canner for low-acid vegetables like green beans and corn, as well as meats. Our pantry now looks like a mini grocery store!

    * Tomatoes: We can diced tomatoes, crushed tomatoes, and salsa. This saves us about $50-70 per month on canned tomato products alone during winter.

    * Green Beans: A bushel of green beans from a local farmer can be bought cheap, then canned for year-round side dishes. We estimate this saves us approximately $100 throughout the off-season.

    * Jams & Jellies: Using homegrown or locally picked fruit, we make all our own preserves. This easily saves us $15-20 per month compared to store-bought.

    Freezing for Freshness and Convenience

    Freezing is often the easiest entry point into food preservation. We freeze berries, chopped vegetables, and even entire meals. Just blanching vegetables for a few minutes before freezing helps maintain their quality.

    * Berries: Wash, dry, and freeze berries on a baking sheet before transferring to bags. Perfect for smoothies and winter desserts.

    * Pesto Cubes: Blend extra basil into pesto and freeze in ice cube trays. Pop one into pasta or soup for a burst of flavor.

    Dehydrating for Light and Long-Term Storage

    Our dehydrator is always humming. It’s fantastic for herbs, fruit leathers, and even emergency food supplies.

    * Herbs: Dry your garden herbs for cooking. They take up little space and retain their flavor for months.

    * Apple Slices: A great healthy snack that saves us from buying expensive fruit snacks.

    Fermentation for Probiotics and Flavor

    Sauerkraut, kimchi, and fermented pickles are not only delicious and healthy but also extremely cost-effective to make. Cabbage is cheap, and fermenting extends its life significantly.

    Consider our post on Crack the Code: Preserving Eggs Long-Term (No Fridge Needed!) for another great preservation method!

    📋 Get the Beginner Checklist →

    This next part? Nobody talks about it, but it changed everything for us.

    !Canned goods and bulk staples showing how to save money on groceries homesteading through preservation.

    Smart Sourcing: Beyond Your Homestead

    Even with a thriving garden and a full pantry, we can’t grow everything. That’s where smart sourcing comes in to reinforce how to save money on groceries homesteading.

    Buying in Bulk & Direct from Farmers

    We’ve found incredible savings by cutting out the middleman. This means buying a whole or half animal directly from a local farmer, or joining a CSA (Community Supported Agriculture) program.

    * Bulk Meat: We split a half-cow with friends every year. The upfront cost (around $1200 for us) feels like a lot, but calculated by the pound, it’s significantly cheaper (often $3-5/lb for premium cuts) than buying individual packages at the grocery store. It fills our chest freezer and lasts us 8-10 months.

    * Local Produce: During peak season, we visit farmers’ markets an hour before closing and often get deals on ‘ugly’ produce perfect for canning or freezing. We also have a standing order with a local farmer for a bushel of peaches every August for our canning projects.

    * Co-ops & Discount Stores: Membership to a local food co-op or shopping at stores like Aldi/Lidl for non-perishables and pantry staples saves us another 15-20% on those items.

    Foraging for Free Food

    Depending on where you live, wild edibles can supplement your diet for free! We forage for wild berries, mushrooms (only with expert identification!), and even edible greens like dandelion and plantain.

    * Dandelions: Young dandelion greens are great in salads, and the roots can be roasted for a coffee substitute.

    * Blackberries: Our property is edged with wild blackberries, providing gallons of fruit for jams and pies every summer – completely free.

    The Homestead Kitchen: Cooking from Scratch and Reducing Waste

    Our kitchen is the heart of our homestead, and it’s where we truly embody the spirit of how to save money on groceries homesteading.

    Say Goodbye to Processed Foods

    Processed foods are notoriously expensive and often less nutritious. By cooking almost everything from scratch, we eliminate these costs. Breads, sauces, dressings, and snacks – it’s all made here.

    * Homemade Bread: Making our own sourdough bread (flour, water, salt, starter) saves us about $4-5 per loaf compared to artisan bread. Even basic yeast bread is far cheaper than store-bought.

    * Bone Broth: After butchering chickens (which we raise ourselves – see Raising Backyard Chickens: Pros, Cons & What to Expect), we use the bones to make nourishing bone broth. This is basically free, whereas store-bought bone broth can be $5-8 per carton.

    Meal Planning and Leftover Creativity

    Planning our meals around what’s in season, what we’ve preserved, and what’s in the pantry prevents impulse buys and reduces waste. Leftovers are gold!

    * Weekly Meal Plan: Every Sunday, we sit down and plan out 7 dinners, often incorporating ingredients nearing their ‘use by’ date. This helps us empty the fridge before grocery day.

    * ‘Clean Out the Fridge’ Dinners: Once a week, we have a dinner where everyone finds something in the fridge that needs to be eaten. It’s often a hodgepodge but always prevents waste.

    Raise a Few Animals (If You Can!)

    While not everyone can have animals, if you’re serious about homesteading and how to save money on groceries homesteading, they can be a massive asset.

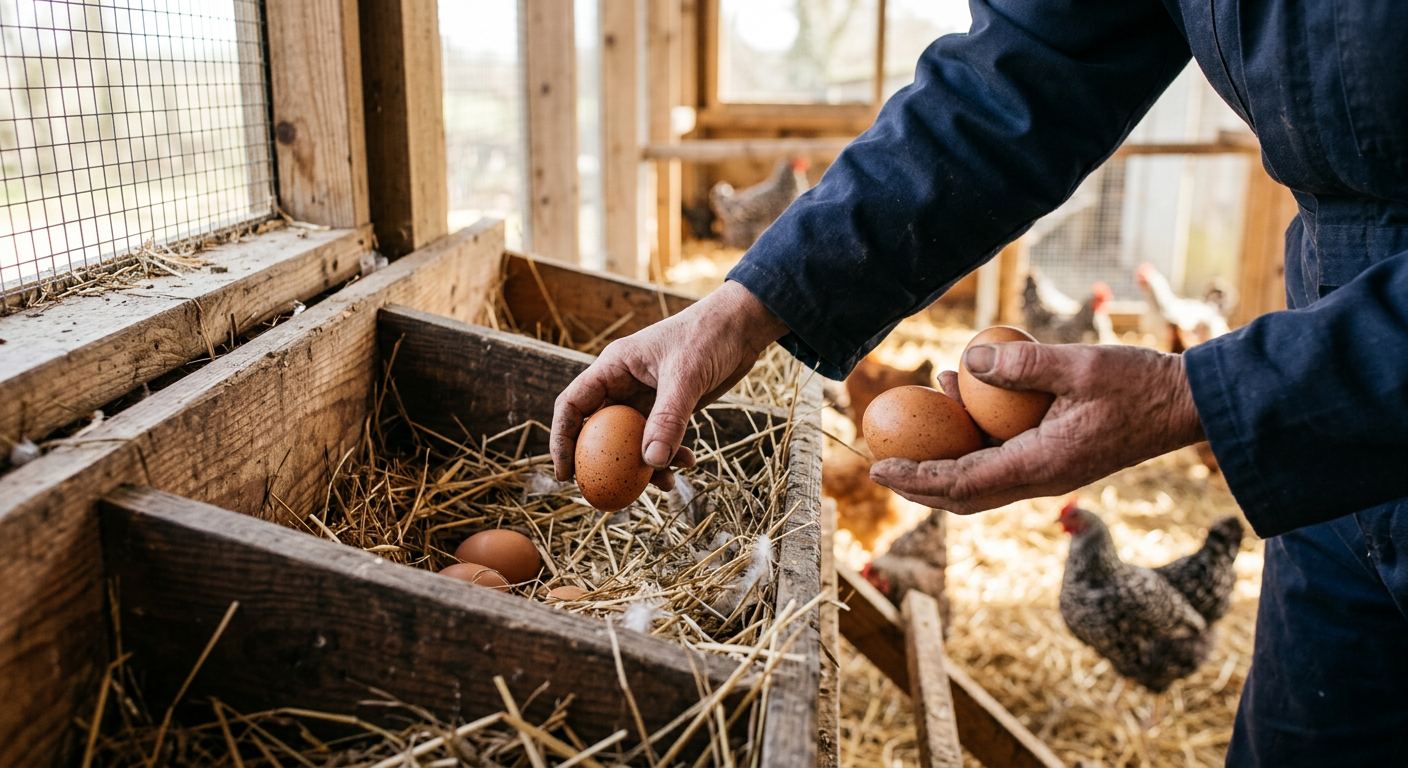
    * Chickens for Eggs: Our flock of a dozen laying hens provides all the eggs we need, plus extras to sell to neighbors. We spend about $30 a month on feed, but we get about 8-10 dozen eggs per week. That’s dirt cheap eggs! (Learn more in Build a Movable Chicken Tractor for Sustainable Pest Control).

    * Dairy Goats: A couple of dairy goats can provide milk, cheese, and yogurt, almost completely eliminating dairy from your grocery list. We have two, and their milk supply is bountiful.

    Don’t skip this — it’ll save you hours (and money).

    💡 Pro Tips

    * Track Your Spending: For a month or two, actually write down every single grocery expense. You’ll be shocked where your money goes. This data helps you target key areas for savings.

    * Invest in Good Tools: A quality pressure canner, dehydrator, or even an extra freezer pays for itself quickly when you’re preserving large quantities of food.

    * Learn a New Skill Every Season: Focus on mastering one new preservation method (canning, dehydrating, fermenting) per gardening season. This keeps it manageable and fun.

    * Barter and Trade: Connect with other local homesteaders or farmers. We often swap excess eggs for berries or help with canning for some of their surplus vegetables.

    * Compost Food Scraps: Instead of tossing vegetable peels and uneaten bits, compost them. This creates rich soil for your garden, reducing the need for expensive soil amendments and closing the loop.

    ⚠️ Beginner Mistakes to Avoid

    * Planting Too Much of One Thing: Our `zucchini overload` the first year taught us this lesson quickly. Diversify your crops, and plant what you truly enjoy eating.

    * Ignoring Preservation from the Start: Don’t wait until you’re drowning in tomatoes to figure out canning. Start learning basic preservation methods before your harvest overwhelms you.

    * Buying All the Gear at Once: It’s tempting to get every gadget. Start with the essentials (pots, basic canning supplies, a good knife) and acquire more specialized tools as your needs grow.

    * Not Meal Planning: Without a plan, you’ll inevitably buy things you don’t need or let fresh produce go bad. A simple weekly plan makes a huge difference.

    * Giving Up Too Soon: There will be failures – pests, crop blights, canning mishaps. Don’t let them deter you. Learn from them and keep going.

    !Collecting fresh eggs from a coop as a way to learn how to save money on groceries homesteading.

    Frequently Asked Questions

    How much can you realistically save on groceries with homesteading?

    Our family saves over $750 a month, which is about 60% of our original grocery bill. However, what you save depends on your dedication, the size of your garden, and your willingness to commit to scratch cooking and preservation. Many homesteaders report saving 30-70%.

    What are the cheapest things to grow to save money on groceries?

    High-yield, fast-growing items like lettuce, spinach, radishes, green beans, and zucchini are very cost-effective. Expensive store-bought items like fresh herbs and berries also offer significant savings when grown at home.

    Does homesteading really save money, or does it cost more in the long run?

    It absolutely saves money in the long run, but there’s an upfront investment in seeds, supplies, and potentially tools or animal enclosures. However, most of these are one-time costs or have long lifespans. The fresh, organic food you produce is far cheaper than buying it, and the skills you gain are invaluable.

    How much land do you need to significantly reduce your grocery bill?

    Not as much as you think! Even urban homesteaders with small backyards or balconies can grow a substantial amount of food. A well-planned 100-200 sq ft garden can provide a significant portion of a family’s produce needs for several months. For more, check out Tiny Space, Big Harvest: How to Start Urban Homesteading Small Space.

    What are good beginner animals to help save on groceries?

    Chickens are a great start for fresh eggs. They are relatively low-maintenance and provide daily protein. Rabbits can be raised for meat fairly easily. Dairy goats are excellent for milk if you have the space and commitment. For more ideas, see Tiny Farm, Big Rewards: Best Low Maintenance Farm Animals.

    Wrapping up this chat, I hope you see that figuring out how to save money on groceries homesteading isn’t just about cutting costs; it’s about building resilience, developing invaluable skills, and putting truly nourishing food on your family’s table. It takes effort, sure, but the rewards—both financial and personal—are immense. We started small, learned as we went, and now our grocery bill is a fraction of what it once was. You can do it too!

    What’s your biggest challenge with reducing your grocery bill? I’d love to hear your story.

    🔧 See Recommended Tools →


    📚 More From Our Homestead

    Ready to Start Your Homestead Journey?

    Free guides, checklists, and tools to help you build your dream homestead.
    Explore Free Resources →

  • Easiest Homesteading Animals to Raise? Here’s Our Story

    !A peaceful backyard showing what are the easiest homesteading animals to raise in a natural setting.

    When we first started dreaming of our homestead, the animal questions hit us hard. Were we ready for the commitment? Would we wake up one day to a chicken escaping or a goat eating our prize-winning tomatoes? It felt overwhelming, but we knew animals were a cornerstone of self-sufficiency. So, we started small, very small, and learned a ton along the way about what are the easiest homesteading animals to raise.

    🎯 Quick Answer: The easiest homesteading animals for beginners are typically chickens (for eggs), rabbits, and sometimes ducks. They require less space, lower initial investment, and simpler daily care compared to larger livestock, making them ideal for learning the ropes of animal husbandry.

    🌱 Start Your Homestead Plan →

    🔑 Key Takeaways

    * Chickens are often the gateway animal: They’re relatively forgiving, provide daily rewards, and teach basic animal care.

    * Consider your space and climate: What works in a small backyard in Florida might not work on acres in Alaska.

    * Start with a clear purpose: Eggs, meat, weed control, or manure? Your goals will guide your choices.

    * Factor in costs beyond purchase price: Feed, housing, veterinary care, and processing all add up.

    * Rabbits offer quick returns: Especially for meat, they grow fast and are highly efficient.

    * Ducks are hardy and productive: Great for eggs, pest control, and don’t need a pond, just a water source for splashing.

    Our First Foray: Chickens for Eggs

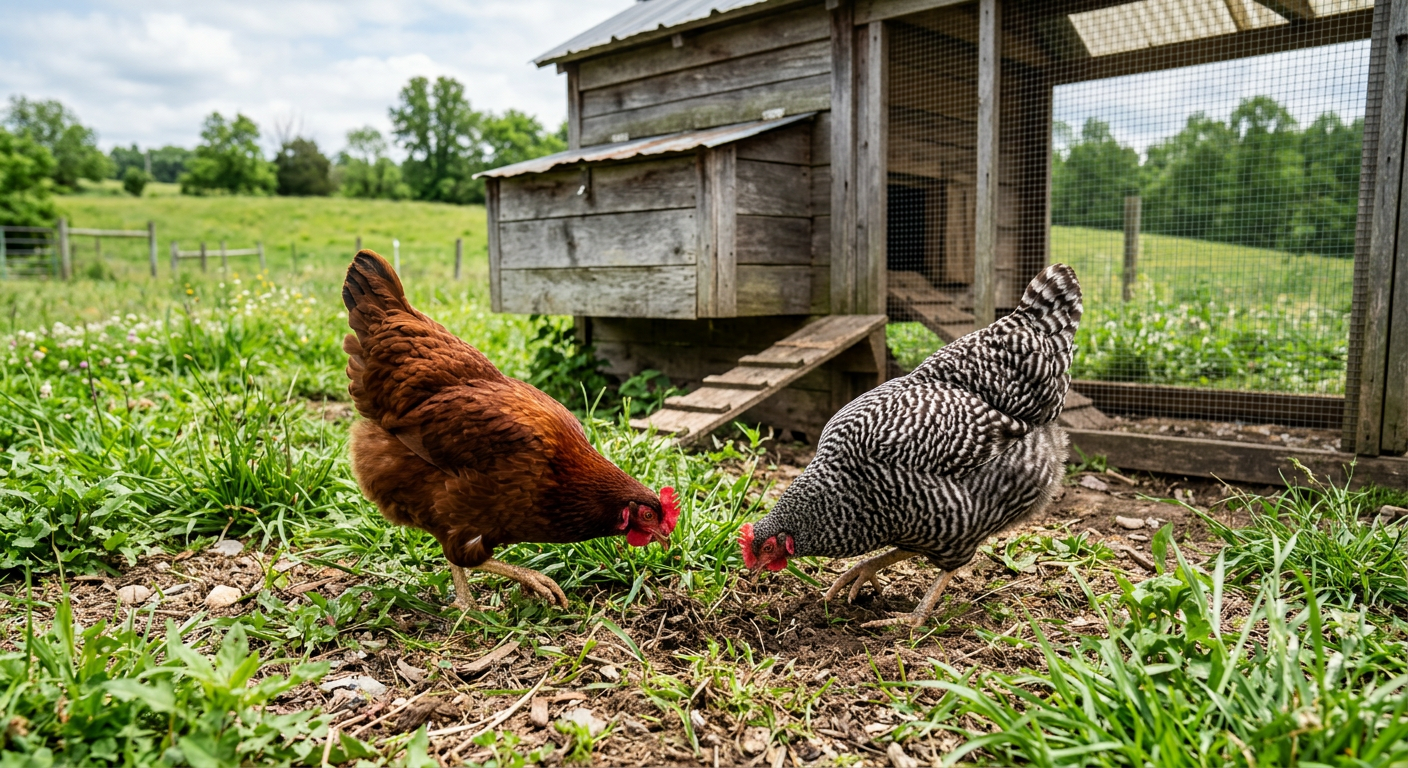
    When we first asked ourselves, “what are the easiest homesteading animals to raise?” the unanimous answer from our homesteader friends was chickens. We started with just six laying hens – three Rhode Island Reds and three Barred Plymouth Rocks – back in 2018. The setup cost us about $400. This included a pre-built coop we found on sale, a feeder, a waterer, and the six chicks themselves at about $3 each. We chose these breeds because they’re known for being good layers and fairly docile.

    Why Chickens are Great for Beginners

    * Daily Rewards: Nothing beats fresh eggs every morning. Our six hens gave us an average of 4-5 eggs a day during peak season. It’s incredibly motivating!

    * Relatively Low Maintenance: They need daily food and water, coop cleaning every week or two, and protection from predators. We spent about 15-20 minutes a day on routine care.

    * Pest Control: Our free-ranging chickens dramatically reduced the bug population in our garden (though we had to watch them around younger plants!).

    * Compost Boosters: Chicken manure is a fantastic addition to the compost pile, enriching our garden beds.

    We quickly learned the true joy of watching them scratch around, and even the occasional skirmish over a tasty bug became part of the daily entertainment. But before you get your own flock, make sure you know what you’re getting into.

    This next part? Nobody talks about it, but it changed everything for us.

    The Unexpected Joy of Rabbits

    Okay, so chickens were great, but we wanted to explore a meat source that wasn’t as noisy or required processing that involved plucking feathers (which, let me tell you, is a job!). That’s when we discovered rabbits. When considering what are the easiest homesteading animals to raise for meat, rabbits quickly rose to the top of our list. Initially, we were a little squeamish, but the efficiency and quality of the meat won us over.

    We started with two New Zealand White does and one buck for $150 total, plus another $200 for sturdy hutches, water bottles, and feeders. Within four months, our first litter was ready for processing. Rabbits have a short gestation period (31 days) and can produce several litters a year.

    Why Rabbits are a Homesteading Gem

    * Quiet & Clean: Compared to other livestock, rabbits are incredibly quiet. Their droppings are also a fantastic, ‘cold’ manure that can be used directly in the garden without composting.

    * Space-Efficient: You can raise a significant number of rabbits in a relatively small area, making them perfect for urban or suburban homesteads. We fit three hutches in a 10×10 foot area.

    * Fast Turnaround: From birth to butcher size, it takes about 10-12 weeks for most meat breeds. This means you can have a consistent supply of lean, healthy meat.

    * Low Feed Conversion Ratio: They convert feed to meat very efficiently, often requiring less feed per pound of meat than chickens or larger animals.

    Our biggest lesson with rabbits was the importance of proper ventilation in their hutches and keeping them safe from predators. Raccoons are a real threat, so secure housing is non-negotiable. Now that you understand the meat side, let’s splash into another easy option.

    📋 Get the Beginner Checklist →

    Diving into Ducks: The Unsung Heroes

    After a few years with chickens and rabbits, we wanted to diversify our egg supply and add another layer of pest control. Enter ducks! We were initially hesitant, imagining a messy pond full of quacking, but what are the easiest homesteading animals to raise for unique eggs and pest control? Ducks, hands down. We started with five Pekin ducklings for about $25 total. We already had a secure coop space, so our only extra cost was a large, shallow tub for them to splash in.

    Benefits of Raising Ducks

    * Hardy & Disease Resistant: Ducks are generally much hardier than chickens and tend to be more resistant to common poultry diseases. We’ve had far fewer health issues with our ducks.

    * Excellent Foragers: They are incredible at pest control, devouring slugs, snails, and various insects that chickens often ignore. Our garden saw a significant reduction in pests after we introduced the ducks.

    * Rich, Large Eggs: Duck eggs are larger and richer than chicken eggs, fantastic for baking. Our five Pekins gave us 4-5 eggs a day.

    * Less Destructive to Gardens: While they love to forage, they tend to do less damage to garden beds than chickens, as they don’t scratch as aggressively. They do love to dabble and make mud, though, so good drainage is key.

    Our biggest piece of advice for ducks is to ensure they have access to water deep enough to submerge their heads to keep their nostrils clean – even if it’s just a sturdy kiddie pool. They don’t need a pond, but they absolutely thrive with plenty of water for splashing and preening. But before you get too excited about all these animals, there are a few things you need to consider carefully.

    Keep reading — this is where most people mess up.

    Key Considerations Before Getting Started

    Choosing what are the easiest homesteading animals to raise isn’t just about the animal itself; it’s about your specific situation. We learned this the hard way by almost getting goats before realizing our fencing was nowhere near adequate.

    Space Requirements

    * Chickens: Require about 2-3 square feet per bird inside the coop and 8-10 square feet per bird in an outdoor run. Our 6 hens lived comfortably in a 24 sq ft coop with a 50 sq ft run. For free-ranging, allow ample space. (USDA’s guide on small flock care).

    * Rabbits: Each adult rabbit needs at least a 24×30 inch hutch. They fare better with more space, especially does with litters. Our three adult rabbits lived in individual 36×30 inch hutches.

    * Ducks: Similar to chickens, about 3-4 square feet per bird inside the coop and 10-15 square feet per bird in a run. They also need a water source for splashing that’s at least 6-8 inches deep and wide enough for them to move around in.

    Time Commitment & Daily Chores

    * Chickens/Ducks: 15-30 minutes daily for feeding, watering, egg collection, and general observation. Weekly coop cleaning can take 30-60 minutes.

    * Rabbits: 10-20 minutes daily for feeding, watering, and checking on kits. Weekly hutch cleaning takes about 15-30 minutes per hutch.

    Initial and Ongoing Costs

    This is where many beginners get surprised. We track all our homestead expenses, and it’s always more than you think.

    * Initial: Animal purchase, housing (coop, hutches), feeders, waterers, fencing.

    * Ongoing: Feed (varies greatly but can be $20-$50/month for a small flock/colony), bedding, supplements, and potential veterinary costs. Our chicken feed for six hens costs us about $25 a month, while rabbit feed for our colony runs about $30 a month.

    Don’t skip this — it’ll save you hours (and money).

    !Rhode Island Red and Barred Rock hens, often considered what are the easiest homesteading animals to raise.

    Getting Started: Actionable Steps for New Homesteaders

    So you’ve decided what are the easiest homesteading animals to raise for your situation. Now, let’s get them! Here’s how we approach bringing new animals onto our homestead.

    1. Research Local Regulations

    Before you even look at buying an animal, check your local city or county ordinances. Many suburban areas have limits or prohibitions on certain livestock. This can save you a lot of headache (and potential fines!). We had a scare recently when our county considered new restrictions on fowl, which luckily didn’t pass.

    2. Plan and Build Secure Housing

    Predator protection is paramount. Coyotes, raccoons, stoats, hawks – they’re all looking for an easy meal. For our chickens and ducks, we built an entirely enclosed run using hardware cloth (not chicken wire!) buried six inches into the ground. For rabbits, we use sturdy, elevated hutches with secure latches and wire bottoms to allow droppings to fall through. For ideas on homestead layouts or building, check out our post on Your First Homestead Layout: Simple Steps for Beginners.

    3. Source Healthy Animals

    Buy from reputable breeders or hatcheries. Inspect the animals for signs of illness (lethargy, discharge, ruffled feathers/fur). Healthy stock means fewer problems down the line. We typically order day-old chicks and ducklings from known hatcheries or purchase weaned rabbits from local breeders with good reviews.

    4. Prepare for Feed and Water

    Have your feed, feeders, and waterers ready before the animals arrive. Choose species-appropriate feed. For our chickens and ducks, we use a high-quality layer feed. Rabbits get a special pellet alongside hay. Ensure water is always fresh and clean. Consider automatic waterers to save time.

    💡 Pro Tips

    * Start small: Don’t try to get all the animals at once. Master one species before adding another.

    * Observe daily: Learn your animals’ routines. Any change in behavior can be an early sign of trouble.

    * Have a plan for emergencies: Know a local vet who treats livestock or keep a basic animal first-aid kit on hand.

    * Batch chores: We feed and water all our animals at the same time each morning and evening to create an efficient routine.

    * Utilize their waste: Animal manure is a goldmine for your garden. Research composting methods for chickens and ducks or use rabbit manure directly.

    ⚠️ Beginner Mistakes to Avoid

    * Underestimating predator pressure: Many dreams are dashed by predators. Invest in strong, secure housing from day one.

    * Ignoring local regulations: Waking up to a notice from the city about your illegal chickens is no fun. Check first!

    * Starting with too many animals: Overwhelm leads to burnout. A small, well-managed flock/colony is better than a large, neglected one.

    * Not having a plan for processing (meat animals): If you’re raising for meat, understand the process, find local resources, or be prepared to do it yourself.

    * Skimping on feed quality: Cheap feed often means unhealthy animals and lower production. Invest in good nutrition.

    Frequently Asked Questions

    What are the easiest homesteading animals to raise for a small backyard?

    For a small backyard, especially in urban or suburban settings, chickens (for eggs) and rabbits (for meat or pets) are generally the easiest. They require less space and can be housed in contained systems. Consider dwarf chicken breeds for even smaller footprints. Our small urban setup started with 4 chickens in a 4×8 ft coop.

    How much time do beginner homesteading animals require daily?

    Most beginner animals like chickens, ducks, or rabbits require about 15-30 minutes of daily care. This includes feeding, watering, checking on their well-being, and collecting eggs or checking on litters. Weekly deep cleaning of coops or hutches will add more time.

    Can I mix different easy homesteading animals in one space?

    Generally, no. While some people successfully integrate chickens and ducks, or even specific breeds of rabbits, it’s not recommended for beginners. Different species have different needs, social structures, and potential for disease transmission or aggression. We keep our chickens and ducks in separate runs adjacent to each other, and rabbits in their own hutches.

    What’s the biggest cost associated with easy homesteading animals?

    After the initial setup cost for housing, feed is almost always the biggest ongoing expense. It can fluctuate with market prices, but it’s a constant. We try to offset ours by foraging for greens for our rabbits and growing a small flock-specific garden for our chickens and ducks.

    Do I need a permit to raise chickens or ducks in my backyard?

    It depends entirely on your local municipality. Some cities allow a certain number of hens but no roosters, while others prohibit all poultry. Always check with your local zoning and animal control departments before bringing any animals home. This is especially true for us as we live on the edge of the city limits.

    !A homesteader holding a rabbit, one of the top choices for what are the easiest homesteading animals to raise.

    Ready to Bring Life to Your Homestead?

    Deciding what are the easiest homesteading animals to raise for your unique situation is the first exciting step! For us, starting with a small flock of chickens was the perfect introduction, opening the door to rabbits and ducks later. Each animal brought its own rewards and lessons, deepening our connection to the land and our food source. Remember, homesteading is a journey, not a destination, and every animal adds to the rich tapestry of that experience.

    What’s your biggest challenge with starting with homesteading animals? I’d love to hear your story.

    🔧 See Recommended Tools →


    📚 More From Our Homestead

    Ready to Start Your Homestead Journey?

    Free guides, checklists, and tools to help you build your dream homestead.
    Explore Free Resources →

  • Tiny Farm, Big Rewards: Best Low Maintenance Farm Animals

    Hey there, fellow homestead dreamers! When we first started our journey, the thought of adding animals to our small homestead was exciting, but also… well, a little intimidating. There’s so much conflicting advice out there, and frankly, some of it makes it sound like you need a full-time staff just to keep a chicken alive. But after years of learning, living, and a few comical (and sometimes frustrating) adventures, we’ve discovered that it’s absolutely possible to integrate a bustling farm life into a small footprint without burning yourself out.

    We’ve dedicated ourselves to finding the best low maintenance farm animals for small homesteads – creatures that contribute to our family’s self-sufficiency without demanding every waking hour. Because let’s be real, most of us aren’t quitting our day jobs to become full-time farmers from day one! Our goal was to find animals that fit into our busy lives, providing eggs, meat, milk, or garden helpers, while still leaving us time to enjoy our evenings and weekends.

    🌱 Ready to start your homestead journey? Explore our free guides and tools →

    Today, I want to share our hard-won wisdom and introduce you to the animals that have truly made a difference on our homestead. We’ll talk about what makes an animal “low maintenance,” why they’re perfect for smaller spaces, and give you a realistic peek into what to expect from each one.

    What Makes an Animal “Low Maintenance” for a Small Homestead?

    Before we dive into specific animals, let’s define what we mean by “low maintenance” in the homesteading world. It’s not about ignoring them – no animal is zero maintenance! For us, it boils down to a few key factors:

    * Minimal Daily Input: Can they largely care for themselves, or do they require constant supervision? We’re talking less daily feeding, fewer health issues, and less intricate housing.

    * Space Efficiency: How much land do they actually need? Small homesteads often mean limited acreage, so animals that don’t need vast pastures are key.

    * Foraging Ability: Do they prefer to graze or forage for a significant portion of their food? This reduces feed costs and workload.

    * Hardiness & Health: Are they prone to disease or easily stressed? Robust animals mean fewer vet calls and less worry.

    * Temperament: Are they generally calm and easy to handle? This is especially important if you have kids around or are new to animal husbandry.

    * Return on Investment (Time & Effort): What do you get back for your effort? Eggs, meat, milk, pest control, fertilizer? The more benefits, the better!

    Our Top Picks: The Best Low Maintenance Farm Animals for Small Homesteads

    After years of trial and error (and a few escaped chickens!), these are the animals that have proven their worth on our small, busy homestead.

    #### 1. Chickens: The Homestead Gateway Drug (and Egg Layers!)

    I don’t think there’s a homesteader out there who didn’t start with chickens. And for good reason! They are, hands down, one of the best low maintenance farm animals for small homesteads, especially for beginners.

    * Why we love them: Fresh eggs every day! They are natural pest controllers, turning bugs and kitchen scraps into valuable protein. Their manure is fantastic for the garden (just make sure it composts first!). Plus, they’re just plain entertaining to watch.

    * Maintenance Level: Moderate-Low. Once their coop is set up securely (critter-proof is crucial!), daily tasks are simple: feed, water, egg collection. We spend about 15-20 minutes a day on our flock of 10 hens. Cleaning the coop is a weekly to bi-weekly chore, taking about an hour.

    * Space Needs: Surprisingly little. A good rule of thumb is 3-4 sq ft per bird inside the coop and 8-10 sq ft per bird in the run. We free-range ours whenever possible, but a secure run is essential for safety. Read more about how to build a movable chicken tractor for sustainable pest control to see how we managed space efficiently.

    * Costs: Chicks cost $3-$5 each. A basic coop can be built for a few hundred dollars or bought for $500-$1500+. Feed runs about $20-$30 for a 50lb bag, lasting our small flock a couple of weeks.

    * Our Experience: We started with 6 hens, and quickly realized how much we loved fresh eggs. We’ve found breeds like lớp (Orpingtons, Rhode Island Reds, Wyandottes) to be exceptionally docile and cold-hardy. They lay consistently for 2-3 years, then production tapers off, but they’ll still lay!

    #### 2. Ducks: The Unsung Heroes of Pest Control

    Many new homesteaders overlook ducks, but they really are fantastic, especially if you have a slightly wetter area on your property or struggle with slugs and snails. They’re another strong contender for the best low maintenance farm animals for small homesteads.

    * Why we love them: Ducks are phenomenal foragers, eating tons of slugs, snails, and other garden pests. Their eggs are richer and larger than chicken eggs, fantastic for baking. They are generally more disease-resistant than chickens and less prone to scratching up garden beds (they ‘dab’ rather than scratch).

    * Maintenance Level: Low. Similar to chickens, but they need a water source deeper than just a bowl for dipping their heads. A kiddie pool works perfectly. They also tend to keep their bedding cleaner than chickens!

    * Space Needs: Similar to chickens, but they appreciate having access to a pond or a large tub of water. We dedicate a small, fenced-off corner of our property for their personal spa area.

    * Costs: Ducklings are often $5-$10 each. Housing can be a modified chicken coop, or a simple, secure shed.

    * Our Experience: Our five Embden ducks are hilarious and industrious. They gobble up pests that chickens ignore, and their eggs are a prized commodity! They do make a bit more mud around their water source, but it’s a small price to pay for pest control and delicious eggs.

    #### 3. Rabbits: Meat, Manure, and Mirth

    If you’re interested in a sustainable meat source or high-quality fertilizer, rabbits are hard to beat for a small footprint. They’re quiet, clean, and incredibly efficient.

    * Why we love them: They multiply quickly, providing a sustainable meat source (if that’s your goal) with a small feed input. Their “bunny berries” are cold manure, meaning you can put it directly on your garden beds without composting, enriching your soil immediately. They’re also relatively quiet and don’t take up much space.

    * Maintenance Level: Moderate-Low. Daily feeding and watering, plus weekly cage cleaning. The biggest chore is keeping their cages clean to prevent ammonia buildup and health issues.

    * Space Needs: Very little. A comfortable hutch can house 1-2 rabbits. For breeding, you’ll need multiple hutches. We use stacked cages to save space.

    * Costs: Breeding stock can range from $30-$100 per rabbit depending on the breed. Hutches can be homemade or purchased for $50-$200 each. Feed costs are low, as they munch on hay and a small amount of pellets.

    * Our Experience: We raised New Zealand Whites for a few years and found them to be incredibly efficient. The fresh manure was a game-changer for our raised beds – talk about a nutrient boost! It perfectly complemented our small backyard vegetable garden. We harvested about 30 rabbits a year from 2 does and 1 buck, providing a significant portion of our family’s meat.

    📋 Free Download: Get our Small Homestead Animal Starter Checklist →

    #### 4. Quail: Compact Egg Machines

    If you’re really tight on space, quail are your answer. These tiny birds are phenomenal egg layers and can even provide meat in a surprisingly small footprint.

    * Why we love them: They take up minimal space – you can house a flock of 20-30 quail in the same area as 2-3 chickens. They mature and start laying eggs incredibly fast (around 6-8 weeks!). Their eggs are small but delicious and packed with nutrients. They’re also very quiet, making them ideal for urban or suburban homesteads.

    * Maintenance Level: Low. Daily feeding and watering. Their small size makes cleaning their cages a bit quicker than larger birds.

    * Space Needs: Minimal. A 2’x3’ cage can comfortably house 10-15 Coturnix quail. They thrive in secure, enclosed aviaries or cages.

    * Costs: Quail chicks are inexpensive ($1-$3 each), or you can buy fertile eggs and hatch them yourself. Cages are relatively cheap to build or buy.

    * Our Experience: We currently have a small flock of Bobwhite quail and they are awesome! They lay an egg almost every day, and their chirping is quite soothing. We keep them in a large converted rabbit hutch, and it’s been fantastic for fresh eggs without needing much land. We even harvest some for meat in the fall – a delicate, tasty treat.

    #### 5. Goats: The Energetic Land Clearers (Choose Wisely!)

    Now, goats typically wouldn’t make a “low maintenance” list for everyone, but if you choose the right breed and have issues with brush or weeds, they can actually be a huge asset to a small homestead. We’re specifically talking about smaller, dairy or fiber breeds, not full-sized meat goats.

    * Why we love them: Dairy goats provide fresh milk, which can be turned into cheese, yogurt, and soap. Fiber goats (like Angoras or Cashmeres) offer luxurious wool. They are also fantastic at clearing brush, acting as living lawnmowers and weed-eaters.

    * Maintenance Level: Moderate. They do require more daily attention than chickens or rabbits. Daily milking for dairy goats, secure fencing (goats are escape artists!), and hoof trimming are regular tasks. They are very social and need companionship.

    * Space Needs: More than other animals on this list, but miniature breeds like Nigerian Dwarfs or Pygmies can thrive on 1/4 to 1/2 acre with good browsing. We have two Nigerian Dwarfs on about half an acre, and they keep the overgrowth at bay nicely.

    * Costs: Breeding stock varies widely, from $200-$500+ per animal. Fencing can be a significant investment ($500-$2000 for good goat fence). Feed is primarily hay, with supplemental grain for milking does.

    * Our Experience: Our two Nigerian Dwarf does, Buttercup and Daisy, are a chaotic joy. They supply us with plenty of delicious milk for our family, and their antics keep us laughing. Yes, they require more effort than our chickens – especially the daily milking and constant fence checks – but the fresh milk products make it worth it for us. They’ve also cleared out so much invasive brush on the edge of our property that would have taken us weeks of manual labor!

    Setting Up for Success: Essential Tips for Small Homestead Animals

    No matter which of the best low maintenance farm animals for small homesteads you choose, a good setup is paramount for keeping them low-maintenance in the long run.

    * Secure Housing: This is non-negotiable. Predators are everywhere, and a well-built, predator-proof coop or hutch saves endless heartache. When we were first setting up our chicken coop, we spent a solid weekend making sure every crack and crevice was secured, and it’s paid off for years.

    * Water, Water, Water: Fresh, clean water is essential, and often overlooked. Bigger waterers mean less frequent refilling. Consider automated water systems if feasible.

    * Nutritional Feed: Don’t skimp on quality feed. Healthy animals are low-maintenance animals. Supplement with kitchen scraps and garden produce where appropriate.

    * Pasture/Foraging Management: If your animals forage, rotate them to fresh ground to prevent overgrazing, parasite buildup, and mud pits. This also helps regenerate your soil and reduce feed costs.

    * Know Your Local Regulations: Check with your municipality about animal restrictions, especially if you’re in an urban or suburban area. You don’t want to get attached to a flock only to find out you have to rehome them!

    * Emergency Plan: Have a vet’s number on hand, and know basic first aid for your animals. Things happen, and being prepared minimizes stress.

    FAQ: Your Burning Questions About Small Homestead Animals

    Got questions? We’ve heard them all! Here are some common ones about keeping the best low maintenance farm animals for small homesteads.

    Q: How much land do I really need for animals?

    A: Less than you think! For chickens or rabbits, you can start with a backyard-sized space. Ducks and quail also don’t need acres. Goats require more space, typically a quarter-acre minimum for two miniatures, but they’re great at utilizing brushy areas. The key is efficient design and rotation.

    Q: What about winter care? Do low-maintenance animals become high-maintenance then?

    A: Winter does increase the workload slightly, mostly around keeping water from freezing and ensuring adequate ventilation without drafts. However, hardy breeds of the animals mentioned (like cold-tolerant chickens or goats with good shelter) remain relatively low-maintenance. We use heated dog bowls for water and deep litter method in the coop to reduce winter chores.

    Q: Can I mix different types of animals on a small homestead?

    A: Yes, carefully! We successfully keep chickens and ducks together. They generally coexist well, though ducks need extra water access. Mixing species like goats with chickens can work but requires watchful eyes and separate housing/feeding areas to prevent bullying or disease transmission. Research specific animal compatibilities thoroughly.

    Q: Is it expensive to get started with farm animals?

    A: The initial setup can be, but it doesn’t have to break the bank. You can often find used coops or hutches, or build them yourself. Chicks or ducklings are cheap, and adult animals can sometimes be found for free or low cost from other homesteaders reducing their stock. Our first chicken coop was built almost entirely from reclaimed pallets, keeping costs under $50!

    Q: How do these animals contribute to self-sufficiency?

    A: Immensely! Eggs provide protein, rabbits and quail can provide meat. Goats give milk for dairy products. All of them produce valuable manure for your garden, reducing the need for chemical fertilizers. Chickens and ducks provide pest control. It’s a beautiful, symbiotic cycle!

    What We Use & Recommend on Our Homestead

    We’ve tried a lot of products over the years, and these are the ones that have truly stood the test of time and homesteader wear-and-tear. These are what we actually use on our homestead and make our animal chores that much easier:

    * Galvanized Poultry Waterers: (Link to a general poultry watering resource on UseHomesteadOS) We prefer 5-gallon metal ones. They hold a lot of water and are easy to clean.

    * Hardware Cloth (1/2″ mesh): (Link to a general fencing/hardware cloth resource on UseHomesteadOS) Essential for predator-proofing coops and runs. We learned the hard way that chicken wire is NOT enough!

    * The Encyclopedia of Country Living: This book is practically our homesteading bible. It covers everything from animal care to preserving food.

    * Heavy Duty Wheelbarrow: Trust us, you’ll be moving a lot of feed, hay, and manure. A good quality, durable wheelbarrow is worth every penny.

    Bringing animals onto your small homestead is a rewarding adventure that adds so much life and purpose to your property. By choosing the best low maintenance farm animals for small homesteads, you set yourself up for success, enjoyment, and a truly self-sufficient lifestyle without constant overwhelm.

    Don’t let the fear of too much work stop you! Start small, research your chosen animals thoroughly, and enjoy the incredible journey. We’re always learning and growing here on our homestead, and we’d love for you to join us.

    For more homesteading tips, guides, and to find all the resources discussed today, explore usehomesteados.com. Bookmark us, subscribe to our newsletter, and let’s keep growing together!


    📚 More From Our Homestead

    Ready to Start Your Homestead Journey?

    Free guides, checklists, and tools to help you build your dream homestead.
    Explore Free Resources →

  • Your First Homestead Layout: Simple Steps for Beginners

    Your First Homestead Layout: Simple Steps for Beginners

    When we first officially bought our little slice of heaven and decided to dive headfirst into homesteading, my head was spinning! I pictured rows of thriving gardens, happy chickens clucking, and maybe even a goat or two. But how do you get from that dreamy vision to a functional, productive space? That’s the million-dollar question, isn’t it? If you’re wondering how to plan a homestead layout for beginners, trust me, I’ve been exactly where you are. It felt like trying to solve a giant jigsaw puzzle without all the pieces.

    After years of trial, error, and a lot of moving things around, we’ve learned a ton about what works and what really doesn’t. Our first garden was in the wrong spot, our chicken coop was too far from the water source, and our compost pile was… well, let’s just say it was a learning experience. But that’s okay! We’re here to share our real-life lessons so you can avoid some of our early mistakes and get a head start. Planning your homestead layout doesn’t have to be overwhelming; it can actually be a really exciting part of the journey!

    Why a Good Homestead Layout Matters (More Than You Think!)

    Think of your homestead as a living, breathing ecosystem – and you’re the architect. A well-thought-out layout isn’t just about aesthetics; it’s about efficiency, productivity, and your sanity. When we first started, we just kind of plunked things down where they seemed to fit. Our garden was way out in the back forty, meaning every trip for watering or harvesting was a trek. Our compost heap was a good 100 feet from the kitchen, which meant less frequent trips and therefore less useful compost.

    What we quickly realized was that a smart layout minimizes wasted effort, saves you time, and can even reduce resource use. It’s the difference between feeling like you’re constantly fighting against your property and feeling like your homestead is working with you. For beginners especially, getting this right from the start can make all the difference in staying motivated and preventing burnout.

    Our Early Layout Blunders and Lessons Learned

    Our biggest mistake was underestimating access. We put our first chicken coop tucked away in a corner because it felt ‘out of the way.’ What we didn’t think about was the daily trek with buckets of water and feed, and then hauling eggs back to the house. It was a chore, pure and simple. Moving the coop closer to our water spigot and main pathways made daily chores so much smoother. We also learned that thinking about future expansion now is key. We wish we’d considered where our fruit trees would go before we planted that first random shrub.

    Phase 1: Observing Your Land – The Foundation of a Great Plan

    Before you even dream about where the chicken coop will go, the very first step in how to plan a homestead layout for beginners is to sit back and observe your land. This phase is critical and often overlooked. When we bought our 5 acres, we spent a solid six months just watching before we put a single shovel in the ground for a major project.

    Map it Out: The First Step to Understanding Your Space

    Grab some graph paper or use an online tool (we use a simple free one called “Homesteados Maps” which you can find at https://usehomesteados.com/maps). Sketch out your property boundaries. Mark existing structures like your house, shed, and driveway. Don’t forget any big trees, rock formations, or wet areas.

    * Existing Features: House, driveway, large trees, fences, utility lines (call 811!), septic system.

    * Sun Paths: Observe where the sun hits in summer and winter. Which areas get full sun? Which are shady? This is HUGE for garden placement.

    * Water Flow: Where does water collect after a rain? Where does it drain? This impacts garden beds, animal enclosures, and even potential pond placement. Look at natural swales and slopes.

    * Wind Patterns: Which direction does the prevailing wind come from? You’ll want to protect certain areas, like delicate vegetable gardens or wind-sensitive structures.

    * Microclimates: Notice small areas that are warmer, colder, wetter, or drier than their surroundings. A sunny, protected south-facing wall might be perfect for special herbs like those mentioned in our post on Best Perennial Herbs for Cold Climate Homesteads.

    Taking photos throughout the day and in different seasons can be incredibly helpful during this observation period. We kept a journal for weeks to track these things.

    Phase 2: Defining Your Homestead Goals and Needs

    Now that you know your land, it’s time to figure out what you want your land to do for you. This is where your personal vision comes into play. When we first started, “self-sufficiency” was a buzzword, but we quickly realized that meant different things to different people. For us, it meant growing most of our vegetables, having fresh eggs, and eventually, some fruit.

    * Prioritize Your Projects: Are you starting with a vegetable garden? Chickens? Beekeeping? Not everything has to happen at once. Our family began with a very small garden (you can read about our journey in How to Start a Small Backyard Vegetable Garden: Beginner Guide). Slowly, we added chickens a year later.

    * Consider Your Family’s Needs: How much food do you need to produce? How much time can you realistically commit each day/week? We have two young kids, so daily chores need to be efficient.

    Future Expansion: Even if you’re not getting goats this year, think about where they could* go in the future. Leave some room!

    * Budget: Be realistic about what you can afford upfront. Starting small and expanding is always a good strategy.

    Make a list of all the elements you’d like to include: vegetable garden, fruit trees, berry patches, chicken coop, rabbit hutches, compost areas, rainwater catchment (grab some tips here about Best Small Scale Rainwater Systems for Off-Grid Living), tool shed, outdoor living spaces, etc. Don’t censor yourself here – get all your dreams down!

    Phase 3: Designing Your Functional Zones – Applying Permaculture Principles

    This is where you start to put pencil to paper (or mouse to screen) and truly plan a homestead layout for beginners. We’ve found that thinking in terms of “zones” makes this much simpler. This is a core permaculture principle, and it really helps with efficiency.

    The Zone System: Locating Elements Logically

    * Zone 0: The House. This is your hub. Activities directly around your home.

    * Zone 1: Frequently Visited. Things you use daily or multiple times a day.

    * Examples: Kitchen garden (salad greens, herbs), compost bin (for kitchen scraps), main paths, small herb spiral near the kitchen door. Our Zone 1 compost is now only 20 steps from our kitchen!

    * Zone 2: Regularly Visited. Things you visit a few times a week.

    * Examples: Main vegetable garden, chicken coop, small orchard, berry bushes, nursery beds. Ours now includes a dedicated spot for our compost pile, which gets turned weekly.

    * Zone 3: Periodically Visited. Things you visit weekly or a few times a month for maintenance or harvest.

    * Examples: Larger orchards, staple crop gardens (corn, potatoes), pastured animals, firewood storage, tool shed. Our main potato patch is here.

    * Zone 4: Infrequently Visited. Semi-wild areas, larger pastures, timber production. Minimal human maintenance.

    * Examples: Woodlot, larger animal pastures.

    * Zone 5: Wild/Untouched. This zone is left as wild as possible, allowing nature to thrive.

    When we redid our layout, we took our map from Phase 1 and started sketching potential zones. We realized that our initial chicken coop, originally in Zone 3, needed to be in Zone 2. And our main garden, initially in Zone 4, definitely belonged in Zone 2 to make it manageable.

    Phase 4: Considering Key Elements for Your Layout

    Now, let’s get specific about placing those elements you dreamed about. This is crucial for how to plan a homestead layout for beginners effectively.

    1. Water Access: The Lifeline of Your Homestead

    Water is king. Period. Our first year, we spent hours hauling water because we didn’t fully map out our spigots and potential rainwater collection points.

    * Connect to existing sources: Where are your outdoor spigots? Can you expand your plumbing easily?

    * Rainwater Harvesting: Consider placing greenhouses, sheds, or coops under rooflines that can easily collect rainwater. Check out our guide on Best Small Scale Rainwater Systems for Off-Grid Living for ideas. We collect about 500 gallons annually from our barn roof alone!

    * Gravity: Can you use the natural slope of your land for irrigation? A water tank placed uphill can gravity-feed water downhill.

    2. Sunlight Needs: Orienting Gardens and Structures

    Most vegetables need at least 6-8 hours of direct sunlight. Our first garden was shaded by a huge oak tree in the late afternoon, which significantly reduced our yields.

    * Garden Placement: Generally, south-facing (in the Northern Hemisphere) with full sun is ideal. Avoid placing tall structures or trees immediately to the south of your garden.

    * Greenhouses/Polytunnels: Orient them east-west for maximum winter sun exposure.

    * Animal Housing: Protection from harsh winter winds and scorching summer sun is vital. East-facing entrances are often best for catching morning sun in winter.

    3. Pathways and Access: Your Homestead’s Arteries

    Efficiency! Wide, clear paths save so much time and effort.

    * Main Pathways: Should be wide enough for a wheelbarrow (at least 3-4 feet) and lead to frequently visited areas (garden, compost, coop). We use wood chips for ours – they’re cheap, good for soil, and suppress weeds.

    * Utility/Service Paths: Driveway access, delivery points, areas for turning equipment.

    * Slope Considerations: Avoid paths that become slippery or prone to erosion.

    4. Animal Integration: Placement with Purpose

    When we started with chickens, they were just… chickens. Now, we think about how they integrate into the system.

    * Pastures/Runs: Consider rotating animals through different areas for soil fertility and pest control.

    * Protection: Predators are a real threat. Place coops and runs where they’re visible and accessible for protection. Our chicken run now integrates into our orchard, helping with pest control and fertilization.

    * Composting: Chicken litter is fantastic for compost! Locate coops near your compost pile.

    5. Utilities and Services: Plan for Power, Greywater & Waste

    Don’t forget the boring but essential stuff!

    * Electricity: Where do you need power? For pumps, lighting, tools? Plan for trenching if necessary.

    * Septic/Sewer: Know your septic field location – you can’t build over it.

    * Compost Toilets/Greywater: If you’re going off-grid, where will these systems be located?

    * Waste Management: Beyond the compost, where will you stash garbage and recycling?

    Phase 5: Iteration and Flexibility – Your Plan isn’t Set in Stone!

    Here’s the honest truth: your first homestead layout won’t be your last. Even after our careful planning, we’ve adjusted things. Our compost pile has moved three times! Our initial garden expanded into another bed because we realized we needed more space for tomatoes. This flexibility is a strength, not a weakness. Don’t be afraid to tweak as you go.

    Start small, implement a portion of your plan, and observe. Does it work? Is it efficient? What could be better? We often recommend implementing one major element per season or year for beginners. Remember, homesteading is a journey of continuous learning, as we’ve highlighted in our 10 Beginner Homesteading Tips to Start Your Self-Sufficient Journey Today.

    When we started, if someone had handed me a perfect, final layout for our property, I wouldn’t have learned nearly as much as I did through the process of observing, planning, doing, and adjusting. Your homestead is a canvas, and you’re the artist. Get creative, stay practical, and most importantly, enjoy the process!

    Frequently Asked Questions About Homestead Layouts

    Q1: How much land do I need to start a homestead and plan a layout?

    A: You can start homesteading and planning a layout on surprisingly little land! Many urban homesteaders thrive on just a quarter-acre or even less by focusing on vertical gardening, intensive planting, and container growing. For typical suburban homesteading goals (vegetables, a few chickens), 1/2 to 1 acre is a great starting point. For larger animals like goats or a small orchard, 2-5+ acres might be more suitable. It’s more about efficient design than sheer size.

    Q2: What’s the most common mistake beginners make when planning their homestead layout?

    A: Hands down, it’s underestimating the importance of water access and sunlight. Many beginners place gardens in convenient spots without checking for optimal sun exposure, or they put animal housing far from a water source, leading to daily hauling chores. Another big one is not thinking about pathways and flow – making it hard to move materials or people around efficiently. We really encourage spending time in the observation phase before you commit to anything permanent.

    Q3: How long should I spend on the observation phase before designing?

    A: Ideally, you should observe your land for at least one full year, if possible, to see how sun, wind, and water behave in all four seasons. However, for most beginners eager to start, even 3-6 months of focused observation during your primary growing season can provide invaluable insights. Don’t rush it! The more you observe, the fewer mistakes you’ll make later on.

    Q4: Are there free tools to help me design my homestead layout?

    A: Absolutely! For simple mapping, grab some graph paper, a ruler, and colored pencils – that’s often the best start. For digital options, you can use Google Earth to get an aerial view of your property and then print it to draw on. There are also free online drawing tools or simple diagram makers that can help. We built a basic one at https://usehomesteados.com/maps for our community which is super easy to use for initial sketching.

    Q5: Should I try to implement my entire homestead layout plan all at once?

    A: Definitely not! That’s a recipe for burnout and frustration. We always advise a phased approach. Pick one major project (like your main garden or chicken coop) that aligns with your most pressing goals. Implement that, learn, observe, and then move on to the next piece of your plan. This iterative process allows you to adapt as you gain experience and understand your land better. Most successful homesteads are built layer by layer over many years.

    Ready to Start Sketching Your Dream Homestead?

    I hope our family’s journey has given you a clearer path for how to plan a homestead layout for beginners. It’s a journey, not a sprint, and every step, even the missteps, teaches you something valuable. Don’t let perfection be the enemy of good when you’re just starting out. Grab your pad and pencil, head outside, and start observing.

    Got questions as you plan? I’d love to hear them! And if you’re looking for more practical advice and real-life homesteading stories, be sure to explore more articles right here on our blog. We’re always sharing our latest projects, lessons, and tips to help you on your own self-sufficiency adventure. You can find many guides, from gardening to animal care, to help you bring your homestead vision to life!


    📚 More From Our Homestead

    Ready to Start Your Homestead Journey?

    Free guides, checklists, and tools to help you build your dream homestead.
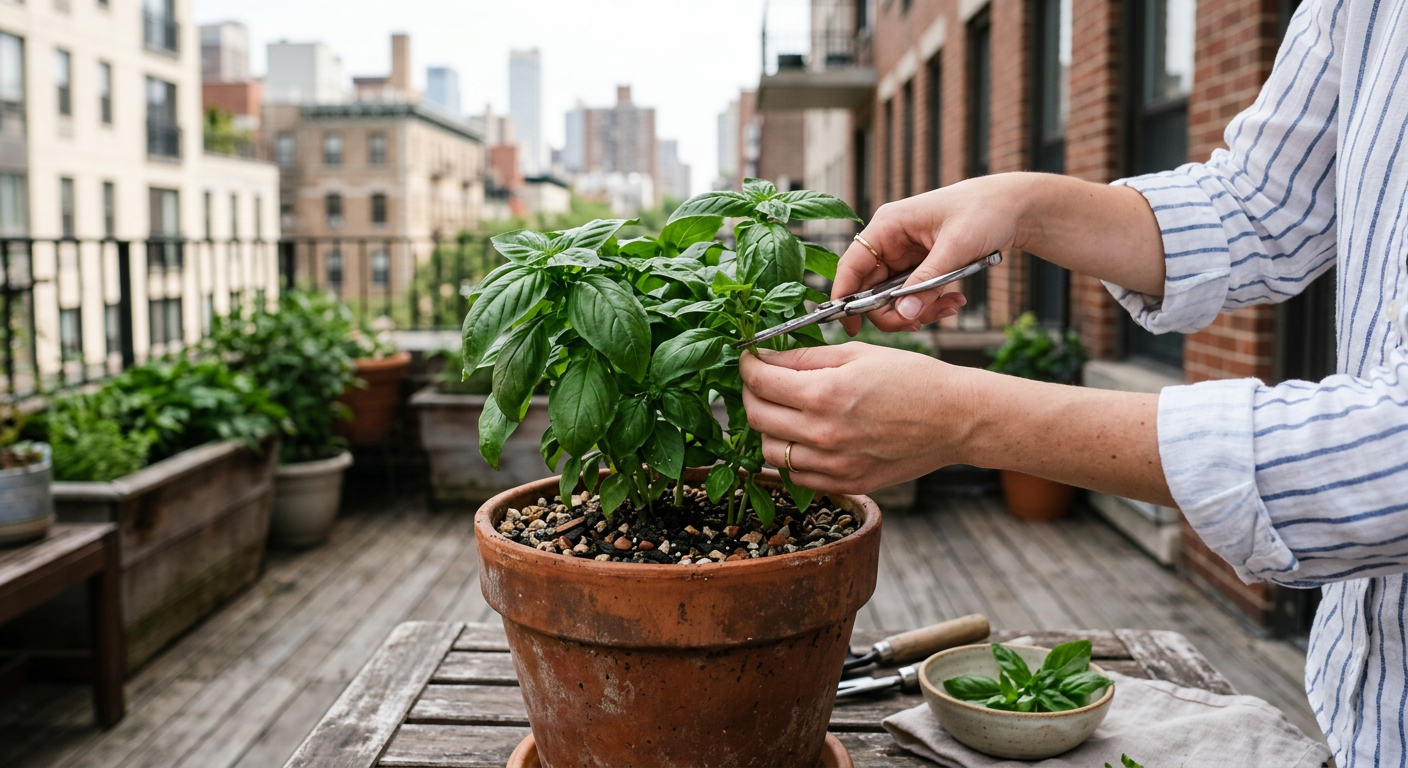
    Explore Free Resources →

  • Homesteading Hacks: Save Serious Money on Groceries!

    !A lush backyard garden showing how to save money on groceries homesteading by growing produce.

    I remember staring at our grocery bill just five years ago, my jaw practically on the floor. It was over $1200 for a family of four, and we weren’t even buying fancy stuff! That’s when we knew something had to change — saving money on groceries was going to be a non-negotiable part of our homesteading journey.

    🎯 Quick Answer: Saving money on groceries through homesteading involves a multi-pronged approach: grow what you can, preserve your harvests, buy in bulk directly from producers, cook from scratch, and strategically reduce waste. Our family cut our grocery bill by over 60% using these methods.

    🌱 Start Your Homestead Plan →

    🔑 Key Takeaways

    * Garden for Savings: Growing even a small portion of your produce can drastically reduce your grocery expenses, especially for high-cost items like fresh herbs and berries.

    * Preserve Your Harvest: Canning, freezing, dehydrating, and fermenting extends the life of your bounty, making seasonal savings last all year.

    * Strategic Bulk Buying: Purchasing staples, meat, and dairy directly from farmers or co-ops in large quantities offers significant price breaks.

    * Cook from Scratch: Eliminating processed foods means fewer expensive ready-meals and more control over ingredients and costs.

    * Waste Not, Want Not: Smart meal planning and creative use of leftovers prevent food waste, directly impacting your budget.

    * Animal Contributions: Raising chickens for eggs or a few dairy goats can provide fresh, often ‘free,’ protein and dairy, further reducing grocery needs.

    !Fresh harvested vegetables on a table illustrating how to save money on groceries homesteading.

    Our Journey to Saving Money on Groceries Homesteading

    When we first moved onto our little patch of land, we had grand visions of self-sufficiency. But honestly, the initial push wasn’t just about the romantic idea of ‘living off the land’; it was about necessity. That $1200 bill was a wake-up call, and we started looking at how to save money on groceries homesteading as our first major project.

    Our first year, we only managed to shave off about 15% from our grocery expenses. We were enthusiastic but a bit disorganized. We grew too many zucchinis and not enough of what we actually ate frequently. Over the years, refining our methods and focusing on high-impact areas, we now consistently keep our monthly grocery spending under $450 for the same family of four. That’s a savings of over $750 every single month!

    This transformation didn’t happen overnight, but it was incredibly rewarding. The peace of mind knowing where our food comes from, and the extra money in our pockets, has been truly life-changing. Now, let’s dive into exactly how we did it. But before you start, there’s one mistake that ruins everything — I’ll cover it next.

    Grow Your Own: The Ultimate Grocery Hacker

    If you want to know how to save money on groceries homesteading, growing your own food is hands down the most impactful step. We started with a tiny 4×8 raised bed, and it quickly expanded.

    Prioritize High-Cost or High-Consumption Crops

    Don’t try to grow everything at once. Focus on items that are expensive at the store or that your family eats a lot of. For us, that meant.

    * Berries: Fresh raspberries and blueberries are pricey, especially organic ones. Our small patch of everbearing raspberries gives us fresh fruit for months.

    * Herbs: A small herb garden saves a fortune. A bunch of fresh basil can be $3-4; growing it costs pennies. We’ve got rosemary, thyme, oregano, and mint flourishing.

    * Salad Greens: Lettuce, spinach, and kale grow quickly and can be harvested repeatedly. We found that a continuous harvest of greens saved us about $20-30/month in buying pre-washed bags.

    * Tomatoes & Peppers: We go through a lot of these in sauces, salads, and cooking. Growing our own means fresh produce all summer and plenty for canning.

    Start Small, Learn, Then Expand

    We didn’t plant an acre overnight. Our first garden was modest, and we learned a ton about our soil, sunlight, and what thrives here. Each year, we’d add another bed or expand a patch. This gradual scaling prevented overwhelm and helped us enjoy the process. Read our guide on How to Start a Small Backyard Vegetable Garden: Beginner Guide for a great starting point.

    Consider Yield and Space Efficiency

    Some crops give you more bang for your buck. For instance, a single zucchini plant can produce more squash than you know what to do with! But also consider vertical gardening for space-saving. Pole beans, cucumbers, and even small melons can climb, maximizing your harvest in a small footprint.

    Keep reading — this is where most people mess up.

    Preserve the Bounty: Extending Your Savings

    What’s the point of growing all that food if it goes bad? Preserving is crucial for how to save money on groceries homesteading year-round. It means enjoying summer’s sweetness in the dead of winter without paying premium prices.

    Canning for Shelf Stability

    We started with water bath canning for high-acid foods like jams, jellies, pickles, and tomato sauce. Later, we invested in a pressure canner for low-acid vegetables like green beans and corn, as well as meats. Our pantry now looks like a mini grocery store!

    * Tomatoes: We can diced tomatoes, crushed tomatoes, and salsa. This saves us about $50-70 per month on canned tomato products alone during winter.

    * Green Beans: A bushel of green beans from a local farmer can be bought cheap, then canned for year-round side dishes. We estimate this saves us approximately $100 throughout the off-season.

    * Jams & Jellies: Using homegrown or locally picked fruit, we make all our own preserves. This easily saves us $15-20 per month compared to store-bought.

    Freezing for Freshness and Convenience

    Freezing is often the easiest entry point into food preservation. We freeze berries, chopped vegetables, and even entire meals. Just blanching vegetables for a few minutes before freezing helps maintain their quality.

    * Berries: Wash, dry, and freeze berries on a baking sheet before transferring to bags. Perfect for smoothies and winter desserts.

    * Pesto Cubes: Blend extra basil into pesto and freeze in ice cube trays. Pop one into pasta or soup for a burst of flavor.

    Dehydrating for Light and Long-Term Storage

    Our dehydrator is always humming. It’s fantastic for herbs, fruit leathers, and even emergency food supplies.

    * Herbs: Dry your garden herbs for cooking. They take up little space and retain their flavor for months.

    * Apple Slices: A great healthy snack that saves us from buying expensive fruit snacks.

    Fermentation for Probiotics and Flavor

    Sauerkraut, kimchi, and fermented pickles are not only delicious and healthy but also extremely cost-effective to make. Cabbage is cheap, and fermenting extends its life significantly.

    Consider our post on Crack the Code: Preserving Eggs Long-Term (No Fridge Needed!) for another great preservation method!

    📋 Get the Beginner Checklist →

    This next part? Nobody talks about it, but it changed everything for us.

    !Canned goods and bulk staples showing how to save money on groceries homesteading through preservation.

    Smart Sourcing: Beyond Your Homestead

    Even with a thriving garden and a full pantry, we can’t grow everything. That’s where smart sourcing comes in to reinforce how to save money on groceries homesteading.

    Buying in Bulk & Direct from Farmers

    We’ve found incredible savings by cutting out the middleman. This means buying a whole or half animal directly from a local farmer, or joining a CSA (Community Supported Agriculture) program.

    * Bulk Meat: We split a half-cow with friends every year. The upfront cost (around $1200 for us) feels like a lot, but calculated by the pound, it’s significantly cheaper (often $3-5/lb for premium cuts) than buying individual packages at the grocery store. It fills our chest freezer and lasts us 8-10 months.

    * Local Produce: During peak season, we visit farmers’ markets an hour before closing and often get deals on ‘ugly’ produce perfect for canning or freezing. We also have a standing order with a local farmer for a bushel of peaches every August for our canning projects.

    * Co-ops & Discount Stores: Membership to a local food co-op or shopping at stores like Aldi/Lidl for non-perishables and pantry staples saves us another 15-20% on those items.

    Foraging for Free Food

    Depending on where you live, wild edibles can supplement your diet for free! We forage for wild berries, mushrooms (only with expert identification!), and even edible greens like dandelion and plantain.

    * Dandelions: Young dandelion greens are great in salads, and the roots can be roasted for a coffee substitute.

    * Blackberries: Our property is edged with wild blackberries, providing gallons of fruit for jams and pies every summer – completely free.

    The Homestead Kitchen: Cooking from Scratch and Reducing Waste

    Our kitchen is the heart of our homestead, and it’s where we truly embody the spirit of how to save money on groceries homesteading.

    Say Goodbye to Processed Foods

    Processed foods are notoriously expensive and often less nutritious. By cooking almost everything from scratch, we eliminate these costs. Breads, sauces, dressings, and snacks – it’s all made here.

    * Homemade Bread: Making our own sourdough bread (flour, water, salt, starter) saves us about $4-5 per loaf compared to artisan bread. Even basic yeast bread is far cheaper than store-bought.

    * Bone Broth: After butchering chickens (which we raise ourselves – see Raising Backyard Chickens: Pros, Cons & What to Expect), we use the bones to make nourishing bone broth. This is basically free, whereas store-bought bone broth can be $5-8 per carton.

    Meal Planning and Leftover Creativity

    Planning our meals around what’s in season, what we’ve preserved, and what’s in the pantry prevents impulse buys and reduces waste. Leftovers are gold!

    * Weekly Meal Plan: Every Sunday, we sit down and plan out 7 dinners, often incorporating ingredients nearing their ‘use by’ date. This helps us empty the fridge before grocery day.

    * ‘Clean Out the Fridge’ Dinners: Once a week, we have a dinner where everyone finds something in the fridge that needs to be eaten. It’s often a hodgepodge but always prevents waste.

    Raise a Few Animals (If You Can!)

    While not everyone can have animals, if you’re serious about homesteading and how to save money on groceries homesteading, they can be a massive asset.

    * Chickens for Eggs: Our flock of a dozen laying hens provides all the eggs we need, plus extras to sell to neighbors. We spend about $30 a month on feed, but we get about 8-10 dozen eggs per week. That’s dirt cheap eggs! (Learn more in Build a Movable Chicken Tractor for Sustainable Pest Control).

    * Dairy Goats: A couple of dairy goats can provide milk, cheese, and yogurt, almost completely eliminating dairy from your grocery list. We have two, and their milk supply is bountiful.

    Don’t skip this — it’ll save you hours (and money).

    💡 Pro Tips

    * Track Your Spending: For a month or two, actually write down every single grocery expense. You’ll be shocked where your money goes. This data helps you target key areas for savings.

    * Invest in Good Tools: A quality pressure canner, dehydrator, or even an extra freezer pays for itself quickly when you’re preserving large quantities of food.

    * Learn a New Skill Every Season: Focus on mastering one new preservation method (canning, dehydrating, fermenting) per gardening season. This keeps it manageable and fun.

    * Barter and Trade: Connect with other local homesteaders or farmers. We often swap excess eggs for berries or help with canning for some of their surplus vegetables.

    * Compost Food Scraps: Instead of tossing vegetable peels and uneaten bits, compost them. This creates rich soil for your garden, reducing the need for expensive soil amendments and closing the loop.

    ⚠️ Beginner Mistakes to Avoid

    * Planting Too Much of One Thing: Our `zucchini overload` the first year taught us this lesson quickly. Diversify your crops, and plant what you truly enjoy eating.

    * Ignoring Preservation from the Start: Don’t wait until you’re drowning in tomatoes to figure out canning. Start learning basic preservation methods before your harvest overwhelms you.

    * Buying All the Gear at Once: It’s tempting to get every gadget. Start with the essentials (pots, basic canning supplies, a good knife) and acquire more specialized tools as your needs grow.

    * Not Meal Planning: Without a plan, you’ll inevitably buy things you don’t need or let fresh produce go bad. A simple weekly plan makes a huge difference.

    * Giving Up Too Soon: There will be failures – pests, crop blights, canning mishaps. Don’t let them deter you. Learn from them and keep going.

    !Collecting fresh eggs from a coop as a way to learn how to save money on groceries homesteading.

    Frequently Asked Questions

    How much can you realistically save on groceries with homesteading?

    Our family saves over $750 a month, which is about 60% of our original grocery bill. However, what you save depends on your dedication, the size of your garden, and your willingness to commit to scratch cooking and preservation. Many homesteaders report saving 30-70%.

    What are the cheapest things to grow to save money on groceries?

    High-yield, fast-growing items like lettuce, spinach, radishes, green beans, and zucchini are very cost-effective. Expensive store-bought items like fresh herbs and berries also offer significant savings when grown at home.

    Does homesteading really save money, or does it cost more in the long run?

    It absolutely saves money in the long run, but there’s an upfront investment in seeds, supplies, and potentially tools or animal enclosures. However, most of these are one-time costs or have long lifespans. The fresh, organic food you produce is far cheaper than buying it, and the skills you gain are invaluable.

    How much land do you need to significantly reduce your grocery bill?

    Not as much as you think! Even urban homesteaders with small backyards or balconies can grow a substantial amount of food. A well-planned 100-200 sq ft garden can provide a significant portion of a family’s produce needs for several months. For more, check out Tiny Space, Big Harvest: How to Start Urban Homesteading Small Space.

    What are good beginner animals to help save on groceries?

    Chickens are a great start for fresh eggs. They are relatively low-maintenance and provide daily protein. Rabbits can be raised for meat fairly easily. Dairy goats are excellent for milk if you have the space and commitment. For more ideas, see Tiny Farm, Big Rewards: Best Low Maintenance Farm Animals.

    Wrapping up this chat, I hope you see that figuring out how to save money on groceries homesteading isn’t just about cutting costs; it’s about building resilience, developing invaluable skills, and putting truly nourishing food on your family’s table. It takes effort, sure, but the rewards—both financial and personal—are immense. We started small, learned as we went, and now our grocery bill is a fraction of what it once was. You can do it too!

    What’s your biggest challenge with reducing your grocery bill? I’d love to hear your story.

    🔧 See Recommended Tools →


    📚 More From Our Homestead

    Ready to Start Your Homestead Journey?

    Free guides, checklists, and tools to help you build your dream homestead.
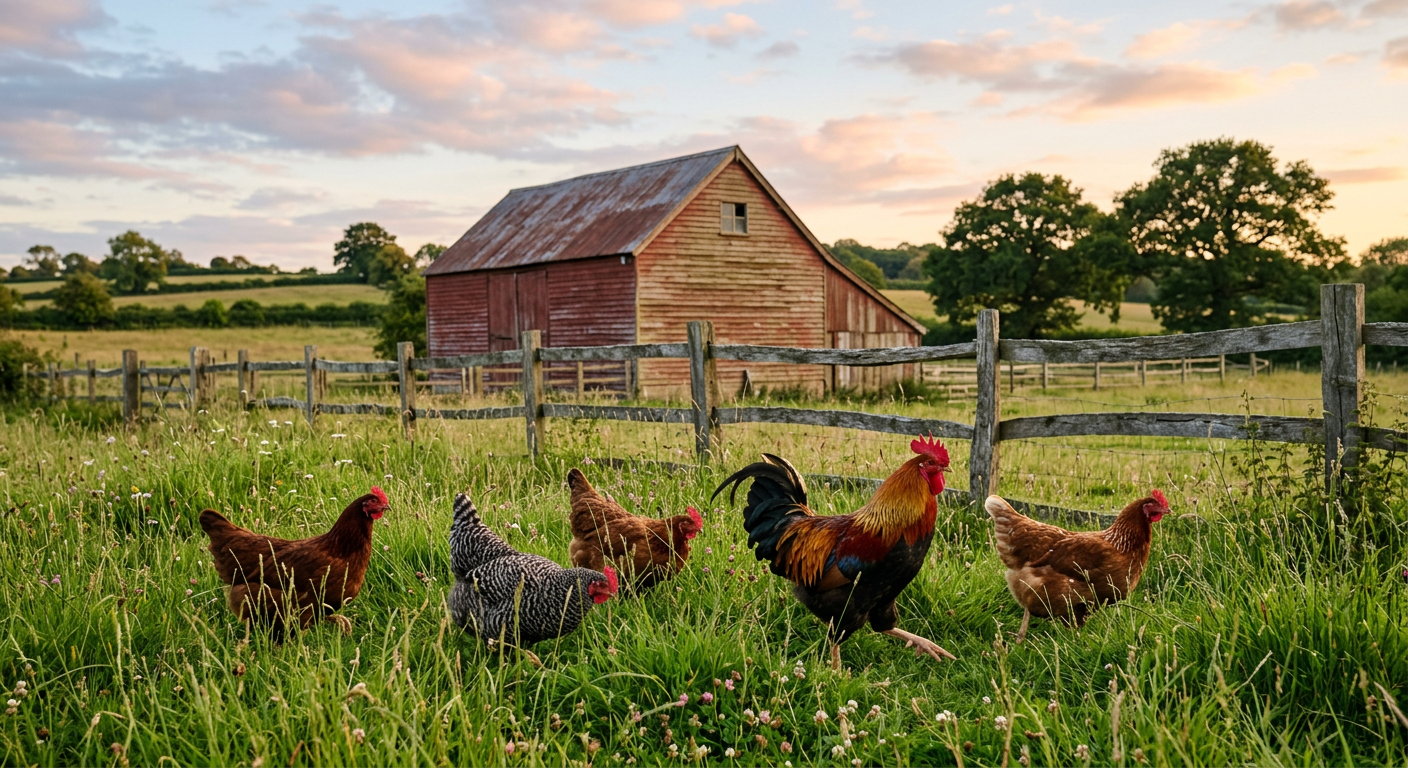
    Explore Free Resources →


    👉 Related: Basic Food Preservation for Beginners: Our Family’s Go-To Methods

  • Easiest Homesteading Animals to Raise? Here’s Our Story

    !A peaceful backyard showing what are the easiest homesteading animals to raise in a natural setting.

    When we first started dreaming of our homestead, the animal questions hit us hard. Were we ready for the commitment? Would we wake up one day to a chicken escaping or a goat eating our prize-winning tomatoes? It felt overwhelming, but we knew animals were a cornerstone of self-sufficiency. So, we started small, very small, and learned a ton along the way about what are the easiest homesteading animals to raise.

    🎯 Quick Answer: The easiest homesteading animals for beginners are typically chickens (for eggs), rabbits, and sometimes ducks. They require less space, lower initial investment, and simpler daily care compared to larger livestock, making them ideal for learning the ropes of animal husbandry.

    🌱 Start Your Homestead Plan →

    🔑 Key Takeaways

    * Chickens are often the gateway animal: They’re relatively forgiving, provide daily rewards, and teach basic animal care.

    * Consider your space and climate: What works in a small backyard in Florida might not work on acres in Alaska.

    * Start with a clear purpose: Eggs, meat, weed control, or manure? Your goals will guide your choices.

    * Factor in costs beyond purchase price: Feed, housing, veterinary care, and processing all add up.

    * Rabbits offer quick returns: Especially for meat, they grow fast and are highly efficient.

    * Ducks are hardy and productive: Great for eggs, pest control, and don’t need a pond, just a water source for splashing.

    Our First Foray: Chickens for Eggs

    When we first asked ourselves, “what are the easiest homesteading animals to raise?” the unanimous answer from our homesteader friends was chickens. We started with just six laying hens – three Rhode Island Reds and three Barred Plymouth Rocks – back in 2018. The setup cost us about $400. This included a pre-built coop we found on sale, a feeder, a waterer, and the six chicks themselves at about $3 each. We chose these breeds because they’re known for being good layers and fairly docile.

    Why Chickens are Great for Beginners

    * Daily Rewards: Nothing beats fresh eggs every morning. Our six hens gave us an average of 4-5 eggs a day during peak season. It’s incredibly motivating!

    * Relatively Low Maintenance: They need daily food and water, coop cleaning every week or two, and protection from predators. We spent about 15-20 minutes a day on routine care.

    * Pest Control: Our free-ranging chickens dramatically reduced the bug population in our garden (though we had to watch them around younger plants!).

    * Compost Boosters: Chicken manure is a fantastic addition to the compost pile, enriching our garden beds.

    We quickly learned the true joy of watching them scratch around, and even the occasional skirmish over a tasty bug became part of the daily entertainment. But before you get your own flock, make sure you know what you’re getting into.

    This next part? Nobody talks about it, but it changed everything for us.

    The Unexpected Joy of Rabbits

    Okay, so chickens were great, but we wanted to explore a meat source that wasn’t as noisy or required processing that involved plucking feathers (which, let me tell you, is a job!). That’s when we discovered rabbits. When considering what are the easiest homesteading animals to raise for meat, rabbits quickly rose to the top of our list. Initially, we were a little squeamish, but the efficiency and quality of the meat won us over.

    We started with two New Zealand White does and one buck for $150 total, plus another $200 for sturdy hutches, water bottles, and feeders. Within four months, our first litter was ready for processing. Rabbits have a short gestation period (31 days) and can produce several litters a year.

    Why Rabbits are a Homesteading Gem

    * Quiet & Clean: Compared to other livestock, rabbits are incredibly quiet. Their droppings are also a fantastic, ‘cold’ manure that can be used directly in the garden without composting.

    * Space-Efficient: You can raise a significant number of rabbits in a relatively small area, making them perfect for urban or suburban homesteads. We fit three hutches in a 10×10 foot area.

    * Fast Turnaround: From birth to butcher size, it takes about 10-12 weeks for most meat breeds. This means you can have a consistent supply of lean, healthy meat.

    * Low Feed Conversion Ratio: They convert feed to meat very efficiently, often requiring less feed per pound of meat than chickens or larger animals.

    Our biggest lesson with rabbits was the importance of proper ventilation in their hutches and keeping them safe from predators. Raccoons are a real threat, so secure housing is non-negotiable. Now that you understand the meat side, let’s splash into another easy option.

    📋 Get the Beginner Checklist →

    Diving into Ducks: The Unsung Heroes

    After a few years with chickens and rabbits, we wanted to diversify our egg supply and add another layer of pest control. Enter ducks! We were initially hesitant, imagining a messy pond full of quacking, but what are the easiest homesteading animals to raise for unique eggs and pest control? Ducks, hands down. We started with five Pekin ducklings for about $25 total. We already had a secure coop space, so our only extra cost was a large, shallow tub for them to splash in.

    Benefits of Raising Ducks

    * Hardy & Disease Resistant: Ducks are generally much hardier than chickens and tend to be more resistant to common poultry diseases. We’ve had far fewer health issues with our ducks.

    * Excellent Foragers: They are incredible at pest control, devouring slugs, snails, and various insects that chickens often ignore. Our garden saw a significant reduction in pests after we introduced the ducks.

    * Rich, Large Eggs: Duck eggs are larger and richer than chicken eggs, fantastic for baking. Our five Pekins gave us 4-5 eggs a day.

    * Less Destructive to Gardens: While they love to forage, they tend to do less damage to garden beds than chickens, as they don’t scratch as aggressively. They do love to dabble and make mud, though, so good drainage is key.

    Our biggest piece of advice for ducks is to ensure they have access to water deep enough to submerge their heads to keep their nostrils clean – even if it’s just a sturdy kiddie pool. They don’t need a pond, but they absolutely thrive with plenty of water for splashing and preening. But before you get too excited about all these animals, there are a few things you need to consider carefully.

    Keep reading — this is where most people mess up.

    Key Considerations Before Getting Started

    Choosing what are the easiest homesteading animals to raise isn’t just about the animal itself; it’s about your specific situation. We learned this the hard way by almost getting goats before realizing our fencing was nowhere near adequate.

    Space Requirements

    * Chickens: Require about 2-3 square feet per bird inside the coop and 8-10 square feet per bird in an outdoor run. Our 6 hens lived comfortably in a 24 sq ft coop with a 50 sq ft run. For free-ranging, allow ample space. (USDA’s guide on small flock care).

    * Rabbits: Each adult rabbit needs at least a 24×30 inch hutch. They fare better with more space, especially does with litters. Our three adult rabbits lived in individual 36×30 inch hutches.

    * Ducks: Similar to chickens, about 3-4 square feet per bird inside the coop and 10-15 square feet per bird in a run. They also need a water source for splashing that’s at least 6-8 inches deep and wide enough for them to move around in.

    Time Commitment & Daily Chores

    * Chickens/Ducks: 15-30 minutes daily for feeding, watering, egg collection, and general observation. Weekly coop cleaning can take 30-60 minutes.

    * Rabbits: 10-20 minutes daily for feeding, watering, and checking on kits. Weekly hutch cleaning takes about 15-30 minutes per hutch.

    Initial and Ongoing Costs

    This is where many beginners get surprised. We track all our homestead expenses, and it’s always more than you think.

    * Initial: Animal purchase, housing (coop, hutches), feeders, waterers, fencing.

    * Ongoing: Feed (varies greatly but can be $20-$50/month for a small flock/colony), bedding, supplements, and potential veterinary costs. Our chicken feed for six hens costs us about $25 a month, while rabbit feed for our colony runs about $30 a month.

    Don’t skip this — it’ll save you hours (and money).

    !Rhode Island Red and Barred Rock hens, often considered what are the easiest homesteading animals to raise.

    Getting Started: Actionable Steps for New Homesteaders

    So you’ve decided what are the easiest homesteading animals to raise for your situation. Now, let’s get them! Here’s how we approach bringing new animals onto our homestead.

    1. Research Local Regulations

    Before you even look at buying an animal, check your local city or county ordinances. Many suburban areas have limits or prohibitions on certain livestock. This can save you a lot of headache (and potential fines!). We had a scare recently when our county considered new restrictions on fowl, which luckily didn’t pass.

    2. Plan and Build Secure Housing

    Predator protection is paramount. Coyotes, raccoons, stoats, hawks – they’re all looking for an easy meal. For our chickens and ducks, we built an entirely enclosed run using hardware cloth (not chicken wire!) buried six inches into the ground. For rabbits, we use sturdy, elevated hutches with secure latches and wire bottoms to allow droppings to fall through. For ideas on homestead layouts or building, check out our post on Your First Homestead Layout: Simple Steps for Beginners.

    3. Source Healthy Animals

    Buy from reputable breeders or hatcheries. Inspect the animals for signs of illness (lethargy, discharge, ruffled feathers/fur). Healthy stock means fewer problems down the line. We typically order day-old chicks and ducklings from known hatcheries or purchase weaned rabbits from local breeders with good reviews.

    4. Prepare for Feed and Water

    Have your feed, feeders, and waterers ready before the animals arrive. Choose species-appropriate feed. For our chickens and ducks, we use a high-quality layer feed. Rabbits get a special pellet alongside hay. Ensure water is always fresh and clean. Consider automatic waterers to save time.

    💡 Pro Tips

    * Start small: Don’t try to get all the animals at once. Master one species before adding another.

    * Observe daily: Learn your animals’ routines. Any change in behavior can be an early sign of trouble.

    * Have a plan for emergencies: Know a local vet who treats livestock or keep a basic animal first-aid kit on hand.

    * Batch chores: We feed and water all our animals at the same time each morning and evening to create an efficient routine.

    * Utilize their waste: Animal manure is a goldmine for your garden. Research composting methods for chickens and ducks or use rabbit manure directly.

    ⚠️ Beginner Mistakes to Avoid

    * Underestimating predator pressure: Many dreams are dashed by predators. Invest in strong, secure housing from day one.

    * Ignoring local regulations: Waking up to a notice from the city about your illegal chickens is no fun. Check first!

    * Starting with too many animals: Overwhelm leads to burnout. A small, well-managed flock/colony is better than a large, neglected one.

    * Not having a plan for processing (meat animals): If you’re raising for meat, understand the process, find local resources, or be prepared to do it yourself.

    * Skimping on feed quality: Cheap feed often means unhealthy animals and lower production. Invest in good nutrition.

    Frequently Asked Questions

    What are the easiest homesteading animals to raise for a small backyard?

    For a small backyard, especially in urban or suburban settings, chickens (for eggs) and rabbits (for meat or pets) are generally the easiest. They require less space and can be housed in contained systems. Consider dwarf chicken breeds for even smaller footprints. Our small urban setup started with 4 chickens in a 4×8 ft coop.

    How much time do beginner homesteading animals require daily?

    Most beginner animals like chickens, ducks, or rabbits require about 15-30 minutes of daily care. This includes feeding, watering, checking on their well-being, and collecting eggs or checking on litters. Weekly deep cleaning of coops or hutches will add more time.

    Can I mix different easy homesteading animals in one space?

    Generally, no. While some people successfully integrate chickens and ducks, or even specific breeds of rabbits, it’s not recommended for beginners. Different species have different needs, social structures, and potential for disease transmission or aggression. We keep our chickens and ducks in separate runs adjacent to each other, and rabbits in their own hutches.

    What’s the biggest cost associated with easy homesteading animals?

    After the initial setup cost for housing, feed is almost always the biggest ongoing expense. It can fluctuate with market prices, but it’s a constant. We try to offset ours by foraging for greens for our rabbits and growing a small flock-specific garden for our chickens and ducks.

    Do I need a permit to raise chickens or ducks in my backyard?

    It depends entirely on your local municipality. Some cities allow a certain number of hens but no roosters, while others prohibit all poultry. Always check with your local zoning and animal control departments before bringing any animals home. This is especially true for us as we live on the edge of the city limits.

    !A homesteader holding a rabbit, one of the top choices for what are the easiest homesteading animals to raise.

    Ready to Bring Life to Your Homestead?

    Deciding what are the easiest homesteading animals to raise for your unique situation is the first exciting step! For us, starting with a small flock of chickens was the perfect introduction, opening the door to rabbits and ducks later. Each animal brought its own rewards and lessons, deepening our connection to the land and our food source. Remember, homesteading is a journey, not a destination, and every animal adds to the rich tapestry of that experience.

    What’s your biggest challenge with starting with homesteading animals? I’d love to hear your story.

    🔧 See Recommended Tools →


    📚 More From Our Homestead

    Ready to Start Your Homestead Journey?

    Free guides, checklists, and tools to help you build your dream homestead.
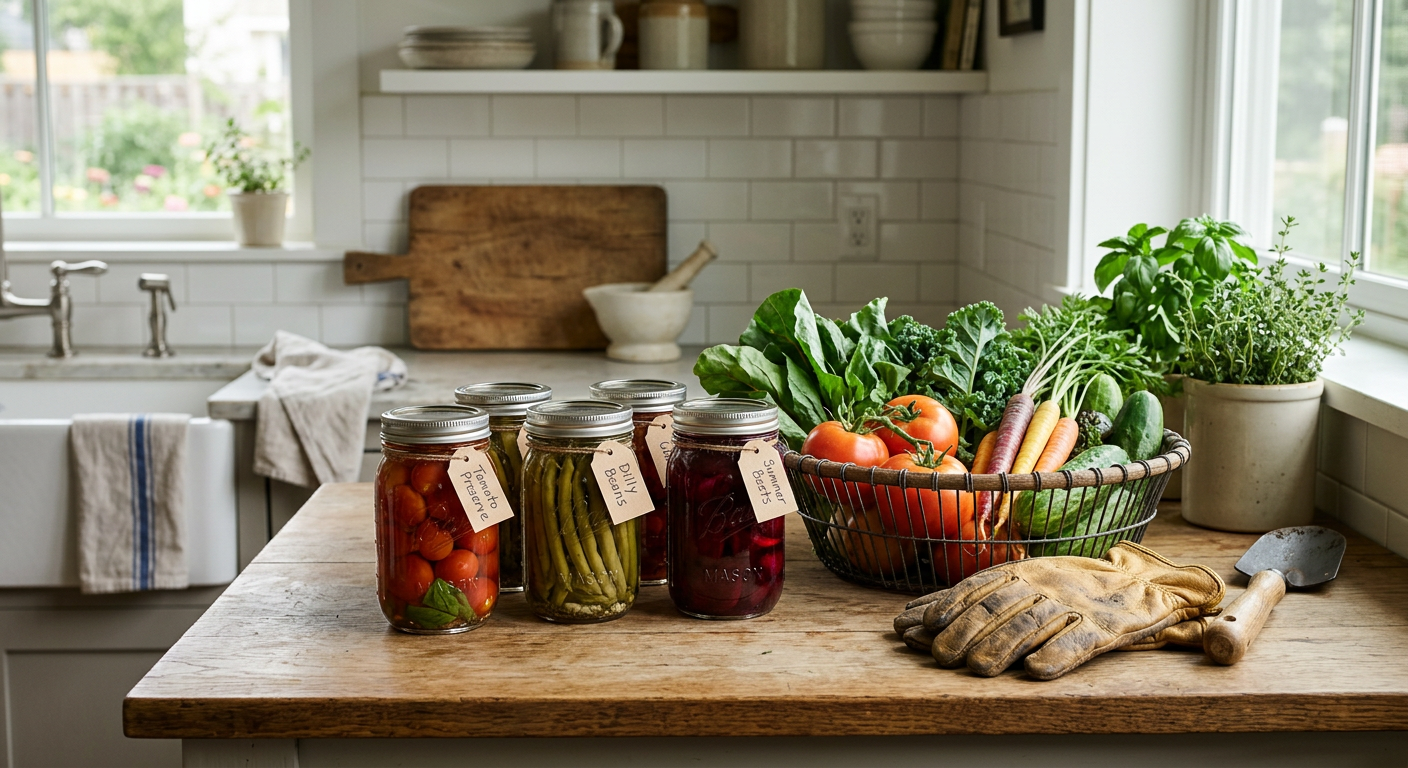
    Explore Free Resources →


    👉 Related: Homesteading Without Land? Get Experience Now!

    👉 Related: Maintaining Off-Grid Appliances and Systems for Longevity

  • Goat Milk Income Guide: Profitable Small-Scale Farming

    The Ultimate Guide to Profitable Goat Milk Farming

    Starting a goat milk enterprise is one of the most rewarding and scalable ways to monetize a small homestead or rural property. Unlike large-scale dairy cattle operations, dairy goats require less land, smaller initial investment, and produce a high-value product that is increasingly in demand among health-conscious consumers and boutique processors.

    Getting Started: Initial Requirements and Setup

    Launching a goat milk business requires careful planning and a commitment to animal welfare. You cannot simply buy a goat and start selling; you need a structured environment that ensures milk safety and animal health.

    1. Land and Infrastructure

    You don’t need hundreds of acres. A general rule of thumb is 6 to 8 goats per acre. At a minimum, you will need:

    • Secure Fencing: Goats are notorious escape artists. High-tensile woven wire (4-5 feet high) is the industry standard.
    • Shelter: A dry, draft-free barn or three-sided shed is essential. Each goat needs approximately 15-20 square feet of indoor space.
    • The Milking Parlor: This must be a separate, clean area from the living quarters to prevent contamination. It should have a raised milking stand and washable surfaces.

    2. Choosing Your Breed

    Not all goats are created equal in terms of milk production.

    • Alpine: High volume, dependable.
    • Nubian: Famous for high butterfat content (great for soap and cheese).
    • Saanen: The “Holsteins” of the goat world; highest producers of milk volume.
    • LaMancha: Known for a long lactation cycle and high production.

    3. Equipment Costs

    Initial equipment includes stainless steel milking pails (approx. $50), a strip cup ($15), filtration systems, and cooling tanks. For beginners, a manual or small vacuum pump milker ($500 – $1,200) is often the first major investment.

    Income Potential

    Your revenue depends on whether you sell raw milk (where legal), pasteurized milk, or value-added products like cheese and caramel (cajeta).

    | Scenario | Herd Size | Primary Product | Estimated Annual Revenue |

    | :— | :— | :— | :— |

    | Low (Hobbyist) | 3-5 Does | Raw Milk / Herd Shares | $3,000 – $6,000 |

    | Medium (Commercial)| 15-20 Does | Fluid Milk & Basic Cheese | $18,000 – $35,000 |

    | High (Boutique)| 40+ Does | Specialty Cheese & Skincare | $75,000 – $150,000+ |

    Note: These figures assume a mix of direct-to-consumer sales and retail partnerships.

    Cost Breakdown: Ongoing Expenses

    Profitability is determined by how well you manage your “input costs.” Here are the estimated annual expenses per goat:

    • Feed & Hay: $300 – $450. Grass hay is the staple, supplemented with high-protein grain during lactation.
    • Veterinary & Meds: $50 – $100. Covers vaccinations, deworming, and emergency calls.
    • Supplies: $75. Includes teat dip, filters, cleaning agents, and bedding (straw/shavings).
    • Marketing & Utilities: $100. Electricity for cooling and water, plus social media ads or farmers’ market fees.

    Total Estimated Operating Cost per Doe: $525 – $725 per year.

    Step-by-Step Process to Launching Your Business

    Step 1: Market Research

    Before buying animals, find out who is buying. Visit local farmers’ markets. Is there a demand for raw milk (herd shares) or is the market saturated? High-end chefs often look for local chèvre (goat cheese), which can fetch $20-$30 per pound.

    Step 2: Acquire Quality Stock

    Buy from a CAE (Caprine Arthritis Encephalitis) and Johnes-free tested herd. Buy “second fresheners” (goats on their second kidding) if you are a beginner, as they are already trained to the milk stand.

    Step 3: Implement a Milking Routine

    Consistency is key. Milk at the exact same times every day (e.g., 6:00 AM and 6:00 PM). Fast cooling is the secret to “sweet” tasting milk; the temperature must drop below 40°F within two hours of milking.

    Step 4: Packaging and Branding

    Modern consumers buy with their eyes. Invest in professional labels and glass bottles if doing direct sales. Highlight that your goats are pasture-raised or non-GMO fed to justify a premium price point.

    Scaling Your Operation

    Once you have mastered the care of a small herd, scaling requires moving from “labor-intensive” to “system-intensive.”

  • Automated Systems: Transition from hand milking or single-bucket milkers to a pipeline system that carries milk directly to a bulk cooling tank.
  • Value-Added Processing: The real money is in processing. Converting 10 gallons of milk into 10 lbs of aged goat cheese can triple your profit margin compared to selling fluid milk.
  • Breeding Sales: High-quality, registered dairy goats can be sold as breeding stock. A registered buckling from a high-production line can sell for $500 – $1,500.
  • Agritourism: Host “goat yoga” or farm tours. This creates a secondary income stream that uses the same assets (the goats) without increasing milk production work.
  • Legal & Regulatory Compliance

    The dairy industry is one of the most regulated in the world.

    Success Stories

    Scenario A: The Herd Share Success

    Sarah in Ohio started with 4 Nubian goats. Because Ohio prohibits direct raw milk sales, she used a “Herd Share” model. 20 families pay her $40/month as a “boarding fee” to care for their shares of the goats. She nets roughly $800/month after expenses with only a 1-hour daily time commitment.

    Scenario B: The Value-Added Creamery

    In Vermont, Thomas and Elena grew their herd to 30 Saanens. They built a licensed creamery and focused entirely on feta and chèvre. By selling to five local co-ops and three high-end restaurants, they generate over $90,000 in gross revenue annually.

    Frequently Asked Questions (FAQ)

    Q: How much milk does a goat produce per day?

    A: A healthy dairy goat averages 3 to 4 quarts (0.75 to 1 gallon) per day during her peak lactation, which lasts about 10 months.

    Q: Can I make a living with just 10 goats?

    A: As a standalone income, it is difficult unless you are making high-end value-added products like soap or skincare. However, it functions perfectly as a significant supplemental income.

    Q: Is goat milk soap more profitable than milk?

    A: Yes, in terms of shelf life. Milk is perishable and must be sold immediately. Soap can be made in large batches, stored, and shipped nationwide, which removes the geographical limit of your customer base.

    Q: What is the biggest challenge in goat farming?

    A: Parasite management and the 365-day-a-year commitment. Goats must be milked every single day without fail unless you use a “share-milking” approach with the kids.

    Q: Do I need a bull (buck) on the farm?

    A: No. Many small farmers use Artificial Insemination (AI) or “drive-way breeding” services to avoid the expense and smell of keeping a buck on-site.


    📚 More From Our Homestead

    Ready to Start Your Homestead Journey?

    Free guides, checklists, and tools to help you build your dream homestead.
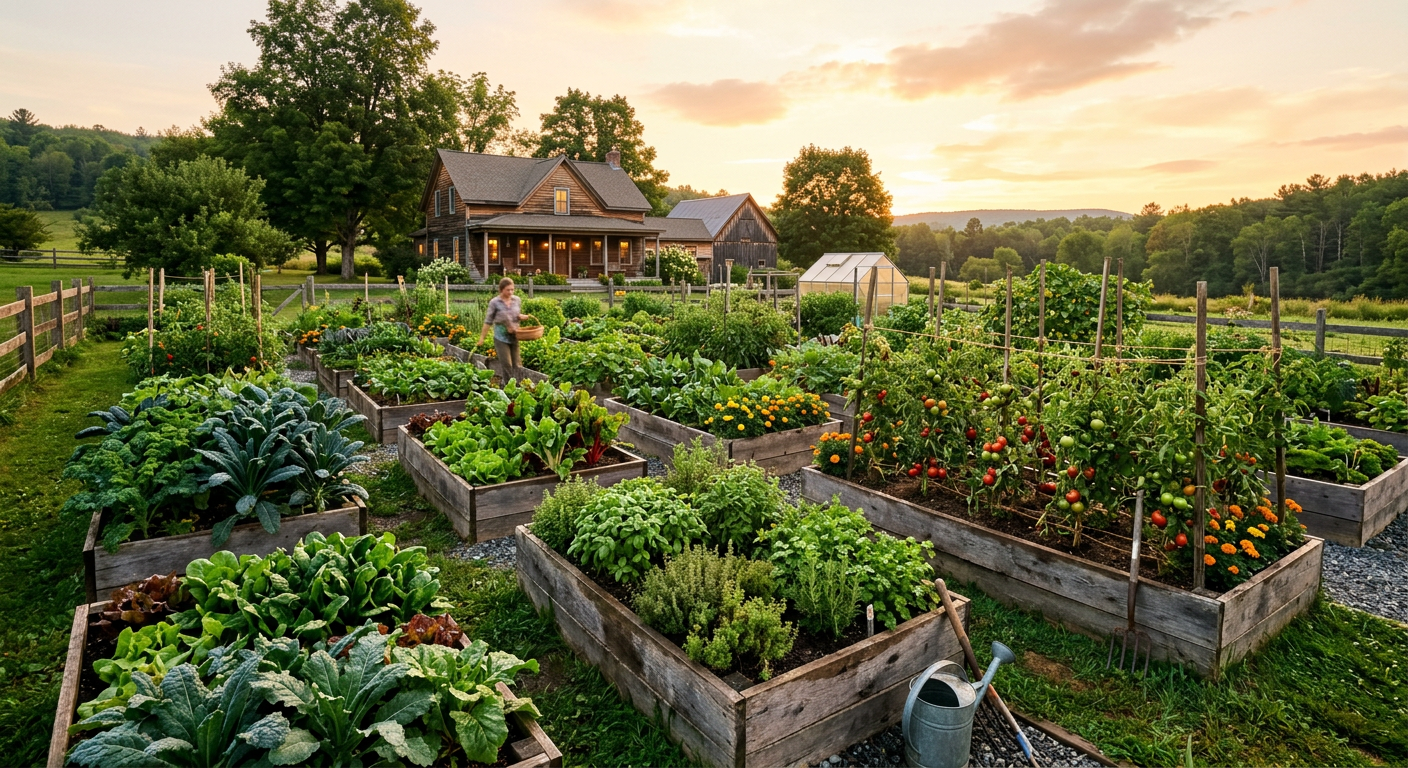
    Explore Free Resources →


  • Tiny Farm, Big Rewards: Best Low Maintenance Farm Animals

    Hey there, fellow homestead dreamers! When we first started our journey, the thought of adding animals to our small homestead was exciting, but also… well, a little intimidating. There’s so much conflicting advice out there, and frankly, some of it makes it sound like you need a full-time staff just to keep a chicken alive. But after years of learning, living, and a few comical (and sometimes frustrating) adventures, we’ve discovered that it’s absolutely possible to integrate a bustling farm life into a small footprint without burning yourself out.

    We’ve dedicated ourselves to finding the best low maintenance farm animals for small homesteads – creatures that contribute to our family’s self-sufficiency without demanding every waking hour. Because let’s be real, most of us aren’t quitting our day jobs to become full-time farmers from day one! Our goal was to find animals that fit into our busy lives, providing eggs, meat, milk, or garden helpers, while still leaving us time to enjoy our evenings and weekends.

    🌱 Ready to start your homestead journey? Explore our free guides and tools →

    Today, I want to share our hard-won wisdom and introduce you to the animals that have truly made a difference on our homestead. We’ll talk about what makes an animal “low maintenance,” why they’re perfect for smaller spaces, and give you a realistic peek into what to expect from each one.

    What Makes an Animal “Low Maintenance” for a Small Homestead?

    Before we dive into specific animals, let’s define what we mean by “low maintenance” in the homesteading world. It’s not about ignoring them – no animal is zero maintenance! For us, it boils down to a few key factors:

    * Minimal Daily Input: Can they largely care for themselves, or do they require constant supervision? We’re talking less daily feeding, fewer health issues, and less intricate housing.

    * Space Efficiency: How much land do they actually need? Small homesteads often mean limited acreage, so animals that don’t need vast pastures are key.

    * Foraging Ability: Do they prefer to graze or forage for a significant portion of their food? This reduces feed costs and workload.

    * Hardiness & Health: Are they prone to disease or easily stressed? Robust animals mean fewer vet calls and less worry.

    * Temperament: Are they generally calm and easy to handle? This is especially important if you have kids around or are new to animal husbandry.

    * Return on Investment (Time & Effort): What do you get back for your effort? Eggs, meat, milk, pest control, fertilizer? The more benefits, the better!

    Our Top Picks: The Best Low Maintenance Farm Animals for Small Homesteads

    After years of trial and error (and a few escaped chickens!), these are the animals that have proven their worth on our small, busy homestead.

    #### 1. Chickens: The Homestead Gateway Drug (and Egg Layers!)

    I don’t think there’s a homesteader out there who didn’t start with chickens. And for good reason! They are, hands down, one of the best low maintenance farm animals for small homesteads, especially for beginners.

    * Why we love them: Fresh eggs every day! They are natural pest controllers, turning bugs and kitchen scraps into valuable protein. Their manure is fantastic for the garden (just make sure it composts first!). Plus, they’re just plain entertaining to watch.

    * Maintenance Level: Moderate-Low. Once their coop is set up securely (critter-proof is crucial!), daily tasks are simple: feed, water, egg collection. We spend about 15-20 minutes a day on our flock of 10 hens. Cleaning the coop is a weekly to bi-weekly chore, taking about an hour.

    * Space Needs: Surprisingly little. A good rule of thumb is 3-4 sq ft per bird inside the coop and 8-10 sq ft per bird in the run. We free-range ours whenever possible, but a secure run is essential for safety. Read more about how to build a movable chicken tractor for sustainable pest control to see how we managed space efficiently.

    * Costs: Chicks cost $3-$5 each. A basic coop can be built for a few hundred dollars or bought for $500-$1500+. Feed runs about $20-$30 for a 50lb bag, lasting our small flock a couple of weeks.

    * Our Experience: We started with 6 hens, and quickly realized how much we loved fresh eggs. We’ve found breeds like lớp (Orpingtons, Rhode Island Reds, Wyandottes) to be exceptionally docile and cold-hardy. They lay consistently for 2-3 years, then production tapers off, but they’ll still lay!

    #### 2. Ducks: The Unsung Heroes of Pest Control

    Many new homesteaders overlook ducks, but they really are fantastic, especially if you have a slightly wetter area on your property or struggle with slugs and snails. They’re another strong contender for the best low maintenance farm animals for small homesteads.

    * Why we love them: Ducks are phenomenal foragers, eating tons of slugs, snails, and other garden pests. Their eggs are richer and larger than chicken eggs, fantastic for baking. They are generally more disease-resistant than chickens and less prone to scratching up garden beds (they ‘dab’ rather than scratch).

    * Maintenance Level: Low. Similar to chickens, but they need a water source deeper than just a bowl for dipping their heads. A kiddie pool works perfectly. They also tend to keep their bedding cleaner than chickens!

    * Space Needs: Similar to chickens, but they appreciate having access to a pond or a large tub of water. We dedicate a small, fenced-off corner of our property for their personal spa area.

    * Costs: Ducklings are often $5-$10 each. Housing can be a modified chicken coop, or a simple, secure shed.

    * Our Experience: Our five Embden ducks are hilarious and industrious. They gobble up pests that chickens ignore, and their eggs are a prized commodity! They do make a bit more mud around their water source, but it’s a small price to pay for pest control and delicious eggs.

    #### 3. Rabbits: Meat, Manure, and Mirth

    If you’re interested in a sustainable meat source or high-quality fertilizer, rabbits are hard to beat for a small footprint. They’re quiet, clean, and incredibly efficient.

    * Why we love them: They multiply quickly, providing a sustainable meat source (if that’s your goal) with a small feed input. Their “bunny berries” are cold manure, meaning you can put it directly on your garden beds without composting, enriching your soil immediately. They’re also relatively quiet and don’t take up much space.

    * Maintenance Level: Moderate-Low. Daily feeding and watering, plus weekly cage cleaning. The biggest chore is keeping their cages clean to prevent ammonia buildup and health issues.

    * Space Needs: Very little. A comfortable hutch can house 1-2 rabbits. For breeding, you’ll need multiple hutches. We use stacked cages to save space.

    * Costs: Breeding stock can range from $30-$100 per rabbit depending on the breed. Hutches can be homemade or purchased for $50-$200 each. Feed costs are low, as they munch on hay and a small amount of pellets.

    * Our Experience: We raised New Zealand Whites for a few years and found them to be incredibly efficient. The fresh manure was a game-changer for our raised beds – talk about a nutrient boost! It perfectly complemented our small backyard vegetable garden. We harvested about 30 rabbits a year from 2 does and 1 buck, providing a significant portion of our family’s meat.

    📋 Free Download: Get our Small Homestead Animal Starter Checklist →

    #### 4. Quail: Compact Egg Machines

    If you’re really tight on space, quail are your answer. These tiny birds are phenomenal egg layers and can even provide meat in a surprisingly small footprint.

    * Why we love them: They take up minimal space – you can house a flock of 20-30 quail in the same area as 2-3 chickens. They mature and start laying eggs incredibly fast (around 6-8 weeks!). Their eggs are small but delicious and packed with nutrients. They’re also very quiet, making them ideal for urban or suburban homesteads.

    * Maintenance Level: Low. Daily feeding and watering. Their small size makes cleaning their cages a bit quicker than larger birds.

    * Space Needs: Minimal. A 2’x3’ cage can comfortably house 10-15 Coturnix quail. They thrive in secure, enclosed aviaries or cages.

    * Costs: Quail chicks are inexpensive ($1-$3 each), or you can buy fertile eggs and hatch them yourself. Cages are relatively cheap to build or buy.

    * Our Experience: We currently have a small flock of Bobwhite quail and they are awesome! They lay an egg almost every day, and their chirping is quite soothing. We keep them in a large converted rabbit hutch, and it’s been fantastic for fresh eggs without needing much land. We even harvest some for meat in the fall – a delicate, tasty treat.

    #### 5. Goats: The Energetic Land Clearers (Choose Wisely!)

    Now, goats typically wouldn’t make a “low maintenance” list for everyone, but if you choose the right breed and have issues with brush or weeds, they can actually be a huge asset to a small homestead. We’re specifically talking about smaller, dairy or fiber breeds, not full-sized meat goats.

    * Why we love them: Dairy goats provide fresh milk, which can be turned into cheese, yogurt, and soap. Fiber goats (like Angoras or Cashmeres) offer luxurious wool. They are also fantastic at clearing brush, acting as living lawnmowers and weed-eaters.

    * Maintenance Level: Moderate. They do require more daily attention than chickens or rabbits. Daily milking for dairy goats, secure fencing (goats are escape artists!), and hoof trimming are regular tasks. They are very social and need companionship.

    * Space Needs: More than other animals on this list, but miniature breeds like Nigerian Dwarfs or Pygmies can thrive on 1/4 to 1/2 acre with good browsing. We have two Nigerian Dwarfs on about half an acre, and they keep the overgrowth at bay nicely.

    * Costs: Breeding stock varies widely, from $200-$500+ per animal. Fencing can be a significant investment ($500-$2000 for good goat fence). Feed is primarily hay, with supplemental grain for milking does.

    * Our Experience: Our two Nigerian Dwarf does, Buttercup and Daisy, are a chaotic joy. They supply us with plenty of delicious milk for our family, and their antics keep us laughing. Yes, they require more effort than our chickens – especially the daily milking and constant fence checks – but the fresh milk products make it worth it for us. They’ve also cleared out so much invasive brush on the edge of our property that would have taken us weeks of manual labor!

    Setting Up for Success: Essential Tips for Small Homestead Animals

    No matter which of the best low maintenance farm animals for small homesteads you choose, a good setup is paramount for keeping them low-maintenance in the long run.

    * Secure Housing: This is non-negotiable. Predators are everywhere, and a well-built, predator-proof coop or hutch saves endless heartache. When we were first setting up our chicken coop, we spent a solid weekend making sure every crack and crevice was secured, and it’s paid off for years.

    * Water, Water, Water: Fresh, clean water is essential, and often overlooked. Bigger waterers mean less frequent refilling. Consider automated water systems if feasible.

    * Nutritional Feed: Don’t skimp on quality feed. Healthy animals are low-maintenance animals. Supplement with kitchen scraps and garden produce where appropriate.

    * Pasture/Foraging Management: If your animals forage, rotate them to fresh ground to prevent overgrazing, parasite buildup, and mud pits. This also helps regenerate your soil and reduce feed costs.

    * Know Your Local Regulations: Check with your municipality about animal restrictions, especially if you’re in an urban or suburban area. You don’t want to get attached to a flock only to find out you have to rehome them!

    * Emergency Plan: Have a vet’s number on hand, and know basic first aid for your animals. Things happen, and being prepared minimizes stress.

    FAQ: Your Burning Questions About Small Homestead Animals

    Got questions? We’ve heard them all! Here are some common ones about keeping the best low maintenance farm animals for small homesteads.

    Q: How much land do I really need for animals?

    A: Less than you think! For chickens or rabbits, you can start with a backyard-sized space. Ducks and quail also don’t need acres. Goats require more space, typically a quarter-acre minimum for two miniatures, but they’re great at utilizing brushy areas. The key is efficient design and rotation.

    Q: What about winter care? Do low-maintenance animals become high-maintenance then?

    A: Winter does increase the workload slightly, mostly around keeping water from freezing and ensuring adequate ventilation without drafts. However, hardy breeds of the animals mentioned (like cold-tolerant chickens or goats with good shelter) remain relatively low-maintenance. We use heated dog bowls for water and deep litter method in the coop to reduce winter chores.

    Q: Can I mix different types of animals on a small homestead?

    A: Yes, carefully! We successfully keep chickens and ducks together. They generally coexist well, though ducks need extra water access. Mixing species like goats with chickens can work but requires watchful eyes and separate housing/feeding areas to prevent bullying or disease transmission. Research specific animal compatibilities thoroughly.

    Q: Is it expensive to get started with farm animals?

    A: The initial setup can be, but it doesn’t have to break the bank. You can often find used coops or hutches, or build them yourself. Chicks or ducklings are cheap, and adult animals can sometimes be found for free or low cost from other homesteaders reducing their stock. Our first chicken coop was built almost entirely from reclaimed pallets, keeping costs under $50!

    Q: How do these animals contribute to self-sufficiency?

    A: Immensely! Eggs provide protein, rabbits and quail can provide meat. Goats give milk for dairy products. All of them produce valuable manure for your garden, reducing the need for chemical fertilizers. Chickens and ducks provide pest control. It’s a beautiful, symbiotic cycle!

    What We Use & Recommend on Our Homestead

    We’ve tried a lot of products over the years, and these are the ones that have truly stood the test of time and homesteader wear-and-tear. These are what we actually use on our homestead and make our animal chores that much easier:

    * Galvanized Poultry Waterers: (Link to a general poultry watering resource on UseHomesteadOS) We prefer 5-gallon metal ones. They hold a lot of water and are easy to clean.

    * Hardware Cloth (1/2″ mesh): (Link to a general fencing/hardware cloth resource on UseHomesteadOS) Essential for predator-proofing coops and runs. We learned the hard way that chicken wire is NOT enough!

    * The Encyclopedia of Country Living: This book is practically our homesteading bible. It covers everything from animal care to preserving food.

    * Heavy Duty Wheelbarrow: Trust us, you’ll be moving a lot of feed, hay, and manure. A good quality, durable wheelbarrow is worth every penny.

    Bringing animals onto your small homestead is a rewarding adventure that adds so much life and purpose to your property. By choosing the best low maintenance farm animals for small homesteads, you set yourself up for success, enjoyment, and a truly self-sufficient lifestyle without constant overwhelm.

    Don’t let the fear of too much work stop you! Start small, research your chosen animals thoroughly, and enjoy the incredible journey. We’re always learning and growing here on our homestead, and we’d love for you to join us.

    For more homesteading tips, guides, and to find all the resources discussed today, explore usehomesteados.com. Bookmark us, subscribe to our newsletter, and let’s keep growing together!


    📚 More From Our Homestead

    Ready to Start Your Homestead Journey?

    Free guides, checklists, and tools to help you build your dream homestead.
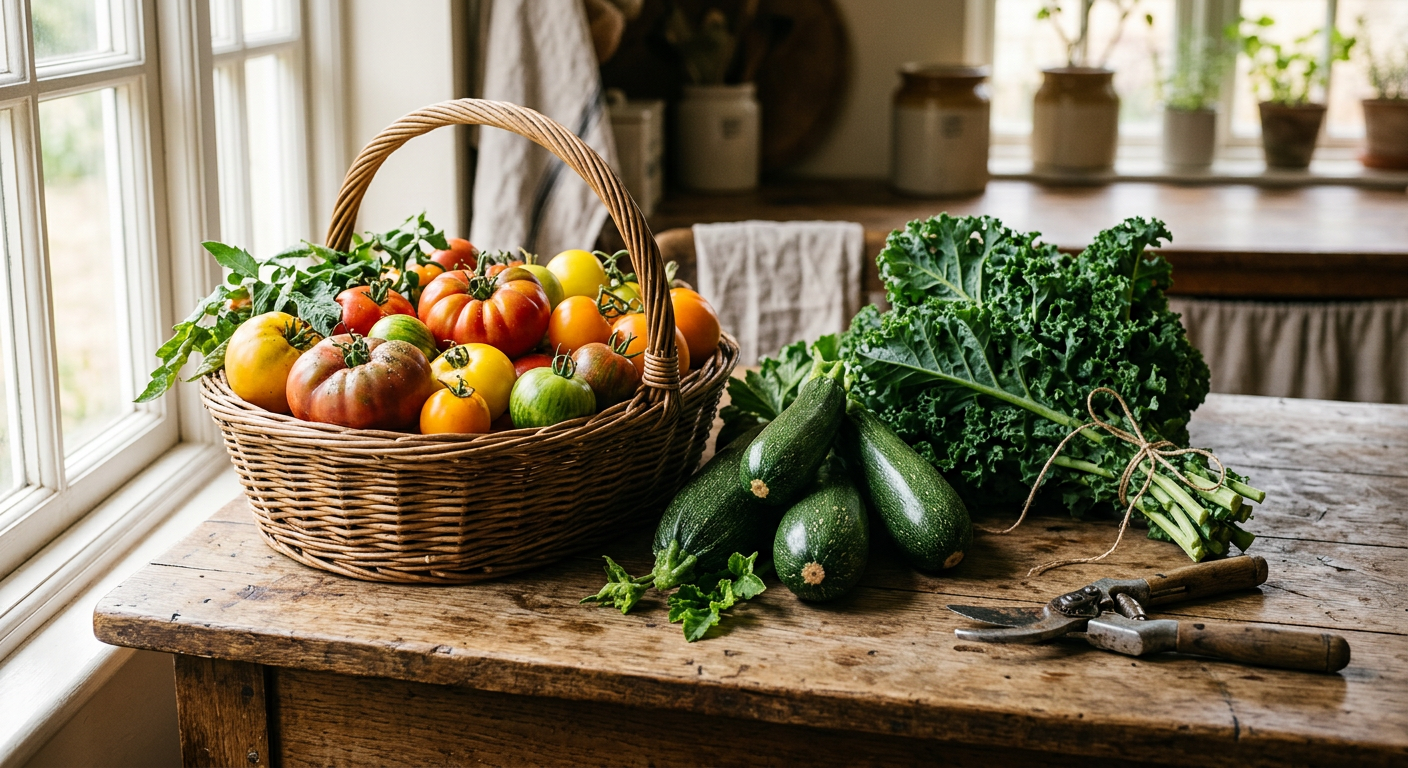
    Explore Free Resources →


    👉 Related: Top Homesteading Books for Beginners 2026: Start Today

    👉 Related: Raising Backyard Chickens: Pros, Cons & What to Expect