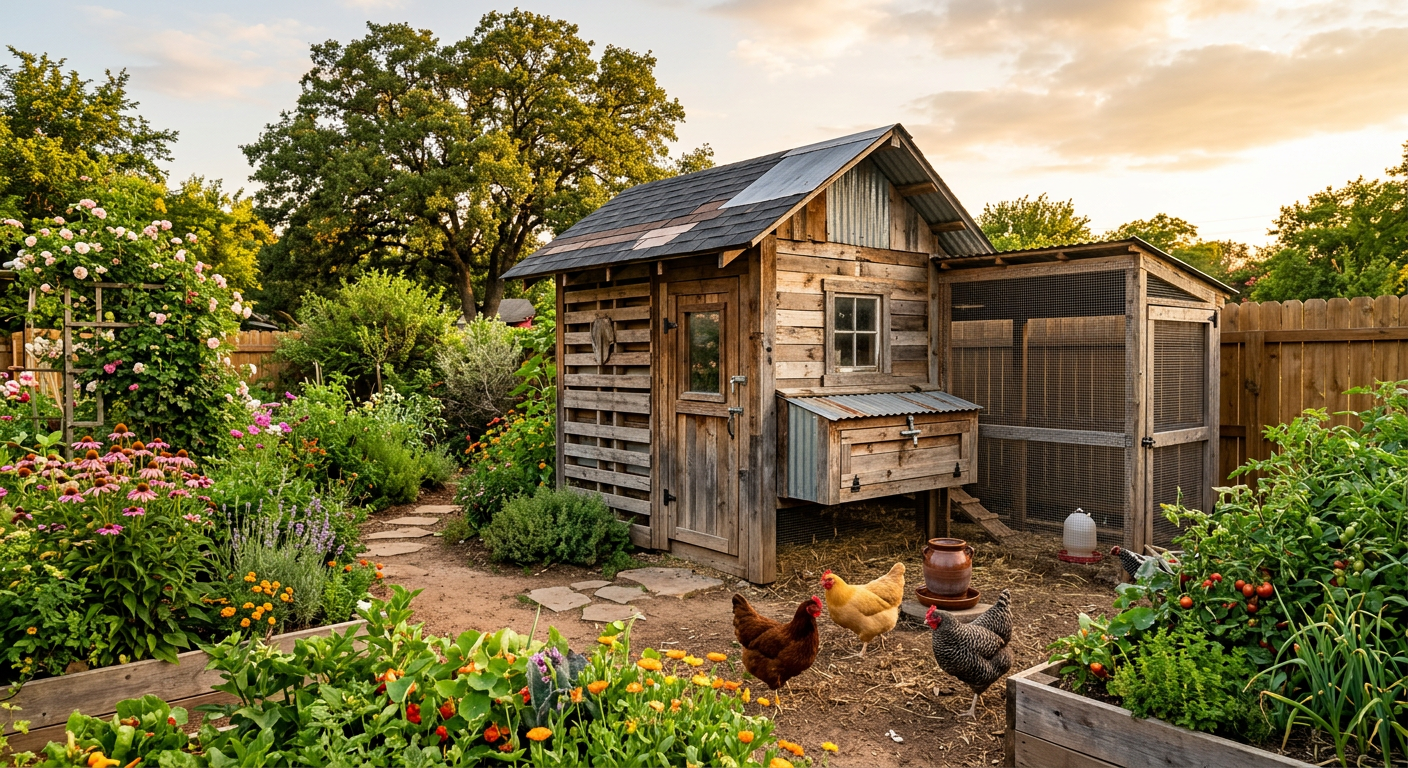
!A sturdy backyard setup showing how to build cheap chicken coop plans using reclaimed pallet wood.
I’ll never forget the sick feeling in my stomach, standing in the pre-dawn chill. A rogue windstorm had ripped half the roofing felt off our very first chicken coop, and the inside was a soggy, miserable mess. We’d spent over $400 on a kit, and it folded like a wet napkin in the first real test. That expensive failure taught me a hard lesson: you don’t need fancy, you need tough. And tough doesn’t have to be expensive.
🎯 Quick Answer: The best way to build a cheap chicken coop is to source free or salvaged materials like pallets and scrap lumber, focus on non-negotiable safety features (predator-proofing, ventilation), and use simple, functional designs like an A-frame or a reinforced pallet structure. Forget aesthetics; focus on what keeps your flock safe and dry.
🔑 Key Takeaways
* Scavenge First, Buy Later: Your best materials are often free. Pallets, construction site off-cuts, and old sheds are gold mines for a budget build.
* Function Over Form: A beautiful coop that doesn’t breathe is a death trap. Prioritize ventilation, predator protection, and ease of cleaning over fancy trim.
* Hardware Cloth is Non-Negotiable: Chicken wire keeps chickens in, but hardware cloth keeps raccoons, weasels, and hawks out. This is not the place to save a few dollars.
* Simpler is Stronger: Complicated plans have more points of failure. A basic A-frame or a simple shed-style coop is easier to build, easier to reinforce, and just as effective.
* Build Bigger Than You Need: Chicken math is real. You’ll always end up with more birds than you planned. A little extra space now saves you from building a second coop later.
—
!Finding free pallet wood and lumber for how to build cheap chicken coop plans on a budget.
Scrounging for Gold: How to Find Materials for Free
Our second coop, the one that’s still standing strong after six years, cost us exactly $87. The cost was for screws, hinges, and a roll of hardware cloth. The rest? All scavenged. Learning how to find free building materials is one of the most vital beginner homesteading tips you can master.
Here’s where we looked:
* Facebook Marketplace & Craigslist: Look in the “Free” section. People are constantly giving away old sheds, playhouses, and leftover lumber just to get it off their property. We found a dismantled child’s playhouse that formed the core of our current coop.
* Pallets: Look behind warehouses or industrial parks (always ask permission!). Make sure you get the ones stamped with “HT” for heat-treated, not “MB” for methyl bromide, which is toxic.
* Construction Sites: Drive by new home builds on a Friday afternoon. With the site manager’s permission, you can often grab a truckload of off-cuts and scrap plywood from their dumpster that are perfect for coop walls and nesting boxes.
My biggest score was a stack of 12 untreated pallets from a local garden center. They were happy to see them go. Those pallets became the entire frame and most of the walls for our coop. It’s not pretty, but it’s a fortress.
Don’t just build a coop; build a resilient homestead. That starts with knowing what materials you have and what you need.
—
The “Good Enough” Coop: 4 Non-Negotiable Features
You can skimp on a lot, but you absolutely cannot skimp on these four things. Believe me, I’ve paid the price for getting these wrong. The goal isn’t just learning how to build cheap chicken coop plans; it’s learning how to build safe ones.
1. Ventilation (But Not Drafts)
Chickens produce a ton of moisture and ammonia. Without good ventilation up high, that moisture builds up and causes frostbite in the winter and respiratory infections year-round. You need vents near the roofline that are covered to prevent rain from getting in. A draft at roost level is bad, but stale air is deadly.
2. Absolute Predator-Proofing
I’ll say it again: chicken wire is not predator-proof. A raccoon will rip through it like tissue paper. You must use 1/2-inch or 1/4-inch hardware cloth on ALL openings, including vents. We lost two of our best hens to a weasel who squeezed through a one-inch gap we overlooked. Every window, every vent, every single opening needs to be covered and secured with screws and washers, not just staples.
3. Roosting Bars
Chickens sleep on roosts, not on the floor. It keeps them clean and safe. Use a 2×4 with the wide side up, or even just sturdy, rounded branches. Give them about 8-10 inches of roost space per bird. Make them higher than the nesting boxes, or the birds will sleep (and poop) in the boxes.
4. Dark, Cozy Nesting Boxes
For every 3-4 hens, you need one nesting box (about 12x12x12 inches). They want a dark, safe, quiet place to lay. We built ours out of scrap plywood and put a hinged lid on the outside of the coop for easy egg collection. This saves you from having to go inside the coop every day. The hens feeling safe to lay is just as important as all the logistics of raising backyard chickens.
Focusing on these essentials is how you build a coop that lasts for years, not just a season.
—
No-Frills Cheap Chicken Coop Plans You Can Build
Forget downloading complicated 50-page blueprints. The best plans are the ones you can draw on the back of a napkin and adapt to the materials you have on hand. Here are two designs we’ve used that are perfect for beginners.
The A-Frame Tractor
This is the ultimate beginner’s coop, especially for a small flock (2-4 birds). It’s basically a triangle on wheels.
* Frame: Build two large wooden triangles out of 2x4s. Connect them at the top and with cross-braces along the bottom.
* Housing: The top third of the A-frame is the enclosed coop. Use scrap plywood to box in this area, creating a triangular space for them to sleep. Include a small roost and one nesting box.
* Run: The bottom two-thirds is the open-air run. Cover this area completely with hardware cloth. Don’t forget the bottom, or diggers will get in.
* Benefit: It’s a complete coop and run in one. You can move it around your yard every few days to give chickens fresh grass and control pests. We have a whole guide on how to build a movable chicken tractor if you want to dive deeper.
The Pallet Palace
This is what we have now for our main flock of 15. It’s a small shed-style coop built almost entirely from free pallets.
* Foundation: We laid four pallets flat on leveled concrete blocks to create a raised floor. This keeps it dry and deters rodents.
* Walls: We stood pallets up vertically on the floor platform and screwed them together at the corners to form the walls. Then, we covered the inside and outside with scrap plywood and salvaged tin roofing to make them solid and weatherproof.
* Roof: A simple, sloped roof made from 2×4 rafters and covered in free tin from an old barn. The slope is crucial for shedding rain and snow.
For a project like this, it helps to keep track of your materials and steps. When we first started, everything was a chaotic mess of notes. Now, we use a simple digital system to map out projects from start to finish. If you’re tackling multiple projects, a planner like Homestead OS can make the difference between a finished project and a pile of wood.
Keep reading—this is where I tell you how to avoid my biggest time-wasting mistakes.
—
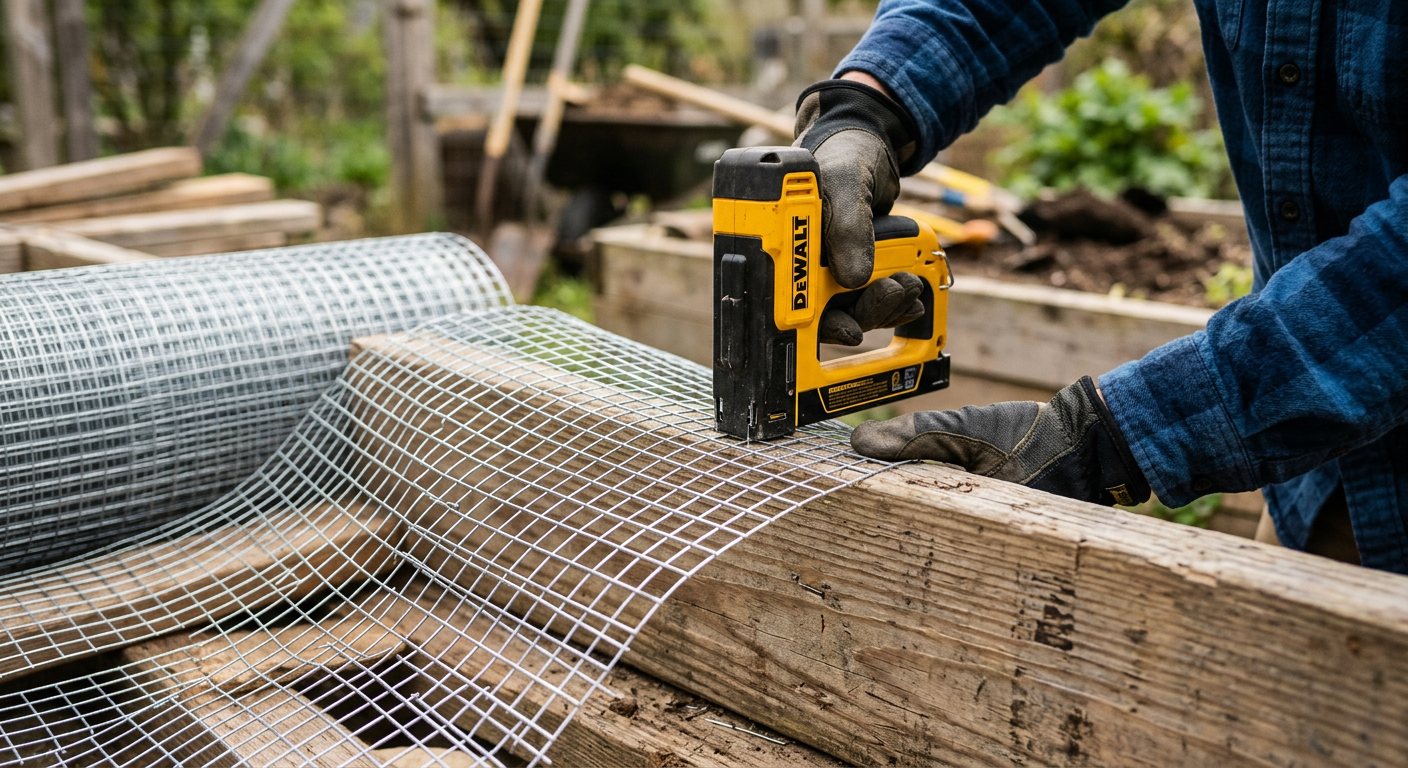
!Installing predator-proof hardware cloth while following how to build cheap chicken coop plans.
💡 Pro Tips
These are the little things you learn after your third build and second predator attack. Learn from my scars.
* Build a Human-Sized Door. My back still aches thinking about shoveling out our first coop, bent over double because the door was only four feet high. Make the door big enough for you to walk in and out comfortably with a shovel or wheelbarrow.
* Paint is Your Friend. Even if you use cheap scrap wood or pallets, a few thick coats of exterior paint (use low-VOC or barn paint) will add years to your coop’s life. It seals the wood against moisture and rot.
* Deep Litter Method Saves Time. Instead of cleaning the coop weekly, we use the deep litter method. Start with 4-6 inches of pine shavings. As it gets soiled, just turn it over with a pitchfork and add a fresh layer on top. Twice a year, you clean it all out and have incredible compost for your garden.
* Put Your Coop on Blocks. Even if it’s not a pallet coop, elevating your structure a few inches off the ground on concrete blocks prevents the base from rotting and makes it harder for rodents to chew their way in. It’s a simple step that adds longevity. You can review some great plans from university extensions like this one from the University of Georgia Extension.
—
⚠️ Beginner Mistakes to Avoid
I cringe when I see new chicken keepers making these mistakes because I made almost all of them myself.
* Using Chicken Wire for Runs. I know I’ve said it twice, but it’s the single biggest (and most heartbreaking) mistake. A raccoon took three of our first flock of pullets through chicken wire. Use hardware cloth. Period.
* Forgetting a “Chicken Ramp.” If your coop is elevated, your chickens need a textured ramp to get in and out. A smooth piece of plywood will be too slippery, especially when wet or icy. We just screwed small wood strips cross-wise every few inches on our ramp to give them grip.
* No Easy Way to Collect Eggs. Don’t build a coop where you have to go inside, move chickens, and dig through bedding to get the eggs. Build external nesting boxes with a lid on the outside. It’s a game-changer.
* Building It Too Small. I promise you, six chickens will become ten, and ten will become fifteen. It’s called chicken math. Build your coop for at least 50% more chickens than you plan to get. It’s so much easier than adding an extension later. Keeping project specs and future plans organized is tough, which is why having a central place to track everything is so critical. A simple digital tool like Homestead OS helps you plan for this kind of expansion from day one.
—
Frequently Asked Questions
H3: How much space do chickens need in a coop?
A good rule of thumb is 3-4 square feet per bird inside the coop if they have an outdoor run, and about 10 square feet per bird in the run. If they are permanently confined, you need much more. Overcrowding leads to stress, pecking, and disease.
H3: Can I use pressure-treated wood for a chicken coop?
I avoid it, especially for any interior surfaces the chickens might peck at. The chemicals used for treating the wood (like arsenate) can be toxic. If you must use it for foundational parts that touch the ground, make sure it is completely sealed with paint and doesn’t come into contact with the birds or their bedding.
H3: What is the absolute cheapest way to build a chicken coop?
The cheapest way is to convert an existing structure. An old dog house, a plastic garden shed, or a corner of a garage can be fortified and converted into a coop for next to nothing. Just ensure it has ventilation and is predator-proof.
H3: How do I predator-proof a cheap coop on a budget?
Hardware cloth over every opening is #1. For latches, don’t use simple hook-and-eye closures. A raccoon can open those easily. Use a two-step latch, like a carabiner clip through a deadbolt, that requires opposable thumbs to operate.
—
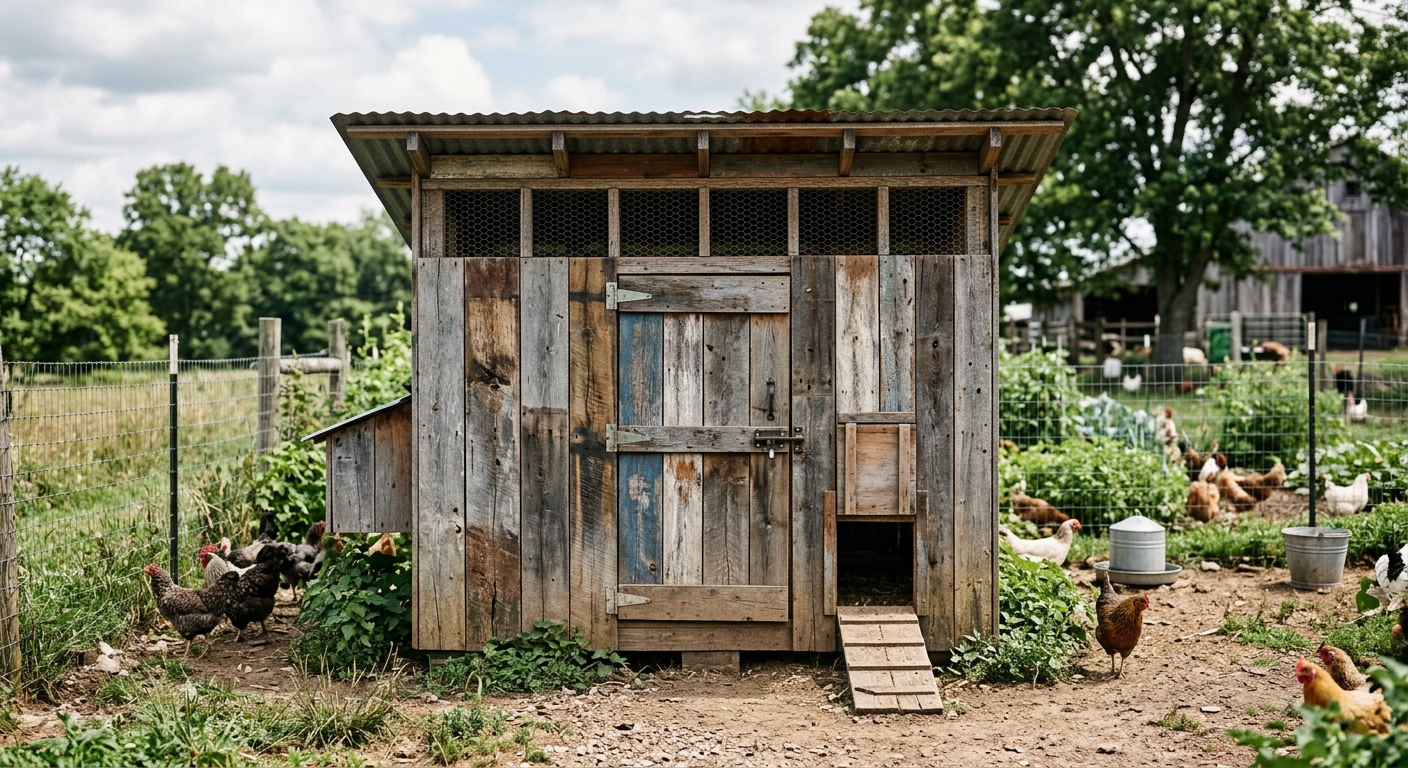
!A finished rustic structure demonstrating simple how to build cheap chicken coop plans for $87.
It’s More Than Just a Box for Birds
Building that second coop from scraps and sweat wasn’t just about saving money. It was about resiliency. It was about looking at a pile of what someone else considered trash and seeing a safe, warm home for our animals. It was proof that we could provide for our homestead without a big budget.
You don’t need a thousand dollars or professional plans. You need a little creativity, a lot of sweat, and the knowledge of what actually matters: safety, health, and security for your flock.
For more behind-the-scenes stories and daily tips from our homestead, come follow along on our Facebook page. We share the wins, the failures, and everything in between.
What’s the most clever material you’ve scavenged and repurposed for a project? Share your scores in the comments below!
📚 More From Our Homestead
- Companion Planting Guide That Doubled Our Yields
- Apartment Friendly Urban Chicken Breeds (Our Top Picks)
- How to Become Self-Sufficient in Five Years: Our Plan
- No Eggs? Troubleshooting Chicken Laying Problems
- Best Veggies for a Backyard Organic Garden (Our Picks)
Ready to Start Your Homestead Journey?
Free guides, checklists, and tools to help you build your dream homestead.
Leave a Reply