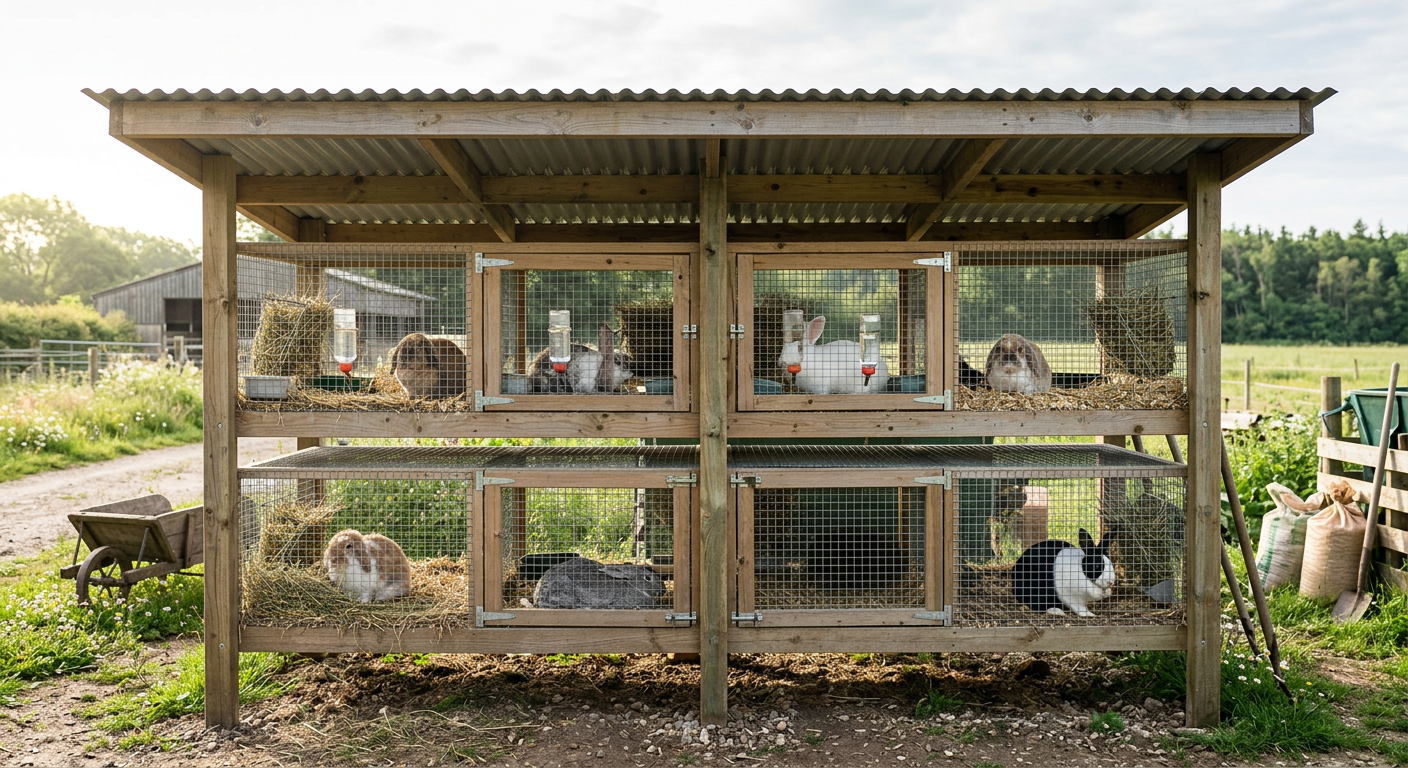
I’ll never forget the sound. A soft, wet thump on the concrete floor of our barn at 3 AM. I ran out with a headlamp to find a newborn kit, stone cold, that had fallen through the wire floor because the first-time doe hadn’t pulled enough fur for her nest. That gut-wrenching moment taught me more about the real housing requirements for meat rabbits than any book ever could.
🎯 Quick Answer: The fundamental housing requirements for meat rabbits include secure, predator-proof cages with adequate space (at least 1 square foot per pound of rabbit), protection from sun, wind, and rain, excellent ventilation to prevent respiratory illness, and a solid resting area to prevent sore hocks.
🔑 Key Takeaways
* Size Matters: A breeding doe needs a minimum of 30″ x 36″ of cage space. Bucks can have slightly less, around 30″ x 30″. Overcrowding is a recipe for stress, disease, and failure.
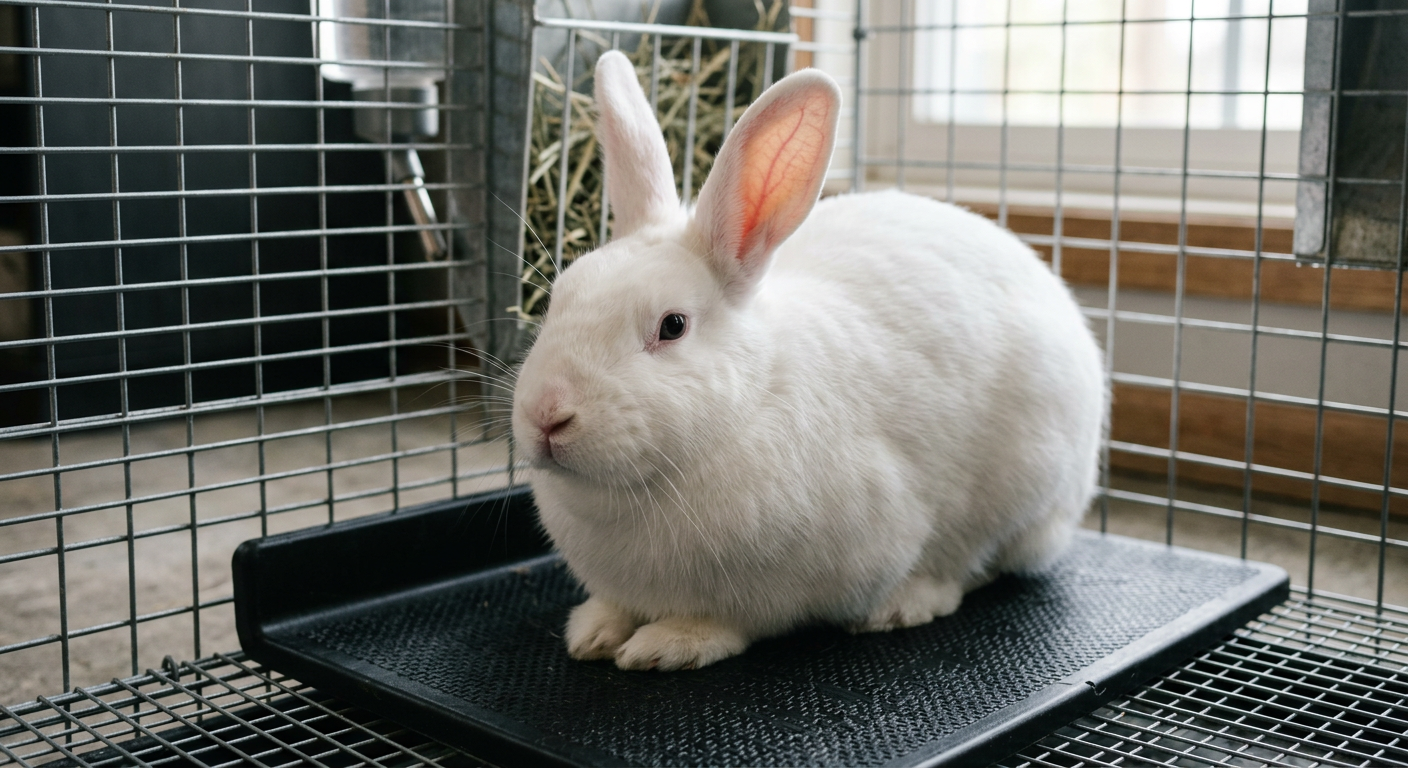
* Wire Floors are a Trade-Off: 1/2″ x 1″ wire flooring is the standard for sanitation, letting waste fall through. However, you MUST provide a solid resting board (a piece of untreated plywood or a plastic mat) to prevent painful sore hocks.
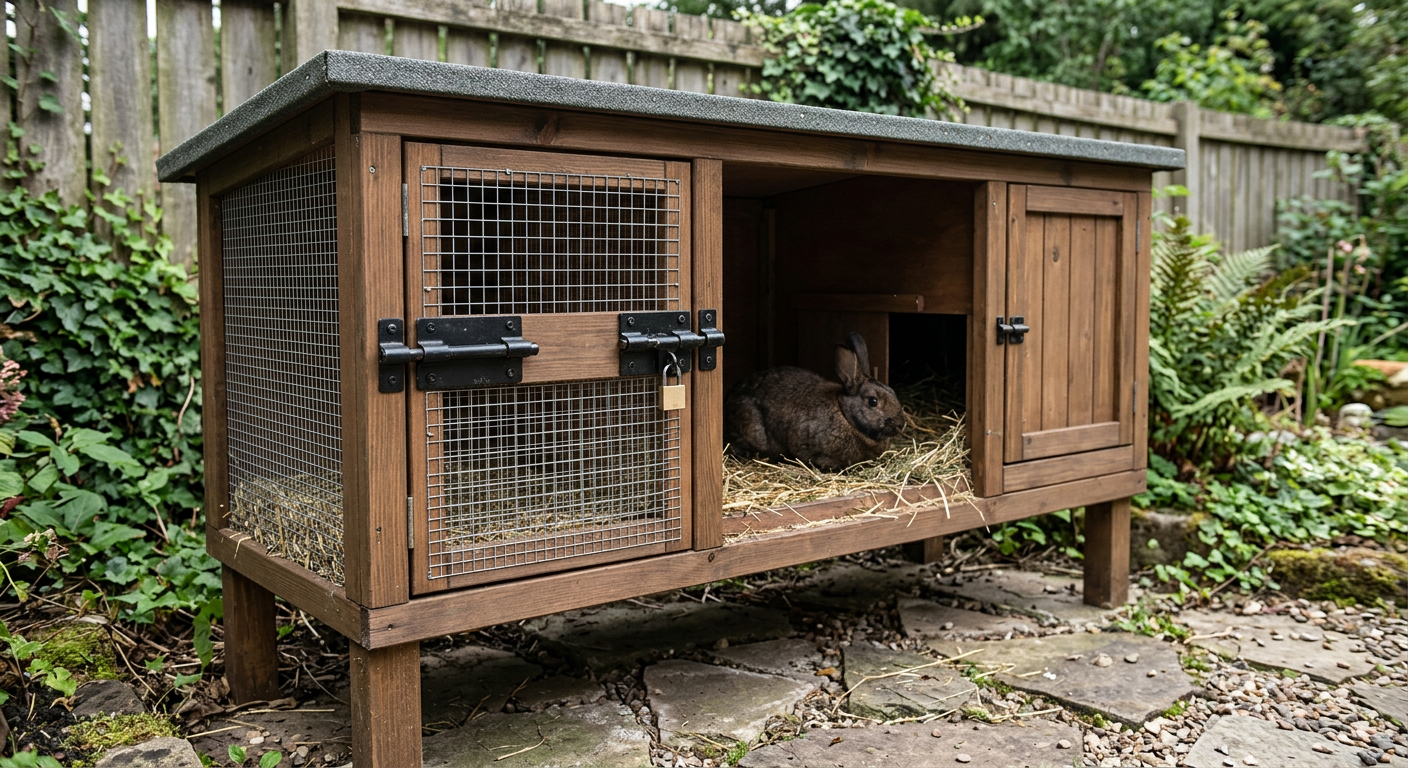
* Predator-Proofing is Not Optional: Your setup must be secure from dogs, raccoons, weasels, and hawks. We use 1/2″ hardware cloth on any open sides of our rabbitry, and it’s saved our stock more than once.
* Ventilation > Insulation: Rabbits handle cold far better than heat. A structure that blocks wind and rain but allows for constant, fresh airflow is more important than an insulated, airtight building.
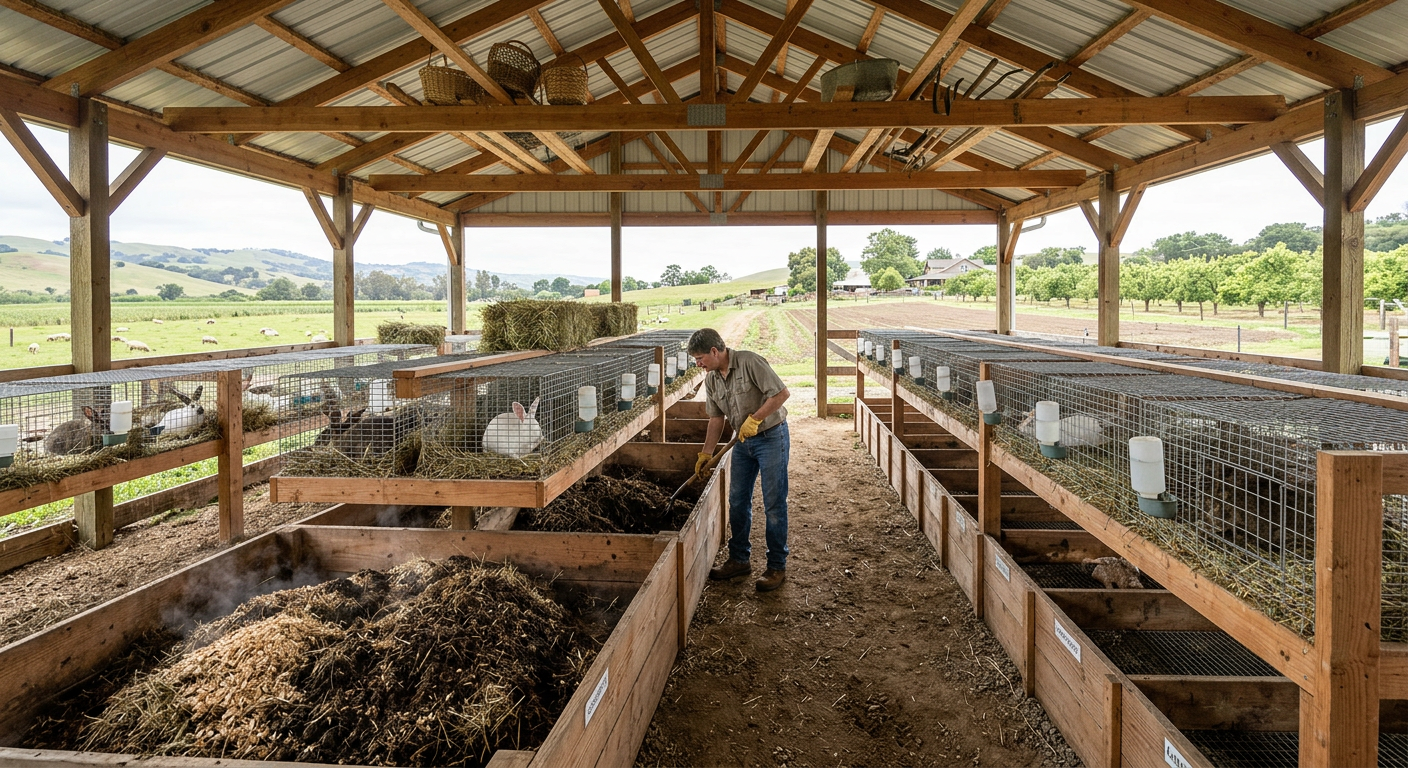
* Plan for Manure: A single breeding trio can produce a surprising amount of waste. A plan for managing it (like composting or a worm farm) is a non-negotiable part of your housing setup.
—
!A rabbit on a resting board meeting housing requirements for meat rabbits to prevent sore hocks.
Cages vs. Colonies: What We Chose and Why
When we first got into rabbits, the idea of a colony was so romantic. Little bunnies hopping around a big, beautiful pen in a natural setting. We tried it. We spent a weekend building a 10×10 tractor with a hardware cloth floor and a wooden shelter.
It was a disaster.
Within a month, the bucks were fighting viciously. We couldn’t keep track of who was bred to whom. When the first litter was kindled, another doe killed half the kits. It was pure chaos, and it makes it nearly impossible to run a clean, productive meat rabbit operation. Some people make it work, but for beginners, I’ll say this: start with cages.
Cages give you complete control. You know exactly what each rabbit is eating, how their manure looks (a key health indicator!), and when they are due. We switched to an all-wire cage system from Klubertanz, and our productivity and the animals’ health improved overnight. They aren’t as pretty, but they are far more functional and humane when managed correctly. For us, rabbits are one of the best low maintenance farm animals for small homesteads, but only with the right systems in place.
Keep reading — this is where most people mess up.
Now, let’s talk about the exact cage specs you need.
—
The Nitty-Gritty on Cage Sizing and Materials
This is where you can’t afford to cut corners. A proper cage is an investment that pays off in healthy rabbits and less work for you. The standard for meat breeds like New Zealands or Californians is a cage that is 30″ deep, 36″ wide, and 18″ tall for a doe and her litter. A buck or a doe without a litter can do well in a 30″ x 30″ x 18″ cage.
The Wire You Absolutely Need
Don’t even think about using chicken wire. It’s a death trap. Rabbits will chew through it, and predators will tear it open in a second.
* Floor: Use 14-gauge, 1/2″ x 1″ galvanized wire. This lets droppings fall through but is small enough that baby rabbit feet don’t get stuck.
* Sides & Top: 16-gauge, 1″ x 2″ galvanized wire works perfectly for the rest of the cage. It’s lighter and cheaper but still strong enough.
We built our first set of cages ourselves to save money. We bought a 100-foot roll of wire, a set of J-clip pliers, and a thousand J-clips for about $120. It took a full weekend of scratched hands and cursing, but we did it. If you’re building your own systems, it helps to have a good set of tools. We found that having the right essential homesteading tools makes all the difference. Or, you can buy pre-made cages for about $80-$150 each, which is what we do now to save time.
Cages are just one part of the equation; where you put them is just as critical.
—
Essential Housing Requirements for Meat Rabbits: Beyond the Cage
Your cages need to be housed in something. You can’t just leave them out in the yard. Rabbits need protection from the elements, especially direct sun, wind, and driving rain.
Our Three-Sided Shed Solution
We built a simple 8′ x 16′ three-sided shed against the north side of our barn. The back faces the prevailing winter wind, and the open front faces south, getting gentle morning sun but blocking the harsh afternoon heat. The roof is just corrugated metal on a 2×4 frame. This setup cost us about $400 in materials and provides the two most important things: shade and ventilation.
Heat is a bigger killer than cold. A rabbit in direct sun with no shade can die from heatstroke in under an hour. In the summer, we freeze 2-liter soda bottles full of water and put one in each cage on hot afternoons. It’s a lifesaver. Good airflow is also non-negotiable for meeting the housing requirements for meat rabbits, as stagnant, ammonia-filled air leads to respiratory infections—a common and deadly problem. According to the University of California’s guide on rabbit production, proper ventilation is key to herd health. If you are struggling with your homestead layout, using a system like Homestead OS can help you plan your spaces effectively from the start.
In the winter, we staple heavy-duty construction tarps over the open front of the shed, leaving a 6-inch gap at the top for air exchange. This blocks the wind and snow but prevents the air from getting stale. The rabbits, with their thick winter coats, are perfectly happy even when it’s 10°F outside.
Now for the gear that goes inside those cages.
—
!Secure predator-proof mesh used to meet safety and housing requirements for meat rabbits.
Don’t Forget Feeders, Waterers, and Nest Boxes!
Your housing system isn’t complete without the right accessories. We made the mistake of using ceramic bowls for food and water at first. HUGE mistake. The rabbits tipped them over constantly, pooped in them, and wasted so much food.
Our Recommended Setup:
* Feeders: Get all-metal, sifting J-feeders that mount to the outside of the cage. You fill them from the outside, they hold a 2-3 day supply of food, and the sifting bottom gets rid of fine dust that rabbits won’t eat.
* Waterers: An automated nipple watering system is a game-changer. We ran a simple PVC pipe system from a 5-gallon bucket that gravity-feeds water to each cage. It cost about $50 and saves us an hour of work each day. No more frozen water bottles in winter or slimy bowls in summer. If you need inspiration for your own projects, searching for a good resource full of homestead plans is a great step. The plans inside Homestead OS helped us build our first chicken coop and we adapted the concepts for our rabbitry.
* Nest Boxes: For your does, you need a nest box they can kindle in. A simple box made of scrap wood or metal works fine. Ours are about 18″ long, 10″ wide, and 10″ tall. We give it to the doe on day 28 of her pregnancy, fill it with clean pine shavings, and she does the rest, pulling fur to make a warm nest for her babies.
Getting the details right is what makes this sustainable.
—
💡 Pro Tips
* Always Use Resting Boards. We use 12″x12″ pieces of untreated 1/2″ plywood. We lost a doe to a leg infection from sore hocks before we learned this lesson. The boards cost pennies and prevent suffering.
* Install Urine Guards. Seriously. Rabbit urine is incredibly corrosive and will destroy wooden hutch legs or a barn wall in a year. We use 4″ strips of corrugated plastic zip-tied to the back and sides of the cages to direct everything straight down.
* Start a Worm Bin Underneath. The best thing we ever did was put a large worm farm directly under the cages. The worms process the manure and bedding, eliminating cleanup work and producing the best garden compost you’ve ever seen. It turns a waste product into a valuable resource.
* Overbuild Your Predator-Proofing. We thought our first latch system was good enough. Then a raccoon figured out how to open it. We came out to two dead rabbits. Now we use two redundant latches on every door. Don’t learn that lesson the way we did.
—
⚠️ Beginner Mistakes to Avoid
—
Frequently Asked Questions
What is the best flooring for meat rabbits?
The best and most sanitary flooring is 1/2″ x 1″ 14-gauge galvanized wire. It allows droppings to fall through, keeping the rabbit clean and reducing the risk of disease. However, you MUST also provide a solid resting mat or board (wood, hard plastic, or rubber) to prevent sore hocks.
Can meat rabbits live on the ground in a tractor?
Yes, but it’s more complicated. A rabbit tractor moved daily provides fresh forage but increases exposure to parasites like coccidia from the ground. You also have a much higher risk of predators digging under. We find cage systems are more sanitary and secure for a consistent meat supply.
How much does it cost to build a meat rabbit cage?
Building a DIY cage for a single doe (30″x36″x18″) will cost about $40-$60 in materials (wire, J-clips) if you buy in bulk. Buying a single pre-made cage of the same size will typically cost $80-$150. Your tools (J-clip pliers, wire cutters) are an additional one-time cost.
Do meat rabbits need a heat lamp in the winter?
No. As long as they are protected from wind, rain, and snow and have a dry place to be, adult rabbits grow thick winter coats and tolerate cold very well. A well-enclosed nest box filled with straw and the doe’s fur is enough to keep kits warm even in freezing temperatures. Heat lamps are a major fire hazard in a barn full of hay and shavings.
—
Getting the housing requirements for meat rabbits right from the start saves you so much money, time, and heartache. We learned through trial and error, but you don’t have to. Build it right, build it securely, and you’ll be on your way to raising a healthy, sustainable source of protein for your family.
For more daily stories from our homestead and to see our rabbit setup in action, be sure to follow our family’s page on Facebook!
What’s the one thing holding you back from raising your own meat rabbits? Let us know in the comments below!
📚 More From Our Homestead
- Homesteading for Beginners on One Acre: The Ultimate Guide
- Build a Cheap Chicken Coop: My $87 Plan That Works
- Companion Planting Guide That Doubled Our Yields
- Apartment Friendly Urban Chicken Breeds (Our Top Picks)
- How to Become Self-Sufficient in Five Years: Our Plan
Ready to Start Your Homestead Journey?
Free guides, checklists, and tools to help you build your dream homestead.
Leave a Reply