When we first started homesteading, we quickly realized that growing a ton of food was only half the battle. The other half was figuring out how to keep it from going bad! Our early attempts at preserving were, shall we say, a bit haphazard – a lot of freezer-burned veggies and questionable jars. But we learned, mostly through trial and error, that you don’t need fancy equipment to lock in your harvest’s goodness.
🎯 Quick Answer: The cheapest ways to preserve food for beginners often involve traditional methods like drying (dehydrating without a machine), root cellaring (even a simple one), fermentation, and freezing high-yield produce strategically. These methods require minimal upfront investment and leverage natural processes or basic kitchen tools.
—
🔑 Key Takeaways
* Sun Drying is Free: Harness the sun’s power for herbs, fruits, and even some vegetables with zero electricity cost.
* Cold Storage is Key: A simple root cellar or even a cool, dark corner can extend the life of many crops for months.
* Fermentation is Easy & Healthy: Turn cabbage into sauerkraut or cucumbers into pickles with just salt and water.
* Strategic Freezing: Focus on high-value items or those you’ll use frequently to make freezer space count.
* Cost-Benefit Analysis: Always weigh the cost of your time and ingredients against buying fresh later.
* Start Small: Don’t try to preserve everything at once; master one or two methods first.
—
!Air drying herbs as one of the cheapest ways to preserve food for beginners in a home kitchen.
What are the Cheapest Ways to Preserve Food for Beginners? Our Family’s Top Picks
Learning what are the cheapest ways to preserve food for beginners was a game-changer for our family budget. We found that the methods that cost the least upfront often give you the biggest bang for your buck in the long run. It’s about working with what you have and embracing simplicity.
Sun Drying & Air Drying: The Original Dehydrator
When I first looked into dehydrators, I saw price tags of hundreds of dollars, and my heart sank. We just didn’t have that kind of money to spare on a new appliance. That’s when my grandma reminded me about how they used to dry everything in the sun. Talk about a lightbulb moment!
#### How We Do It
We mostly sun-dry herbs, cherry tomatoes, and thin fruit slices like apples or pears. For herbs, we simply tie small bundles together and hang them upside down in a warm, dry, well-ventilated spot in our pantry or guest room. They’re usually ready in 1-2 weeks. For fruits and tomatoes, we slice them thin, arrange them on old window screens or cooling racks covered with cheesecloth (to keep bugs off!), and set them outside on sunny, low-humidity days. We bring them in at night to avoid dew. This really is one of the answers to what are the cheapest ways to preserve food for beginners – pure sunshine!
#### Costs & Materials
* Initial Cost: Practically zero if you have screens or racks. Maybe a few dollars for cheesecloth.
* Time: 3-7 days for fruits/veggies, 1-2 weeks for herbs, depending on climate.
* Results: Flavorful, concentrated foods with no electricity bill. We’ve saved a ton on dried herbs alone. It’s also a fantastic way to preserve extra produce from our garden. If you’re starting your own garden, check out our post on How to Start a Small Backyard Vegetable Garden: Beginner Guide for some ideas!
Keep reading — this is where most people mess up.
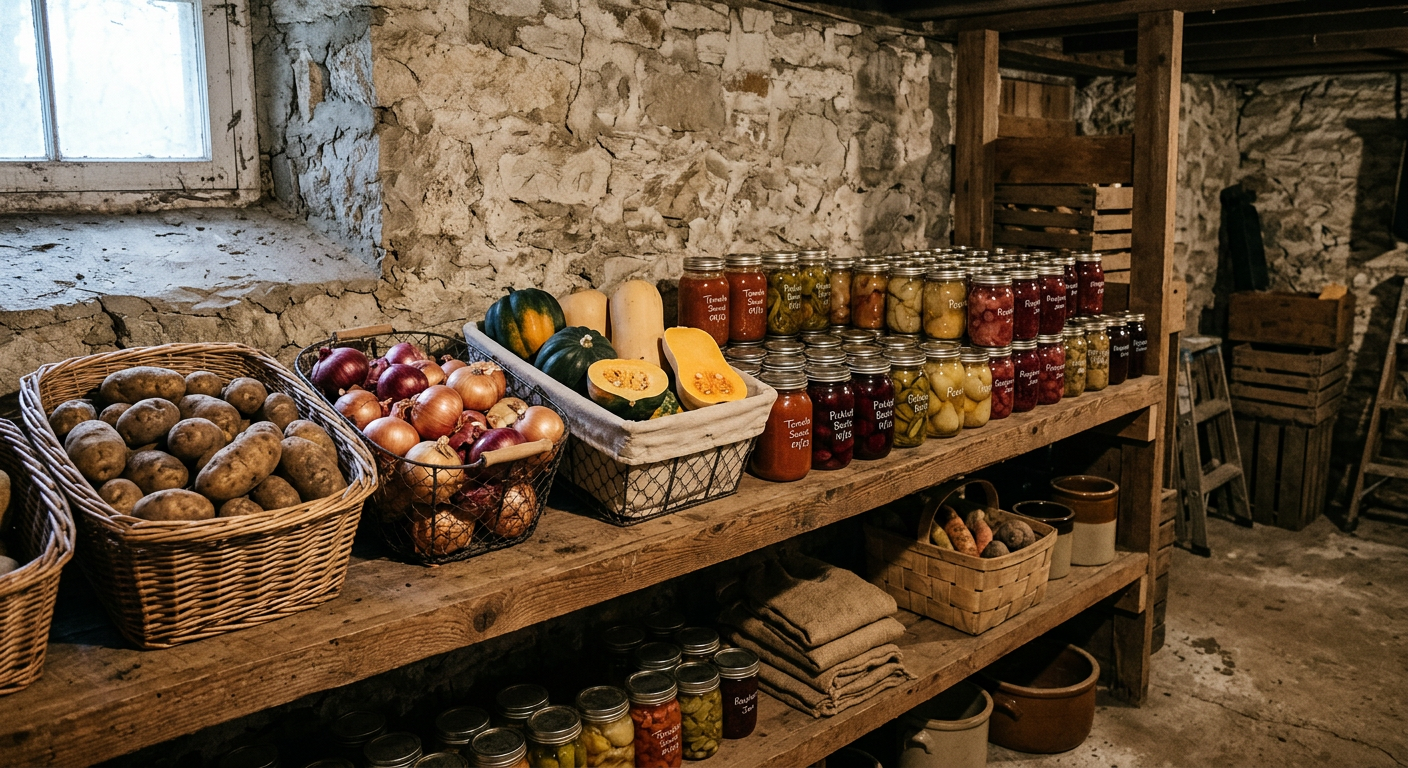
Root Cellaring & Cold Storage: Nature’s Refrigerator
Not everyone has a fancy underground root cellar, and neither did we when we started. But the principles of cold, dark, and humid storage can be applied in many ways that won’t cost you an arm and a leg. For us, it meant finding the coolest spot in our house.
#### Our Simple Setup
Our first ‘root cellar’ was literally a cool, dark corner in our unfinished basement. We used old wooden crates and even sturdy cardboard boxes layered with straw or sawdust. We store things like potatoes, carrots, apples, squash, and onions down there. The key is to keep produce from touching, ensure good airflow, and maintain consistent temperature and humidity.
#### Costs & Materials
* Initial Cost: $0-$50 for crates, straw, or sawdust. Maybe a cheap thermometer/hygrometer ($15-20) to monitor conditions.
* Time: Minimal setup time. Weeks to months of extended storage.
* Results: We’ve kept potatoes good for 6-8 months, apples for 3-4, and squash even longer. This is hands-down one of the most effective and cheapest ways to preserve food for beginners, especially for staple crops. This is a crucial step for anyone learning Mastering: What Essential Homesteading Skills Beginners Need.
This next part? Nobody talks about it, but it changed everything for us.
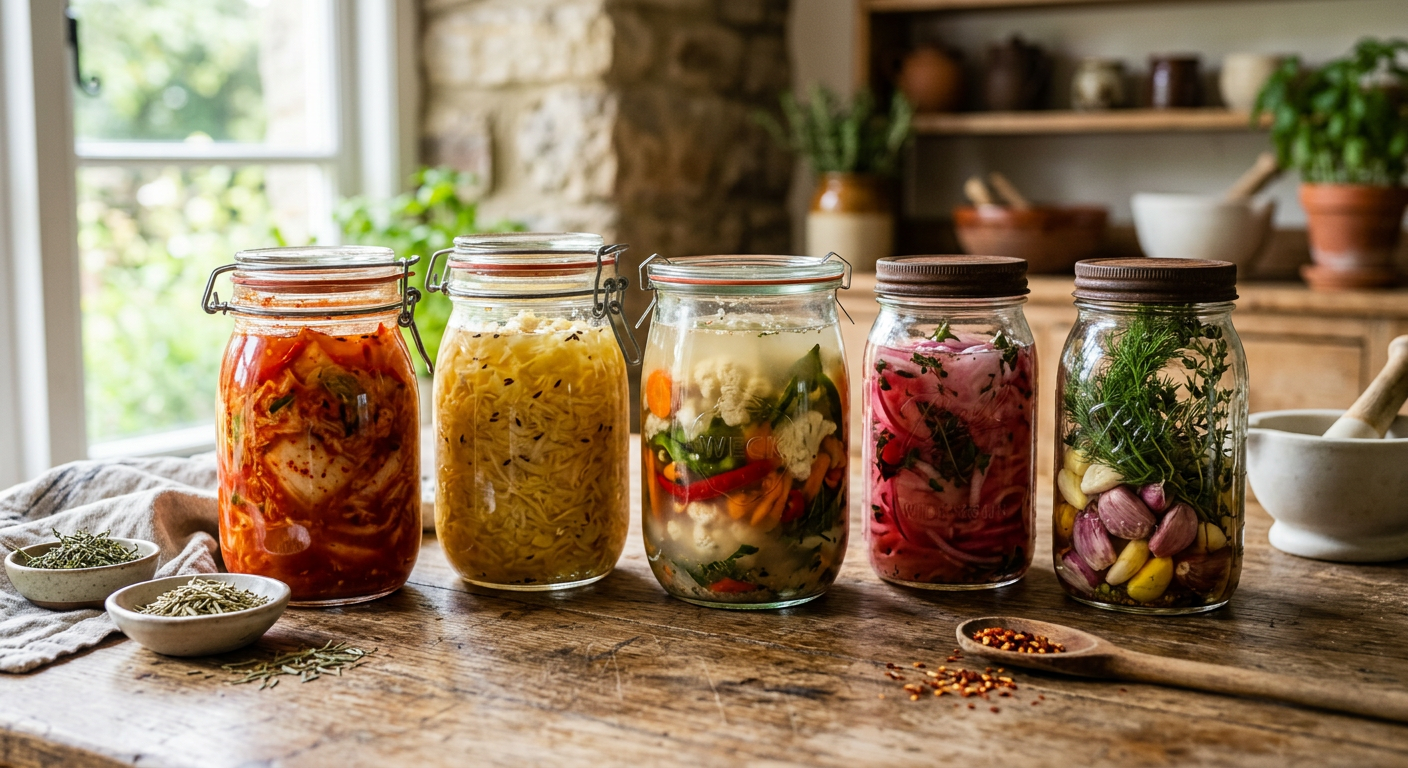
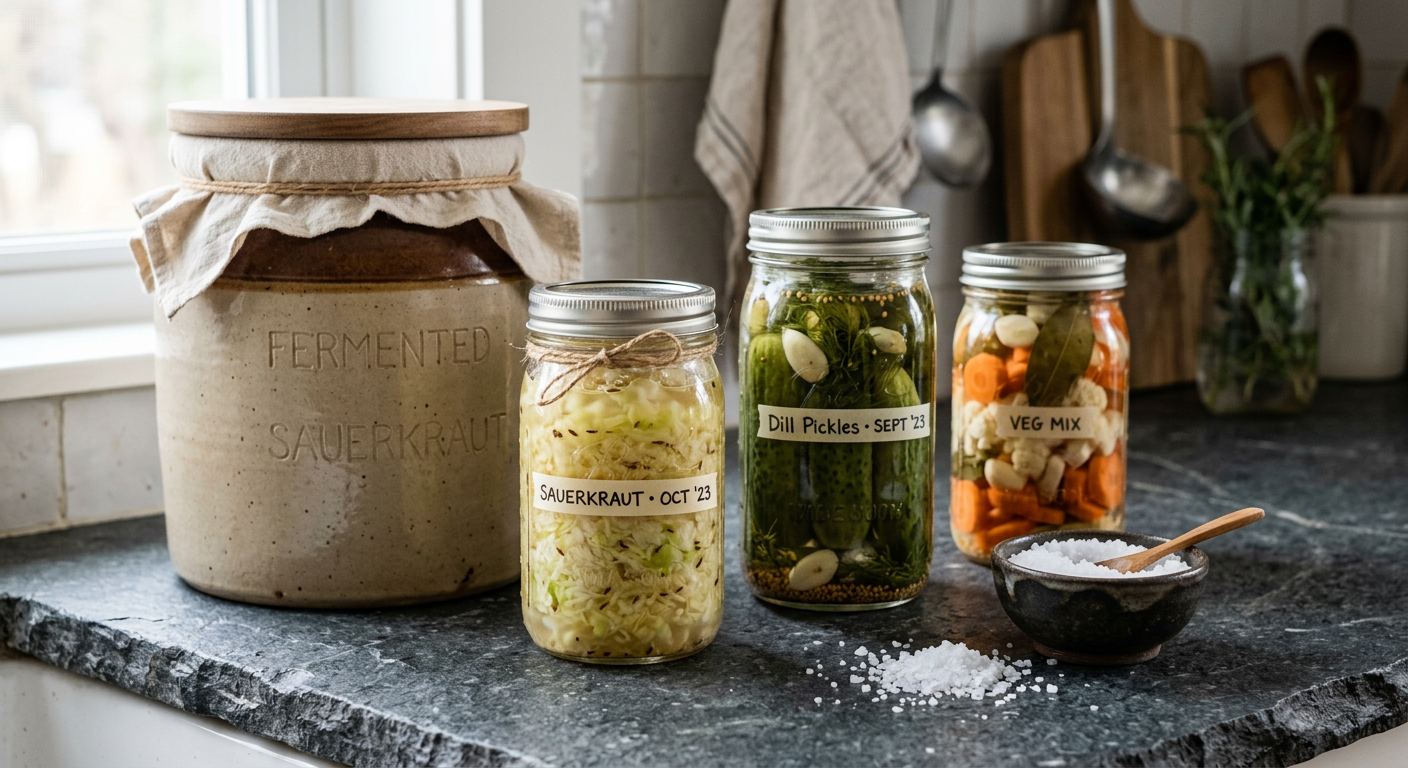
Fermentation: A Living, Probiotic Powerhouse
Fermentation might sound intimidating, but at its core, it’s just controlled spoilage – and it’s incredibly simple and cheap. We started with sauerkraut, and now we ferment all sorts of things, from pickles to hot sauce. It’s amazing how a little salt and time can transform raw produce into something stable and delicious.
#### Our Fermentation Journey
My first batch of sauerkraut was just shredded cabbage and salt, packed into a quart jar. I used a small plate and a rock (cleaned, of course!) to keep the cabbage submerged under its own brine. No fancy airlocks or crocks needed. After about 3 weeks on the counter, it was ready. We’ve since invested in a few canning jars with airlock lids (about $5-7 each), but you absolutely don’t need them to start.
#### Costs & Materials
* Initial Cost: $0-$20 for jars, salt, and maybe a fermentation weight or airlock lid if you get fancy.
* Time: 15-30 minutes of active prep, 1-4 weeks of passive fermentation.
* Results: Tangy, gut-healthy preserves that last for months in the fridge. This method works wonders for cabbage, cucumbers, carrots, and green beans. We’ve saved a small fortune on store-bought pickles and kraut.
Strategic Freezing: Maximizing Your Freezer Space
While a freezer requires electricity, it’s still one of the most effective budget-friendly preservation methods if used wisely. The trick is to identify what freezes well without much fuss and to blanch properly.
#### How We Prioritize Freezing
We don’t freeze everything, but we do freeze a lot of berries, blanched green beans, corn kernels, and pre-prepped cooking bases like chopped onions and peppers. Blanching vegetables (a quick boil then an ice bath) is crucial to stop enzyme action and maintain quality. We use reusable freezer bags (about $1-2 each) or old plastic containers. Don’t underestimate how much you can save if you blanch and freeze a huge harvest of green beans instead of buying them off-season for triple the price!
#### Costs & Materials
* Initial Cost: $0 (if you have containers) to $20 for freezer bags. The main cost is the electricity to run your freezer.
* Time: 30 minutes to an hour per batch for blanching and packing.
* Results: Fresh-tasting produce available year-round. This is particularly good for items that degrade quickly fresh. We find this invaluable, especially since we learned early on what are the cheapest ways to preserve food for beginners often involves a mix of methods.
Don’t skip this — it’ll save you hours (and money).
Canning with Acidic Foods: Water Bath Basics
While pressure canning can get expensive with specialized equipment, water bath canning for high-acid foods (like tomatoes, pickles, fruit jams) is surprisingly affordable for beginners. You likely already have most of the equipment.
#### Our Canning Adventures
When we harvest a big crop of tomatoes, we turn them into crushed tomatoes, salsa, or sauce. For fruits, we make jams. All of these can be safely water-bath canned. All you really need is a large pot deep enough for jars to be submerged by at least an inch, a rack for the bottom (even a few canning rings taped together works!), tongs, and canning jars with new lids. A set of 12 pint jars with lids and rings costs about $15-20. Lids need to be new each time, but rings and jars are reusable.
#### Costs & Materials
* Initial Cost: $20-$50 for a canner pot (if you don’t have one) and a dozen jars with lids. Lids typically cost $5-7 for a dozen.
* Time: 1-3 hours per batch, including prep and processing.
* Results: Shelf-stable foods that last for 1-2 years, saving trips to the store and significant money on canned goods. This is a fundamental skill for anyone committed to Homesteading on a Budget: Our Smart Start Guide.
—
💡 Pro Tips
* Grow Preservation-Friendly Crops: Focus your garden efforts on things that preserve well, like potatoes, onions, cabbage, green beans, and berries. This cuts down on buying produce to begin with.
* Buy in Bulk & On Sale: When local farmers or stores have gluts of produce (e.g., tomatoes in late summer), buy large quantities to preserve. The cost per pound plummets.
* Repurpose & Reuse: Don’t buy new; use what you have! Old glass jars for fermentation, repurposed buckets for cold storage, fabric scraps for straining.
* Master One Method at a Time: Instead of trying all five methods at once, pick one or two that appeal most and get really good at them. Our journey helped us realize what are the cheapest ways to preserve food for beginners often means simplifying first.
* Keep a Preservation Log: Document what you preserved, how much, when, and how it tasted later. This helps you refine your methods.
—
⚠️ Beginner Mistakes to Avoid
* Not Labeling Properly: “Mystery jar” syndrome is real! Always label with contents and date. We’ve lost track more times than I’d like to admit.
* Ignoring Proper Sanitation: Especially with canning and fermenting, clean everything. Botulism is rare but serious. A quick rinse isn’t enough.
* Overpacking Jars/Containers: Leave headspace in jars for canning and freezing; don’t cram too much into root cellaring containers – airflow is important.
* Starting Too Big: Don’t buy 50 pounds of cabbage for sauerkraut on your first try. Start with a small batch to learn the ropes.
* Skipping Research for Canning: Always follow tested recipes for canning (USDA guidelines are your friend!) to ensure safety. Improper canning can lead to dangerous food spoilage. (USDA National Center for Home Food Preservation) is an excellent resource.
—
Frequently Asked Questions
What food preservation method lasts the longest?
A: Properly canned foods (both water bath and pressure canning) can safely last for 1-2 years or even longer on the shelf. Dehydrated foods, if stored correctly in airtight containers, also have a very long shelf life, often many years.
Can I preserve food without special equipment?
A: Absolutely! Sun drying, air drying herbs, simple root cellaring in a cool dark space, and basic fermentation (jars, salt) require very little to no specialized equipment. Freezing only requires a freezer and appropriate containers, which many homes already have.
Is freezing cheaper than canning?
A: It depends on your situation. Freezing has an ongoing electricity cost, but very little upfront equipment cost if you have a freezer. Canning has a higher initial equipment cost (canner, jars, lids) but no ongoing energy cost once preserved. For beginners wondering what are the cheapest ways to preserve food for beginners, both have their place but freezing often feels less daunting to start.
How much money can I save by preserving my own food?
A: Significant savings! Imagine buying a bushel of tomatoes for $20 and turning them into 30 cans of sauce that would cost $3 each at the store – that’s $90 worth of sauce for $20. Plus, you control the ingredients, avoiding preservatives and excess salt.
What’s the easiest food to start preserving?
A: Herbs (air drying), green beans (freezing), and cabbage (fermenting into sauerkraut) are all fantastic starting points. They require minimal equipment and have simple, forgiving processes. If you’re looking for 10 Beginner Homesteading Tips to Start Your Self-Sufficient Journey Today, adding one of these to your list is a smart move.
—
What are the cheapest ways to preserve food for beginners isn’t just about saving money; it’s about connecting with your food, building self-reliance, and getting creative in the kitchen. We’ve loved seeing our pantry fill up with homegrown and homemade goodness, and the peace of mind knowing we have food put by is invaluable. Don’t be afraid to start small and learn as you go, just like we did.
What’s your biggest challenge with food preservation? I’d love to hear your story.
📚 More From Our Homestead
- Maintaining Off-Grid Appliances and Systems for Longevity
- Homesteading Without Land? Get Experience Now!
- Easiest Homesteading Animals to Raise? Here’s Our Story
- Finding Your Homestead: A Beginner’s Property Guide
- Mastering: What Essential Homesteading Skills Beginners Need
Ready to Start Your Homestead Journey?
Free guides, checklists, and tools to help you build your dream homestead.
👉 Related: Homesteading Supplies List for Beginners: The Essentials
👉 Related: How to Make Money From a Small Homestead
👉 Related: Homesteading Hacks: Save Serious Money on Groceries!
Leave a Reply