Tag: gardening

  • Zero Budget Homestead: How to Begin Homesteading with No Money

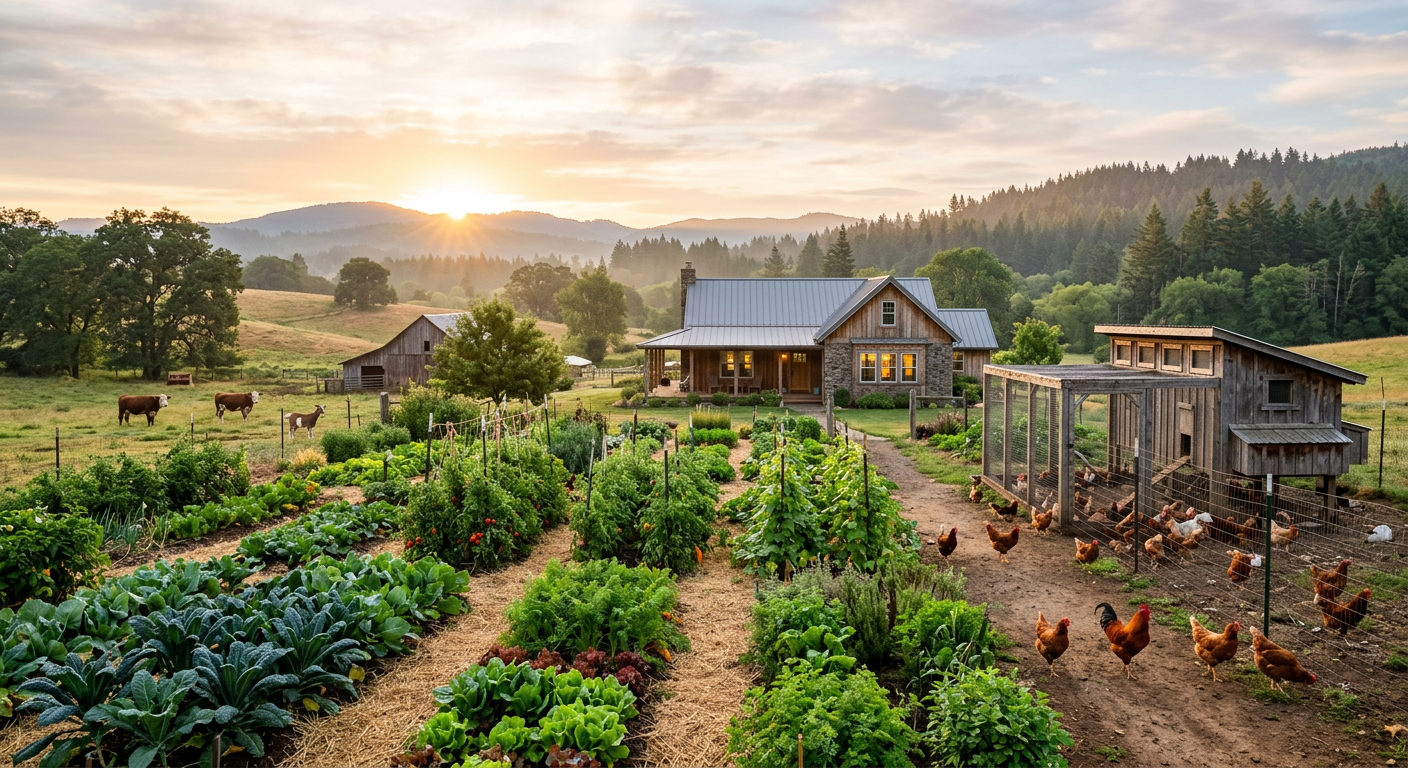
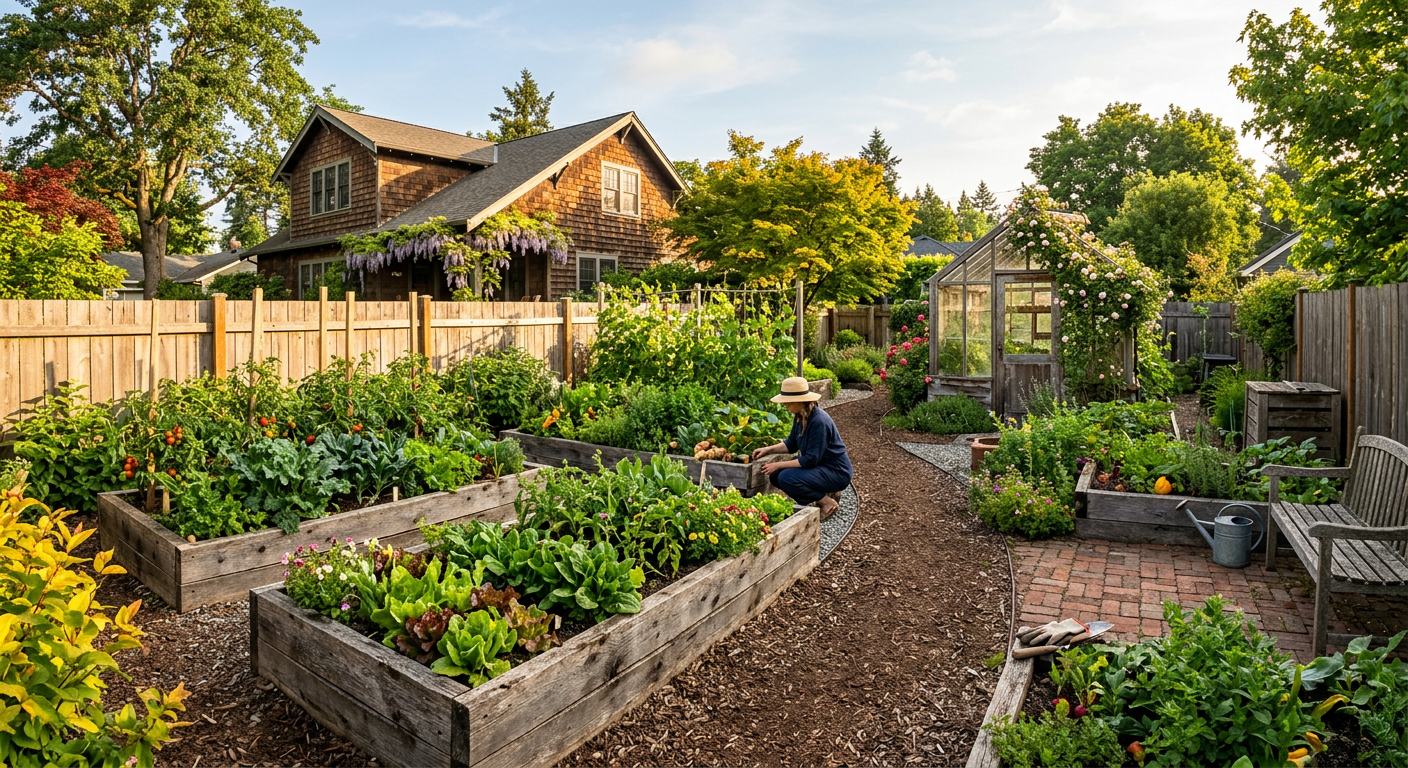
    !A thriving backyard garden illustrating how to begin homesteading with no money using recycled materials.

    When we first started dreaming of a more self-sufficient life, we pictured sprawling acres, expensive livestock, and fancy equipment. The reality? We had next to nothing in savings, two hungry kids, and a tiny backyard in the suburbs. We truly wondered how to begin homesteading with no money.

    Then we realized something profound: homesteading isn’t about buying a farm; it’s about a mindset of resourcefulness and self-reliance, no matter your starting point. Our journey proved that you absolutely can homestead without a big budget. It just takes creativity, sweat equity, and a willingness to learn.

    🎯 Quick Answer: You can indeed begin homesteading with no money by focusing on free resources, skill-building, scavenging, bartering, and maximizing your current space. Start small, cultivate a resilient mindset, and let your journey evolve as you gain experience and resources.

    🌱 Start Your Homestead Plan →

    🔑 Key Takeaways

    * Embrace Resourcefulness: Learn to see waste as potential and transform discards into assets.

    * Skill Over Spend: Prioritize acquiring practical skills like gardening, preserving, and foraging over buying expensive tools initially.

    * Start Small & Local: Focus on what you can achieve in your current space, even an apartment balcony or small yard.

    * Barter & Network: Connect with your community; trade skills, excess produce, or labor instead of cash.

    * Free Education is Key: Utilize libraries, free online courses, and local workshops to gain knowledge.

    * “No Money” Doesn’t Mean “No Effort”: This path requires significant time, dedication, and problem-solving.

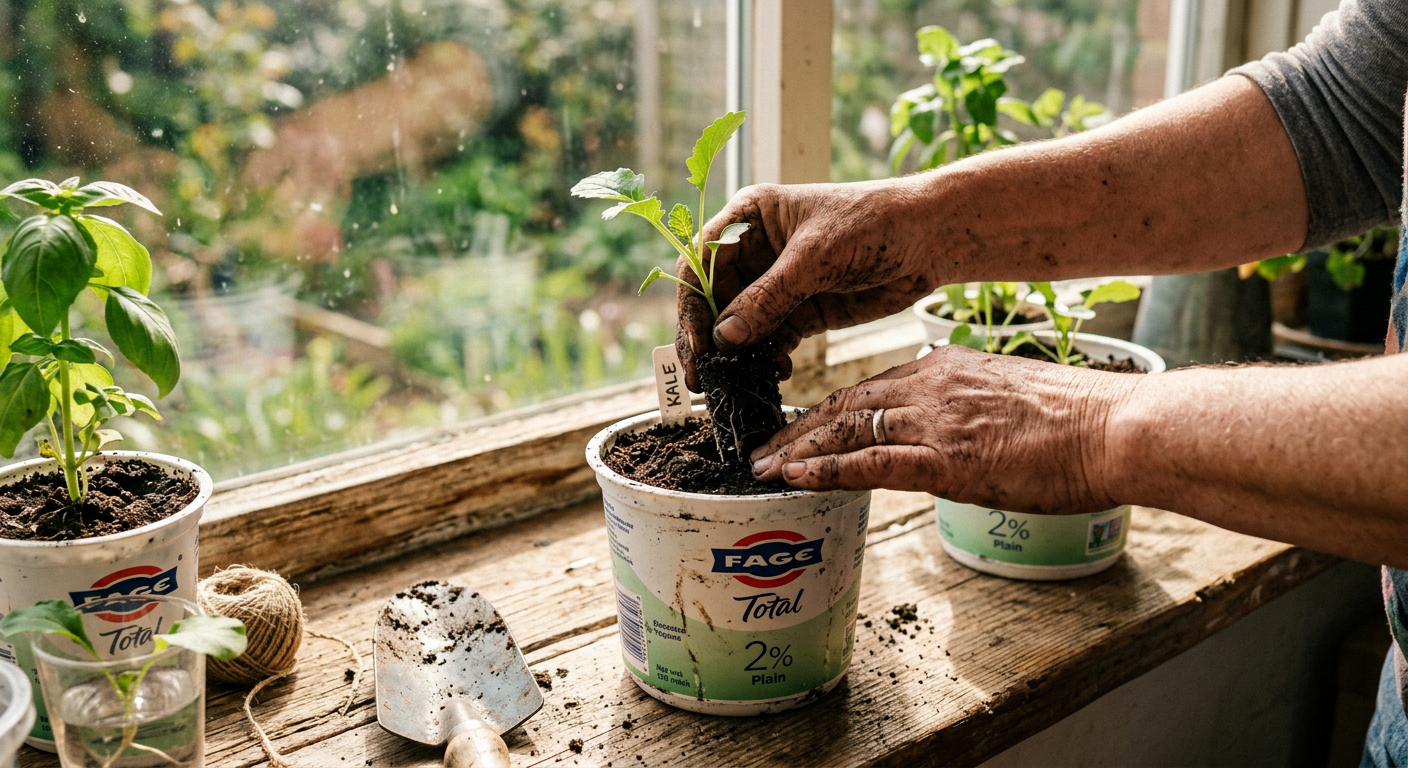
    !Small scale gardening in recycled containers, showing how to begin homesteading with no money at home.

    Rethinking What “Homesteading” Means

    For many folks, the image of a homesteader is someone living on 40 acres with a barn full of animals and a pantry overflowing with homegrown food. While that’s certainly a beautiful vision, it often comes with a hefty price tag that can be discouraging. We certainly felt that pressure early on.

    But for us, and for many others we’ve met along the way, homesteading is about actively reducing our reliance on external systems – whether that’s the grocery store, the power company, or even the municipal water supply. This can happen anywhere, and importantly, it can start with very little capital. Our first “homestead” was a rented house in the city with a tiny patch of dirt.

    Defining Your “Zero Budget” Start

    When we talk about how to begin homesteading with no money, we’re really talking about prioritizing skills, leveraging existing resources, and being incredibly creative. Your starting point might be a few pots on a patio, learning to bake your own bread, or figuring out how to fix things instead of buying new ones. It’s about self-sufficiency at its core, not a property size or a bank account balance.

    Keep reading — this is where most people mess up.

    Our initial steps were all about small wins that built confidence and saved us pennies. We learned to make our own cleaning supplies, mend clothes, and grow a few herbs in pots. These tiny victories were incredibly empowering and didn’t cost a dime. Next, let’s dive into some practical ways to get started without opening your wallet.

    Cultivating a Garden from Scratch (for Free!)

    Growing your own food is arguably the cornerstone of homesteading, and it’s one of the best areas to begin with no money. We literally started ours with scavenged materials and free seeds.

    Scavenging for Supplies

    Forget fancy raised beds! Our first garden beds were made from old tires we found curbside, discarded wooden pallets, and even old bathtubs. Look on local community groups (like Facebook Marketplace’s “Free Stuff” sections) for people giving away broken pots, concrete blocks, or even old lumber. Construction sites often have scrap wood they’d be happy for you to haul away.

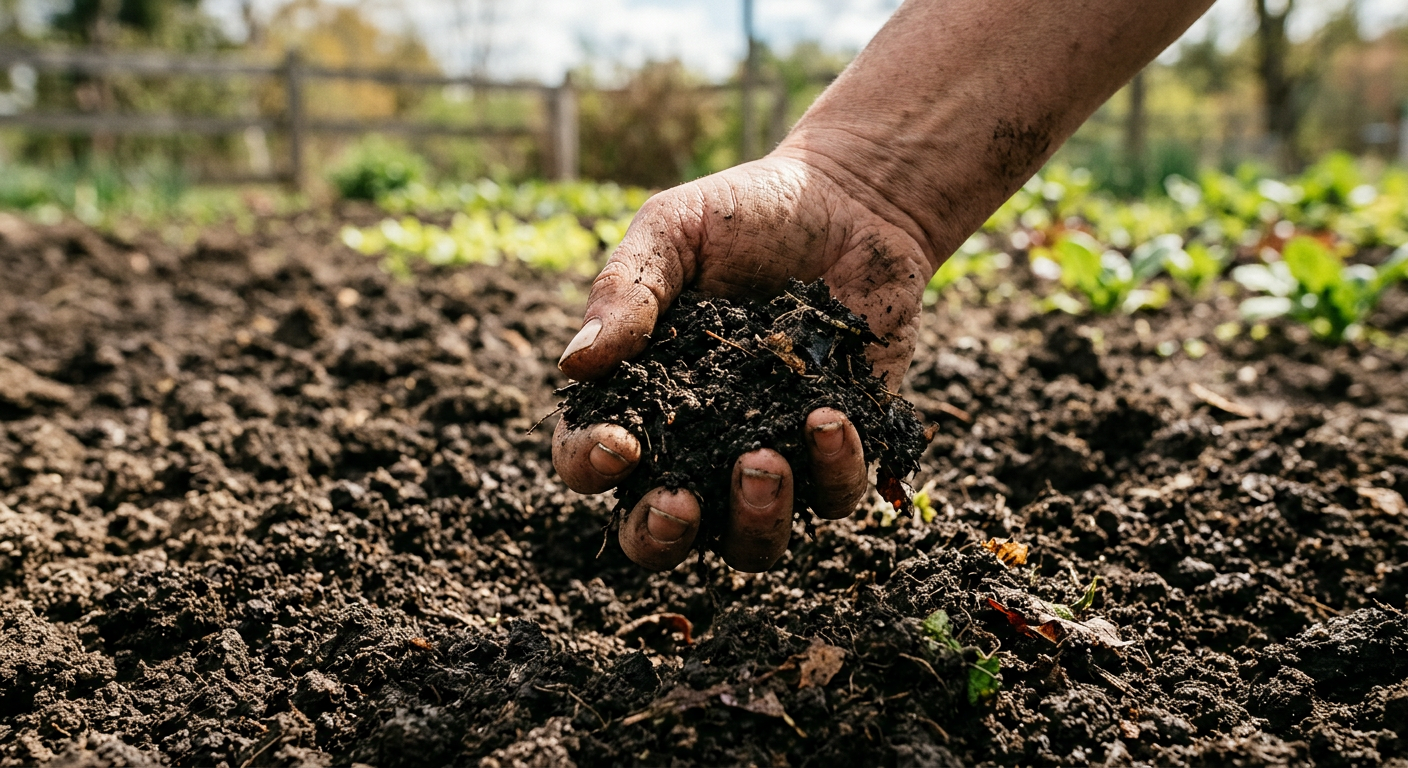
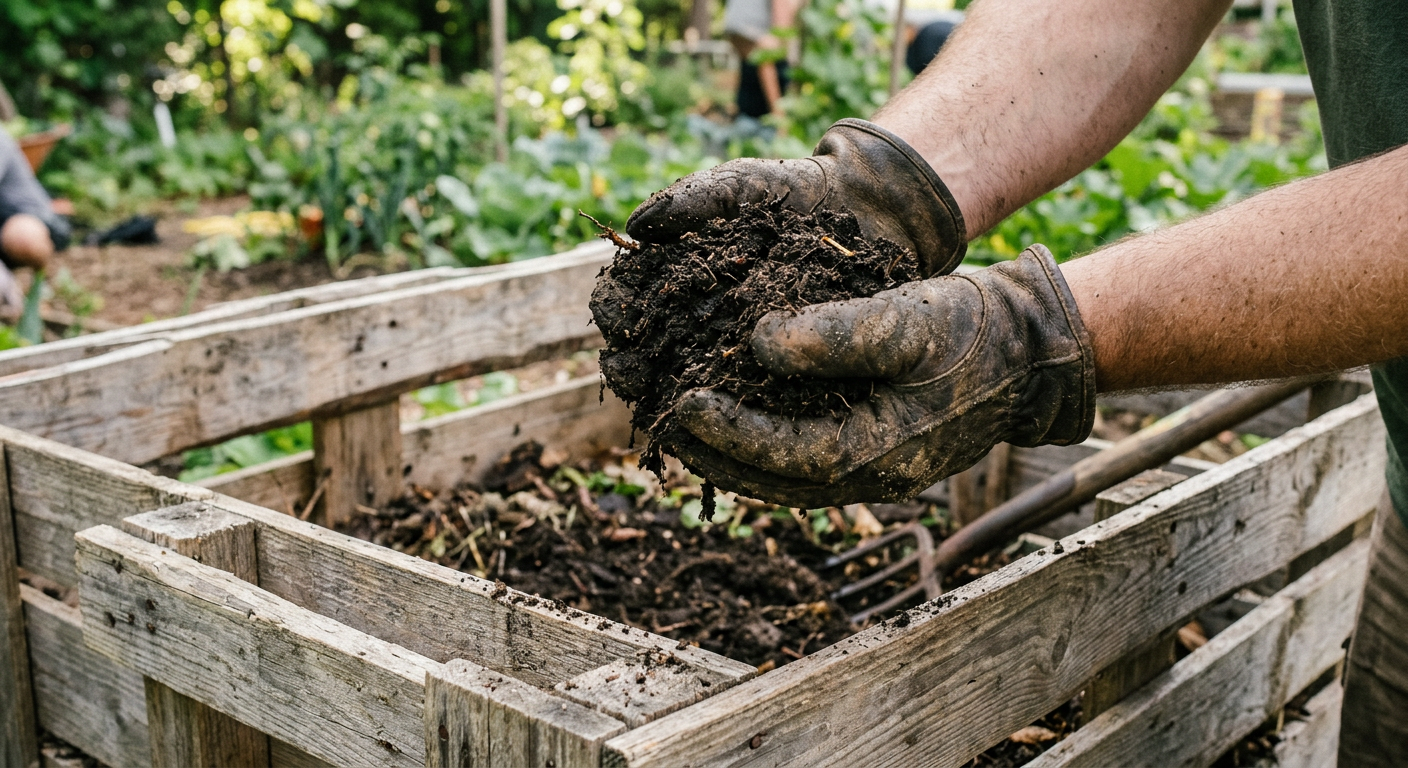
    Compost is Gold: Start a compost pile immediately*. Food scraps, yard waste, even newspaper – it all breaks down into rich soil. This is absolutely free and will save you from buying bags of soil down the line. We collected coffee grounds from local cafes for years.

    * Seed Saving & Swaps: Don’t buy new seeds. Save seeds from produce you eat (tomatoes, peppers, squash). Connect with local gardening groups; experienced gardeners often have excess seeds they’ll gladly share. Libraries sometimes even have seed libraries now! We actually sourced about 80% of our first garden’s seeds through swaps.

    Propagating and Foraging for Food

    Many plants can be grown from cuttings, not just seeds. Potatoes can sprout from old spuds, and herbs like mint, basil, and rosemary root easily in water. We’ve even grown pineapple from the top of a store-bought fruit!

    Foraging for edible wild plants is another fantastic, free way to supplement your diet. Dandelions, clover, plantain, and wild berries grow in many areas. Just be absolutely certain of your identification before consuming anything. Invest in a good local foraging guide from your library. Check out resources like your local university extension office for guides on edible plants in your region (e.g., USDA Plants Database).

    This next part? Nobody talks about it, but it changed everything for us.

    Once you begin to create your garden, you’ll want to think about how to manage pests without chemicals or costly solutions. Our experience taught us that a movable chicken tractor can work wonders for pest control and soil fertilization, without needing a permanent coop. You can even build a movable chicken tractor for sustainable pest control from scavenged materials.

    Building Skills and Knowledge (Free Resources)

    Money might be tight, but time is an investment you can make. The most valuable assets on a homestead aren’t necessarily bought; they are learned. Your hands and your brain are your most powerful tools when you try to begin homesteading with no money.

    Library Powerhouse

    Our local library was, and still is, an absolute treasure trove. We borrowed countless books on gardening, food preservation, basic carpentry, animal husbandry, and even foraging. They often have free workshops on topics like canning or even knitting. Don’t underestimate this resource!

    Online Learning Freeness

    The internet is brimming with free knowledge. YouTube tutorials on everything from building a compost bin to basic plumbing repairs are invaluable. Look for university extension sites, government agricultural departments (like USDA National Agricultural Library for research), and experienced homesteading blogs (like usehomesteados.com!) for reliable information. We spent many evenings watching videos and reading articles, turning that knowledge into action the next day.

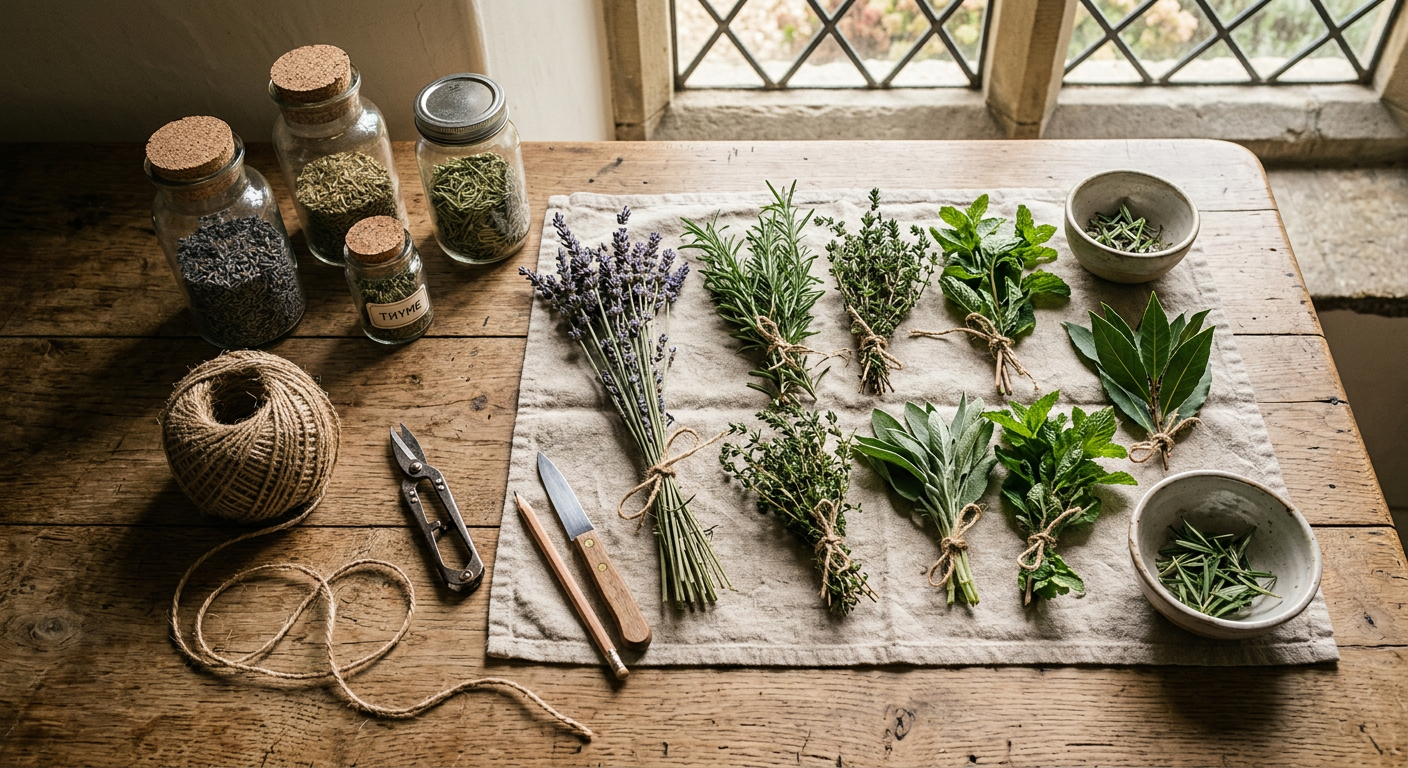
    !Drying homegrown herbs on a table to show how to begin homesteading with no money through DIY skills.

    Bartering, Community, and Side Hustles

    When cash isn’t an option, creativity and connection become your currency. We learned that very quickly when we were first trying to figure out how to begin homesteading with no money.

    The Art of Bartering

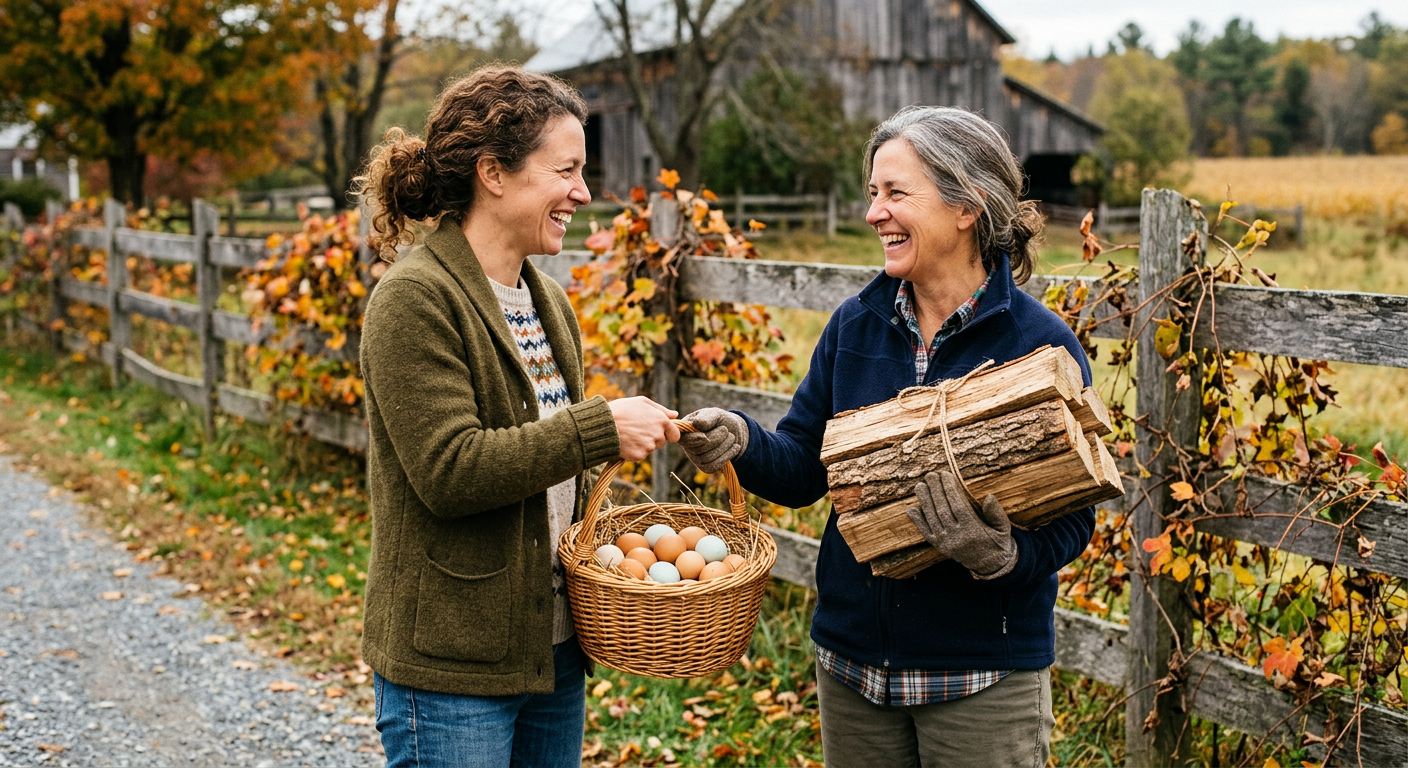
    Bartering is ancient, effective, and completely free. Do you have a skill you can offer? Maybe you’re good at mending clothes, baking bread, or pet-sitting. Offer your services in exchange for something you need. We’ve traded homemade sourdough for fresh eggs, garden surplus for help with fence repairs, and our mechanic skills for a pile of seasoned firewood.

    * Local Co-ops & Groups: Seek out local food co-ops, community gardens, or homesteading groups. These are ripe with opportunities for collaboration and trading. We found amazing mentors and friends through our local produce swap.

    Earning Small Amounts for Big Wins

    While the goal is to begin with no initial money, a little bit of income generated through homesteading itself can kickstart bigger projects. Can you sell excess produce from your garden at a farmer’s market? Offer an extra dozen eggs if you get backyard chickens (they practically pay for themselves!). Even selling simple crafts or performing odd jobs for neighbors can generate enough cash for a crucial tool or a bag of chicken feed.

    📋 Get the Beginner Checklist →

    Embracing a “Use It Up, Wear It Out, Make Do, or Do Without” Mentality

    This old adage became our family motto. We learned to repair instead of replace, to reuse everything possible, and to be content without luxuries. This mindset shift is powerful. We extended the life of tools, refurbished old furniture, and found new purposes for items others discarded. It’s a key part of how to begin homesteading with no money.

    Don’t skip this — it’ll save you hours (and money).

    Next, let’s talk about the common pitfalls that can trip up even the most enthusiastic no-money homesteader.

    Starting Small & Scaling Up

    Don’t overwhelm yourself with grand visions right away. Our journey taught us that consistent, small steps lead to big changes over time. Thinking about how to begin homesteading with no money and imagining a vast self-sufficient farm usually leads to burnout.

    Maximize Your Current Space

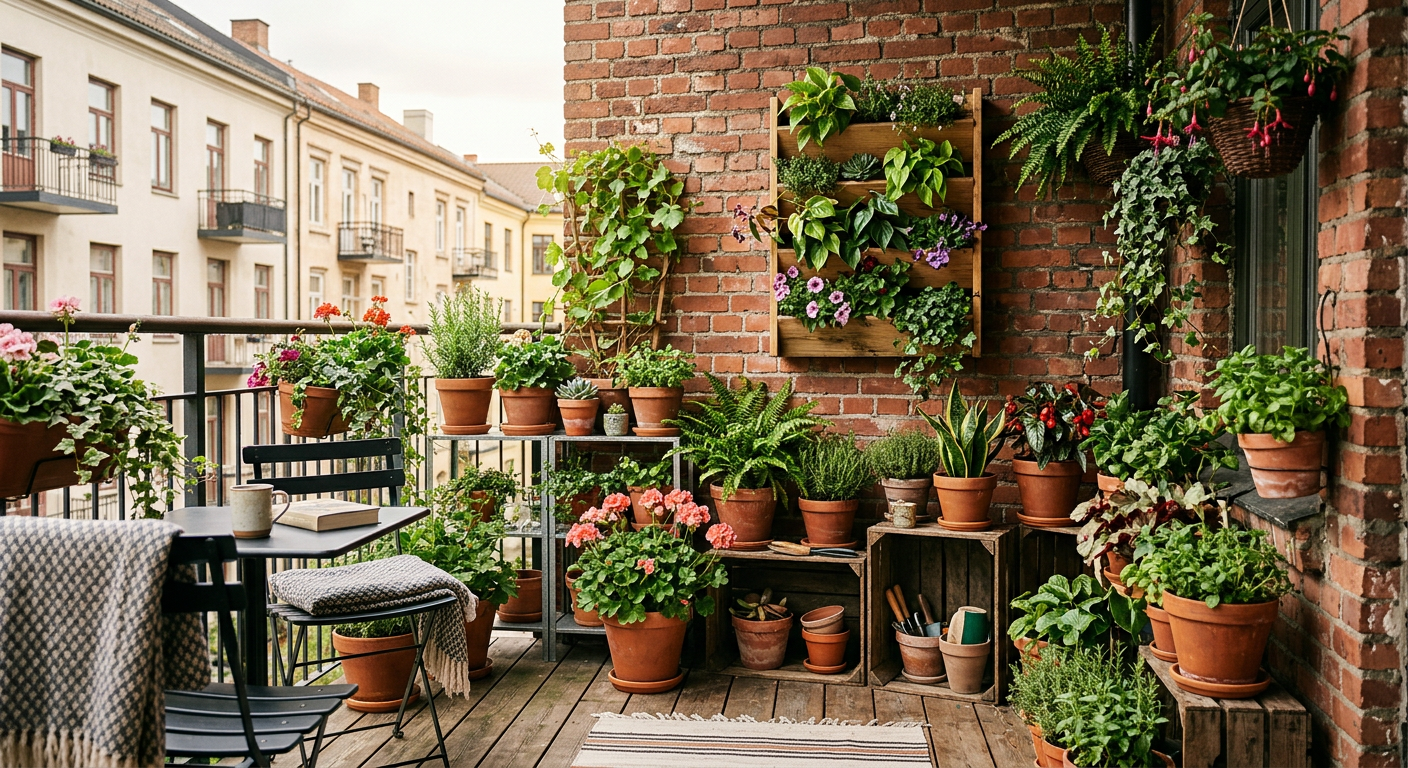
    Even in an apartment, you can homestead! Think vertical gardening, growing herbs on windowsills, sprouting seeds, or making kombucha. If you have a small backyard, focus on high-yield crops like tomatoes, bush beans, and leafy greens. We started with just two 4×4 raised beds (made from free pallet wood) and were amazed at how much food we harvested.

    * Consider a Container Garden: Old five-gallon buckets (often free from bakeries or restaurants if you ask) make excellent containers for many vegetables.

    * Start with Easy Wins: Choose plants that are known to be hardy and productive, like zucchinis, radishes, or lettuce. Success builds confidence!

    Phased Introduction of Animals (If Desired)

    If your goal eventually includes animals, start small and consider their inputs. Chickens are often a great starting point for beginners, providing eggs and pest control, and their manure enriches your garden. You can even build a movable chicken tractor for sustainable pest control from free or low-cost materials.

    However, carefully research local ordinances and the true cost of their feed before acquiring any animals. A local feed store might be willing to trade feed for labor or excess produce down the line. We started with three rescue hens we got for free; their coop was made entirely of scrap wood.

    💡 Pro Tips

    * Document Everything: Keep a journal of what you plant, what works, what doesn’t, and how much you harvest. This becomes an invaluable free resource.

    * Connect Locally: Join local gardening groups, homesteading meetups, or online forums. Sharing knowledge and resources is crucial.

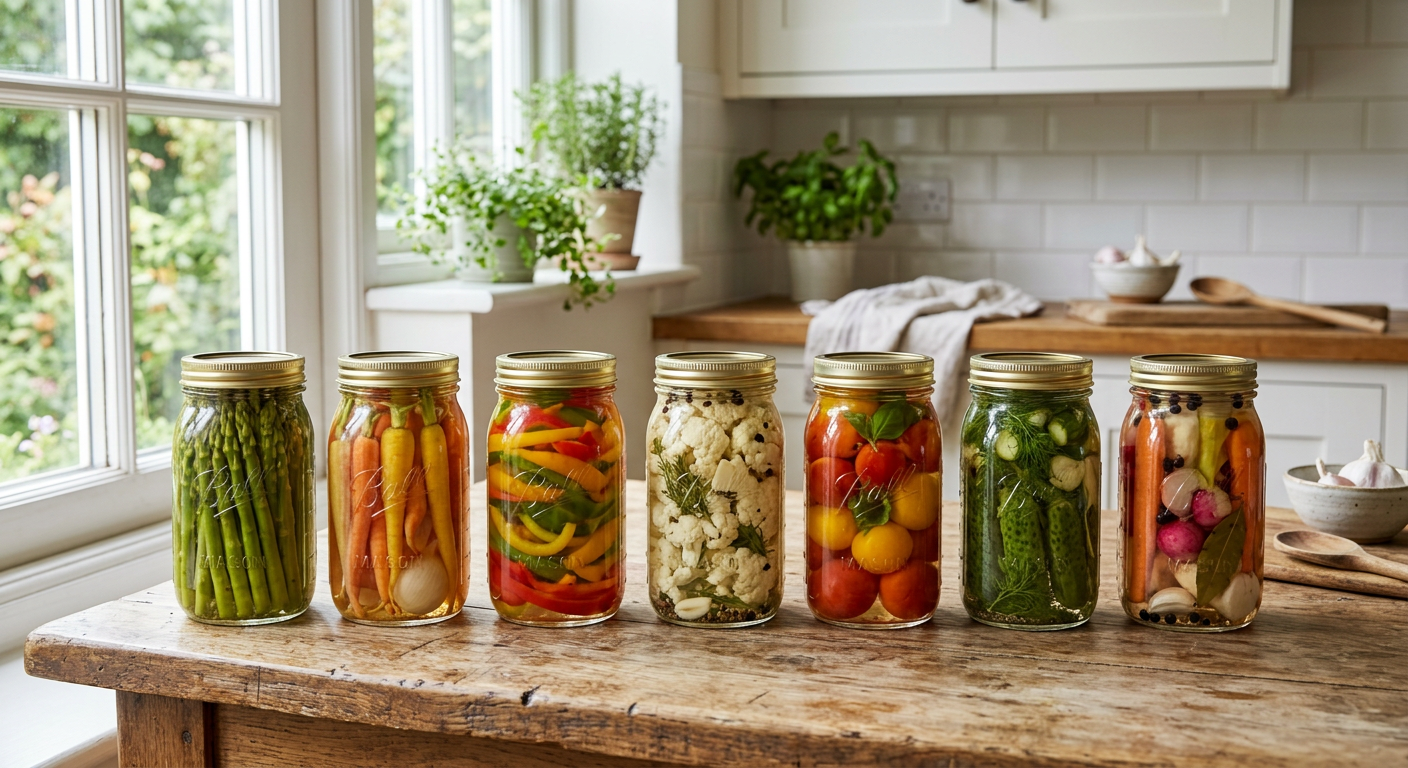
    * Learn to Can/Preserve: Even small harvests can be preserved to stretch your food budget. Basic food preservation for beginners can often be learned with minimal equipment.

    * Master a Few Skills Deeply: Instead of trying to do everything at once, pick 2-3 core homesteading skills (e.g., gardening, basic repairs, food preservation) and become proficient.

    * “Pay It Forward”: As you acquire skills and resources, look for ways to help others in your community. This builds goodwill and strengthens your local network.

    ⚠️ Beginner Mistakes to Avoid

    * Buying Everything at Once: This is the easiest way to drain your nonexistent budget. Learn to scavenge, borrow, or make before you buy.

    * Trying to Do Too Much, Too Soon: Starting with too many projects leads to burnout. Pick one or two small, achievable goals.

    Ignoring Local Regulations: Check zoning laws, HOA rules, and any city ordinances regarding gardening, animals, or composting before* you start to avoid costly fines.

    * Neglecting Skill Development: Believing you need expensive tools instead of learning the corresponding skills is a common trap. Your hands are your primary tools.

    * Not Asking for Help: Many experienced homesteaders love sharing their knowledge. Don’t be afraid to ask for advice or even discarded materials.

    !Two people bartering goods, a key strategy for how to begin homesteading with no money in a community.

    Frequently Asked Questions

    ### Can you really homestead without any money at all?

    Yes, but it’s important to understand the definition. While you might not spend cash on land or fancy equipment, you’ll be investing heavily in time, effort, and creativity. You’re trading money for resilience, skill, and resourcefulness. It means starting with what’s free: seeds from produce scraps, found materials, and your own labor.

    ### What’s the cheapest way to get started with homegrown food?

    Start with a small container garden using free pots (like 5-gallon buckets), grow from saved seeds or free cuttings, and build rich soil from a homemade compost pile. Focus on high-yield, easy-to-grow crops like lettuce, radishes, bush beans, and cherry tomatoes. Also, consider learning about urban homesteading with kids for inspiration if you have a family.

    ### How do I get homesteading land if I have no money?

    This is the big one, and it’s tough but not impossible. Options include house-sitting or caretaking on a property in exchange for housing and garden space, leasing land with an option to buy (start with a very long lease), or even seeking out homesteading mentorship programs where you live and work on someone else’s land to gain experience and potentially build equity. Some may even allow you to live there in exchange for labor. We know folks who started by moving onto a relative’s unused property as well.

    ### What skills are most important to learn first when starting with no money?

    Gardening (especially seed saving and composting), basic hand tool use, food preservation (like dehydrating or fermenting), repairing things, and perhaps a simple craft that can be bartered or sold (like baking or soap making). These skills directly reduce expenses and provide valuable trading goods.

    ### Where can I find free homesteading supplies?

    Keep an eye on local curb alerts, Facebook Marketplace “Free” sections, Craigslist, and freecycle networks. Ask local businesses (bakeries for buckets, coffee shops for grounds). Visit construction sites for scrap wood (ask permission!). Connect with community gardens or experienced gardeners for seed and plant swaps. Libraries and community centers often have free resources and workshops.

    Alright, friends, our journey from zero dollars to a thriving homestead wasn’t always easy, but it was incredibly rewarding. It taught us that true wealth isn’t measured in dollars, but in resilience, resourcefulness, and the bounty of your own two hands. You don’t need a lot of money to start homesteading; you just need to start.

    What’s your biggest challenge with starting a homestead with no money? I’d love to hear your story.

    🔧 See Recommended Tools →


    📚 More From Our Homestead

    Ready to Start Your Homestead Journey?

    Free guides, checklists, and tools to help you build your dream homestead.
    Explore Free Resources →

  • Mastering Practical Skills for Self-Sufficiency at Home

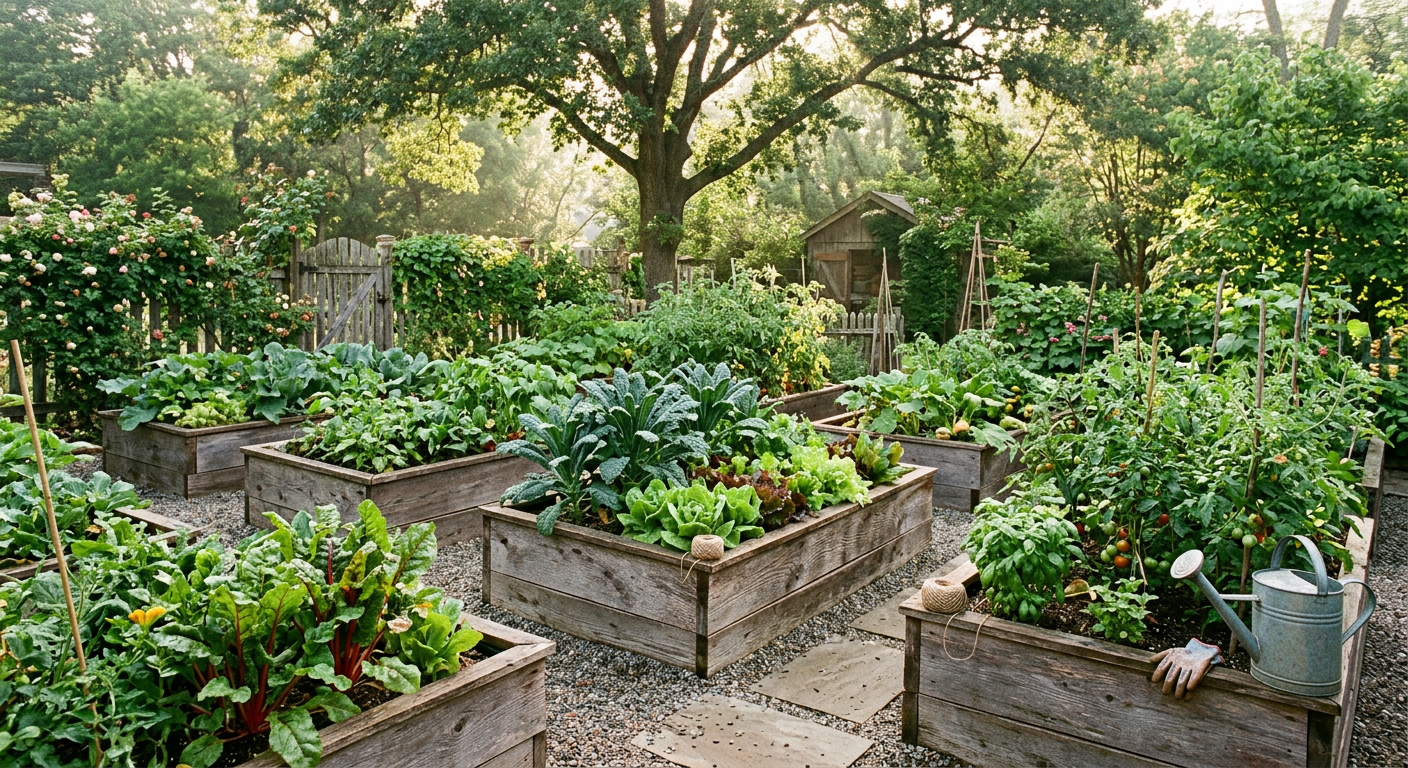
    !A thriving garden showing practical skills for self-sufficiency at home through home-grown produce.

    When we first moved to our little patch of land, fueled by dreams of self-sufficiency, we quickly learned that ‘knowing’ wasn’t enough. We needed to do. We started with grand plans, but the reality hit hard when our first garden failed or a tool broke. That’s when we realized the deep importance of developing practical skills for self-sufficiency at home.

    🎯 Quick Answer: Building practical skills for self-sufficiency at home means learning hands-on capabilities like gardening, food preservation, basic repairs, and resource management. Our family’s journey showed us these skills save money, build resilience, and foster a deeper connection to our food and home.

    🌱 Start Your Homestead Plan →

    🔑 Key Takeaways

    * Start Small, Learn Big: Don’t try to master everything at once; pick one or two skills and build from there.

    * Embrace the Learning Curve: Mistakes are part of the process. Our first compost bins were a mess, but we learned!

    * Hands-On is Best: Reading is great, but getting your hands dirty (literally!) is how these practical skills for self-sufficiency at home truly sink in.

    * Community is Key: Don’t be afraid to ask for help or trade knowledge with neighbors and local homesteaders.

    * Budgeting is Practical: Understand the initial investment for tools and resources, and how to make them last.

    * Prioritize Foundational Skills: Focus on skills that directly impact your food, water, and shelter first.

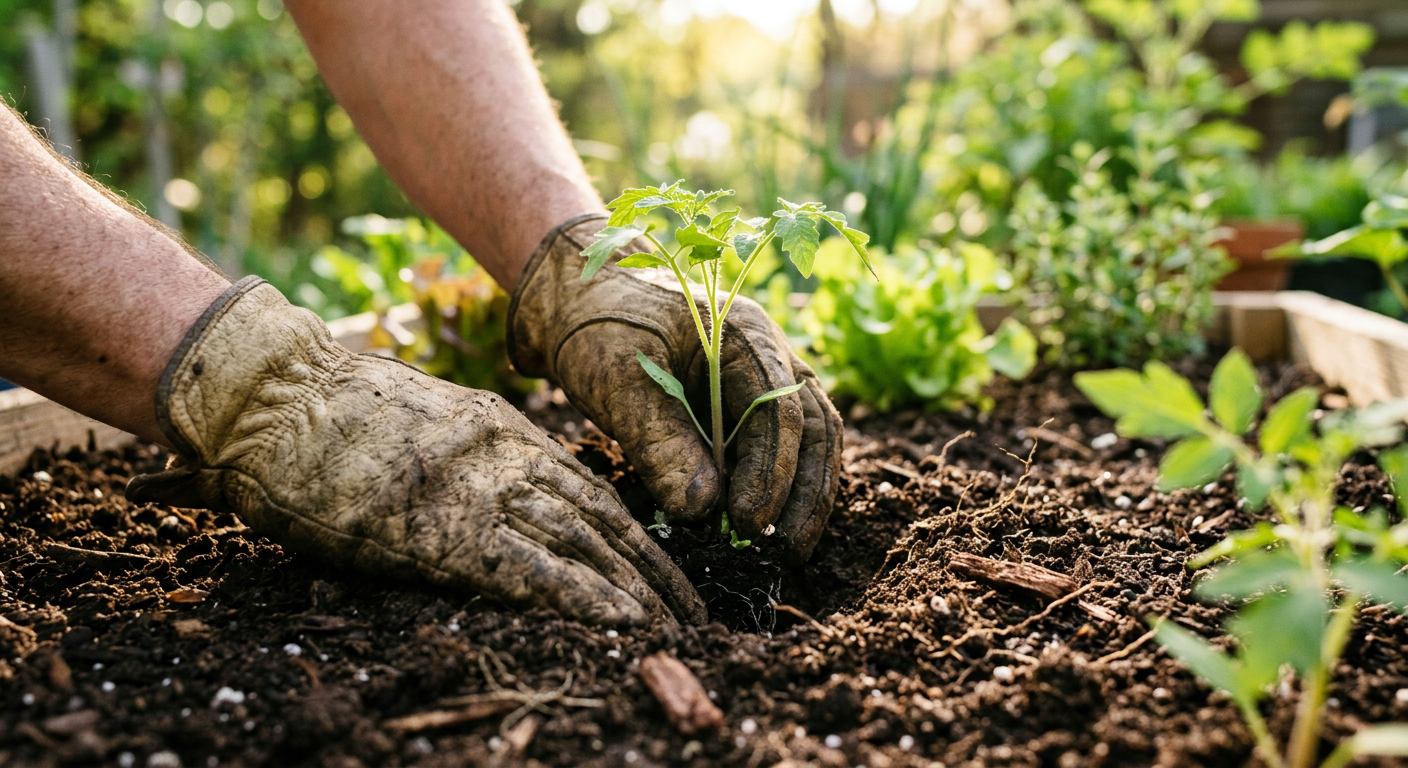
    !Hands planting seeds, illustrating practical skills for self-sufficiency at home in a family garden.

    Growing Your Own: The Foundation of Food Independence

    For us, growing our own food was the very first step toward having practical skills for self-sufficiency at home. Nothing beats the taste of a tomato you’ve grown yourself, and the peace of mind knowing where your food comes from is priceless. When we first started, we dug up a 10×10 foot plot and planted everything under the sun, hoping for the best.

    The Humble Vegetable Garden

    Our first year growing vegetables was a comedy of errors and triumphs. We spent about $150 on seeds, some basic tools, and a soil test. We quickly learned that good soil is paramount. We realized that companion planting actually works, and that just because a seed packet said ‘full sun’ didn’t mean all day full sun in our climate. Planting success truly is a core practical skill for self-sufficiency at home.

    * Start with Easy Crops: Think zucchini, radishes, lettuce, and bush beans. They forgive a lot of beginner mistakes.

    * Understand Your Zone: Knowing your USDA plant hardiness zone is crucial for choosing the right plants and planting times. We live in Zone 6b, which impacts our frost dates significantly.

    * Compost is Gold: We started a compost pile from kitchen scraps and animal manure. Within 6 months, we had enough rich soil amendment to vastly improve our clay-heavy garden beds.

    Small-Scale Animal Husbandry

    After a successful first garden season, we decided to add chickens. We started with six hens, costing us about $40 for chicks and another $200 for a small coop and initial feed. The fresh eggs were a game-changer! We now have a larger flock, and they provide daily eggs, pest control, and fantastic fertilizer. Mastering skills like chicken care is a major step in practical self-sufficiency for food.

    * Research Breeds: Some hens are better layers, some are more cold-hardy. We love Rhode Island Reds for their consistent laying.

    * Shelter Needs: Chickens need protection from predators and the elements. Our first coop design was simple but effective. You can learn more about building a movable chicken tractor here.

    * Daily Care Routine: Feed, fresh water, and egg collection take about 15-20 minutes a day for our flock.

    The next step after growing is making sure none of it goes to waste – that’s where preservation comes in. Keep reading — this is where most people mess up.

    Preserving the Harvest: Stretching Your Bounty

    There’s no point in all that hard work in the garden if you can’t keep the food fresh for months! Learning various food preservation techniques immediately became one of our most vital practical skills for self-sufficiency at home. Our first canning session was with green beans – we felt like true pioneers!

    Canning and Dehydrating

    Our initial investment for canning totaled about $100 for a pressure canner (essential for low-acid foods), jars, lids, and a basic canning kit. Dehydrating was even cheaper, only snagging a small dehydrator for $60. We quickly filled our pantry shelves with canned tomatoes, jams, and dried herbs.

    * Safety First: Always follow USDA guidelines for canning to prevent botulism. We downloaded their free guides and consulted them constantly. You can find more trusted resources for food preservation from authoritative sources like the National Center for Home Food Preservation.

    * Batch Processing: Designate ‘canning days’ where you process large quantities of one item. Our record is 30 quarts of tomato sauce in a single day!

    * Experiment with Flavors: Don’t just can plain vegetables. We make pickled beets, pepper jellies, and dried fruit leathers.

    Fermentation and Freezing

    Beyond canning, we ventured into fermentation with sauerkraut and kimchi. It’s incredibly simple, often just cabbage and salt, and adds fantastic probiotics to our diet. Freezing is another easy win, especially for fruits and blanched vegetables, as long as you have reliable freezer space.

    * Basic Fermentation Kit: A few mason jars, airlocks, and weights might cost you $30-50, and you can reuse them indefinitely.

    * Vacuum Sealing: For longer freezer storage and to prevent freezer burn, a vacuum sealer (around $80-150) is a worthwhile investment.

    * Inventory Your Stock: We keep a running list of what’s in our pantry and freezer so food doesn’t get lost or forgotten. Our master list saves us so much wasted food!

    This next part? Nobody talks about it, but it changed everything for us.

    📋 Get the Beginner Checklist →

    Basic Home Repair and Maintenance: Being Your Own Handyman

    One of the biggest financial drains for us used to be calling a professional for every little fix. Cultivating practical skills for self-sufficiency at home regarding basic repairs has saved us hundreds, if not thousands, of dollars over the years. From leaky faucets to fence mending, having these skills is empowering.

    Plumbing and Electrical Basics

    Nobody wants to deal with a burst pipe in the middle of winter! Learning how to shut off our main water supply, fix a running toilet, or change an outlet became essential. We spent about $75 on a good set of screwdrivers, a wrench, and a voltage tester.

    * Watch and Learn: YouTube tutorials are invaluable. We’ve fixed everything from a garbage disposal to a wobbly ceiling fan just by carefully following step-by-step videos.

    * Safety First, Always: Before touching anything electrical, always turn off the power at the breaker panel. Always! And if you’re unsure, call an expert. Some things aren’t worth the risk.

    * Preventative Maintenance: Simple tasks like cleaning gutters annually, checking smoke detectors, and sealing drafty windows prevent bigger problems down the line.

    Carpentry and General Fixes

    Our homestead always needs something repaired – a sagging gate, a loose floorboard, a new shelf in the kitchen. Having some basic carpentry tools and knowing how to use them has been incredibly useful. Our initial carpentry toolkit – a hammer, tape measure, saw, and drill – cost around $150.

    * Learn to Measure Twice, Cut Once: This old adage holds true. Precision saves material and frustration.

    * Scavenge Materials: We’ve found old pallets, discarded wood, and even tree branches that we’ve upcycled for various projects around the homestead.

    * Regular Inspections: Walk around your property monthly and look for things that need attention. Fixing a small problem now prevents it from becoming a huge, costly repair later.

    Don’t skip this — it’ll save you hours (and money).

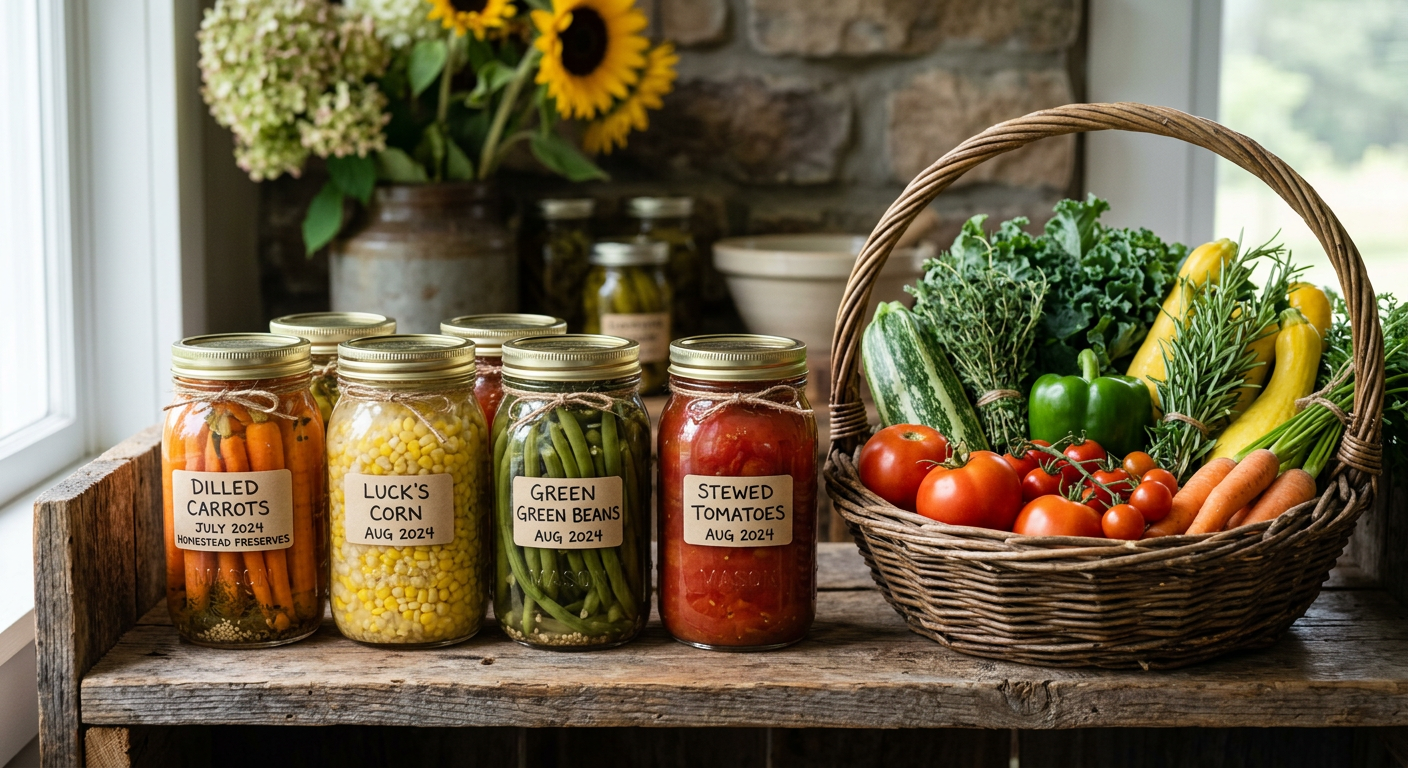
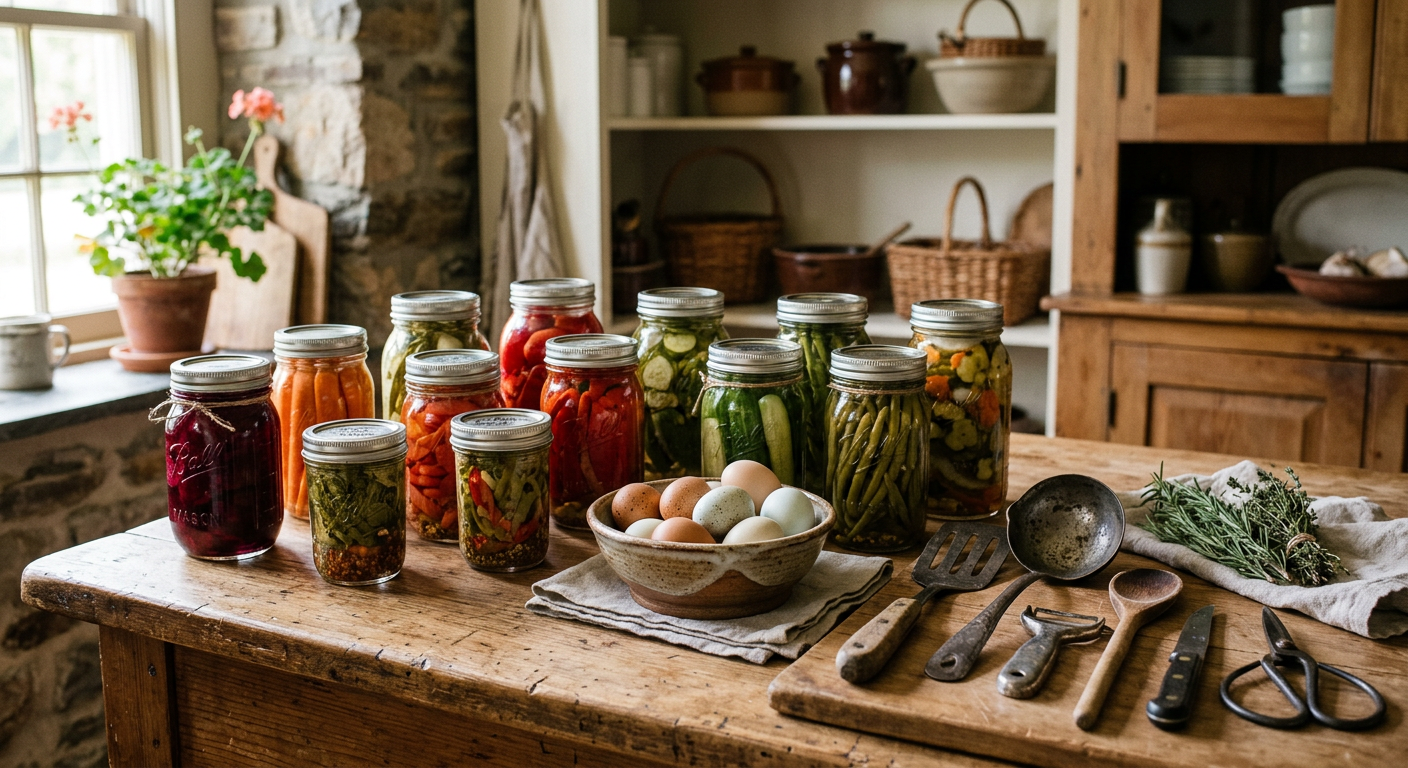
    !Canned goods and preserves highlighting practical skills for self-sufficiency at home and food storage.

    Resource Management: Water, Energy, and Waste

    True practical skills for self-sufficiency at home aren’t just about making things; they’re about managing what you have. This means being smart about water, energy, and minimizing waste. We’ve gradually integrated systems that reduce our reliance on external resources.

    Water Conservation and Collection

    Water is life, especially on a homestead. We started by installing rain barrels attached to our downspouts – a simple, low-cost project at about $70 per barrel. This water is perfect for the garden and even for washing tools. It significantly reduced our city water bill during the summer months.

    * Greywater Systems: We’re currently exploring diverting our washing machine’s greywater to irrigate fruit trees. This requires careful planning and local code compliance.

    * Mulch, Mulch, Mulch: A thick layer of mulch in the garden drastically reduces evaporation, meaning we water less frequently.

    * Small-Scale Rainwater Harvesting: For more robust systems, check out our guide on Best Small Scale Rainwater Systems for Off-Grid Living.

    Energy Efficiency and Alternative Sources

    Our journey with energy started with simple efficiency: LED lights, turning off electronics, and improving insulation. We’re now looking into solar options for a portion of our energy needs. Even small steps make a difference in your energy footprint and bills.

    * Energy Audit: Many utility companies offer free energy audits to pinpoint areas of heat loss or inefficiency.

    * Passive Solar Design: Even without a full solar panel array, positioning windows and using heavy curtains can significantly impact heating and cooling costs.

    * Off-Grid Lighting: Solar pathway lights and hand-crank lanterns are great for reducing reliance on grid electricity for outdoor or emergency lighting.

    Foraging and Wildcrafting: Connecting with Nature

    This is one of the more romantic practical skills for self-sufficiency at home! We started small, identifying wild edibles and medicinal plants right on our property. It’s amazing what treasures you can find in your own backyard or local woods. Our initial investment was just a good field guide (about $25) and a keen eye.

    Identifying Edible and Medicinal Plants

    Our kids love this, turning a walk in the woods into a treasure hunt. We’ve learned to recognize wild edibles like dandelions (leaves, flowers, roots are all edible!), plantain, and various berries. We always follow strict guidelines to ensure safety.

    * Positive Identification is Critical: Never eat anything you aren’t 100% sure about. When in doubt, leave it out. A good rule of thumb is to never forage alone when you’re just starting and always have an experienced person or multiple confirmed guides.

    * Sustainable Harvesting: Only take what you need and leave plenty for wildlife and for the plant to propagate. We never harvest more than 10-20% of a patch.

    * Local Resources: Check with your local university extension for foraging groups or classes in your area.

    💡 Pro Tips

    * The 30-Minute Rule: Dedicate just 30 minutes a day or a few hours a week to learning and practicing a new skill. It adds up remarkably fast!

    * Document Your Progress: Keep a homestead journal. We log our planting dates, harvest yields, repair notes, and even mistakes. It’s a goldmine of information year after year.

    * Embrace ‘Good Enough’: Not every project needs to be perfect. A functional repair is often better than waiting for perfection.

    * Cross-Train: Many skills overlap. Learning how to use a drill for carpentry will also help with building a fence for your chickens.

    * Barter and Trade: Offer your developing practical skills for self-sufficiency at home in exchange for someone else’s expertise or goods in your community.

    ⚠️ Beginner Mistakes to Avoid

    * Overwhelm: Trying to learn too many skills at once leads to burnout. Pick one, enjoy the process, then move on.

    * Ignoring Research: Jumping in without understanding basics (like soil or electrical safety) can lead to costly mistakes or even danger.

    * Buying All the Tools at Once: Start with essential homesteading tools you’ll use frequently. We cover these in our post about Essential Homesteading Tools to Buy First.

    * Underestimating Time: Everything takes longer than you think it will, especially when you’re learning. Factor in buffer time for projects.

    * Isolation: Thinking you have to do it all yourself. Connect with other homesteaders! We’ve made incredible friends through our shared journey.

    !Tools on a workbench representing the practical skills for self-sufficiency at home like basic repairs.

    Frequently Asked Questions

    What are the most important practical skills for self-sufficiency at home for beginners?

    We’d say growing food (gardening), basic food preservation (canning/freezing), and simple home repairs. These three areas will give you the biggest bang for your buck in terms of immediate impact on your daily life and budget.

    How much does it cost to get started learning self-sufficiency skills?

    Honestly, not as much as you might think! Many skills, like basic gardening or foraging, can start with very little initial investment – a few seed packets, a spade, or a field guide. For things like canning, a pressure canner might be your biggest initial cost (around $100-$150), but it’s a one-time purchase that pays for itself quickly.

    Can I learn practical skills for self-sufficiency if I live in an apartment?

    Absolutely! Urban homesteading is a thriving movement. You can learn container gardening, food preservation, basic mending, and even small-scale composting. These are all valuable practical skills for self-sufficiency at home, no matter your location. Check out our post on Urban Homesteading with Kids for more ideas.

    What’s the best way to practice these skills if I’m busy?

    Integrate them into your daily routine. Spend 15 minutes checking on your garden, or use your lunch break to learn a new knot. We set aside Saturday mornings for bigger projects, and even then, we keep them manageable. Consistency over intensity is key.

    Where can I find reliable resources for learning these skills?

    Local library books, university extension offices (like the USDA’s resources), experienced homesteaders in your area, and reputable online communities (like ours!) are fantastic starting points. Don’t underestimate the power of hands-on workshops too.

    For us, developing these practical skills for self-sufficiency at home isn’t just about saving money or ‘being prepared.’ It’s about a deeper connection to our food, our land, and each other. It’s about knowing that with our own hands, we can provide for our family, no matter what comes our way. Every sprouted seed, every fixed fence, every jar of preserves fills us with a quiet pride and a profound sense of resilience.

    What’s your biggest challenge with learning new self-sufficiency skills? I’d love to hear your story!

    🔧 See Recommended Tools →


    📚 More From Our Homestead

    Ready to Start Your Homestead Journey?

    Free guides, checklists, and tools to help you build your dream homestead.
    Explore Free Resources →

  • Homesteading Hacks: Save Serious Money on Groceries!

    !A lush backyard garden showing how to save money on groceries homesteading by growing produce.

    I remember staring at our grocery bill just five years ago, my jaw practically on the floor. It was over $1200 for a family of four, and we weren’t even buying fancy stuff! That’s when we knew something had to change — saving money on groceries was going to be a non-negotiable part of our homesteading journey.

    🎯 Quick Answer: Saving money on groceries through homesteading involves a multi-pronged approach: grow what you can, preserve your harvests, buy in bulk directly from producers, cook from scratch, and strategically reduce waste. Our family cut our grocery bill by over 60% using these methods.

    🌱 Start Your Homestead Plan →

    🔑 Key Takeaways

    * Garden for Savings: Growing even a small portion of your produce can drastically reduce your grocery expenses, especially for high-cost items like fresh herbs and berries.

    * Preserve Your Harvest: Canning, freezing, dehydrating, and fermenting extends the life of your bounty, making seasonal savings last all year.

    * Strategic Bulk Buying: Purchasing staples, meat, and dairy directly from farmers or co-ops in large quantities offers significant price breaks.

    * Cook from Scratch: Eliminating processed foods means fewer expensive ready-meals and more control over ingredients and costs.

    * Waste Not, Want Not: Smart meal planning and creative use of leftovers prevent food waste, directly impacting your budget.

    * Animal Contributions: Raising chickens for eggs or a few dairy goats can provide fresh, often ‘free,’ protein and dairy, further reducing grocery needs.

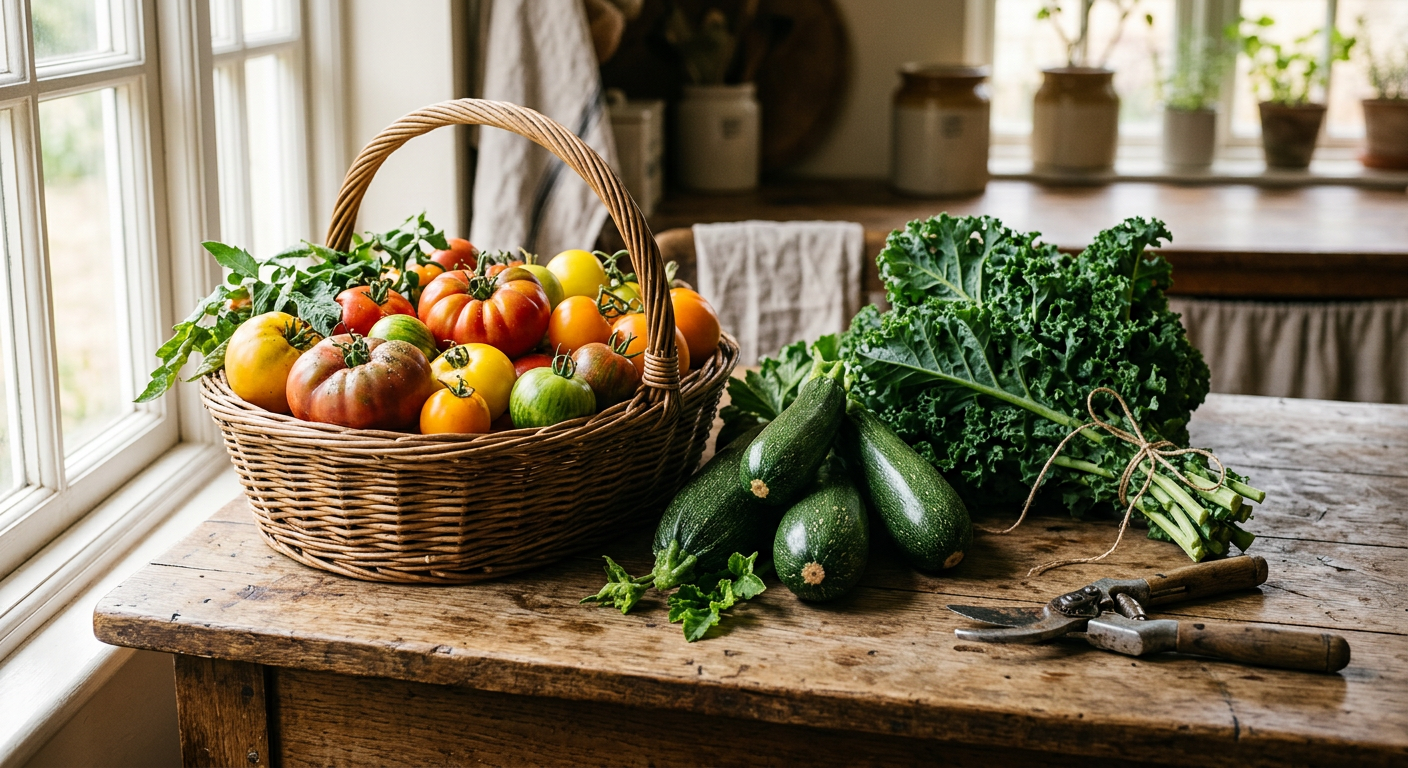
    !Fresh harvested vegetables on a table illustrating how to save money on groceries homesteading.

    Our Journey to Saving Money on Groceries Homesteading

    When we first moved onto our little patch of land, we had grand visions of self-sufficiency. But honestly, the initial push wasn’t just about the romantic idea of ‘living off the land’; it was about necessity. That $1200 bill was a wake-up call, and we started looking at how to save money on groceries homesteading as our first major project.

    Our first year, we only managed to shave off about 15% from our grocery expenses. We were enthusiastic but a bit disorganized. We grew too many zucchinis and not enough of what we actually ate frequently. Over the years, refining our methods and focusing on high-impact areas, we now consistently keep our monthly grocery spending under $450 for the same family of four. That’s a savings of over $750 every single month!

    This transformation didn’t happen overnight, but it was incredibly rewarding. The peace of mind knowing where our food comes from, and the extra money in our pockets, has been truly life-changing. Now, let’s dive into exactly how we did it. But before you start, there’s one mistake that ruins everything — I’ll cover it next.

    Grow Your Own: The Ultimate Grocery Hacker

    If you want to know how to save money on groceries homesteading, growing your own food is hands down the most impactful step. We started with a tiny 4×8 raised bed, and it quickly expanded.

    Prioritize High-Cost or High-Consumption Crops

    Don’t try to grow everything at once. Focus on items that are expensive at the store or that your family eats a lot of. For us, that meant.

    * Berries: Fresh raspberries and blueberries are pricey, especially organic ones. Our small patch of everbearing raspberries gives us fresh fruit for months.

    * Herbs: A small herb garden saves a fortune. A bunch of fresh basil can be $3-4; growing it costs pennies. We’ve got rosemary, thyme, oregano, and mint flourishing.

    * Salad Greens: Lettuce, spinach, and kale grow quickly and can be harvested repeatedly. We found that a continuous harvest of greens saved us about $20-30/month in buying pre-washed bags.

    * Tomatoes & Peppers: We go through a lot of these in sauces, salads, and cooking. Growing our own means fresh produce all summer and plenty for canning.

    Start Small, Learn, Then Expand

    We didn’t plant an acre overnight. Our first garden was modest, and we learned a ton about our soil, sunlight, and what thrives here. Each year, we’d add another bed or expand a patch. This gradual scaling prevented overwhelm and helped us enjoy the process. Read our guide on How to Start a Small Backyard Vegetable Garden: Beginner Guide for a great starting point.

    Consider Yield and Space Efficiency

    Some crops give you more bang for your buck. For instance, a single zucchini plant can produce more squash than you know what to do with! But also consider vertical gardening for space-saving. Pole beans, cucumbers, and even small melons can climb, maximizing your harvest in a small footprint.

    Keep reading — this is where most people mess up.

    Preserve the Bounty: Extending Your Savings

    What’s the point of growing all that food if it goes bad? Preserving is crucial for how to save money on groceries homesteading year-round. It means enjoying summer’s sweetness in the dead of winter without paying premium prices.

    Canning for Shelf Stability

    We started with water bath canning for high-acid foods like jams, jellies, pickles, and tomato sauce. Later, we invested in a pressure canner for low-acid vegetables like green beans and corn, as well as meats. Our pantry now looks like a mini grocery store!

    * Tomatoes: We can diced tomatoes, crushed tomatoes, and salsa. This saves us about $50-70 per month on canned tomato products alone during winter.

    * Green Beans: A bushel of green beans from a local farmer can be bought cheap, then canned for year-round side dishes. We estimate this saves us approximately $100 throughout the off-season.

    * Jams & Jellies: Using homegrown or locally picked fruit, we make all our own preserves. This easily saves us $15-20 per month compared to store-bought.

    Freezing for Freshness and Convenience

    Freezing is often the easiest entry point into food preservation. We freeze berries, chopped vegetables, and even entire meals. Just blanching vegetables for a few minutes before freezing helps maintain their quality.

    * Berries: Wash, dry, and freeze berries on a baking sheet before transferring to bags. Perfect for smoothies and winter desserts.

    * Pesto Cubes: Blend extra basil into pesto and freeze in ice cube trays. Pop one into pasta or soup for a burst of flavor.

    Dehydrating for Light and Long-Term Storage

    Our dehydrator is always humming. It’s fantastic for herbs, fruit leathers, and even emergency food supplies.

    * Herbs: Dry your garden herbs for cooking. They take up little space and retain their flavor for months.

    * Apple Slices: A great healthy snack that saves us from buying expensive fruit snacks.

    Fermentation for Probiotics and Flavor

    Sauerkraut, kimchi, and fermented pickles are not only delicious and healthy but also extremely cost-effective to make. Cabbage is cheap, and fermenting extends its life significantly.

    Consider our post on Crack the Code: Preserving Eggs Long-Term (No Fridge Needed!) for another great preservation method!

    📋 Get the Beginner Checklist →

    This next part? Nobody talks about it, but it changed everything for us.

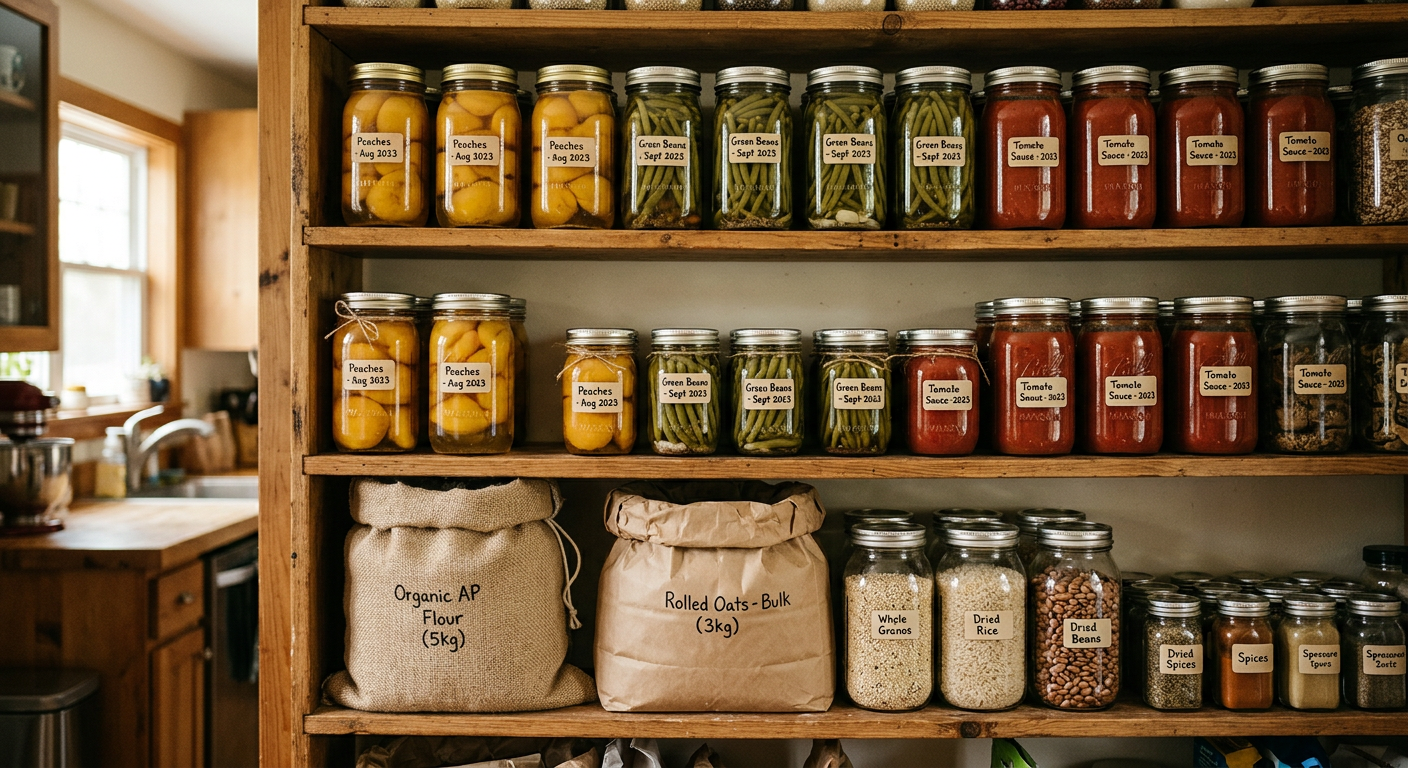
    !Canned goods and bulk staples showing how to save money on groceries homesteading through preservation.

    Smart Sourcing: Beyond Your Homestead

    Even with a thriving garden and a full pantry, we can’t grow everything. That’s where smart sourcing comes in to reinforce how to save money on groceries homesteading.

    Buying in Bulk & Direct from Farmers

    We’ve found incredible savings by cutting out the middleman. This means buying a whole or half animal directly from a local farmer, or joining a CSA (Community Supported Agriculture) program.

    * Bulk Meat: We split a half-cow with friends every year. The upfront cost (around $1200 for us) feels like a lot, but calculated by the pound, it’s significantly cheaper (often $3-5/lb for premium cuts) than buying individual packages at the grocery store. It fills our chest freezer and lasts us 8-10 months.

    * Local Produce: During peak season, we visit farmers’ markets an hour before closing and often get deals on ‘ugly’ produce perfect for canning or freezing. We also have a standing order with a local farmer for a bushel of peaches every August for our canning projects.

    * Co-ops & Discount Stores: Membership to a local food co-op or shopping at stores like Aldi/Lidl for non-perishables and pantry staples saves us another 15-20% on those items.

    Foraging for Free Food

    Depending on where you live, wild edibles can supplement your diet for free! We forage for wild berries, mushrooms (only with expert identification!), and even edible greens like dandelion and plantain.

    * Dandelions: Young dandelion greens are great in salads, and the roots can be roasted for a coffee substitute.

    * Blackberries: Our property is edged with wild blackberries, providing gallons of fruit for jams and pies every summer – completely free.

    The Homestead Kitchen: Cooking from Scratch and Reducing Waste

    Our kitchen is the heart of our homestead, and it’s where we truly embody the spirit of how to save money on groceries homesteading.

    Say Goodbye to Processed Foods

    Processed foods are notoriously expensive and often less nutritious. By cooking almost everything from scratch, we eliminate these costs. Breads, sauces, dressings, and snacks – it’s all made here.

    * Homemade Bread: Making our own sourdough bread (flour, water, salt, starter) saves us about $4-5 per loaf compared to artisan bread. Even basic yeast bread is far cheaper than store-bought.

    * Bone Broth: After butchering chickens (which we raise ourselves – see Raising Backyard Chickens: Pros, Cons & What to Expect), we use the bones to make nourishing bone broth. This is basically free, whereas store-bought bone broth can be $5-8 per carton.

    Meal Planning and Leftover Creativity

    Planning our meals around what’s in season, what we’ve preserved, and what’s in the pantry prevents impulse buys and reduces waste. Leftovers are gold!

    * Weekly Meal Plan: Every Sunday, we sit down and plan out 7 dinners, often incorporating ingredients nearing their ‘use by’ date. This helps us empty the fridge before grocery day.

    * ‘Clean Out the Fridge’ Dinners: Once a week, we have a dinner where everyone finds something in the fridge that needs to be eaten. It’s often a hodgepodge but always prevents waste.

    Raise a Few Animals (If You Can!)

    While not everyone can have animals, if you’re serious about homesteading and how to save money on groceries homesteading, they can be a massive asset.

    * Chickens for Eggs: Our flock of a dozen laying hens provides all the eggs we need, plus extras to sell to neighbors. We spend about $30 a month on feed, but we get about 8-10 dozen eggs per week. That’s dirt cheap eggs! (Learn more in Build a Movable Chicken Tractor for Sustainable Pest Control).

    * Dairy Goats: A couple of dairy goats can provide milk, cheese, and yogurt, almost completely eliminating dairy from your grocery list. We have two, and their milk supply is bountiful.

    Don’t skip this — it’ll save you hours (and money).

    💡 Pro Tips

    * Track Your Spending: For a month or two, actually write down every single grocery expense. You’ll be shocked where your money goes. This data helps you target key areas for savings.

    * Invest in Good Tools: A quality pressure canner, dehydrator, or even an extra freezer pays for itself quickly when you’re preserving large quantities of food.

    * Learn a New Skill Every Season: Focus on mastering one new preservation method (canning, dehydrating, fermenting) per gardening season. This keeps it manageable and fun.

    * Barter and Trade: Connect with other local homesteaders or farmers. We often swap excess eggs for berries or help with canning for some of their surplus vegetables.

    * Compost Food Scraps: Instead of tossing vegetable peels and uneaten bits, compost them. This creates rich soil for your garden, reducing the need for expensive soil amendments and closing the loop.

    ⚠️ Beginner Mistakes to Avoid

    * Planting Too Much of One Thing: Our `zucchini overload` the first year taught us this lesson quickly. Diversify your crops, and plant what you truly enjoy eating.

    * Ignoring Preservation from the Start: Don’t wait until you’re drowning in tomatoes to figure out canning. Start learning basic preservation methods before your harvest overwhelms you.

    * Buying All the Gear at Once: It’s tempting to get every gadget. Start with the essentials (pots, basic canning supplies, a good knife) and acquire more specialized tools as your needs grow.

    * Not Meal Planning: Without a plan, you’ll inevitably buy things you don’t need or let fresh produce go bad. A simple weekly plan makes a huge difference.

    * Giving Up Too Soon: There will be failures – pests, crop blights, canning mishaps. Don’t let them deter you. Learn from them and keep going.

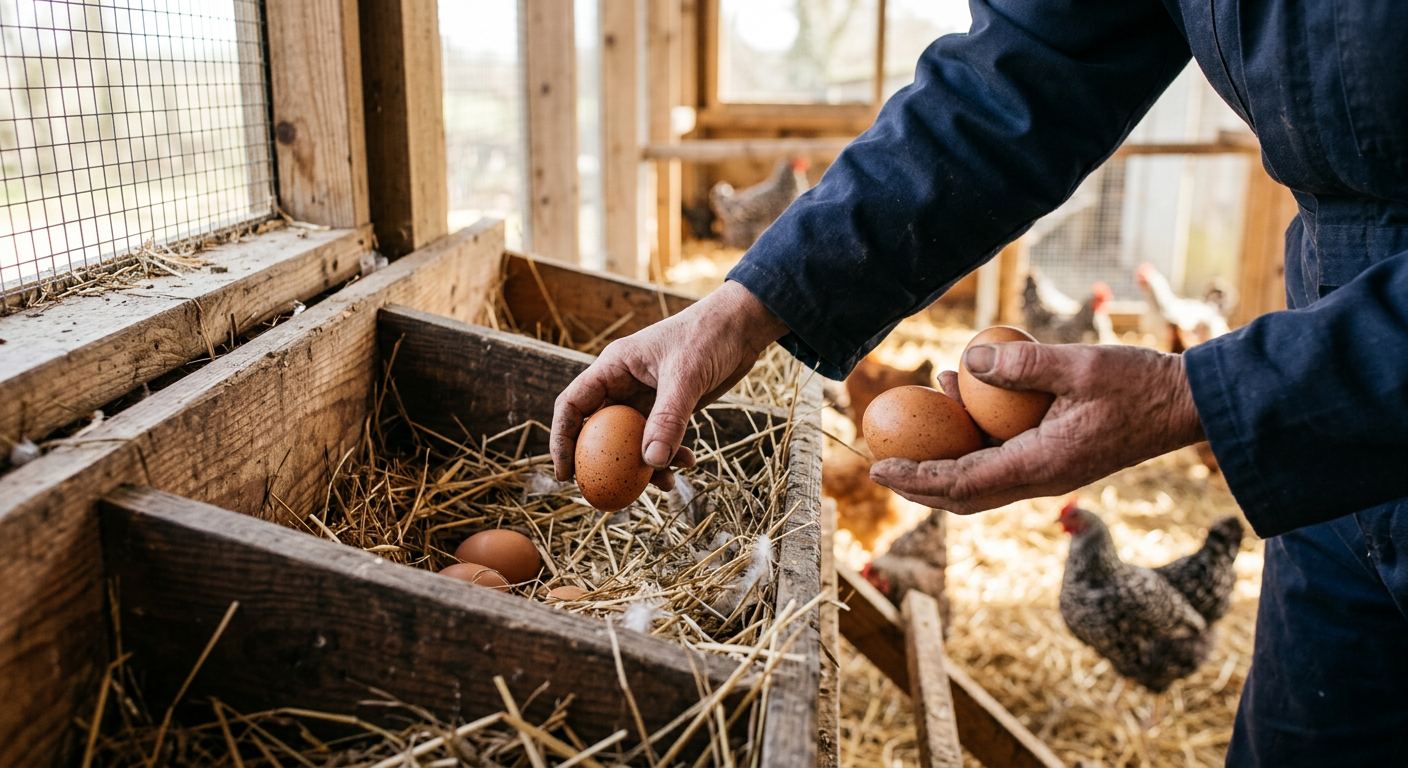
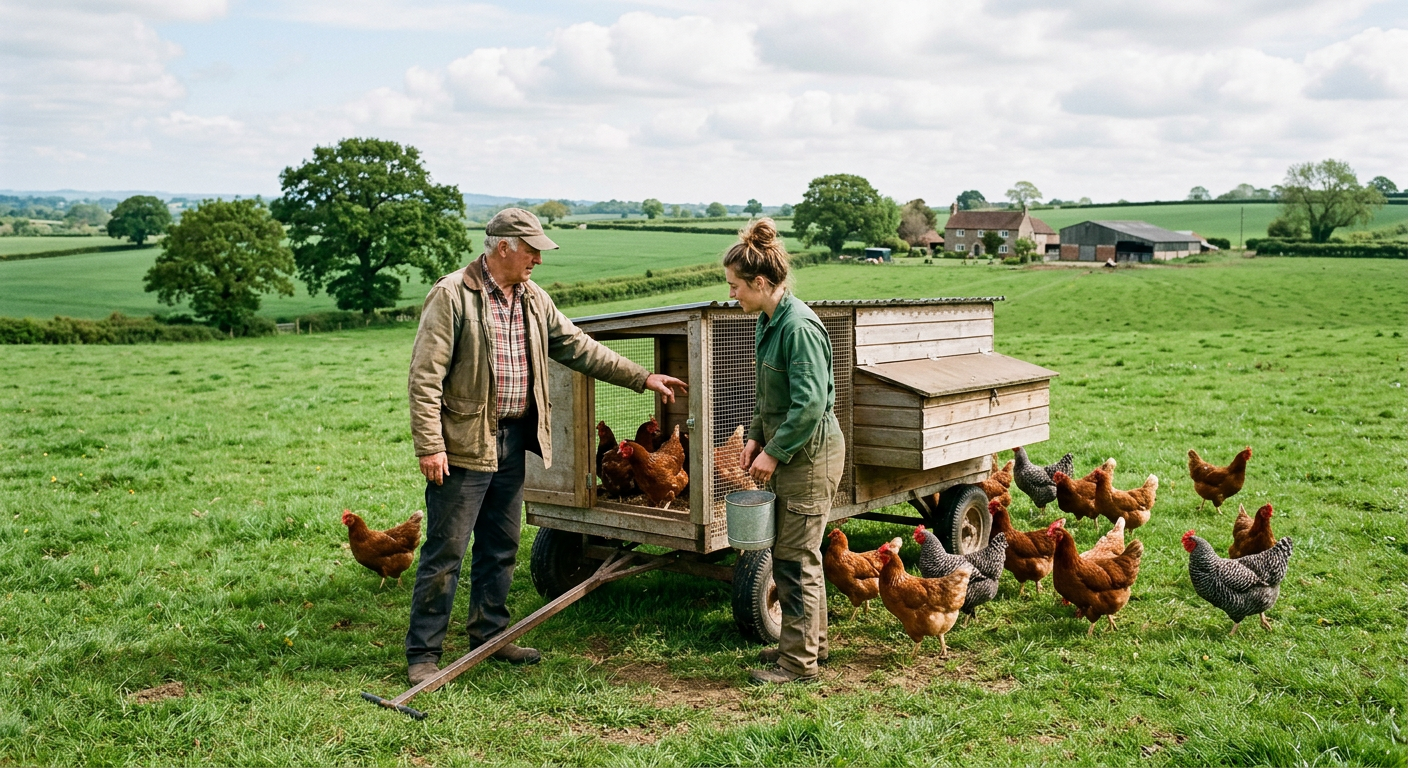
    !Collecting fresh eggs from a coop as a way to learn how to save money on groceries homesteading.

    Frequently Asked Questions

    How much can you realistically save on groceries with homesteading?

    Our family saves over $750 a month, which is about 60% of our original grocery bill. However, what you save depends on your dedication, the size of your garden, and your willingness to commit to scratch cooking and preservation. Many homesteaders report saving 30-70%.

    What are the cheapest things to grow to save money on groceries?

    High-yield, fast-growing items like lettuce, spinach, radishes, green beans, and zucchini are very cost-effective. Expensive store-bought items like fresh herbs and berries also offer significant savings when grown at home.

    Does homesteading really save money, or does it cost more in the long run?

    It absolutely saves money in the long run, but there’s an upfront investment in seeds, supplies, and potentially tools or animal enclosures. However, most of these are one-time costs or have long lifespans. The fresh, organic food you produce is far cheaper than buying it, and the skills you gain are invaluable.

    How much land do you need to significantly reduce your grocery bill?

    Not as much as you think! Even urban homesteaders with small backyards or balconies can grow a substantial amount of food. A well-planned 100-200 sq ft garden can provide a significant portion of a family’s produce needs for several months. For more, check out Tiny Space, Big Harvest: How to Start Urban Homesteading Small Space.

    What are good beginner animals to help save on groceries?

    Chickens are a great start for fresh eggs. They are relatively low-maintenance and provide daily protein. Rabbits can be raised for meat fairly easily. Dairy goats are excellent for milk if you have the space and commitment. For more ideas, see Tiny Farm, Big Rewards: Best Low Maintenance Farm Animals.

    Wrapping up this chat, I hope you see that figuring out how to save money on groceries homesteading isn’t just about cutting costs; it’s about building resilience, developing invaluable skills, and putting truly nourishing food on your family’s table. It takes effort, sure, but the rewards—both financial and personal—are immense. We started small, learned as we went, and now our grocery bill is a fraction of what it once was. You can do it too!

    What’s your biggest challenge with reducing your grocery bill? I’d love to hear your story.

    🔧 See Recommended Tools →


    📚 More From Our Homestead

    Ready to Start Your Homestead Journey?

    Free guides, checklists, and tools to help you build your dream homestead.
    Explore Free Resources →

  • Homesteading Supplies List for Beginners: The Essentials

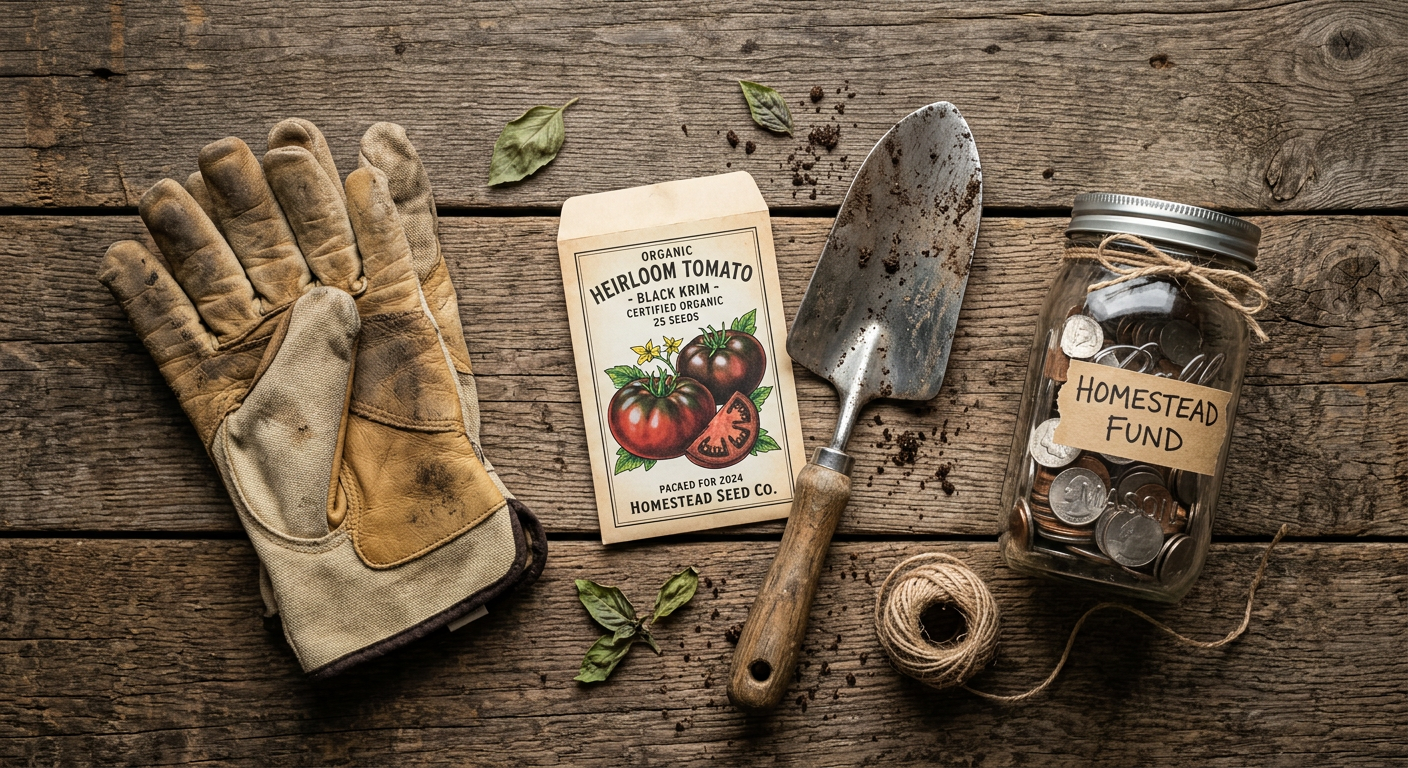
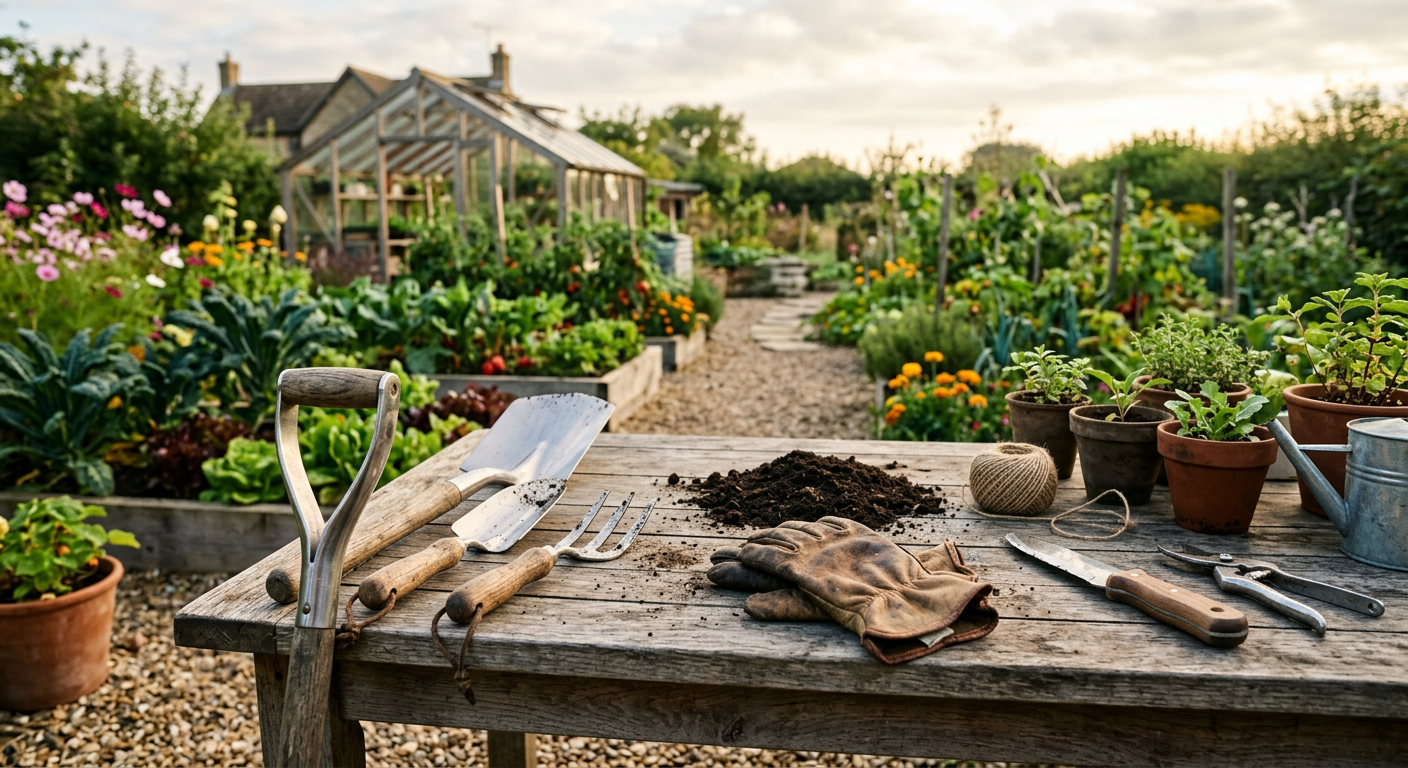
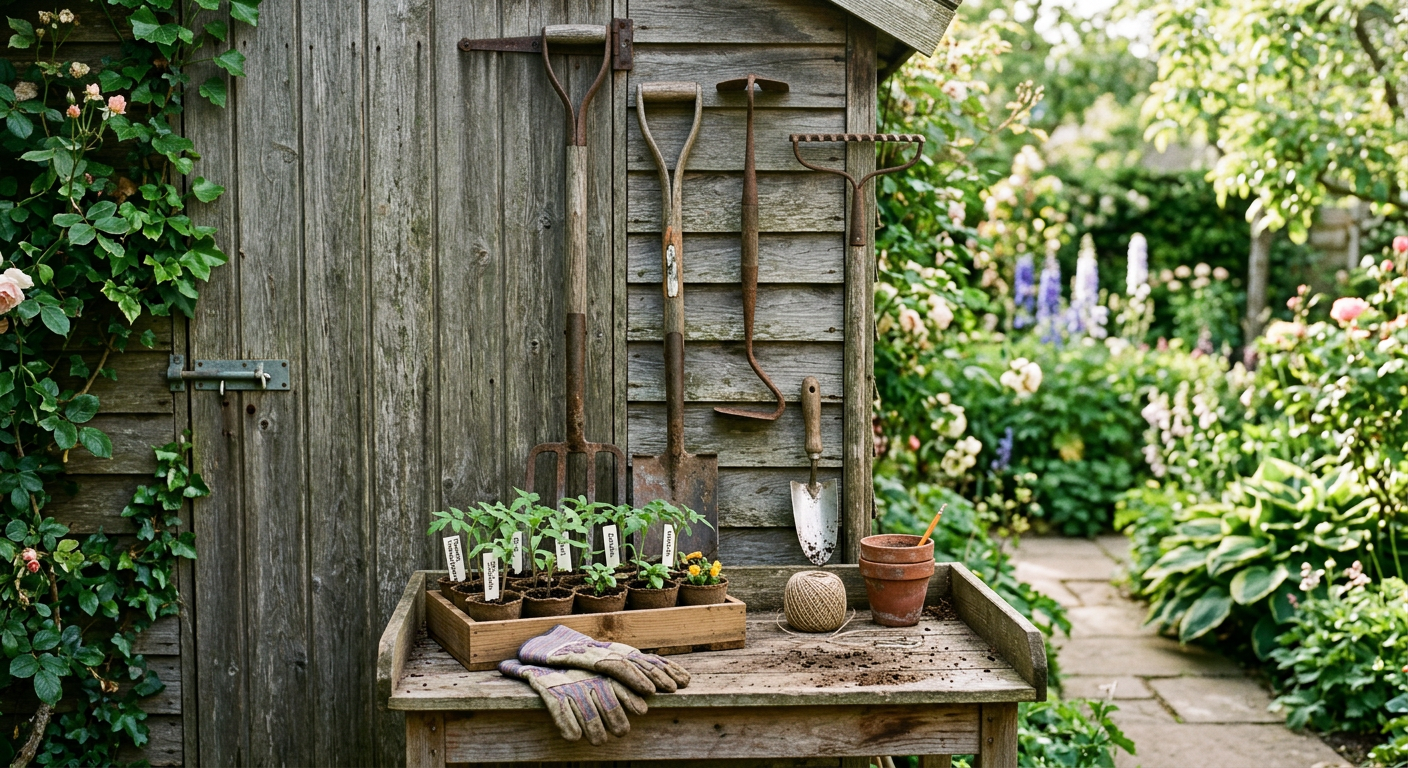
    !An essential homesteading supplies list for beginners featuring hand tools and garden gloves on a wooden table.

    Most people think you need a hundred-acre ranch and a brand-new tractor to start living the dream, but honestly? I started with a few pots on a balcony and a cheap pair of gloves. The truth is, the right homesteading supplies list for beginners focuses on quality over quantity and versatility over flashiness.

    🎯 Quick Answer: Your must-have homesteading supplies include high-quality hand tools (shovels, hoes), food preservation gear (canning jars), basic fencing, and reliable seed banks. Focus first on tools that serve multiple purposes to keep your initial investment low and your productivity high.

    🌱 Start Your Homestead Plan →

    🔑 Key Takeaways

    * Invest in multi-purpose tools to save space and money.

    * Prioritize food preservation gear early to avoid harvest waste.

    * Good footwear and gloves are non-negotiable for safety.

    * Start small with water management and fencing essentials.

    * Focus on soil health tools like broadforks and compost bins.

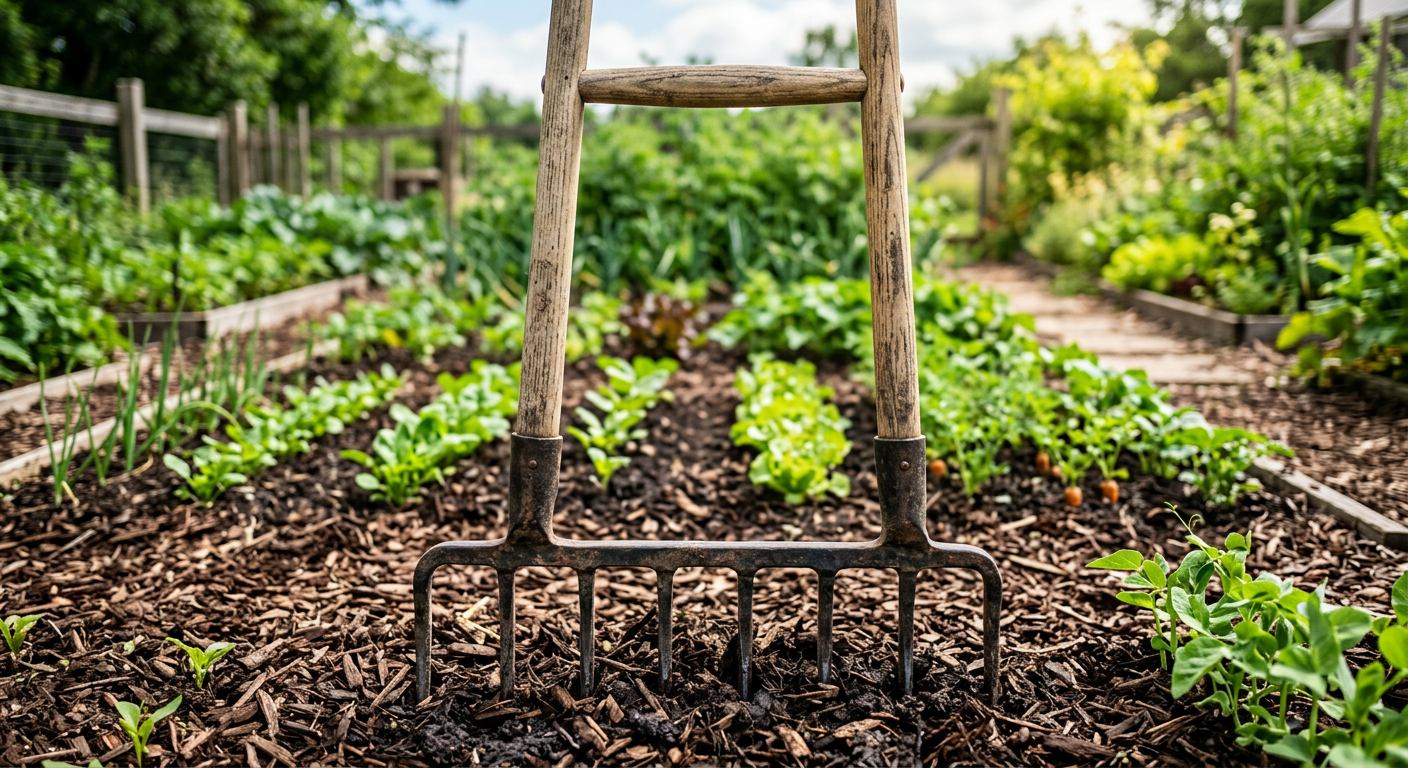
    !Using a metal spade for [gardening, a key item on any homesteading supplies list for beginners.](https://xlvvlujsctgiorcwbtkv.supabase.co/storage/v1/object/public/blog-images/homesteading-supplies-list-for-beginners-the-essentials/after_intro-1776179914087.png)

    1. Gardening Tools: The Foundation of Self-Sufficiency

    Every homesteading supplies list for beginners begins in the dirt. You don’t need a gas-powered tiller that will break your back and your budget. Instead, focus on a high-quality stainless steel spade and a sturdy garden rake. These two tools will handle 80% of your initial yard work.

    I highly recommend adding a broadfork to your kit. It aerates the soil without flipping it, which keeps those helpful microbes exactly where they belong. Pair this with a collection of heirloom seeds that you can save and replant next year. It’s the ultimate way to close the loop on your food production.

    Don’t skip this — it’ll save you hours (and money).

    Now that you’ve got the tools to grow the food, you need to think about how you’re going to keep it from spoiling—and that’s where things get really fun.

    2. The Kitchen Kit: Preserving the Harvest

    Growing the food is only half the battle; the real magic happens in the kitchen. When building out your homesteading supplies list for beginners, look for a reliable water-bath canner or, better yet, a pressure canner. A pressure canner allows you to preserve low-acid foods like beans and meats safely.

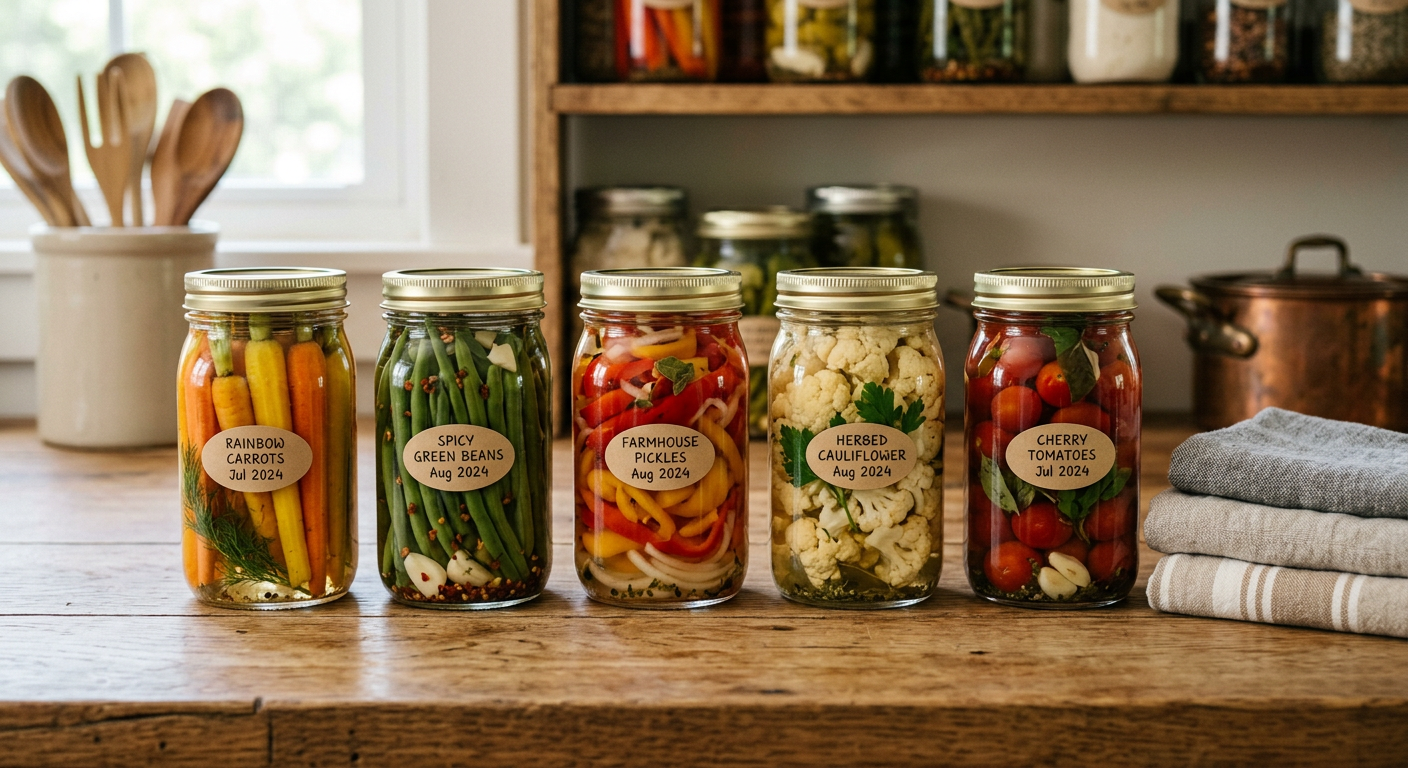
    Stock up on glass Mason jars, new lids, and a good fermentation crock. Fermenting is one of the easiest ways to dive into homesteading because it requires zero electricity and adds a massive boost of probiotics to your diet.

    📋 Get the Beginner Checklist →

    Keep reading — this is where most people mess up.

    Once your kitchen is stocked, you’ll find that your focus shifts from the counter to the perimeter of your property.

    3. Livestock Essentials: Fencing and Feed

    Even if you’re only starting with three chickens, livestock requires a specific set of tools. You’ll need galvanized steel waterers and feeders that can withstand the elements. Plastic might be cheaper, but it cracks in the winter and warps in the summer heat.

    Hardware cloth is the gold standard for your homesteading supplies list for beginners. Unlike standard chicken wire (which only keeps chickens in), hardware cloth keeps predators out. Don’t learn the hard way like I did—raccoons are surprisingly clever with their paws.

    But wait until you hear about the one tool that makes moving heavy bags of feed feel like a breeze.

    !A high-quality broadfork used for soil aeration, part of a homesteading supplies list for beginners.

    4. Maintenance and Repair: The “Homesteaders Toolbox”

    You are now the plumber, the carpenter, and the mechanic. A solid cordless drill, a heavy-duty wheelbarrow, and a high-quality pocket knife are absolute essentials. I’ve found that a wheelbarrow with two wheels in the front is much more stable on uneven terrain than the traditional single-wheel version.

    Also, keep a “fix-it” bucket handy. This should include zip ties, duct tape, fencing pliers, and extra twine. It’s the small stuff that usually breaks when you’re three miles from the nearest hardware store and the sun is going down.

    This next part? Nobody talks about it, but it changed everything for us.

    5. Personal Gear: Protecting the Homesteader

    We often spend so much on the animals and the garden that we forget to take care of ourselves. A pair of waterproof, insulated boots will save your toes during those muddy spring chores. Look for brands that offer lifetime warranties because you will put them to the test.

    High-quality leather work gloves are another must. They protect against thorns, splinters, and blisters that can put you out of commission for days. Homesteading is a marathon, not a sprint, and your body is your most important tool.

    💡 Pro Tips

    * Buy Secondhand First: Scour Facebook Marketplace and estate sales for shovels, rakes, and canning jars. Often, the older tools are made of better steel than the new stuff.

    Focus on One Project: Don’t buy the whole homesteading supplies list for beginners at once. Buy what you need for the next* project only.

    * Organization is Key: Get a wall-mounted rack for your hand tools. Tools left on the ground rust faster and become a tripping hazard.

    * Keep a Journal: A simple notebook to track what works and what doesn’t is just as important as a shovel.

    ⚠️ Beginner Mistakes to Avoid

    * Buying Cheap Tools: You’ll end up buying them twice. It’s better to have one great shovel than three flimsy ones.

    * Overcomplicating the First Year: You don’t need a tractor for a half-acre garden. Master the hand tools first.

    * Neglecting Tool Care: If you don’t oil your wooden handles and clean the mud off your blades, they won’t last the season.

    * Ignoring the Water Source: Not having enough hoses or a reliable water barrel system can lead to a lot of heavy lifting you didn’t plan for.

    !Glass jars for food preservation, a must-have on a homesteading supplies list for beginners.

    Frequently Asked Questions

    What is the most important tool for a new homesteader?

    A high-quality, sharp spade. Whether you are planting trees, digging a fence post, or turning compost, a good spade is utilized daily.

    Should I buy a tiller or a broadfork?

    For beginners, a broadfork is usually better. It’s cheaper, doesn’t require fuel, and preserves your soil structure much better than a motorized tiller.

    How many canning jars do I really need?

    Start with 2-3 dozen quart jars and 2 dozen pint jars. You will be surprised how quickly they fill up once your garden starts producing.

    Where can I find affordable homesteading supplies?

    Check local farm auctions, Craigslist, and thrift stores. Specifically, look for high-quality vintage brands that just need a little sanding and oil.

    Getting started doesn’t have to be overwhelming. Focus on the basics, buy the best you can afford, and take it one day at a time. This lifestyle is all about the journey and the lessons learned along the way.

    What’s your biggest challenge with finding the right tools for your space? I’d love to hear your story in the comments below!

    🔧 See Recommended Tools →


    📚 More From Our Homestead

    Ready to Start Your Homestead Journey?

    Free guides, checklists, and tools to help you build your dream homestead.
    Explore Free Resources →

  • Homesteading Without Land? Get Experience Now!

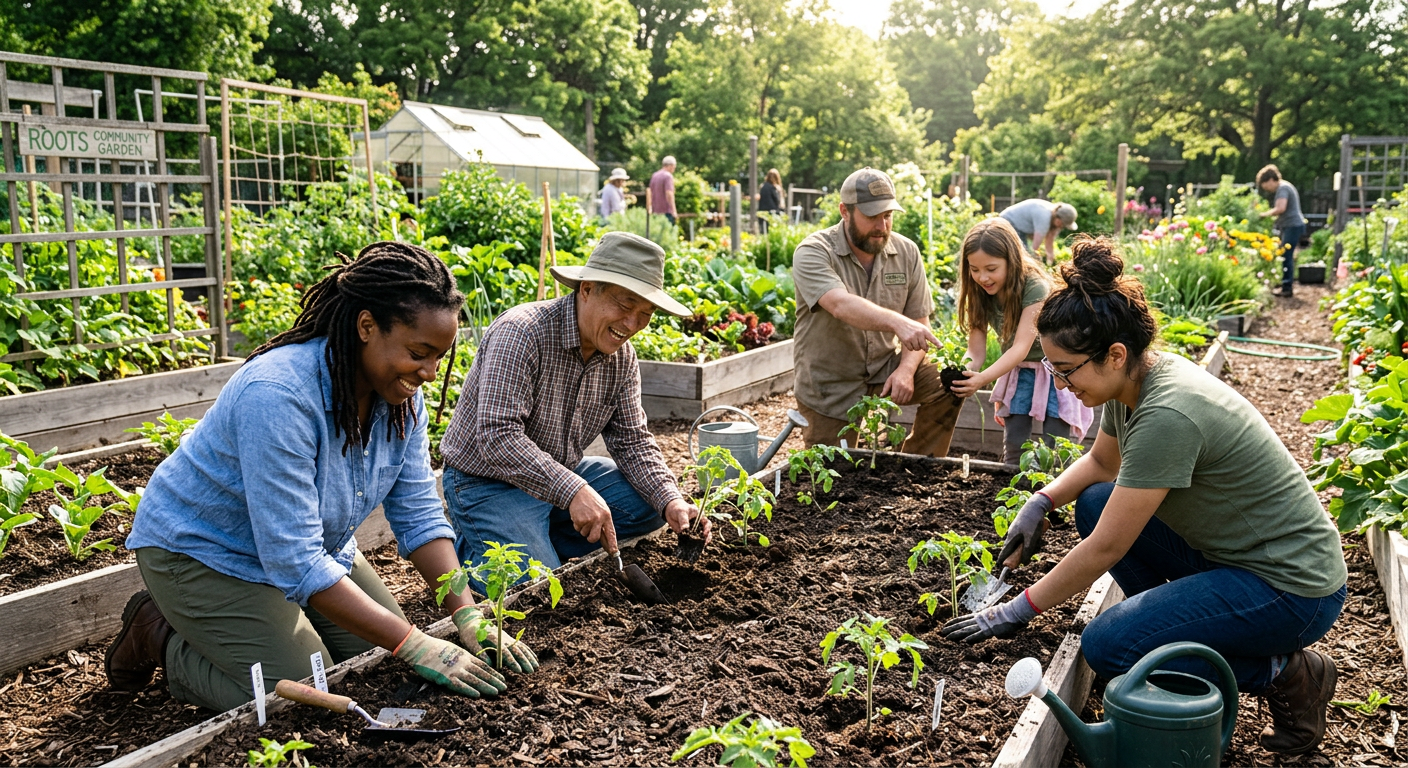
    !People gaining hands-on gardening skills to learn how to get homesteading experience without owning land.

    When we first started dreaming about our homestead, we didn’t have a single acre to our name. We were living in a small city apartment, watching YouTube videos and devouring books, feeling like we were a million miles away from our goal. But then we realized something crucial: you don’t need a farm to start farming in a small way.

    🎯 Quick Answer: You can absolutely get homesteading experience without owning land by actively seeking out opportunities like WWOOFing, volunteering at local farms, joining community gardens, participating in skill-share groups, and even practicing micro-homesteading in your current space. It’s all about getting your hands dirty and building practical skills.

    🌱 Start Your Homestead Plan →

    🔑 Key Takeaways

    * WWOOFing & Farm Stays: Immerse yourself in a working homestead environment, learning directly from experienced farmers, often in exchange for room and board.

    * Volunteer Locally: Reach out to nearby farms, community gardens, or even permaculture projects for hands-on experience without a long-term commitment.

    * Community Gardens: Gain gardening skills, connect with like-minded individuals, and learn about local growing conditions in a shared space.

    * Skill-Share & Workshops: Look for local workshops on canning, preserving, animal husbandry, foraging, or carpentry to build specific skills.

    * Micro-Homesteading: Start small in your current home – grow herbs on a windowsill, learn to preserve, bake bread, or raise small livestock like quail, if allowed.

    * Network Relentlessly: The homesteading community is incredibly supportive. Go to farmers markets, join online groups, and make connections.

    Why Hands-On Experience is Non-Negotiable

    Books, blogs, and documentaries are fantastic resources, and believe me, we’ve consumed our fair share! But there’s a world of difference between reading about raising chickens and actually catching a flapping hen, or between watching a video on canning tomatoes and feeling the heat of the boiling water bath, smelling the sweet aroma, and realizing you forgot to sterilize your jars. That’s real-life learning, and it’s priceless.

    The Value of Making Mistakes (Safely)

    We learned more from our first batch of failed sourdough and our first wilted tomato plants than from a dozen perfect recipes. When you’re trying to get homesteading experience without owning land, you have the huge advantage of making those beginner mistakes on someone else’s dime and watch. This lowers the stakes and builds your confidence gradually. Imagine trying to grow your family’s food on your brand-new, expensive land, only to then discover you don’t know a weed from a crop! Trust us, it’s better to learn the hard way on a small scale first.

    Building Your Skill Stack

    Homesteading isn’t one skill; it’s a whole stack of them. From gardening and animal care to food preservation, basic carpentry, and even financial planning, they all interconnect. Each piece of experience you gain, no matter how small, adds to your overall capability. We always tell people, and we truly believe it, that mastering essential homesteading skills beginners need is a marathon, not a sprint.

    Ready to dive into the nitty-gritty of how we built our experience? Let’s get started!

    Keep reading — this is where most people mess up.

    WWOOFing and Farm Apprenticeships

    “World Wide Opportunities on Organic Farms,” or WWOOF, was one of the first avenues we explored. It’s a global network where volunteers (WWOOFers) live and work on organic farms for a few weeks to several months, usually in exchange for food and accommodation. We didn’t do a full WWOOFing stint ourselves due to young kids at the time, but some friends of ours did, and they rave about the experience.

    #### What to Expect from WWOOFing

    * Work Schedule: Typically 4-6 hours a day, 5-6 days a week. It varies wildly from farm to farm.

    * Tasks: Everything from planting, weeding, harvesting, animal care (chickens, goats, cows), fencing, mucking stalls, cooking, and even building projects.

    * Cost: You typically pay for your travel to and from the farm, and sometimes a small membership fee to access the WWOOF network. Food and lodging are usually provided by the host.

    * Timeframe: From a single weekend to several months or even a year.

    We even looked into specific farm apprenticeships. These are often more structured, sometimes paid, and offer deeper dives into specific areas like dairy farming or market gardening. They usually require a longer commitment, often a full growing season, and can be an incredible way to learn if you’re serious about a specific niche.

    But what if you can’t pick up and move for weeks at a time? There are plenty of local options.

    Local Volunteer Opportunities & Community Gardens

    This is where we really started to gain traction back when we were still in our suburban home. We knew we needed to figure out how to get homesteading experience without owning land close to home, and local volunteering was the perfect fit. We started by simply Googling “community garden near me” and “volunteer farm [my city]”.

    Volunteering at Local Farms

    Many small, local farms – especially those focused on organic or sustainable practices – are often thrilled to have an extra set of hands. We started by reaching out to a small CSA (Community Supported Agriculture) farm about 20 minutes from us. We offered to help out 4 hours every Saturday morning, just to learn.

    #### Our Experience & What We Learned:

    * Hands-On Learning: We learned to properly transplant seedlings, weed rows efficiently, identify common pests, and even help with small animal chores like feeding chickens and collecting eggs. We got great insight into raising backyard chickens: pros, cons & what to expect before we even committed to our own flock!

    * Networking: We met other aspiring homesteaders, farm owners, and seasoned gardeners. These connections were invaluable.

    * Realistic Expectations: We quickly realized that farming is hard work, physically demanding, and full of unexpected challenges. It’s not just idyllic harvesting photos!

    * Cost: Zero, besides our time and gas money. We often went home with a bag of fresh veggies as a thank you, which was an amazing bonus!

    Embracing Community Gardens

    If a full-on farm seems daunting, a community garden is a fantastic stepping stone. We had a small plot (about 10×10 feet) assigned to us for a nominal annual fee, around $50, which covered water and basic tools.

    #### Community Garden Benefits:

    * Grow Your Own Food: You get a dedicated space to grow vegetables, herbs, and flowers, even without your own yard. This was our first real attempt at a small backyard vegetable garden.

    * Mentorship: You’re surrounded by experienced gardeners who are usually eager to share their knowledge. We learned so much from our plot neighbors!

    * Shared Resources: Tools, sometimes even seeds or seedlings, are often shared among members.

    * Pest & Disease Learning: You’ll face real-world challenges like powdery mildew or squash bugs, and learn how to manage them, often with advice from more seasoned gardeners.

    This is a great option to explore if you want to learn how to start a small backyard vegetable garden: beginner guide style but are limited on space.

    This next part? Nobody talks about it, but it changed everything for us.

    📋 Get the Beginner Checklist →

    Skill-Shares, Workshops, and Micro-Homesteading at Home

    While getting out on the land is crucial, don’t underestimate the power of learning and practicing skills right where you are. This is a huge part of how to get homesteading experience without owning land.

    Local Workshops and Skill-Shares

    We sought out local workshops on specific skills we knew we’d need. We found classes at our local extension office, community colleges, and even independent homesteaders offering their expertise.

    #### What We Hunted Down:

    * Food Preservation: We took classes on canning (water bath and pressure canning) and fermenting. Learning to preserve eggs long-term (no fridge needed!) was a game-changer for our future plans, even if we only had store-bought eggs to practice with at the time.

    * Animal Husbandry Basics: A local farm offered a one-day workshop on chicken care, covering everything from coop setup to common diseases. While we didn’t have chickens yet, the knowledge was invaluable.

    * Soap Making & Bread Baking: These aren’t just hobbies; they are true homesteading skills that reduce reliance on store-bought goods.

    * Carpentry Basics: Even just learning how to use a saw and drill safely can save you a ton later when building coops, fences, or raised beds. This directly relates to the essential homesteading tools to buy first.

    We probably spent a few hundred dollars total on these workshops over a couple of years, but the knowledge gained was worth thousands in avoided mistakes and future self-sufficiency.

    Micro-Homesteading in Your Current Space

    This is where the magic really happens without an acre to your name. We started small, right in our tiny backyard and even indoors.

    #### Our Micro-Homesteading Journey:

    * Container Gardening: Our patio became a mini-farm. Tomatoes, peppers, herbs, and even small potatoes thrived in large pots. This was excellent practice for understanding soil, watering, and pest identification.

    * Indoor Growing: We grew herbs on our windowsill and even experimented with a small indoor grow light for salad greens in the winter. Talk about tiny space, big harvest!

    * Composting: Even in our small yard, we started a worm compost bin (vermicomposting) for kitchen scraps. It was gross at first, but incredibly rewarding to turn waste into rich soil.

    * Scratch Cooking & Preserving: We became avid sourdough bakers, made our own condiments, fermented vegetables, and learned to cook from whole ingredients. We canned anything we could get our hands on from the farmers’ market. This was a direct application of the skills learned in workshops.

    * Small Livestock (where permitted): We weren’t allowed chickens in our suburb, but some friends of ours started raising quail for eggs and meat in a small hutch, which they could keep in their shed. Always check local ordinances, but if allowed, quail or even certain rabbit breeds can be excellent ways to gain best low maintenance farm animals experience without vast acreage.

    Don’t skip this — it’ll save you hours (and money).

    !A volunteer on a farm learning how to get homesteading experience without owning land through WWOOFing.

    Connecting with the Homesteading Community

    One of the most valuable resources you have is other people. The homesteading community, both online and in real life, is generally incredibly generous with their knowledge and support. We’ve learned as much from casual conversations as we have from formal classes.

    Online Forums & Social Media Groups

    Join Facebook groups, Reddit communities, and online forums dedicated to homesteading, permaculture, or specific skills like gardening or animal husbandry. Ask questions, share your small wins, and learn from others’ mistakes and successes. We found some amazing local groups this way that helped us find volunteer opportunities.

    Farmers Markets and Local Gatherings

    Farmers’ markets aren’t just for buying produce; they’re excellent networking hubs. Talk to the farmers and vendors – many of them are homesteaders! Ask about their methods, challenges, and if they ever need help. We built relationships this way that led to invitations to farm tours and even help with a harvest day.

    Additionally, look for local events: seed swaps, garden tours, permaculture meetups, or fairs focusing on sustainable living. These are fantastic places to connect with people who share your passion and can offer advice or opportunities.

    💡 Pro Tips

    * Start Small, Start Now: Don’t wait for the perfect plot of land. Every skill you practice today, no matter how minor, builds your homesteading foundation.

    * Document Your Learning: Keep a journal of your gardening successes and failures, recipes you try, and skills you learn. This becomes an invaluable reference later.

    * Be Proactive & Offer Value: When seeking volunteer opportunities, don’t just ask to learn. Offer specific help. “I can help weed for 3 hours every Sunday,” or “I’m handy with tools and could help with a building project.” Farm owners are busy people.

    * Safety First: Always prioritize safety, especially when working with tools, animals, or food preservation. Take workshops seriously and ask questions.

    * Embrace the Journey: Homesteading is a lifestyle, not a destination. Enjoy the process of learning and growing.

    ⚠️ Beginner Mistakes to Avoid

    * Waiting for the “Perfect Land”: This is the biggest trap! Don’t put off learning because you don’t have your ideal homestead yet. Start gaining experience today.

    * Over-Committing: Don’t sign up for a 6-month farm apprenticeship if you’re not sure you can handle the physical demands or time commitment. Start with shorter volunteer stints.

    Not Asking Questions: When you’re volunteering or in a community garden, ask everything*. Most experienced homesteaders love to share what they know. There’s no such thing as a stupid question (well, almost).

    * Ignoring Local Ordinances: Before you start raising any animals or even building certain structures in a community garden, always check local rules and regulations. This saved us a headache with compost bin placement!

    * Isolating Yourself: Homesteading can be tough. Don’t try to go it alone. Connect with others, share your struggles, and celebrate your successes.

    !Learning food preservation as a way for how to get homesteading experience without owning land.

    Frequently Asked Questions

    ### Can I really learn homesteading skills if I live in an apartment?

    Absolutely! We started in a small apartment ourselves. You can practice food preservation, make sourdough, grow herbs and microgreens on windowsills, learn to sew, knit, mend, make natural cleaners, and research extensively. These are all vital homesteading skills!

    ### How much does it cost to get homesteading experience without owning land?

    It can range from completely free if you volunteer your time, to a few hundred dollars for WWOOFing fees (plus travel), or specific workshops. Community garden plots usually have a small annual fee (around $25-$100). Compared to the cost of buying land and making big mistakes, it’s a very affordable way to learn.

    ### How long should I volunteer or WWOOF before buying land?

    There’s no set timeline. Some people volunteer for a few weekends, others for several years. It depends on your learning style, available time, and how much confidence you want to build. We spent about two years actively volunteering and micro-homesteading before we felt ready for our own small acreage.

    ### What kind of local farms should I look for?

    Focus on small, family-owned farms, organic farms, U-pick operations, CSAs, or educational farms. These are often more open to volunteers and sharing knowledge than large commercial operations. Also, check with your local university extension office; they often have lists of farms or programs.

    ### Is urban homesteading a good way to get experience without land?

    Yes, absolutely! Urban homesteading with kids or just by yourself is a fantastic way to develop essential skills like intensive gardening, composting, food preservation, and even small-scale animal husbandry (like chickens or rabbits, where permitted). It teaches you how to maximize limited space and resources, which is a core homesteading principle.

    Getting started on your homesteading journey doesn’t require waiting for the perfect piece of land. It requires a willingness to learn, get your hands dirty, and connect with others. We know this firsthand. Every small step you take today builds the foundation for the homestead of your dreams tomorrow. So go ahead, find that community garden, sign up for a workshop, or start that container garden on your patio!

    What’s your biggest challenge with learning homesteading skills without land? I’d love to hear your story in the comments!

    🔧 See Recommended Tools →


    📚 More From Our Homestead

    Ready to Start Your Homestead Journey?

    Free guides, checklists, and tools to help you build your dream homestead.
    Explore Free Resources →

  • Finding Your Homestead: A Beginner’s Property Guide

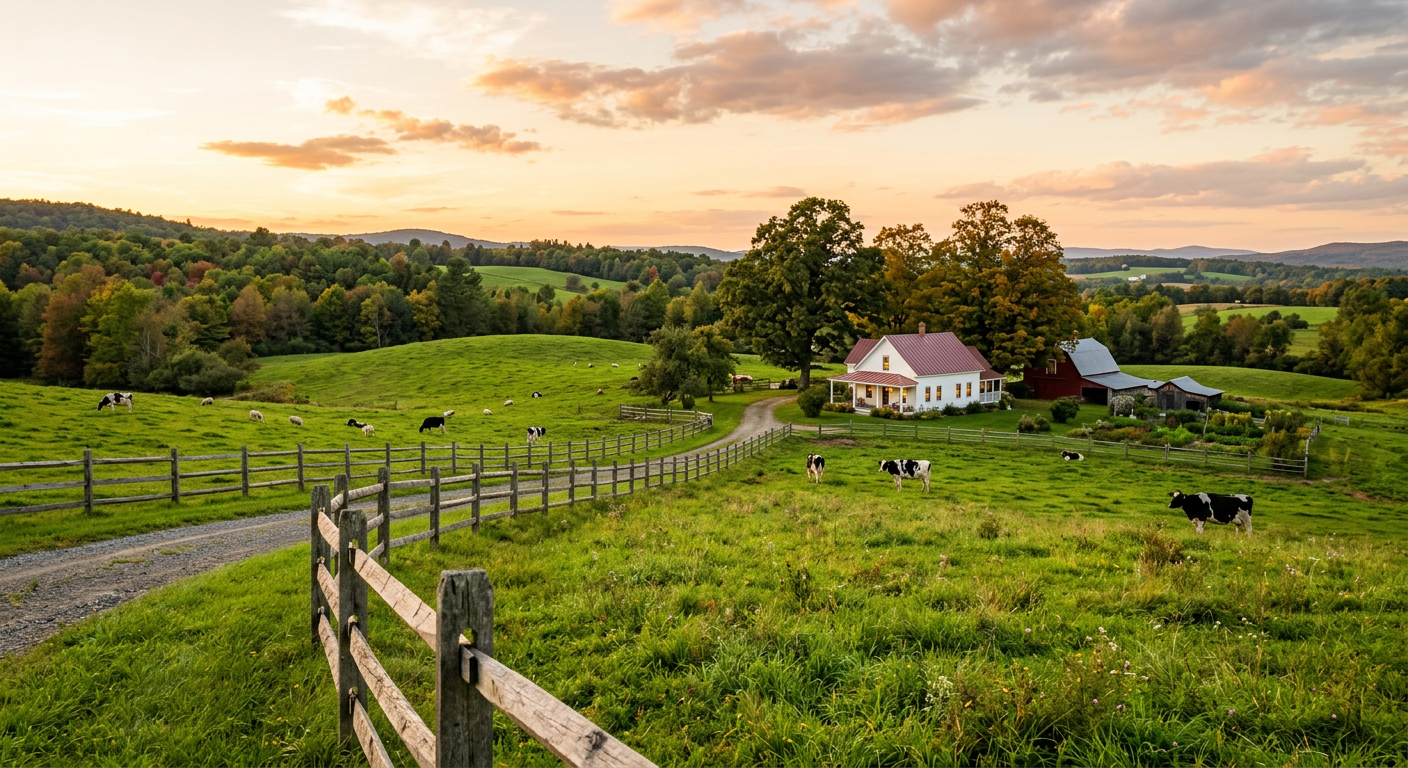
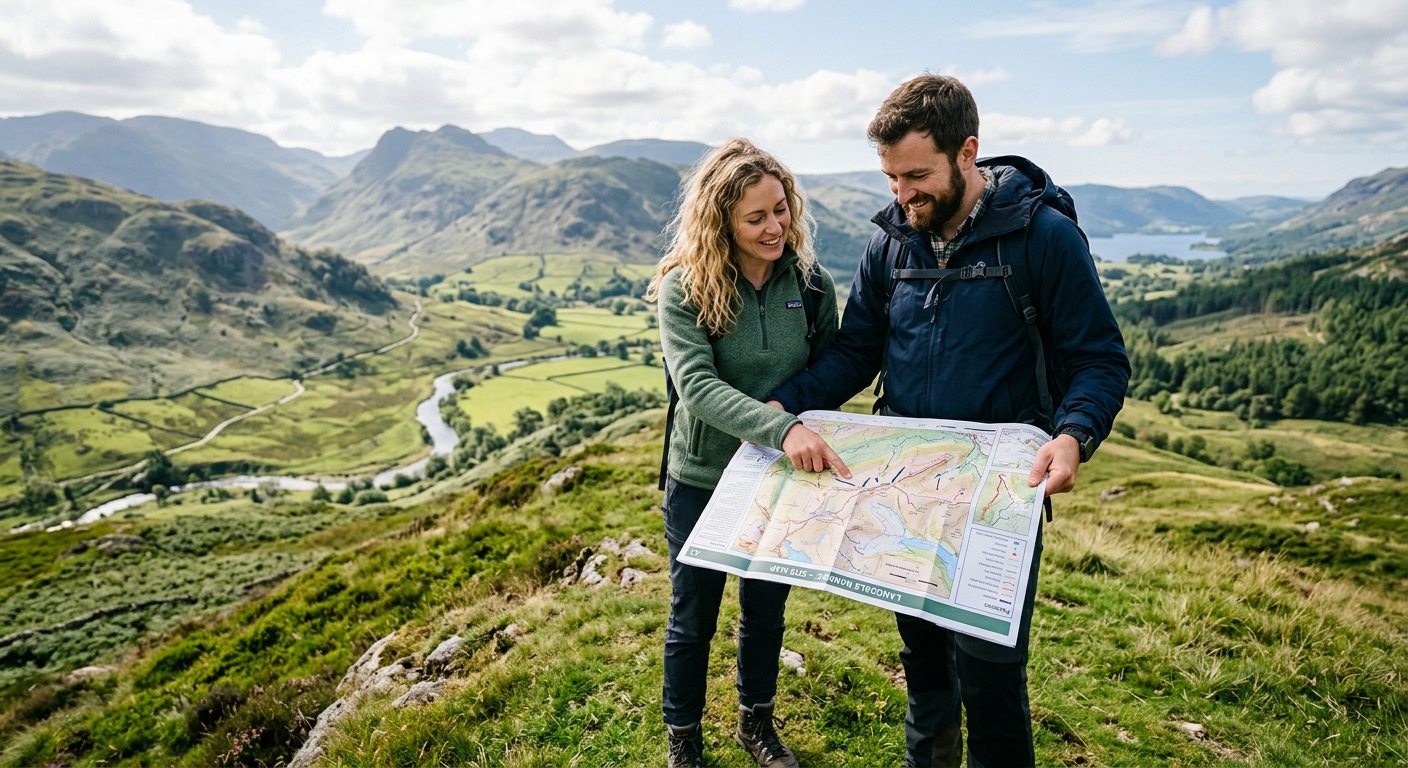
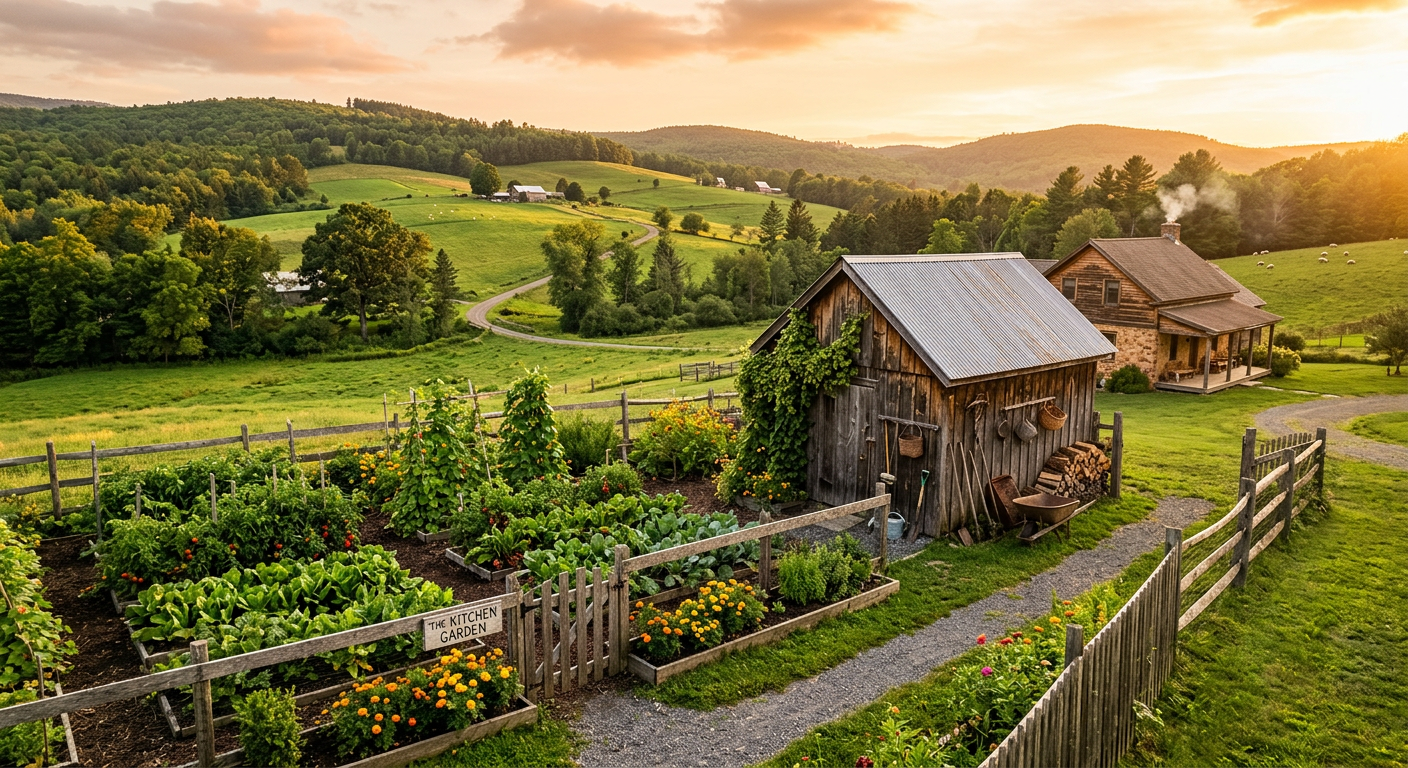
    !A scenic farm landscape showing how to choose a homestead property for beginners with ideal acreage and views.

    When we first started dreaming of homesteading, the idea of finding our perfect patch of land felt like searching for a unicorn – magical, elusive, and maybe a little impossible. We spent countless evenings poring over property listings, our heads swimming with zoning laws, well depths, and septic systems. It was overwhelming, to say the least, but also incredibly exciting to imagine our future on that land.

    🎯 Quick Answer: Choosing a homestead property requires balancing your dreams with practical realities like water access, soil quality, zoning, and budget. For beginners, start by defining your homesteading goals, then prioritize features that support those goals, always keeping an eye on accessibility and infrastructure.

    🌱 Start Your Homestead Plan →

    🔑 Key Takeaways

    * Define Your Vision: Before looking at properties, clarify your homesteading goals (gardening, livestock, off-grid, etc.).

    * Location, Location, Location: Consider climate, community, and proximity to resources you might still need.

    * Water is Life: Assess water sources like wells, springs, or municipal hook-ups – this is non-negotiable!

    * Soil Matters: Good soil is the foundation of a productive garden; poor soil can be remediated but takes time and money.

    * Zoning & Regulations: Understand local laws regarding animals, structures, and land use to avoid costly surprises.

    * Beyond the Price Tag: Factor in infrastructure costs (well, septic, power) and potential land improvements.

    !A couple planning land use while learning how to choose a homestead property for beginners.

    Understanding Your Homesteading Dreams First

    Before you even glance at a real estate listing, we found it crucial to sit down and honestly answer some big questions about our homesteading dreams. What do you really want to do on your land? This isn’t just about fun, it’s about practicalities that will dictate the size, location, and features you need when you’re asking how to choose a homestead property for beginners.

    What are Your Homesteading Goals?

    For us, our initial goal was to grow most of our family’s vegetables, raise a small flock of chickens for eggs, and eventually add a couple of dairy goats. This meant we needed ample garden space, secure fencing potential, and enough acreage to keep animals happily (and legally). If your dream is a sprawling orchard, you’ll need healthy soil and good drainage. If you envision a small-scale cattle operation, pasture quality and water access become paramount. Conversely, if you’re thinking urban homesteading with kids, your property needs will look very different.

    Desired Level of Self-Sufficiency

    Are you aiming for completely off-grid living, or do you just want to supplement your groceries? Off-grid will demand specific features like south-facing slopes for solar, reliable water sources, and potentially a location further from infrastructure. We decided early on to stay connected to grid power for convenience, but with plans for solar backup down the road. This decision significantly impacted the types of properties we considered.

    * Deep Self-Sufficiency: Expect to prioritize natural resources, isolation, and larger acreage.

    * Partial Self-Sufficiency: A smaller plot with good soil and municipal access might be perfect.

    * Budgeting for Self-Sufficiency: Remember, going off-grid can involve substantial upfront costs for systems like solar panels, well drilling, or rainwater harvesting.

    Knowing your ‘why’ will save you countless headaches down the line when you start property hunting. But before you dive in, let’s talk about the single most critical resource.

    The Non-Negotiable: Water, Water, Water

    Seriously, we cannot stress this enough. Water isn’t just nice to have; it’s absolutely essential for a thriving homestead. Whether you’re watering your backyard vegetable garden, hydrating your livestock, or simply living comfortably, reliable water access is paramount when considering how to choose a homestead property for beginners.

    Identifying Water Sources

    When we looked at properties, the first question we asked was always about water. Is there a well? How deep is it? What’s the yield? Is it a shared well? For us, a reliable, private well was a must-have. Asking for well logs and testing the water quality is non-negotiable.

    * Private Wells: Often the most desirable for homesteaders. Inquire about depth, pump age, and historical water levels.

    * Natural Springs/Creeks: Fantastic assets, but check for seasonal fluctuations and potential contamination from upstream sources.

    * Municipal Water: Convenient, but limits self-sufficiency and comes with monthly bills.

    * Rainwater Harvesting: An excellent supplement, but rarely sufficient as a sole source for a full homestead, especially in arid regions.

    Water Rights and Quality

    Many states have complex water rights laws. Make sure you understand what rights come with the property, especially if it includes a stream or shared well. We once looked at a beautiful piece of land with a shared well, but the agreement was so vague and complex that we walked away. Plus, get that water tested! Our local extension office offered affordable water testing for common contaminants like coliform bacteria and nitrates. You don’t want to dig in for years only to find your water is unsafe.

    Keep reading — this is where most people mess up.

    Soil, Topography, and Microclimates

    After water, the ground beneath your feet is your next biggest asset (or liability!). Thinking about how to choose a homestead property for beginners often overlooks the actual composition of the land itself. Our first garden on our current homestead taught us a lot about what good soil isn’t.

    Soil Quality: A Gardener’s Best Friend

    We naively bought our first property assuming all ‘farm land’ was good land. Turns out, our initial soil was heavy clay, compacted, and nutrient-depleted. Building it up took years of adding compost, cover crops, and amendments. If you can get a soil test done before buying, do it! If not, observe native plants – do they look healthy and robust? Are there large swaths of invasive weeds that indicate poor soil? Or, even better, look at what the current owners are growing. Lush, healthy gardens are a good sign.

    * Ideal Soil: Loamy, well-draining, rich in organic matter (dark and crumbly).

    * Challenging Soils: Heavy clay (poor drainage), sandy (dries quickly, nutrient leaching), rocky (limits root growth).

    * Remediation: All soils can be improved, but it’s a long-term investment in time, labor, and materials.

    📋 Get the Beginner Checklist →

    Topography and Drainage

    Is the land flat, gently sloped, or steep? Gentle slopes are often ideal for drainage and passive solar design. Flat land can be prone to standing water if drainage isn’t good. Steep slopes, while offering great views, can be challenging for gardening, building, and even driving equipment. We learned to look for natural contours that could be used for things like swales or terracing.

    Understanding Microclimates

    Every piece of land has its own unique microclimates. Where does the sun hit strongest? Which areas are sheltered from prevailing winds? Are there frost pockets? On our homestead, we have a low-lying area that reliably gets frost two weeks earlier and lasts two weeks longer than other parts of our property. This affects where we plant tender crops or choose to locate certain animal shelters. Observing how current owners have laid out their property can offer valuable clues.

    This next part? Nobody talks about it, but it changed everything for us.

    Zoning, Regulations, and Neighborhood Vibe

    This is the dry, unglamorous part of homesteading, but it’s absolutely critical. Ignoring zoning and local regulations can turn your dream into a nightmare, fast. When we were learning how to choose a homestead property for beginners, we almost made a huge mistake by not digging deep enough into these details.

    Decoding Zoning Laws

    Every county and sometimes even specific townships have zoning laws that dictate what you can and can’t do on your land. Can you have livestock? If so, what kind and how many per acre? Are there restrictions on building new structures like a barn or a greenhouse? What about home-based businesses? These rules are usually available through the county planning department or online. Don’t take a realtor’s word for it; verify everything yourself.

    * Agricultural Zoning: Generally most flexible for homesteaders, but still check specific animal limits.

    * Rural Residential: Often allows some animals and gardening, but can have tighter restrictions on types or numbers.

    * Conservation/Flood Zones: Can severely limit building and land use.

    * HOAs (Homeowners Associations): A HUGE red flag for homesteaders, as they often have very restrictive rules about animals, outbuildings, and even front yard gardens.

    Permitting and Regulations

    Beyond zoning, there are permits for everything from new wells and septic systems to adding a chicken coop (believe it or not!). Understand what local building codes and health department regulations might affect your plans. Some areas have specific rules about minimum setbacks from property lines for animal enclosures or compost piles.

    The Importance of Neighbors and Community

    While finding your slice of heaven, don’t forget the human element. Drive through the neighborhood at different times of day. Are there other homesteaders or farmers around who could be a resource? Or are your potential neighbors hostile to things like roosters crowing at dawn? We made sure to introduce ourselves to a few neighbors before closing on our current property. Their insights were invaluable, and we’ve since built strong friendships.

    Don’t skip this — it’ll save you hours (and money).

    !A rustic water well on a rural lot, a key factor in how to choose a homestead property for beginners.

    Budgeting Beyond the Purchase Price

    It’s easy to get caught up in the listed price of the land, but the true cost of setting up a homestead goes far beyond that initial mortgage payment. When thinking about how to choose a homestead property for beginners, remember that the cheapest land isn’t always the least expensive in the long run. Our family learned this lesson the hard way.

    Infrastructure Costs

    If the property doesn’t have a well, septic system, or power hookup, you’ll need to budget for those. We looked at one property that seemed like a steal, but digging a new well was estimated at $15,000 and installing a septic system another $10,000-$20,000 – suddenly, it wasn’t such a bargain! Get quotes for these major projects before making an offer.

    * Well Drilling: Can range from $5,000 to $25,000+ depending on depth and location.

    * Septic System: Installation averages $10,000-$30,000, varying greatly by system type and soil conditions.

    * Utility Hookups: Bringing power or internet to a remote property can be surprisingly expensive, sometimes tens of thousands of dollars per pole.

    * Fencing: Essential for animals and gardens; costs add up quickly for hundreds or thousands of feet.

    Land Improvements and Tools

    Once you own the land, the work (and spending) really begins. You’ll need tools: a good tractor or four-wheeler, chainsaws, gardening implements, maybe even a small backhoe. There’s also the cost of amending soil, clearing brush, building outbuildings, and establishing gardens or pastures. We initially estimated about 15-20% of our property purchase price for initial setup costs in the first two years, and we still went over!

    * Land Clearing: Removing trees, brush, or old structures.

    * Soil Amendment: Truckloads of compost, manure, or other organic matter.

    * Outbuildings: Chicken coops, sheds, barns.

    * Access Roads/Driveways: If the property lacks good access.

    💡 Pro Tips

    * Walk the Property (Multiple Times!): Visit in different seasons if possible. See how water drains after a rain. Check for shade patterns in summer and winter.

    * Talk to the Locals: Chat with neighbors, post office staff, or folks at the local feed store. They often have invaluable insights about the area, microclimates, and community.

    * Hire a Homestead-Savvy Realtor: Finding a realtor who understands rural properties and homesteading needs can make a huge difference. They’ll know what questions to ask and what pitfalls to look for.

    * Check Cell Service & Internet: Don’t assume. Many rural areas have spotty service, which can be tough if you work from home or need emergency access.

    * Future-Proof Your Purchase: Think 5, 10, even 20 years down the line. Will this property still meet your evolving homesteading goals?

    ⚠️ Beginner Mistakes to Avoid

    * Buying Blindly: Don’t fall in love with the pretty pictures online. Always visit the property in person, multiple times if possible.

    * Ignoring Soil Tests: Planting in poor soil will lead to frustration and wasted effort. At least do a basic home test kit or dig a few holes to inspect the soil structure.

    * Underestimating Water Needs: Water isn’t just for drinking; it’s for animals, gardens, and general homestead operations. Assume you’ll need more than you think.

    * Overlooking Zoning/HOA Rules: These can kill your homesteading dreams before they even start. Verify everything with local authorities.

    * Budgeting Only for Purchase Price: This is probably the biggest mistake. Always factor in significant costs for infrastructure, tools, and land development.

    Frequently Asked Questions

    Is 1 acre enough for a homestead?

    The answer really depends on your goals! For intensive gardening, a small flock of chickens, and perhaps a few fruit trees, 1 acre can be very productive. For grazing larger animals like cows or going completely off-grid with extensive solar arrays, you’ll likely need more. For some inspiration on maximizing small spaces, you could check out this post on homestead layouts for beginners.

    What are the most important things to look for in a homestead property?

    When learning how to choose a homestead property for beginners, the absolute must-haves are reliable water access, decent soil, and favorable zoning. After that, look for defensible space, good sun exposure for gardening, and practical access to infrastructure or community when needed. Your personal goals will help prioritize the rest.

    How much does it cost to start a homestead from scratch?

    Ah, the million-dollar question! Starting a homestead from scratch can range from tens of thousands for a small, developed property to hundreds of thousands or even millions for raw land that needs all new infrastructure. We spent about $150,000 on our 5-acre property and then another $50,000+ in the first three years on well, septic upgrades, fencing, garden beds, and tools. Starting on a budget is possible, but prepare for ongoing expenses!

    Should I buy raw land or a property with existing infrastructure?

    For beginners, a property with existing (and functional!) infrastructure like a well, septic system, and a habitable dwelling is often much easier and faster to get started on. While raw land can be cheaper upfront, the costs and time to develop it can quickly surpass the savings. We opted for a property with a fixer-upper house and a working well/septic, which allowed us to move in and start gardening immediately.

    How do I check for flood zones or other environmental hazards?

    You can typically check federal flood maps (FEMA maps) online for any property address. Your local county planning department can also provide information on environmental overlays, wetlands, or other hazard zones. It’s smart to also visually inspect the land for signs of past flooding or erosion, especially after heavy rains.

    !Rich fertile soil in a hand, illustrating how to choose a homestead property for beginners with good land.

    Finding Your Place Under the Sun

    Choosing a homestead property is one of the most significant decisions you’ll make on your self-sufficiency journey. It’s exhilarating, daunting, and incredibly rewarding when you finally find ‘the one.’ Remember that no property is perfect, and every piece of land comes with its own set of challenges and opportunities. Our advice? Be patient, do your homework, and prioritize the foundational elements like water and soil. With a clear vision and a practical mindset, you’ll be well on your way to breaking ground on your own piece of paradise.

    What’s your biggest challenge with finding the perfect homestead property? I’d love to hear your story in the comments!

    🔧 See Recommended Tools →


    📚 More From Our Homestead

    Ready to Start Your Homestead Journey?

    Free guides, checklists, and tools to help you build your dream homestead.
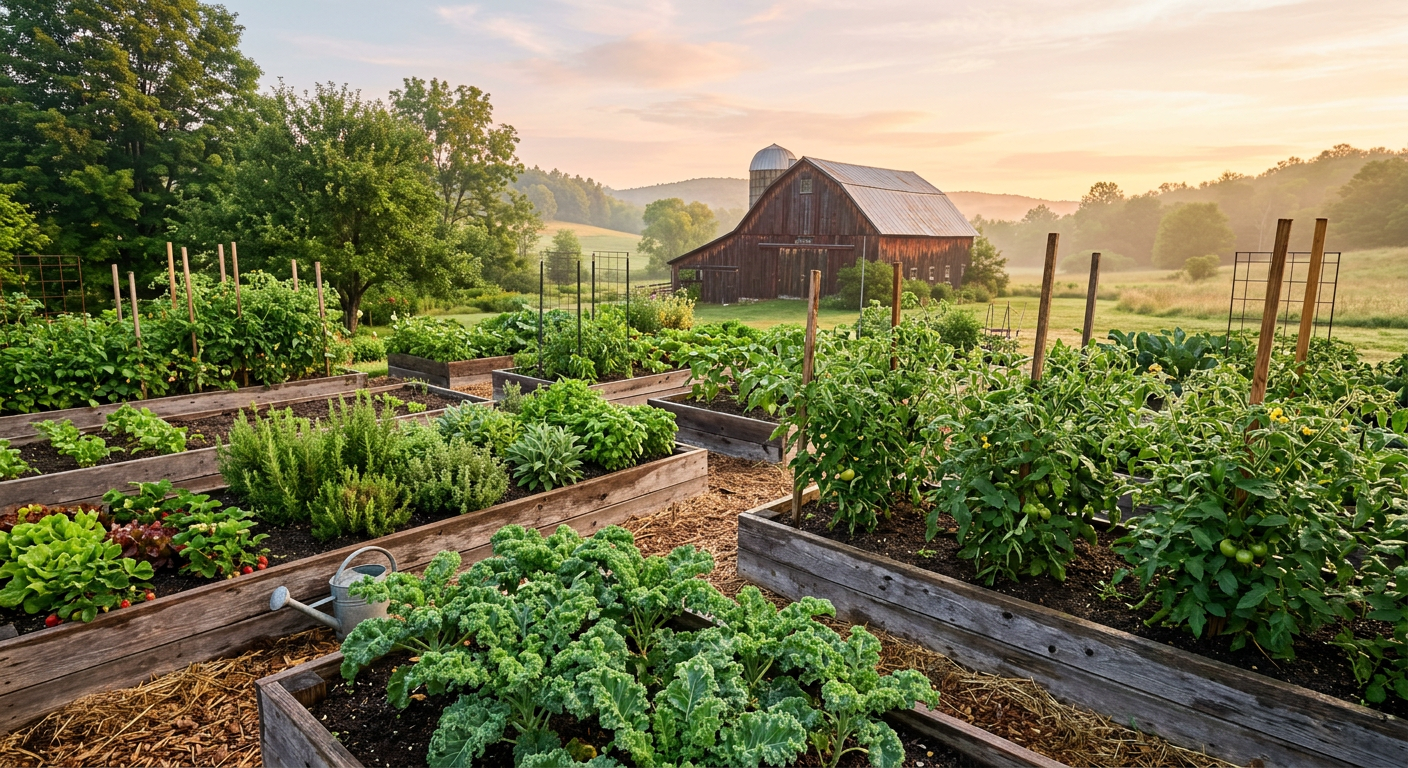
    Explore Free Resources →

  • Mastering: What Essential Homesteading Skills Beginners Need

    !A thriving farm landscape showing what essential homesteading skills beginners need for self-sufficiency.

    When we first started our homesteading journey over a decade ago, we thought it was all about growing vegetables and maybe having a chicken or two. Boy, were we in for a surprise! We quickly learned that true self-sufficiency requires a diverse toolbox of practical knowledge and hands-on abilities.

    🎯 Quick Answer: The essential homesteading skills beginners need cover basic gardening, food preservation, simple repairs, animal care, and resource management. Start small, focus on one skill at a time, and embrace continuous learning to build a resilient homestead.

    🌱 Start Your Homestead Plan →

    🔑 Key Takeaways

    * Start with Gardening: The foundation of homesteading often begins with growing your own food, even a small patch.

    * Learn to Preserve: Harvesting food is only half the battle; knowing how to store it for winter is crucial.

    * Embrace Resourcefulness: Learn basic repair skills and how to make the most of what you have.

    * Basic Animal Husbandry: If you plan on livestock, understanding their care is non-negotiable.

    * Financial Literacy: Budgeting and managing your homestead’s resources are as important as physical skills.

    * Patience and Persistence: Homesteading is a marathon, not a sprint. Be prepared for setbacks and learn from them.

    !Close up of planting a garden, one of the what essential homesteading skills beginners need first.

    Why Mastering Essential Homesteading Skills Transforms Your Life

    When we first moved to our five acres, I distinctly remember trying to fix a leaky faucet and ending up with water everywhere. My husband, bless his heart, just looked at me and said, “Well, now we know that’s not one of your essential homesteading skills!” We laughed, mopped, and then watched a YouTube video on plumbing. The point is, homesteading isn’t just about output; it’s about empowerment. It’s about knowing you can handle things yourself, rain or shine, leaky faucet or hungry chicken.

    Over the years, we’ve gone from clueless newbies to reasonably capable homesteaders, and it’s all thanks to patiently acquiring one skill at a time. It’s incredibly rewarding to look at a full pantry of canned goods or a thriving garden and know we did that.

    This isn’t just theory for us; it’s our daily life. The freedom that comes with self-reliance is unparalleled. But before you dive in, let’s explore what essential homesteading skills beginners need to really thrive – not just survive. This next part? Nobody talks about it, but it changed everything for us.

    The Foundational Philosophy: Learn by Doing

    Our biggest lesson has been to just start. Don’t wait until you know everything. When we wanted to raise chickens, we didn’t read every book first. We bought three chicks, set up a brooder, and learned as we went. We made mistakes, sure, but those became our best teachers.

    For example, our first chicken coop was a makeshift disaster! But we learned quickly about predator proofing and proper ventilation. This hands-on approach helps identify what essential homesteading skills beginners need most for their specific environment and goals.

    * Small Steps, Big Gains: Choose one skill, master it, then move to the next.

    * Embrace Mistakes: They are valuable learning opportunities, not failures.

    * Seek Mentors: Find experienced homesteaders in your area or online communities.

    Essential Homesteading Skills for Growing Your Own Food

    Growing food is often the first picture that comes to mind when we think of homesteading, and for good reason! It’s deeply satisfying to provide for your family directly from the soil. When we planted our first little garden bed, we were so proud of those three scraggly tomato plants. Now, our garden feeds us year-round, thanks to building up our skills over time.

    Understanding what essential homesteading skills beginners need for gardening means more than just putting seeds in the ground. It’s about ecological awareness and working with nature, not against it.

    Basic Gardening and Soil Management 🌱

    We started with a tiny 4×8 ft raised bed. Honestly, those first few seasons were a lot of trial and error. We learned that healthy soil isn’t just dirt; it’s a living ecosystem. We quickly had to learn about composting to enrich our soil and the importance of cover cropping to prevent erosion.

    * Composting: Turning kitchen scraps and yard waste into nutrient-rich soil. We’ve been using a simple three-bin system for years, and it’s amazing how much waste it diverts from landfills.

    * Seed Starting: Starting seeds indoors in late winter saves money and allows for earlier harvests. We usually start our tomatoes and peppers about 8-10 weeks before our last frost date.

    * Crop Rotation: This helps prevent disease and replenish soil nutrients. We rotate our heavy feeders (like corn) with nitrogen fixers (like beans) and light feeders (like carrots).

    * Pest and Disease Identification: Learning to recognize common garden foes and friends. We use beneficial insects and companion planting instead of harsh chemicals whenever possible.

    Water Management and Conservation

    Water is life on a homestead. We learned this the hard way during a particularly dry summer. Our rain barrels quickly became our best friends. Understanding how to use water efficiently not only saves resources but also reduces your utility bills.

    * Rainwater Harvesting: Collecting rainwater from roofs. We installed a simple system years ago with a few large barrels, which you can learn more about in this post: Best Small Scale Rainwater Systems for Off-Grid Living.

    * Drip Irrigation: Efficiently delivering water directly to plant roots minimizes waste. We invested in a basic drip system for our main garden beds about five years ago, and it cut our watering time by half.

    * Mulching: Applying a layer of organic material around plants to retain soil moisture and suppress weeds. We use straw or wood chips, and it’s a game-changer.

    Keep reading — this is where most people mess up.

    Food Preservation: Storing Your Abundance

    Growing a bumper crop is fantastic, but what essential homesteading skills beginners need to really master is what to do with all that food! If you don’t preserve it, it simply goes to waste. After our first huge tomato harvest, we found ourselves with bushels of tomatoes and no idea what to do. That’s when we dove headfirst into preservation.

    It’s not just about canning; there are so many fantastic ways to extend the harvest and enjoy your garden’s bounty all year long. This skill gives us such peace of mind, knowing our pantry is stocked, no matter what happens.

    Canning, Freezing, and Dehydrating 🥫

    We started with simple water bath canning for jams and pickles. Then, when we got chickens, learning how to preserve eggs long-term became a priority. We even experimented with making our own chicken broth and canning it. Here’s a link to one of our popular posts on the topic: Crack the Code: Preserving Eggs Long-Term (No Fridge Needed!).

    * Water Bath Canning: Ideal for high-acid foods like fruits, jams, jellies, and pickles. Our first preserves were strawberry jam – so satisfying!

    * Pressure Canning: Absolutely essential for low-acid foods like vegetables, meats, and stews to prevent botulism. This is a skill we took a class for before trying ourselves.

    * Freezing: One of the easiest methods for many vegetables, fruits, and meats. Blanching vegetables before freezing is key for retaining quality.

    * Dehydrating: Great for herbs, fruit leathers, sun-dried tomatoes, and even making jerky. Our dehydrator runs almost constantly during harvest season.

    Fermentation and Root Cellaring

    Beyond traditional methods, we’ve explored older, more traditional preservation techniques. Fermentation not only preserves food but often enhances its nutritional value. And a good old-fashioned root cellar (or makeshift one) is invaluable for things that just need cool, dark storage.

    * Fermentation: Making sauerkraut, kimchi, pickles, and kombucha. Our kids even help with the sauerkraut now!

    * Root Cellaring: Storing potatoes, carrots, apples, and other produce in a cool, dark, humid environment. We use a corner of our unfinished basement for this, which works surprisingly well.

    📋 Get the Beginner Checklist →

    Basic Animal Husbandry and Health

    One of the most rewarding aspects of our homestead has been raising animals. From our clucking hens to our beloved dairy goats, they add so much life (and labor!) to our days. What essential homesteading skills beginners need for animal care goes beyond just providing food and water. It’s about observation, preventative care, and sometimes, a little DIY vet work.

    Our first hens taught us a lot about chicken health. We’ve managed everything from respiratory issues to bumblefoot, learning new skills with each challenge. One valuable resource for beginner chicken keepers is our post on Raising Backyard Chickens: Pros, Cons & What to Expect.

    Daily Care and Observation 🐔

    Successful animal husbandry starts with routine and keen observation. You learn to read your animals, recognizing subtle signs of illness or distress. Our mornings start with feeding the animals and spending a few minutes just watching them.

    * Feeding and Watering: Ensuring proper nutrition and constant access to fresh water.

    * Shelter Maintenance: Keeping coops, pens, and barns clean and predator-proof. We spend a few hours each week on this.

    * Health Checks: Regularly inspecting animals for injuries, parasites, or signs of illness. Early detection can save a life (and vet bills!).

    Common Veterinary Skills

    While a vet is always the first call for serious issues, there are many common ailments you can learn to manage yourself. We’ve learned to trim hooves, administer vaccinations, and treat minor wounds.

    * Wound Care: Cleaning and bandaging cuts or scrapes. We always have a basic animal first-aid kit on hand.

    * Parasite Control: Implementing natural or chemical options to prevent and treat internal and external parasites. For chickens, we often use diatomaceous earth in their dust bath areas.

    * Administering Medication: Learning how to give oral medications or injections when necessary. Don’t skip this — it’ll save you hours (and money).

    !Canning jars and fresh eggs illustrating what essential homesteading skills beginners need to learn.

    Homesteading Maintenance and Resourcefulness

    Homesteading is inherently about being a jack-or-jill-of-all-trades. Things break, fences need mending, and sometimes you just need to build something from scratch. What essential homesteading skills beginners need in this area often boils down to a can-do attitude and a willingness to learn basic repair and construction.

    When we first moved here, I couldn’t hammer a nail straight to save my life. Now, we’ve built coops, repaired sheds, and even laid some basic plumbing. It saves immense amounts of money and gives you incredible self-reliance.

    Basic Carpentry and Repair 🛠️

    There’s always something to fix on a homestead. A fence post rots, a coop door breaks, or a garden bed needs rebuilding. Learning how to use basic hand and power tools is empowering.

    * Tool Proficiency: Safely using hammers, drills, saws, wrenches, and other essential tools. We probably spent $500 on basic tools in our first year, and they’ve paid for themselves countless times over.

    * Fence Mending: Repairing and building various types of fences for animals and gardens. We’ve become experts at electric fence troubleshooting!

    * Simple Construction: Building raised beds, shelving, or even a small shed. YouTube tutorials are your best friend here.

    Resource Management and Energy Efficiency

    Being aware of our resources and how we use them is crucial for sustainability and our budget. This means thinking about water, electricity, and even waste streams.

    * Energy Conservation: Identifying ways to reduce electricity consumption, like air-drying clothes or using passive solar heating. We track our electric bill closely now!

    * Waste Reduction and Recycling: Composting, repurposing materials, and minimizing our trash output. Very little leaves our property as true ‘waste.’

    * Basic Plumbing and Electrical: Knowing how to fix a leaky pipe or reset a tripped breaker. We’ve learned to tackle minor issues, saving call-out fees.

    💡 Pro Tips

    * Start with ‘Why’: Understand your motivation. Our drive to provide healthier food for our kids kept us going through tough times.

    * Skill Stacking: Focus on skills that complement each other, like gardening and then food preservation.

    * Join Local Groups: Homesteading communities are goldmines for advice, shared resources, and mentorship. We found our first goat through a local homesteading Facebook group!

    * Read, Watch, Learn: There’s an incredible amount of free information available. We probably spend an hour a week researching new techniques.

    * Practice Patience: You won’t master everything overnight. Celebrate small wins and learn from every setback.

    ⚠️ Beginner Mistakes to Avoid

    * Doing Too Much, Too Soon: We tried to do chickens, a huge garden, and fruit trees all at once. We burnt out quickly. Start small!

    * Ignoring Soil Health: Trying to grow things in poor soil is a recipe for frustration. Focus on building healthy soil first.

    * Not Predator Proofing: Losing a flock of chickens to a fox is heartbreaking. Invest in proper predator protection from day one.

    * Lack of Planning: Jumping in without a basic plan for your garden layout, animal housing, or water access can lead to costly mistakes. Check out our post on Your First Homestead Layout: Simple Steps for Beginners.

    * Hoarding Tools: You don’t need every shiny tool. Start with the essentials and build your collection naturally. We discuss this in Essential Homesteading Tools to Buy First? Our Top Picks!.

    Frequently Asked Questions

    What is the most important skill for homesteading?

    We’d argue the most important skill is resourcefulness and a willingness to learn. Homesteading presents constant challenges, and the ability to adapt, research solutions, and try new things is paramount. Without this, even the most skilled gardener might falter when faced with a new pest or a broken tool.

    Can I homestead if I don’t own land?

    Absolutely! Many people successfully practice “urban homesteading” or “apartment homesteading.” Focus on skills like container gardening, food preservation, fermenting, and even raising small animals like quail or urban chickens (if allowed). Check out our guide: Tiny Space, Big Harvest: How to Start Urban Homesteading Small Space.

    How long does it take to learn essential homesteading skills?

    Learning is an ongoing process on a homestead. We’ve been at it for over ten years, and we’re still learning new things every season! You can acquire basic proficiency in core skills like gardening and basic preservation within one to two years, but true mastery comes with decades of practice and experience.

    What are some low-cost ways to learn new homesteading skills?

    There are tons of affordable options! Start with YouTube tutorials, library books, and free online resources. Join local homesteading or gardening clubs, which often offer workshops or skill-sharing events. Volunteering at an established homestead can provide invaluable hands-on experience without upfront costs.

    Should I learn a trade like carpentry or plumbing for homesteading?

    While you don’t need to be a certified pro, having basic carpentry and plumbing skills is incredibly valuable. These skills save you money on contractors and allow you to make repairs quickly when needed. We’ve found that a basic understanding of these trades has saved us thousands of dollars over the years.

    !Repairing a fence and animal care are part of what essential homesteading skills beginners need.

    Ready to Start Building Your Skill Set?

    Homesteading is a journey, not a destination. It’s about building a life of purpose, resilience, and genuine connection to the land and your community. What essential homesteading skills beginners need is really a mindset: one of curiosity, patience, and a bit of grit.

    Don’t feel overwhelmed by the sheer number of skills. Pick one or two that excite you the most, dive in, and celebrate every small success. Before you know it, you’ll look back and marvel at how far you’ve come. We certainly do!

    What’s your biggest challenge with learning new homesteading skills? I’d love to hear your story.

    🔧 See Recommended Tools →


    📚 More From Our Homestead

    Ready to Start Your Homestead Journey?

    Free guides, checklists, and tools to help you build your dream homestead.
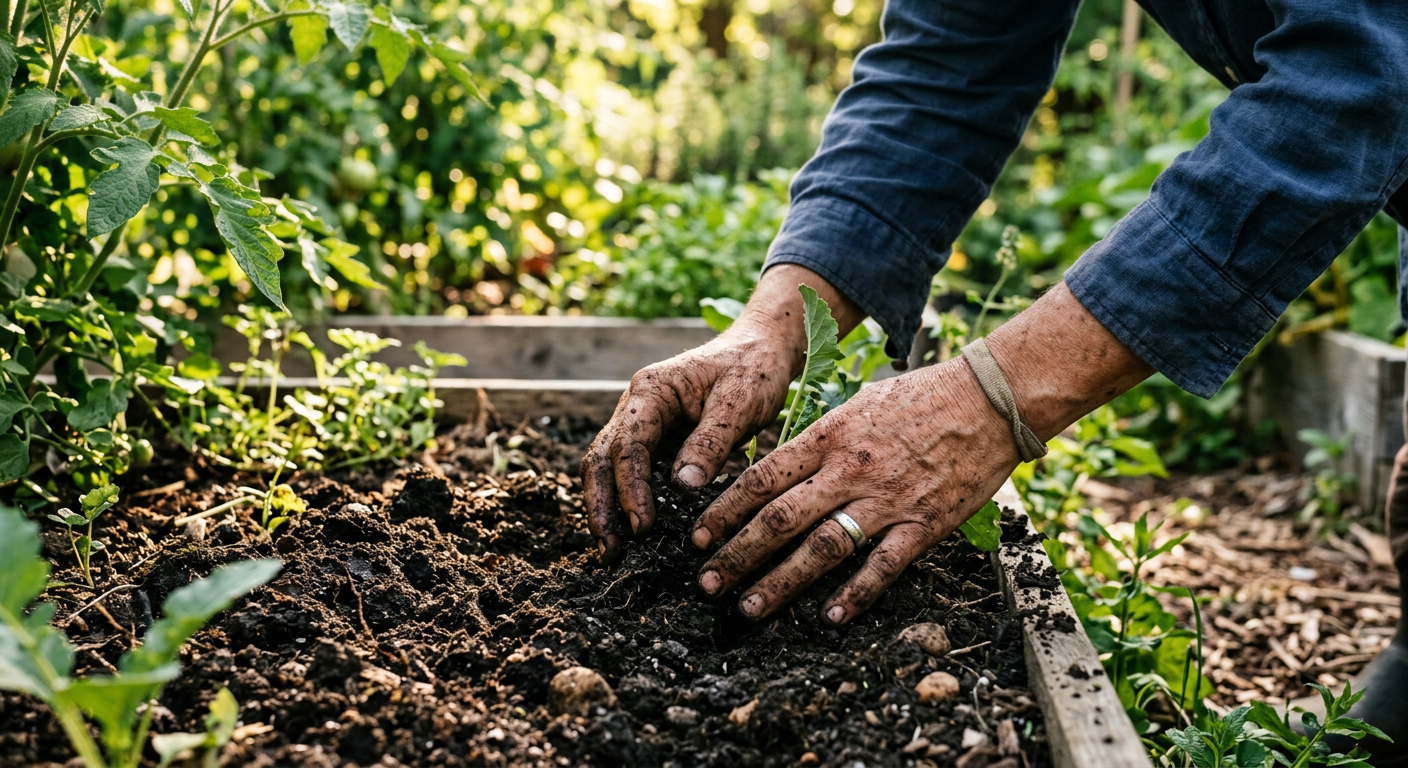
    Explore Free Resources →

  • Homesteading on a Budget: Our Smart Start Guide

    !A thriving backyard garden showing how to get started homesteading on a budget with DIY raised beds.

    When we first started dreaming of our homestead, the biggest thing holding us back wasn’t the hard work (we’re not afraid of dirty hands!), it was the sheer perceived cost. We pictured huge barns, expensive equipment, and acres of land, and thought, “There’s no way we can afford that!” But thankfully, we quickly learned that how to get started homesteading on a budget isn’t just possible; it’s often the best way to begin. We started small, learned as we went, and saved thousands by being resourceful.

    🎯 Quick Answer: To get started homesteading on a budget, focus on skill-building over immediate large purchases, prioritize high-yield projects like gardening and composting, and leverage free or low-cost resources like community gardens, skill-shares, and DIY projects. Start with what you have, where you are.

    🌱 Start Your Homestead Plan →

    🔑 Key Takeaways

    Skills First, Purchases Second: Invest time in learning before spending money on tools or supplies. Knowing how* to do something saves you from buying unnecessary gadgets.

    * Start Small & Scale Up: Don’t try to do everything at once. Focus on one or two projects that offer the most immediate return, like a small vegetable garden or composting system.

    * DIY & Repurpose: The most cost-effective homesteads are built on ingenuity. Look for free materials, learn to fix things, and repurpose items you already own.

    * Community is Key: Barter skills, share resources, and learn from experienced homesteaders. Your community is an invaluable, often free, resource.

    * Track Your Wins (and Losses): Keep a journal of what works and what doesn’t. This helps you refine your approach and avoid costly mistakes in the future.

    * Focus on ‘Highest Return’ Projects: Prioritize activities that directly reduce your grocery bill or build essential self-sufficiency skills immediately.

    !Close-up of healthy compost, a key part of how to get started homesteading on a budget.

    Our Journey: Starting with Just a Small Garden Plot

    When we decided to take the plunge, we didn’t buy a sprawling farm. In fact, we were still living in a suburban home with a postage-stamp-sized backyard. Our very first step in how to get started homesteading on a budget was transforming about 100 square feet of lawn into a vegetable garden. We spent less than $50 that first spring on some seeds, soil amendments, and a few hand tools we already had. That tiny garden, while not feeding us entirely, gave us fresh produce for months and invaluable experience.

    Prioritizing High-Yield, Low-Cost Projects

    We learned early on that not all homesteading projects are created equal in terms of upfront cost versus return. Our priorities became:

    * Vegetable Gardening: Hands down, this was the biggest bang for our buck. We saved hundreds of dollars on groceries by growing our own tomatoes, lettuce, beans, and herbs. For more on getting started, check out our guide on How to Start a Small Backyard Vegetable Garden: Beginner Guide.

    * Composting: Free fertilizer! We started with a simple DIY pallet compost bin. All our kitchen scraps, yard waste, and even shredded paper went in, and rich soil came out. Cost: essentially zero.

    * Preserving Food: Learning basic canning, freezing, and dehydrating meant we could make our garden bounty last. We started with a basic water bath canner our grandma gave us.

    This next part? Nobody talks about it, but it changed everything for us.

    The Power of DIY and Scavenging for Your Homestead

    One of the biggest budget-savers on our homestead has been our willingness to build, fix, and repurpose. We rarely buy new if we can help it. When figuring out how to get started homesteading on a budget, think like a scavenger. Our chicken coop was built from reclaimed pallets and old fence posts we got for free from a local construction site. Our first rainwater catchment system (a crucial budget saver for irrigation!) was literally just a fifty-gallon food-grade barrel we bought for $20, connected to our gutter with a simple diverter.

    Where to Find Free & Cheap Materials:

    * Craigslist/Facebook Marketplace (Free Section): This is a goldmine for everything from moving boxes (great for sheet mulching!) to compost, landscaping rocks, and even lumber scraps.

    * Construction Sites: Always ask first! Often, they’ll let you take scrap wood, concrete blocks, or dirt for free.

    * Local Businesses: Restaurants might have five-gallon pickle buckets (perfect for harvesting or small storage), bakeries might have large plastic tubs, and fruit stands often have apple boxes.

    * Roadside Finds: Keep an eye out for discarded furniture, old tires (great for elevated garden beds), or broken appliances that have useful parts.

    We’ve outfitted entire sections of our homestead purely from salvaged materials. It takes more time and creativity, yes, but it saves an incredible amount of money. Next, I’ll share how we approached animal integration without breaking the bank.

    Smart Ways to Introduce Livestock on a Shoestring

    Adding animals can feel like a massive jump in cost, but it doesn’t have to be. We integrated chickens into our homestead after about a year, and we did it as frugally as possible. When considering how to get started homesteading on a budget with animals, always ask yourself: What’s the immediate benefit, and what’s the minimum viable setup?

    Our Chicken Experiment (and How We Kept Costs Low)

    We started with just three baby chicks we bought for about $4 each. Their initial brooder was a large plastic tote in our spare bathroom! We built their first small coop almost entirely from free pallets and reclaimed roofing tin. Our total investment was under $75 for the chicks, some feed, and a few hardware pieces.

    * Consider “Free” Chickens: Sometimes local farmers or enthusiasts offer surplus roosters or older hens for free. Check local groups!

    * DIY Housing: Avoid expensive pre-made coops or shelters. Learn to build your own from scavenged materials. For inspiration, check out our post on Build a Movable Chicken Tractor for Sustainable Pest Control.

    * Forage & Supplement: Let your chickens free-range if possible to reduce feed costs. We also sprout grains and grow fodder for them (more free food!).

    * Start Small: Don’t get 20 chickens if you’ve never had any. Start with 3-5, learn their needs, and expand if your budget and space allow.

    Keep reading — this is where most people mess up.

    📋 Get the Beginner Checklist →

    !Preserved jars of food highlighting how to get started homesteading on a budget through food storage.

    Building Essential Skills (Without Paid Courses!)

    This is perhaps the most overlooked aspect of how to get started homesteading on a budget: investing in your knowledge. Every skill you learn for free means you don’t have to pay someone else to do it, or buy an expensive tool you’ll only use once. We spent countless hours reading books from the library, watching YouTube videos, and talking to experienced homesteaders.

    Frugal Skill-Building Resources:

    * Your Local Library: Seriously, it’s a treasure trove. We’ve learned about everything from canning to basic carpentry and animal husbandry just through library books. There are some fantastic Top Homesteading Books for Beginners 2026: Start Today.

    * Online Tutorials: From YouTube to university extension sites (like the USDA National Agricultural Library), there’s a wealth of free information on almost any homesteading topic you can imagine.

    * Local Co-ops & Groups: Many areas have gardening clubs, homesteading meetups, or permaculture groups. These are fantastic places to learn, share resources, and even barter skills.

    * Apprenticeships/Volunteering: Offer to help out a local farm or experienced homesteader in exchange for learning. It’s hands-on experience that costs you nothing but time.

    The less you have to pay for an expert, the more money stays in your budget for the essentials. Speaking of essentials, let’s talk about the common pitfalls.

    💡 Pro Tips

    The “Homesteading Before You Homestead” Mindset: Start practicing skills now*, even if you’re in an apartment. Grow herbs in pots, learn to mend clothes, cook from scratch. You’re already homesteading!

    * Leverage Free Manure: Find local farms or equestrians who are happy for you to take their aged manure for your garden. It’s a fantastic, free soil amendment.

    * Seed Saving: Once you’ve grown a first successful crop, learn to save seeds from open-pollinated varieties. This virtually eliminates future seed costs.

    * “Use It Up, Wear It Out, Make It Do, or Do Without”: This old adage is the homesteader’s mantra. Truly embrace it to save money and foster resourcefulness.

    * One-Year Plan: Focus on what you can realistically achieve in your first year with minimal investment. For us, it was a productive garden and starting our compost and worm bin.

    ⚠️ Beginner Mistakes to Avoid

    Buying Too Many Tools Too Soon: Resist the urge for every shiny new garden gadget. Start with the basics (shovel, rake, hoe, hand trowel) and only buy specialized tools when you truly* need them and have the experience to back it up. We have a great guide on Essential Homesteading Tools to Buy First? Our Top Picks!.

    * Overspending on Seeds/Plants: Especially as a beginner, it’s easy to buy more than you can possibly plant or care for. Start small. Seeds are cheaper than starts.

    * Ignoring Soil Health: Trying to grow in poor soil is a recipe for frustration and wasted money on fertilizers. Focus on building healthy soil from day one with compost, mulch, and cover crops.

    * Taking on Too Many Projects: Burnout leads to wasted resources. Start with one or two manageable projects, master them, then slowly expand your homestead. You can’t do it all at once.

    * Not Learning Basic Repairs: Paying someone else to fix a leaky faucet or a broken fence post quickly eats into your budget. Watch videos, read manuals, and learn basic maintenance.

    !Second-hand tools and seedlings represent how to get started homesteading on a budget efficiently.

    Frequently Asked Questions

    How much money do I need to start homesteading?

    You can literally start with zero dollars if you’re willing to invest time and effort. Start with free resources like library books and foraging. Many of us started with just a few dollars for seeds and grew from there. The goal is to reduce reliance on money, not necessarily to spend a lot of it.

    Can I homestead without a lot of land?

    Absolutely! We started on less than an eighth of an acre. Urban homesteading is a growing movement. Focus on vertical gardening, container gardening, and maximizing every square foot. Check out our post on Tiny Space, Big Harvest: How to Start Urban Homesteading Small Space.

    What’s the very first step on a budget?

    The absolute first step is to assess your current skills and resources. What do you already have? What can you learn for free? For us, it was a small patch of grass and a determination to learn how to grow food. Start with research and skill-building before any purchases.

    How do I acquire animals cheaply?

    Look for local farm sales, check online classifieds from hobby farmers offering surplus animals, or even consider rescuing animals. DIY pens and coops from reclaimed materials will drastically cut costs. Remember, chickens are often the most affordable entry point for livestock.

    Is homesteading ever truly free?

    While you’ll always have some input of time, energy, or very basic supplies, the financial outlay can be incredibly low, especially if you prioritize skill-building, foraging, and repurposing. The goal isn’t necessarily zero cost, but rather, maximum self-sufficiency and minimal reliance on external systems.

    Honestly, how to get started homesteading on a budget boils down to one thing: ingenuity. We didn’t start with a trust fund or a sprawling farm. We started with two hands, a small garden, and a burning desire to live more sustainably. Every saved seed, every reclaimed board, every fresh egg from our own backyard felt like a huge victory. It’s a journey of learning, adapting, and celebrating the small wins.

    What’s your biggest challenge with starting a homestead on a budget? I’d love to hear your story.

    🔧 See Recommended Tools →


    📚 More From Our Homestead

    Ready to Start Your Homestead Journey?

    Free guides, checklists, and tools to help you build your dream homestead.
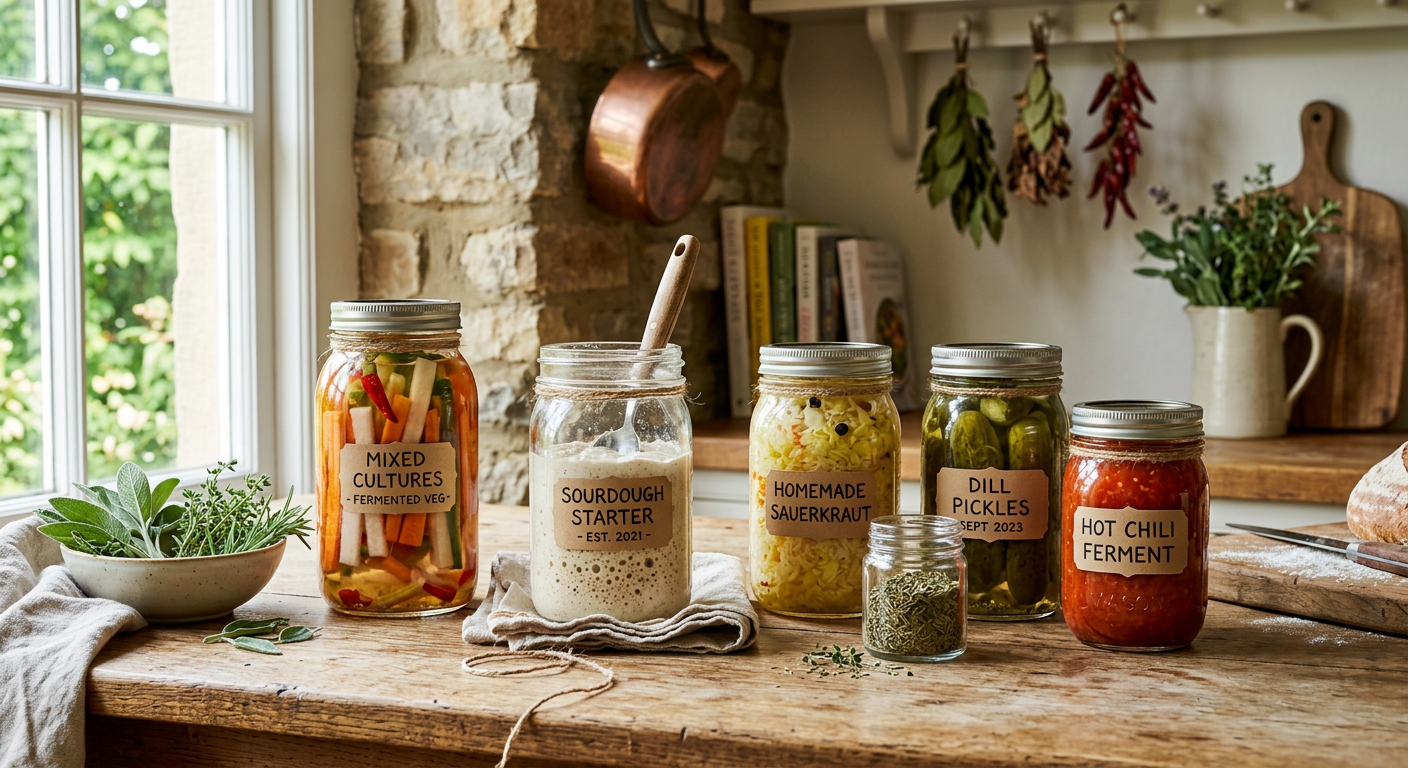
    Explore Free Resources →

  • Top Homesteading Books for Beginners 2026: Start Today

    Top Homesteading Books for Beginners 2026: Start Today

    Starting a homestead can feel like standing at the foot of a massive mountain. Whether you have a tiny balcony in the city or forty acres in the country, the transition to self-sufficiency is a journey of a thousand skills. As we move into the mid-2020s, the resources available to new growers and builders have evolved. If you are looking for the best homesteading books for beginners 2026, you are in the right place to build your ultimate reference library.

    In this guide, we will explore the essential literature that defines modern homesteading. These books bridge the gap between traditional wisdom and contemporary technology, helping you live a more sustainable life.

    Why Books are Essential for Modern Homesteaders

    While the internet is full of quick tutorials and social media snippets, homesteading requires deep, foundational knowledge. When your internet goes out during a storm or you are deep in the garden with muddy hands, a physical book is your most reliable tool. The curated list of homesteading books for beginners 2026 focuses on comprehensive manuals that cover everything from soil health to food preservation.

    Reading a full-length book allows you to understand the “why” behind the “how.” It builds a cohesive mindset rather than a fragmented collection of life hacks. For the 2026 homesteader, these books also integrate modern sustainability practices like greywater systems and smart-tech composting.

    The Must-Have Manuals for 2026

    1. The All-in-One Encyclopedia

    Every beginner needs a “Bible” of homesteading. These massive volumes cover the widest range of topics. Look for titles that include updated sections on renewable energy and climate-resilient gardening. A primary resource should teach you how to plan your layout, manage a budget, and understand the seasonal cycles of a working farm.

    2. High-Yield Small-Space Gardening

    Not everyone starts with a massive plot of land. In 2026, urban and suburban homesteading is more popular than ever. Books focused on intensive gardening—such as square-foot gardening or vertical hydroponics—are vital. These resources teach you how to maximize every square inch of your soil to feed your family year-round.

    3. Modern Livestock Management

    Raising animals is a significant step up from growing carrots. The best homesteading books for beginners 2026 offer practical, humane, and efficient ways to raise chickens, goats, or bees. Look for guides that emphasize preventative health care and natural feeding systems to keep your livestock thriving without constant chemical intervention.

    Skill-Specific Guides for Self-Sufficiency

    Once you have your general manual, you need to dive deep into specific crafts. Homesteading is a collection of dozens of different hobbies that work together as one lifestyle.

    Food Preservation and Fermentation

    Growing the food is only half the battle; keeping it is the other. Modern preservation books go beyond simple canning. The 2026 beginner should look for guides on freeze-drying, advanced fermentation, and root cellar construction. Understanding food safety is paramount, so ensure your chosen books follow the latest USDA safety guidelines.

    Off-Grid Power and Water Systems

    True independence means managing your utilities. As technology becomes more accessible, beginners are now installing their own small-scale solar arrays and rainwater harvesting systems. Books that simplify these complex engineering tasks into beginner-friendly projects are worth their weight in gold.

    Creating Your 2026 Study Plan

    If you are just starting, don’t try to read every book at once. It leads to information overload. Follow this tiered approach to building your knowledge base:

  • Phase One (The Dream): Read general homesteading philosophy and planning books to decide what kind of life you want.
  • Phase Two (The Soil): Focus on gardening and soil health books. This is the foundation of almost every successful homestead.
  • Phase Three (The Animals): Once your garden is established, buy books on small livestock.
  • Phase Four (The Kitchen): Study preservation and cooking from scratch.
  • Digital vs. Physical: Which Should You Buy?

    While we love the convenience of E-readers, homesteading books for beginners 2026 are often better as physical copies. Many of these books contain intricate diagrams, planting charts, and maps that are difficult to view on a small screen. Furthermore, a physical book can be used as a reference in the field where a tablet might be easily damaged by dirt or moisture.

    Conclusion: Your Journey Starts Here

    Building a homestead is a lifelong learning process. By investing in the right homesteading books for beginners 2026, you are not just buying paper and ink; you are investing in your future independence and security. Start with one or two core manuals, master the skills within them, and then expand your library as your homestead grows.

    Remember, the best time to start learning was ten years ago; the second best time is today. Happy reading and happy farming!


    📚 More From Our Homestead

    Ready to Start Your Homestead Journey?

    Free guides, checklists, and tools to help you build your dream homestead.
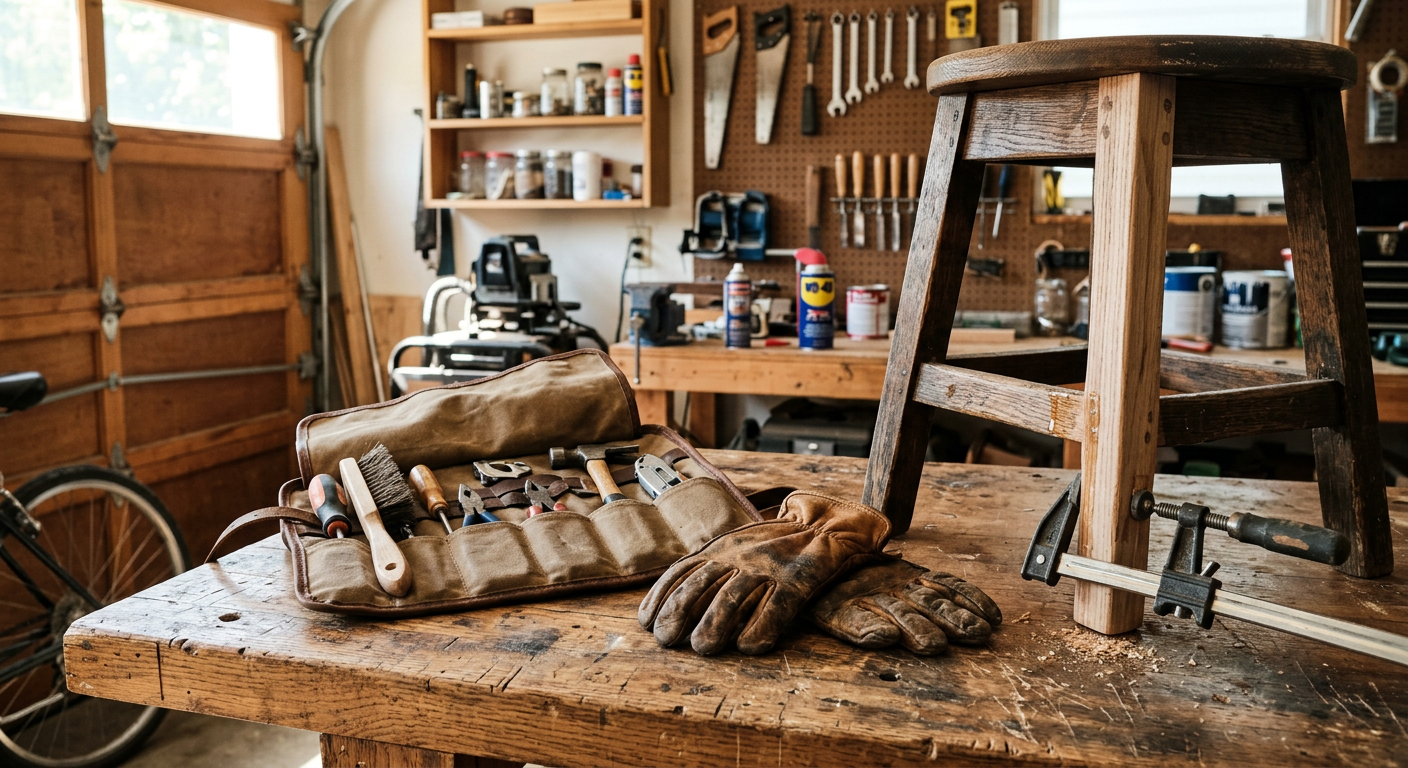
    Explore Free Resources →

  • Tiny Space, Big Harvest: How to Start Urban Homesteading Small Space

    When we first started our homesteading journey, I never imagined we’d be sharing tips on how to start urban homesteading small space. Our dream was always sprawling acres, livestock, and a huge garden. But life has a funny way of planting you where you are, and for so many of you, that means a city apartment, a suburban lot, or even just a tiny balcony. The beautiful truth is, you don’t need a farm to embrace the homesteading spirit! It’s about self-sufficiency, growing your own food, and making the most of what you have, no matter how small.

    We faced our own set of challenges early on, even with our larger rural property. Learning to maximize every inch, dealing with unexpected issues, and finding creative solutions became second nature. That’s why I’m so passionate about helping you, whether you’re in a high-rise or a compact townhouse, discover the incredible joy of urban homesteading. It’s not just a hobby; it’s a lifestyle that connects you deeply to your food, your community, and your environment. Let’s dive in!

    Define Your Urban Homesteading Goals

    Before you sow your first seed or bring home a single chick (don’t worry, we’ll get to that!), it’s crucial to define what homesteading means to you in your specific urban environment. When we first started, we tried to do everything at once – a huge garden, chickens, even contemplating rabbits! It was overwhelming and honestly, a bit of a flop. We quickly learned that starting small and focusing on realistic goals was key.

    Ask yourself:

    * What are your biggest motivations? Is it fresh herbs, pesticide-free veggies, reducing waste, or connecting with nature?

    * How much time can you realistically commit? Daily? Weekly? A few hours here and there?

    What are your local ordinances? Many cities have strict rules about what you can grow or raise. Check with your city or HOA before* you invest any money. When we lived in a more suburban area briefly, we learned our HOA had surprising restrictions on garden bed heights and fencing.

    * What’s your budget? Starting small can be very affordable, but some projects require more upfront investment. We generally budget about $200-$300 for our initial garden setup each spring, including seeds, soil, and starter plants, but you can do it for much less if you’re resourceful.

    Once you have a clearer picture, you can prioritize projects that align with your available space, time, and budget. For more general advice, check out our post on Beginner Homesteading Tips to Start Your Self-Sufficient Journey Today.

    Maximizing Every Inch: Vertical Growing & Container Gardening

    When you’re trying to figure out how to start urban homesteading small space, the absolute golden rule is to go up! Vertical gardening is a game-changer for tight spots. Think of your walls, fences, and even windows as prime real estate for growing food.

    Here are some ideas we’ve seen work wonders:

    * Stackable Planters: These are fantastic for strawberries, herbs, and leafy greens. You can get a three-tier planter for around $30-$50.

    * Vertical Wall Gardens: DIY pallet gardens or purpose-built fabric pockets can transform a bare wall into a lush food factory. We built a simple one from salvaged pallet wood that cost us less than $10 for soil and seeds, and it produced so many herbs we couldn’t keep up!

    * Hanging Baskets: Ideal for cherry tomatoes, certain pepper varieties, and various herbs. Just be mindful of sun exposure.

    * Container Gardening: This is your bread and butter. Most vegetables can be grown in containers. The trick is choosing the right size. Most herbs and leafy greens are happy in 6-8 inch pots, while tomatoes and peppers need at least 5-gallon containers (or larger). We use a lot of 5-gallon paint buckets we clean thoroughly, which are practically free!

    Martha, a friend of ours who lives in a tiny apartment, even turned an old bookcase into a vertical herb garden by lining the shelves and adding grow lights. It’s amazing what you can achieve with a little creativity!

    For more detailed guidance on getting started with growing, take a look at How to Start a Small Backyard Vegetable Garden: Beginner Guide, which has tons of tips applicable even to container gardening.

    Getting Started with Small-Scale Urban Animal Husbandry (Carefully!)

    Alright, let’s talk about furry and feathered friends. This is often where local ordinances become super important. When considering how to start urban homesteading small space with animals, research your local laws FIRST. Some cities surprise you with what they allow, others are very restrictive.

    Chickens (If Permitted!)

    Many urban areas now allow a small flock of hens (roosters are usually a no-go due to noise). We started with 6 hens, and their fresh eggs were a revelation. In a small space, you’ll need:

    * A Compact Coop: Look for options designed for 2-4 hens. You might even find sleek, modern designs that blend into an urban backyard. We know folks who’ve built fantastic coops from repurposed materials for under $100.

    Space for a Run: Even if it’s small, they need an outdoor area. Consider a movable chicken tractor design if space is extremely* limited. This lets them fertilize different parts of your yard. Here’s a great guide on how to build a movable chicken tractor.

    * Food & Water: Self-filling feeders and waterers are a must for small spaces to reduce daily maintenance.

    Rabbits

    Another option for food or fiber, rabbits take up very little space. They are quiet, clean, and their waste is excellent for composting. A small hutch can easily fit on a patio or in a protected corner of a yard.

    Quail

    These tiny birds are gaining popularity in urban settings. They’re much smaller, quieter, and produce eggs even faster than chickens. We’ve considered them for our own setup due to their minimal space requirements.

    Remember, any animal requires daily care, commitment, and often, an initial investment. Be realistic about what you can manage in your tiny urban oasis.

    Beyond Growing: Water, Waste, & Preserving in the City

    Homesteading isn’t just about what you grow; it’s about closing loops and maximizing resources. This is especially true when learning how to start urban homesteading small space.

    Rainwater Harvesting

    This is a fantastic way to conserve water and give your plants chemical-free hydration. A simple rain barrel connected to a downspout can collect gallons of water during a single rain shower. We have a couple of 55-gallon barrels that cost us about $150 each, and they significantly cut down our water bill during dry spells. You can learn more about small-scale rainwater systems here.

    Composting

    Don’t let your food scraps go to waste! Composting reduces landfill burden and creates incredible, nutrient-rich soil for your containers. In a small space, options include:

    * Vermiculture (Worm Composting): A small worm bin can live indoors or on a balcony, is practically odorless if done right, and produces fantastic worm castings. We started with a small kit for about $60.

    * Bokashi Composting: This is an anaerobic process that ferments food scraps, including meat and dairy, which traditional composting can’t handle. The fermented material then needs to be buried or added to a regular compost pile, but it’s a great first step for breaking down all your food waste.

    Food Preservation

    Even a small harvest can be preserved! Learn basic methods:

    * Freezing: Easiest for herbs, blanched vegetables, and berries.

    * Dehydrating: Great for herbs, fruit leathers, and even veggie chips. We have a small dehydrator that cost us around $80 and it’s always running in the autumn.

    * Canning: If you have the space for equipment (a pressure canner can be bulky), canning allows for long-term storage of sauces, pickles, and jams. We typically do a big canning day once a month during harvest season.

    Community & Skill-Sharing: Your Urban Homesteading Network

    One of the most surprising and fulfilling aspects of our homesteading journey has been the community. In an urban environment, this sense of connection is even more vital. You don’t have to go it alone!

    * Join Local Groups: Look for urban gardening clubs, community garden initiatives, or homesteading meetups. Facebook groups are a great place to start.

    * Seed Swaps & Plant Exchanges: A fantastic way to diversify your garden for free and meet like-minded people. We regularly participate in these and always come home with something new and exciting.

    * Skill-Sharing: Can you bake bread? Does your neighbor know how to mend clothes? Bartering skills is a hallmark of homesteading.

    * Support Local Farmers Markets: Even as you grow your own, supporting local farmers keeps agriculture alive in your region and provides you with things you can’t produce yourself.

    Building this network can provide invaluable support, shared knowledge, and even practical resources that you might not have in your small space. Sometimes, the “village” is the biggest resource of all. If you’re looking for broader community and resources, check out usehomesteados.com for a wealth of information and tools to help you on your journey.

    FAQ: Urban Homesteading in Small Spaces

    Q1: Is urban homesteading expensive to start?

    A1: It doesn’t have to be! You can start very affordably with salvaged containers, free seeds from exchanges, and compost made from your kitchen scraps. Our first garden cost us less than $50. However, if you want to invest in vertical garden systems or start with animals like chickens, the initial costs will be higher. Plan on $100-$300 for a solid beginner setup, but it’s possible to do it for much less with creativity.

    Q2: What are the best plants for urban container gardening?

    A2: Leafy greens (lettuce, spinach, kale), herbs (basil, mint, parsley, rosemary), bush beans, radishes, carrots (stubby varieties), peppers, and determinate (bush) tomato varieties are excellent choices that thrive in containers. We’ve had great success with ‘Patio Perfect’ tomatoes and ‘Little Gem’ lettuce in gallon pots.

    Q3: How do I deal with pests in a small urban garden?

    A3: Integrated Pest Management (IPM) is key. This includes companion planting (e.g., marigolds to deter nematodes), hand-picking visible pests, using beneficial insects (you can order ladybugs online!), and applying organic pest sprays like neem oil or insecticidal soap if absolutely necessary. Healthy soil and strong plants are your best defense.

    Q4: Can I really preserve food in a small urban kitchen?

    A4: Absolutely! Freezing and dehydrating require minimal counter space. You can often make small batches of jams or pickles with a regular pot. We even manage to can a few jars at a time on our stovetop pressure canner, though it takes up most of one burner. It’s all about doing what you can with the space you have.

    Q5: What’s the most important thing to remember for urban homesteading?

    A5: Start small, be realistic, and don’t be afraid to experiment! Every mistake is a lesson learned. Consistency is more important than perfection. Enjoy the process of learning and connecting with your food and environment.

    Your Urban Homestead Awaits!

    Homesteading isn’t just about land; it’s a mindset. It’s about resilience, sustainability, and the profound satisfaction of providing for your family. Whether you have a balcony, a small yard, or just a sunny windowsill, you can embrace the homesteading journey. Don’t let a lack of acreage hold you back from growing your own food, nurturing your environment, and living a more self-sufficient life.

    Ready to dig in? Explore more of our articles at usehomesteados.com for practical guides, personal stories, and all the inspiration you need to build your thriving urban homestead, no matter the size!


    📚 More From Our Homestead

    Ready to Start Your Homestead Journey?

    Free guides, checklists, and tools to help you build your dream homestead.
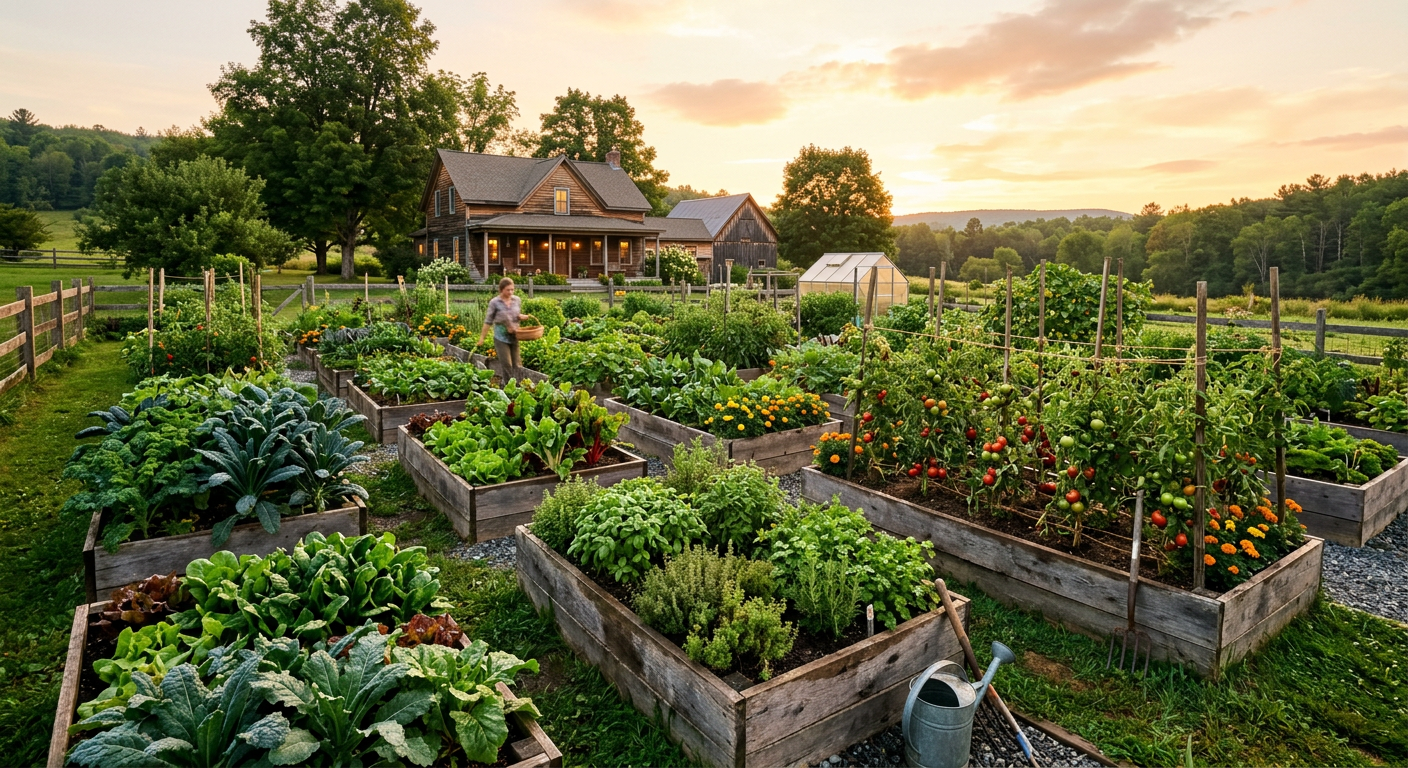
    Explore Free Resources →