Tag: sustainable

  • Profitability Guide: Your Chicken Egg Profit Calculator

    The Ultimate Chicken Egg Profit Calculator & Financial Guide

    Turning a backyard hobby into a profitable venture requires more than just happy hens; it requires a clear understanding of your overhead, production rates, and profit margins. This guide provides a comprehensive framework to act as your manual chicken egg profit calculator, helping you determine exactly how much it costs to produce a dozen eggs and how much you can expect to earn.

    Running a small-scale egg business is a balancing act between feed costs, hen longevity, and market pricing. By the end of this guide, you will be able to look at your flock as both a passion project and a sustainable economic unit.

    How to Calculate Your Egg Profits: Step-by-Step

    To calculate your net profit, you must subtract your Total Operating Expenses from your Gross Revenue. Follow these steps to get an accurate picture of your monthly finances.

  • Calculate Monthly Feed Costs: Take the price of a bag of feed (e.g., $25) and divide it by the weight (50 lbs) to get the cost per pound ($0.50). Multiply this by the amount your flock eats daily. A standard hen eats about 0.25 lbs per day.
  • Determine Monthly Production: Track how many eggs you collect daily over a 30-day period. (Example: 20 hens at an 80% lay rate = 16 eggs/day, or 480 eggs per month).
  • Account for Packaging and Supplies: Don’t forget the cost of egg cartons, labels, and washing supplies. If a carton costs $0.50 and you sell 40 dozen a month, that is $20 in packaging.
  • Set Your Sales Price: Research local prices. Are you selling at $4.00, $6.00, or $8.00 per dozen?
  • The Master Formula:
  • Gross Monthly Revenue* = (Total Dozens Sold) x (Price Per Dozen)

    Total Monthly Costs* = (Feed + Packaging + Electricity + Water + Bedding)

    Net Profit* = Gross Revenue – Total Monthly Costs

    Key Factors Affecting Your Profitability

    Several variables can fluctuate, significantly impacting your bottom line. Keep a close eye on these five areas:

    * Feed Conversion Ratio (FCR): This is the amount of feed required to produce one dozen eggs. High-quality legacy breeds might have a worse FCR than industrial hybrids like ISA Browns, which are bred specifically to turn feed into eggs efficiently.

    * The Molting Cycle: Once a year, hens stop laying to regrow feathers. During this 4-12 week period, your revenue drops to zero while your feed costs remain constant.

    * Daylight Hours: Modern hens need 14-16 hours of light to maintain peak production. Without supplemental light in winter, production can drop by 50-70%.

    * Mortality and Replacement Costs: Hens are most productive in their first two years. You must factor in the cost of buying or hatching new chicks every 24 months to maintain a steady output.

    * Market Positioning: Selling “Farm Fresh” is basic. Selling “Pasture-Raised, Non-GMO, Soy-Free” can allow you to double your asking price, even if your production costs only increase slightly.

    Example Calculation: The 20-Hen Backyard Flock

    Let’s look at a realistic scenario for a homesteader with 20 high-output hens (like Rhode Island Reds) during the peak spring season.

    Assumptions:

    * Feed Cost: $0.55/lb ($27.50 for a 50lb bag).

    * Consumption: 5 lbs of feed per day for the flock (0.25 lbs per bird).

    * Lay Rate: 85% (approx. 17 eggs per day / 42.5 dozen per month).

    * Sales Price: $6.00 per dozen.

    * Packaging: $0.45 per recycled-pulp carton.

    The Math:

    * Revenue: 42.5 dozen x $6.00 = $255.00

    * Feed Cost: 5 lbs x 30 days = 150 lbs. 150 lbs x $0.55 = $82.50

    * Carton Cost: 43 cartons x $0.45 = $19.35

    * Miscellaneous (Water/Bedding): $10.00

    Total Profit: $255.00 – ($82.50 + $19.35 + $10.00) = $143.15 per month.

    Tips to Maximize Your Egg Profits

  • Buy Feed in Bulk: Moving from 50lb bags to a 1,000lb or 2,000lb bulk delivery from a local mill can slash your feed costs by 30-50%.
  • Ferment Your Feed: Soaking grain in water for 2-3 days makes it more digestible. This improves gut health and allows hens to get more nutrients from less volume, effectively lowering your FCR.
  • Utilize Pasture Rotation: If your hens get 30% of their diet from bugs and grass, your grain bill drops. It also produces the dark orange yolks that customers pay a premium for.
  • Sell the “Story”: Use social media to show your happy chickens. People aren’t just buying eggs; they are buying the idea of a healthy, transparent food source. This allows for “Boutique Pricing.”
  • Minimize Waste: Ensure your feeders are at the height of the birds’ backs to prevent “flicking.” Rats and wild birds can also steal up to 10% of your feed if your coop isn’t secure.
  • Common Mistakes to Avoid

    * Underestimating Hidden Costs: Many beginners forget to track the electricity for the brooder lamp, the fuel to drive to the farmers’ market, or the cost of the initial coop construction depreciation.

    * Keeping “Freeloaders”: It is hard to cull or rehome a pet, but from a business perspective, keeping a 4-year-old hen that lays one egg a week is a guaranteed way to lose money.

    * Setting Prices Too Low: Don’t try to compete with grocery store prices. You cannot win a price war with industrial factory farms. Focus on quality and value instead.

    Quick Reference: Costs vs. Earnings Table

    | Expense/Income Item | Estimated Cost (Small Scale) | Estimated Cost (Commercial Hybrid) |

    | :— | :— | :— |

    | Feed per Hen/Day | 0.25 – 0.30 lbs | 0.22 – 0.25 lbs |

    | Feed Cost per lb | $0.50 – $0.80 | $0.25 – $0.40 (Bulk) |

    | Annual Egg Production | 180 – 220 (Heritage) | 280 – 320 (Leghorn/ISA) |

    | Carton Cost (per unit) | $0.40 – $0.60 | $0.15 – $0.25 (Bulk) |

    | Average Selling Price | $5.00 – $9.00 | $3.00 – $5.00 |

    Frequently Asked Questions (FAQ)

    Q: How many chickens do I need to make a profit?
    A: For a small side-income, 20-50 chickens is the “sweet spot.” Below 20, the overhead costs (time, delivery, equipment) often outweigh the revenue. Above 50, you may need better infrastructure and potentially a business license.

    Q: What is the best breed for profit?
    A: If you want pure volume, ISA Browns or White Leghorns are the gold standard. If you want a niche market, Marans (chocolate brown eggs) or Ameraucanas (blue eggs) allow you to charge a premium for “rainbow dozens.”

    Q: At what age should I replace my laying hens?
    A: Most profit-focused farms replace hens at 18-24 months. At this age, egg shell quality declines and the frequency of laying drops by about 20% each year.

    Q: Can I sell eggs for more if they are organic?
    A: Yes, but only if you are certified. However, you can use the term “raised with organic practices” or “no-spray pasture” to command a higher price without the formal (and expensive) USDA certification.

    Q: Should I wash my eggs before selling?
    A: In the US, most states require eggs sold at retail to be washed and refrigerated. However, washing removes the “bloom” (a protective coating), so local laws and your specific market (e.g., neighbors vs. stores) will dictate this. Always check your local Department of Agriculture guidelines.


    📚 More From Our Homestead

    Ready to Start Your Homestead Journey?

    Free guides, checklists, and tools to help you build your dream homestead.

    Explore Free Resources →


  • Build a Movable Chicken Tractor for Sustainable Pest Control

    When we first started out on our homestead, the sheer volume of insects munching on our precious garden plants was enough to make us throw our hands up in despair. We tried everything – organic sprays, hand-picking, even sacrificing a few plants to the bugs to distract them. Nothing truly worked for the long haul. Then, we discovered the magic of chickens, and specifically, learning how to build a movable chicken tractor for sustainable pest control.

    Now, I know what you might be thinking: chickens in the garden? Isn’t that just asking for trouble? And yes, if left to their own devices, a flock of chickens can decimate a garden faster than a hungry rabbit. But a chicken tractor is an entirely different story. For us, it was a game-changer, transforming our pest problem into a natural, self-sustaining solution, and adding rich fertilizer right where we needed it.

    Why a Chicken Tractor is a Homesteading Game-Changer

    Before we dive into the nitty-gritty of how to build a movable chicken tractor for sustainable pest control, let’s talk about why you’d even want one. Beyond the obvious benefit of pest control, these little mobile coops bring a host of advantages to your homestead ecosystem:

    * Natural Pest Extermination: Our chickens are incredibly efficient bug zappers. Grasshoppers, slugs, beetles, grubs – you name it, they’ll eat it. We’ve seen a dramatic reduction in damage to our squash and bean plants since we started rotating the tractor through. It’s like having a tiny, feathered army on patrol!

    * Fertilizer on Demand: Chicken manure is gold for the garden. As our flock forages, they leave behind nutrient-rich droppings, depositing fertilizer directly onto the soil. It’s truly a “fertigation” system, saving us money on amendments. We actually saw our soil tests improve in areas where the tractor spent more time.

    * Weed Control (Pre-Planting): Before we plant a new bed, we often run the chicken tractor over it for a few days. The chickens scratch and peck, loosening the soil, eating weed seeds, and even tackling some smaller weeds. It significantly cuts down on our weeding efforts later.

    * Soil Aeration: Their constant scratching helps to lightly aerate the topsoil, improving water penetration and root growth.

    * Reduced Feed Costs: By allowing them to free-range (albeit in a controlled environment), they supplement their diet with bugs and greens, which means we buy less commercial feed. We estimate it cut our feed bill by about 15-20% during peak growing season.

    * Happy Chickens: They get fresh forage, sunshine, and a constantly changing environment, which leads to healthier, happier birds and, in turn, higher quality eggs.

    When we first introduced our flock to the garden in their new tractor, it was amazing to watch. They instinctually knew what to do. It reminds me a lot of what we stress to beginners in our guide, 10 Beginner Homesteading Tips to Start Your Self-Sufficient Journey Today, about observing nature and working with it, not against it.

    Designing Your Movable Chicken Tractor: What We Learned

    Designing a chicken tractor isn’t a one-size-fits-all endeavor. Ours has evolved significantly since our first clunky attempt! Here are the key design considerations we’ve learned are crucial:

  • Size Matters (for Chickens AND You):
  • * Chicken Space: The general rule of thumb for a chicken tractor is 2-4 sq ft per bird. For our small flock of 6 laying hens, we built a 4 ft x 8 ft tractor, giving them a comfortable 5.3 sq ft each. This prevents overcrowding and stress. If you have fewer birds, you can go smaller, but don’t skimp on space.

    * Your Ability to Move It: This is critical! If it’s too big or heavy, you won’t move it, defeating the purpose. Our 4×8 ft tractor is manageable for one person to move on flat ground, but two people make it effortless, especially if the ground is uneven. Some designs incorporate wheels or skids to make movement easier.

  • Materials: Durable, Safe, and Affordable
  • Frame: We used treated lumber (2x3s and 2x4s) for the main frame. It’s sturdy and holds up well against the elements. If you’re concerned about treated lumber directly* touching edible plants, you can line the bottom with untreated wood or even metal flashing. A lighter option might be PVC, but we found it less durable over time with wind and general wear.

    * Siding/Roof: Plywood or corrugated plastic roofing works well for the solid sections providing shelter. For cost, we often scavenge materials or look for mis-tinted paint at hardware stores to seal salvaged wood.

    Sides: Crucially, we use 1/2-inch hardware cloth, not chicken wire. Chicken wire only keeps chickens in; hardware cloth also keeps predators out*. We learned this the hard way after a raccoon incident (a story for another time!).

    * Wheels/Skids: Our first design used skids made from repurposed fence posts. Our current one has old wagon wheels on one end and handles on the other, making it much easier to pivot and pull.

  • Essential Features:
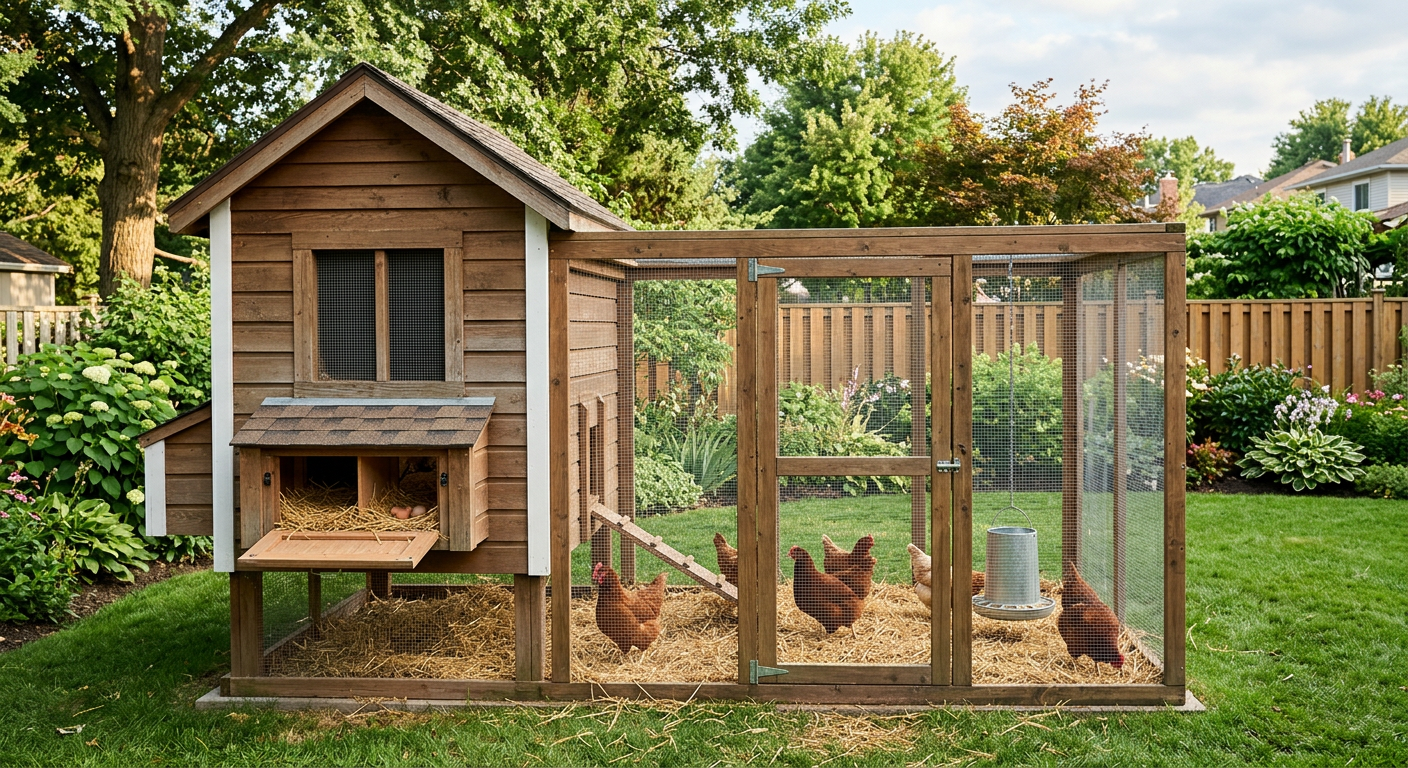
  • * Nesting Boxes: We built a simple exterior nesting box (about 12x12x12 inches with a hinged lid) into one side. This makes egg collection super easy without disturbing the birds. You want about 1 nesting box for every 3-4 hens.

    * Roosting Bar: A simple 2×2 wooden bar across the width of the tractor provides a place for them to sleep off the ground.

    * Feeders and Waterers: We use hanging feeders and waterers that attach to the frame inside. This keeps them off the ground, reducing contamination and spills. We also ensure these are protected from rain.

    * Vents/Access Doors: Good airflow is important. We have a hinged access door on one side for cleaning and tending, and small vents near the top of the enclosed section. Remember, chickens produce a lot of ammonia!

    * Portability: Seriously, design for easy movement. Handles, wheels, skids – whatever works for your strength and terrain.

    Step-by-Step: How to Build a Movable Chicken Tractor For Sustainable Pest Control

    Ready to get your hands dirty? Here’s a simplified breakdown of how we built our most recent (and most successful) chicken tractor for our 6 hens. Total cost was around $200, but that’s with some salvaged wood. If buying all new, you could expect $300-$400. It took us about 2 full days of work.

    Materials List (for a 4ft x 8ft tractor for 6 hens):

    * (6) 2x4s, 8 ft long (frame, roosting bar, handles)

    * (3) 2x3s, 8 ft long (optional lighter frame sections, nesting box frame)

    * (2) sheets of 1/2-inch plywood, 4×8 ft (roof, nesting box sides, end panel)

    * (1) roll 1/2-inch hardware cloth, 3ft x 25ft (sides)

    * (1) small roll hardware cloth, 1/4-inch (vent covers, optional bottom predator skirt)

    * (1) small sheet corrugated plastic roofing, 4×8 ft (optional lightweight roof)

    * (2) repurposed small wagon wheels (or equivalent)

    * (2) heavy duty hinges (access door)

    * (2) small hinges (nesting box lid)

    * (1) barrel bolt latch (access door)

    * Screws (2.5-inch exterior, 1.25-inch exterior)

    * Staple gun and 1/2-inch staples

    * Wood glue (optional, for extra strength)

    * Wood sealer/paint (exterior grade)

    * Small perching dowel or 2×2 for roosting bar

    Tools:

    * Circular saw or miter saw

    * Drill

    * Staple gun

    * Wire cutters

    * Measuring tape, pencil, safety glasses

    The Build:

  • Cut the Lumber: Start by cutting your 2x4s and 2x3s to length for your main frame (four 8-foot lengths and four 4-foot lengths). You’ll also need pieces for legs/supports and the nesting box frame.
  • Assemble the Base: We built a rectangular base first (4×8 ft) using 2x4s, securing corners with screws. We added a cross-brace in the middle for extra stability. This base rests directly on the ground when stationary.
  • Build the Sides: We created two identical side frames. These need to be tall enough for your chickens to stand comfortably (we aimed for about 2.5 ft at the low end and 3.5 ft at the high end for a sloped roof). We attached these to the base frame. A sloped roof helps shed rain.
  • Add End Panels and Roof Support: An enclosed end panel, made from plywood, provides shelter from wind and rain. This is where your roosting bar and nesting boxes will go. We added a few more 2x4s across the top for roof support. The roosting bar was just a 2×2 piece of wood securely screwed into the frame about 18 inches off the ground.
  • Install Hardware Cloth: This is the most time-consuming part. Roll out your 1/2-inch hardware cloth and cut it to fit the open sides and the “ceiling” of the open run area. Secure it generously with your staple gun, and then use small U-nails or specialized washers to ensure it’s firmly attached and predator-proof. Overlap edges where possible.
  • Plywood Roof and Enclosure: Attach the plywood pieces for the enclosed sleeping area, ensuring there’s an overhang to shed rain. We used corrugated plastic for the larger run roof section – lighter and cheaper. Seal all exposed wood with paint or sealer. Remember to cut out a section for your nesting box access.
  • Access Door and Nesting Boxes: Build your main access door (ours is on the open run side) and secure with heavy-duty hinges and a barrel bolt. Build a simple plywood box for the nesting boxes, attach it to the outside of the enclosed end, and fit a hinged lid.
  • Add Wheels/Skids: We bolted our old wagon wheels to one end of the tractor frame, raising that end slightly. On the opposite end, we attached sturdy 2x4s as handles. This way, one person can lift the handle end and roll the tractor like a wheelbarrow.
  • This build was a significant project, but the rewards have been immense. It’s an investment in the health of our garden and our flock. Speaking of garden health and investments, you might find our insights on How to Start a Small Backyard Vegetable Garden: Beginner Guide a helpful companion read.

    Moving and Managing Your Chicken Tractor

    Once your tractor is built, the real fun begins! Here’s how we manage ours for maximum benefit:

    * Rotation Schedule: This is key. We typically move our tractor 1-2 times a day during the growing season, depending on what we want the chickens to accomplish. For intense weeding and bug removal, we’ll leave them in one spot for a full day. For light fertilization and aeration, just a few hours. Observe your chickens and the ground beneath them. If the grass is gone and they’re digging too much, it’s time to move.

    Strategic Placement: We never put the tractor directly in our actively growing garden beds, but rather around them or in fallow beds. We might place it in a section where we plan to plant next season, letting them clear and fertilize. Or, we’ll run it down crop rows after* harvest to clean up fallen produce and bugs. Our garden layout accounts for this rotation, much like the thought process behind Your First Homestead Layout: Simple Steps for Beginners.

    * Water and Feed: Even though they’re foraging, always provide fresh water and feed in the tractor. Their foraging supplements, it doesn’t completely replace, their dietary needs.

    * Predator Protection: We move our tractor right next to our main coop at night, or into a fully enclosed run area, especially if predators like raccoons or coyotes are active. Hardware cloth is your first line of defense, but don’t underestimate determined predators.

    * Cleaning: Even with rotation, you’ll need to clean out the enclosed sleeping area every week or two, depending on the number of birds. This is where those external nesting box access doors and main access doors come in handy.

    The Environmental & Economic Benefits of Movable Chicken Tractors

    Beyond direct pest control, we’ve found that integrating chickens in this way has a huge positive impact on our entire homestead ecosystem.

    Instead of reaching for chemical pesticides, we rely on our flock. This protects pollinators, beneficial insects, and prevents chemical runoff into our soil and water supply. It ties directly into why we choose specific plants like those shared in Best Perennial Herbs for Cold Climate Homesteads – every part of our system contributes to its overall health.

    Economically, we’ve seen savings on pest control products, commercial fertilizers, and even a reduction in our chicken feed bill. Plus, the eggs from healthy, foraging chickens are simply superior in taste and nutrition. It’s a win-win-win combination for taste, wallet, and planet.

    Troubleshooting Common Chicken Tractor Issues

    Even with the best planning, you might run into a few common issues. We certainly have!

    * Chickens Not Moving: If your tractor feels like it’s stuck, check the runners/wheels. Is dirt or debris caught? Is the ground too uneven? Sometimes, you just need a second pair of hands. If it’s a regular struggle, consider adding larger wheels or more robust skids. If we’re moving it on particularly soft ground, we sometimes lay down a temporary path of old plywood scraps.

    * Pest Control Not Effective Enough: Are you moving the tractor frequently enough? Are there enough chickens for the area? Sometimes we let the chickens in an area for an extra day. If you have particularly aggressive pests (like squash bugs), chickens can help, but might not eliminate them entirely. Integrated pest management often requires multiple strategies.

    Predator Concerns: Ensure all* openings are secured with hardware cloth. Double-check latches. If you have ground predators that dig, you might need to add a “skirt” of hardware cloth around the base, extending outwards a foot or two from the perimeter, and burying it slightly. This deters digging predators like raccoons or foxes.

    * Muddy Conditions: Avoid placing your tractor in waterlogged areas. Chickens don’t like mud, and it can lead to foot problems and sanitation issues. If an area gets muddy, move them to higher, drier ground until it improves. Good drainage, like what we talk about for rainwater harvesting, is key across the homestead, even for your chicken tractor placement. In fact, thinking about how you manage water on your homestead, whether it’s for irrigation or preventing mud under your tractor, is critical – that’s why we cover systems like those in Best Small Scale Rainwater Systems for Off-Grid Living.

    FAQs: How to Build a Movable Chicken Tractor for Sustainable Pest Control

    Q: How many chickens do I need for a chicken tractor?

    A: It depends on the size of your tractor and your goals. For effective pest control and fertilization, we recommend a minimum of 3-4 chickens. For a 4×8 ft tractor, 6-8 hens is a good number.

    Q: Can I use a chicken tractor in winter?

    A: It depends on your climate. In very cold areas, a chicken tractor might not provide enough insulation or protection. We move our flock into a more substantial, insulated coop for the coldest months and bring the tractor out again in spring. You can, however, use it for winterizing garden beds by letting them scratch for dormant bugs and weeds.

    Q: How often should I move the chicken tractor?

    A: For active pest control and fertilization, we move ours daily, sometimes twice daily, depending on the area covered and the desired effect. If you’re just using it for light grazing, every few days might suffice. Observe the ground and your chickens – if they’ve eaten everything and are sitting idle, it’s time to move.

    Q: Is a chicken tractor predator-proof?

    A: With proper construction using 1/2-inch hardware cloth, robust latches, and possibly a buried skirt, a chicken tractor can be highly predator-resistant. However, no setup is 100% predator-proof. We always bring our tractor close to our main coop or secure it within a larger fenced area at night to be extra safe.

    Q: What are the best dimensions for a small chicken tractor?

    A: For 3-4 hens, a 4 ft x 6 ft tractor (giving each bird 6-8 sq ft) is a good starting point. You still want it tall enough for chickens to stand and for you to access easily. Taller designs are harder to move but offer more head room; flatter designs are easier to move but might be harder to tend.

    Building a movable chicken tractor has been one of the most impactful projects on our homestead. It aligns perfectly with our philosophy of working smarter, not harder, and creating a truly sustainable system. If you’re looking for an eco-friendly, effective way to manage garden pests and enrich your soil, give it a try! You might just find your chickens become your favorite garden assistants.

    Loving these practical homesteading solutions? We’re always sharing more of our journey and tips on building a thriving self-sufficient life. For even more resources and planning tools to organize your homestead projects, be sure to explore the helpful features over at useHomesteados.com. And if you’re curious about planning out your entire space efficiently, check out our guide on how to plan your ideal homestead layout at useHomesteados.com/blog/how-to-plan-a-homestead-layout-for-beginners. Don’t miss out on all the amazing homesteading knowledge we’ve gathered just for you!


    📚 More From Our Homestead


    Ready to start your homesteading journey? Visit UseHomesteados.com for more guides, tools, and resources.


    👉 Related: Tiny Space, Big Harvest: How to Start Urban Homesteading Small Space

    👉 Related: Tiny Farm, Big Rewards: Best Low Maintenance Farm Animals