!A flock of hens grazing in a garden, highlighting raising backyard chickens for eggs pros cons.
When we first moved to our homestead, one of the very first things my partner and I talked about was getting chickens. Fresh eggs every morning? The idea was just so appealing! We pictured happy hens clucking around, scratching in the dirt, and providing us with breakfast — it sounded like a dream. And in many ways, it truly has been, but it wasn’t without its steep learning curve and a few unexpected realities.
🎯 Quick Answer: Raising backyard chickens for eggs offers incredibly fresh, nutritious food and a rewarding connection to your food source, but it also comes with daily responsibilities, potential costs, and the need to protect them from predators. It’s a commitment, but one that many homesteaders find incredibly worthwhile for the consistent supply of fresh eggs.
—
🔑 Key Takeaways
* Fresh Eggs are Unbeatable: The taste and nutrition of homegrown eggs far surpass store-bought.
* Daily Commitment: Chickens require daily feeding, watering, and coop maintenance, rain or shine.
* Upfront Costs: Expect initial expenses for chicks, coop, feed, and supplies – we spent about $500 to get started with 6 hens.
* Predator Protection is Key: Raccoons, fox, and even hawks are always a threat; secure housing is non-negotiable.
* Local Ordinance Check: Always verify local laws regarding backyard poultry before investing.
* Educational for Families: It’s a fantastic way for kids to learn about food systems and animal care.
—
The Unbeatable Pros of Raising Backyard Chickens for Eggs
There’s a reason homesteaders and backyard enthusiasts alike rave about their flock. For us, the benefits quickly outweighed the initial effort. Here’s why we love our hens.
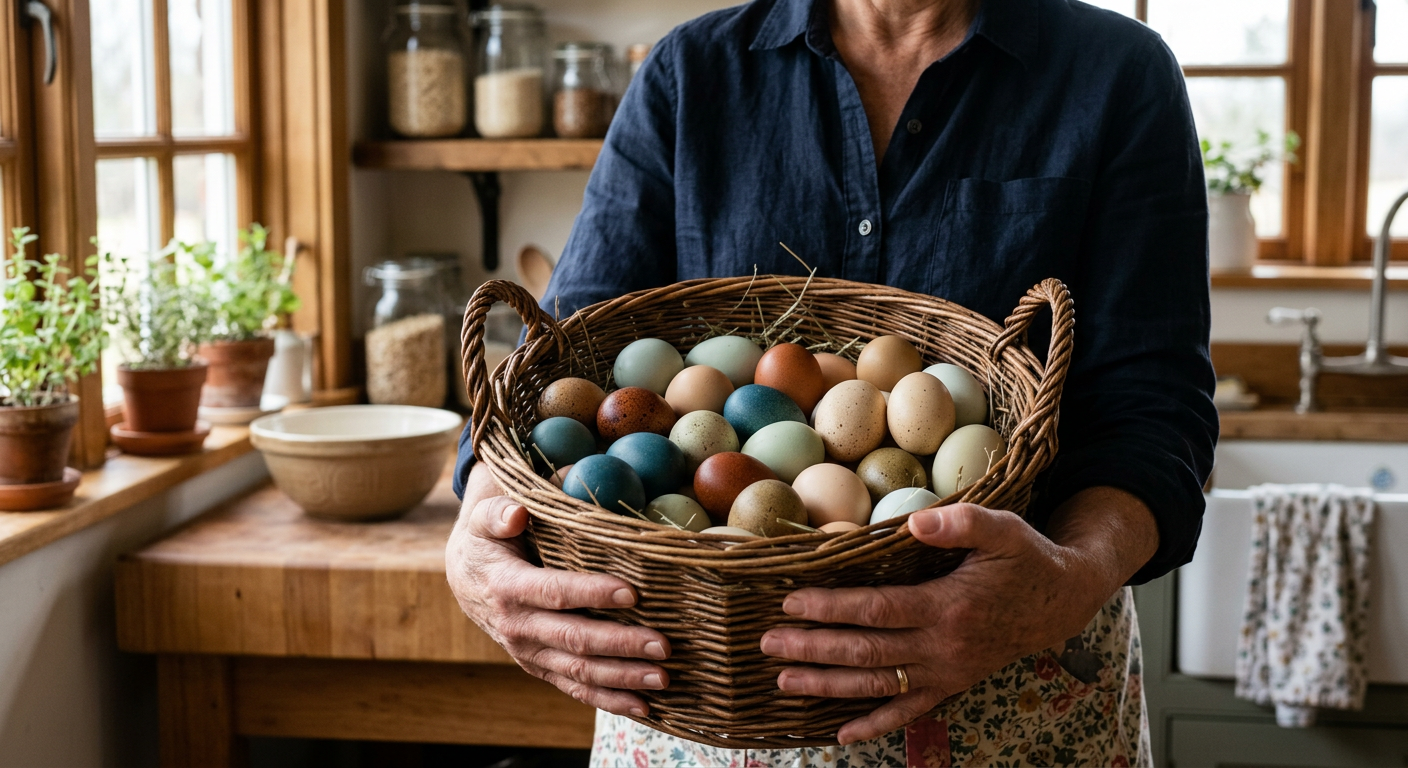
Fresh, Nutritious, and Delicious Eggs
Let’s be honest, this is usually the number one draw, and for good reason! The eggs you’ll get from your own hens are in a league of their own. We noticed a difference immediately, especially in the vibrant orange yolks. Our kids, who were initially skeptical, now swear by “homestead eggs.”
* Taste: They simply taste better. Richer, fuller flavor. It’s hard to go back to store-bought once you’ve experienced fresh.
* Nutrition: Studies suggest backyard eggs can have higher levels of Omega-3 fatty acids, Vitamin D, and lower cholesterol, especially if your hens free-range. Our flock gets to forage for bugs and greens, which we believe makes a big difference.
* Availability: No more running to the store just for eggs! We usually have more than enough for our family of four, plus some to share with neighbors.
This next part? Nobody talks about it, but it changed everything for us.
Pest Control and Garden Helpers
When we first tried growing a small vegetable garden, the slugs and grasshoppers were relentless. This is where our chickens became invaluable! We trained them to respect our raised beds (mostly!) and they feast on garden pests.
* Bug Exterminators: They’re fantastic at controlling insects like grasshoppers, slugs, and grubs without chemicals. Just remember to supervise them around delicate seedlings. We let ours free-range in the garden area for an hour or so each evening after harvest, and it’s a game-changer.
* Weed Control: Chickens love to scratch and peck at weeds, effectively tilling and clearing areas. We’ve used them to clear out patches before planting our fall cover crops.
* Fertilizer Producers: Chicken manure is a rich source of nitrogen, perfect for composting and enriching your garden soil. We collect it from the coop and add it directly to our compost piles. It’s a key ingredient in our how to start a vegetable garden in a small backyard.
Curious about the flip side? It’s not all sunshine and perfectly laid eggs! I’ll cover the real cons next.
—
The Real Cons of Raising Backyard Chickens for Eggs
Before you dive headfirst into chicken ownership, it’s crucial to understand the challenges. We certainly faced a few surprises! It’s not always the idyllic farm life depicted in magazines.
Daily Commitment and Responsibility
Chickens, like any pet or livestock, require consistent care. This isn’t a set it and forget it kind of deal. Even on vacation, we need reliable sitters.
* Daily Chores: Feed, fresh water, and egg collection need to happen every single day. We spend about 15-20 minutes daily on basic chicken care.
* Coop Maintenance: Their coop needs regular cleaning. We deep clean our coop monthly, and spot clean bedding weekly to keep things sanitary and minimize odors. A clean coop is crucial for healthy hens and disease prevention.
* Weather Challenges: Whether it’s scorching summer heat or frigid winter snow, you’ll need to ensure they have adequate shelter, ventilation, and unfrozen water. Winter for us means checking water multiple times a day.
Keep reading — this is where most people mess up.
Upfront Costs and Ongoing Expenses
Getting started with chickens isn’t free. We budgeted, but some things still popped up!
* Initial Setup: You’ll need to buy chicks (we spent $45 for 6 chicks), a brooder setup (heat lamp, feeder, waterer – about $75), a coop (we built ours for around $300 in materials, but a pre-made coop can easily be $500-$1500), and fencing.
* Feed Costs: This is the biggest ongoing expense. A 50lb bag of layer feed costs us about $20-$25 and lasts our 6 hens about 3-4 weeks. Factor in treats, grit, and oyster shell too.
* Health and Supplies: While usually hardy, chickens can get sick. Vet bills for chickens are rare, but you might need remedies, wormers, or mite treatments. We also keep diatomaceous earth on hand for pest control, which adds a few dollars here and there.
Here’s an important point: not every chicken lays forever. I’ll get into that next!
Predators and Pest Attractions
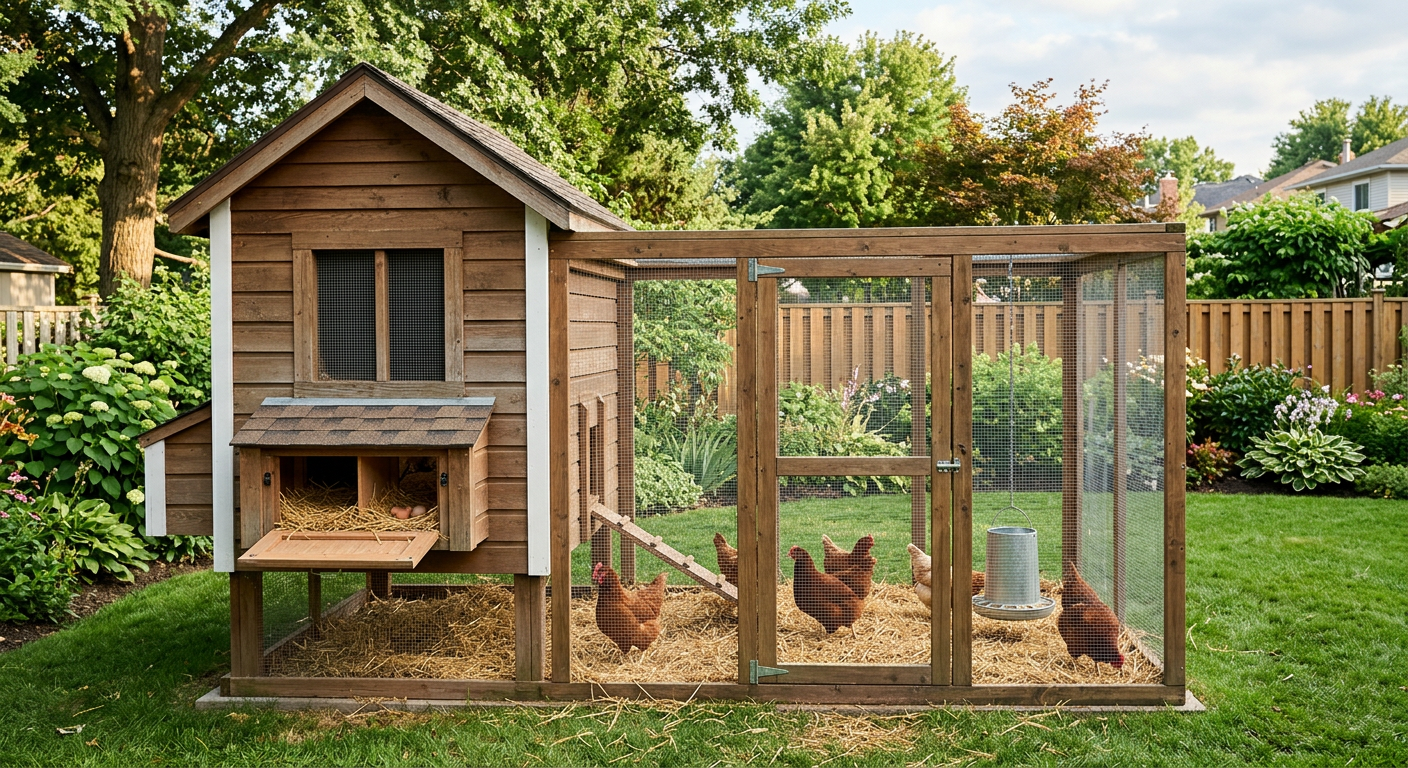
This is a big one. Nature wants your chickens, and trust me, they’re relentless! We learned this the hard way when a raccoon got into our first, less secure coop.
* Constant Threat: Raccoons, foxes, hawks, owls, weasels, stray dogs, and even neighborhood cats are all potential predators. A secure coop is paramount. We use hardware cloth, not chicken wire, for all openings and bury our fence line to prevent digging predators.
* Rodents: Chicken feed can attract mice and rats. Store feed in airtight metal containers and keep the coop clean to deter them. We actually use a movable chicken tractor some seasons to keep them moving off the same ground.
Egg Production Naturally Declines
When we got our first hens, they were egg-laying machines! But like all things, it doesn’t last forever.
* Peak Production: Most hens lay best for their first 2-3 years. After that, production typically declines. Some breeds lay longer than others.
* Winter Slowdown: Shorter daylight hours in winter mean fewer eggs, sometimes none at all, without supplemental lighting. This is completely normal.
* Molting: Once a year, hens will stop laying to regrow their feathers. This can last 6-12 weeks, and it’s a time to make sure they get extra protein!
Don’t skip this — it’ll save you hours (and money).
—
!A secure wooden coop illustrating the setup for raising backyard chickens for eggs pros cons.
💡 Pro Tips
* Start Small: Begin with 3-6 hens. This allows you to learn the ropes without being overwhelmed. We started with six and it felt just right.
* Research Breeds: Choose breeds known for good egg production, docile temperaments, and suitability for your climate. For beginners, breeds like Rhode Island Reds, Plymouth Rocks, or Orpingtons are fantastic choices. We have a mix, and our Wyandottes are incredibly friendly!
* Build Predator-Proof from Day One: Don’t skimp on coop security. Bury hardware cloth, use sturdy latches, and inspect regularly. It’s much easier to do it right the first time than to fix it after a loss.
* Compost Everything: Use your chicken coop clean-out material (straw, shavings, manure) directly into your compost pile. It’s a fantastic nitrogen source and reduces waste.
* Observe Your Flock: Spend a few minutes each day just watching your chickens. You’ll quickly learn their normal behaviors, making it easier to spot when something is off, like an illness or bullying.
—
⚠️ Beginner Mistakes to Avoid
* Not checking local ordinances: This is huge! Many cities have rules about the number of chickens, roosters, and coop setbacks. Check your HOA too. We have friends who had to rehome their flock because they didn’t do their homework.
Using chicken wire for security: Chicken wire keeps chickens in, but it doesn’t keep predators out*. Raccoons can tear right through it. Invest in 1/2″ hardware cloth for secure coops.
* Overfeeding treats: While chickens love treats, too many can lead to obesity and reduced egg production. Stick to 10% or less of their daily intake, focusing on healthy options like kitchen scraps or scratch grains.
* Ignoring ventilation: A lack of proper airflow in the coop can lead to respiratory issues. Ensure there are vents high up for hot air to escape, but still protect from drafts in winter.
Buying roosters unintentionally: Unless you want* fertile eggs and baby chicks, avoid roosters. They can be noisy, aggressive, and aren’t necessary for egg production. Most hatcheries will specify whether chicks are sexed hens or straight run (unsexed).
—
!Child feeding a chicken, an educational benefit of raising backyard chickens for eggs pros cons.
Frequently Asked Questions
🥚 How many eggs will a backyard chicken lay?
Most healthy laying hens will produce 4-6 eggs per week during their peak laying years (ages 1-3). This can vary greatly by breed, feed quality, daylight hours, and the individual hen’s health. We average about 4-5 eggs per day from our 6 hens during spring and summer.
💰 What’s the cost of raising backyard chickens for eggs?
Initial costs can range from $200 (for a very DIY setup) to $1,500+ (for a fancy pre-built coop and equipment). Ongoing costs for feed, grit, and oyster shell average about $20-$30 per month for a small flock of 4-6 hens. So, while you get those fresh eggs, it’s generally not cheaper than store-bought eggs if you factor in all costs.
⚖️ Do I need a rooster for my hens to lay eggs?
No, absolutely not! Hens will lay eggs whether a rooster is present or not. The only difference is that eggs laid by hens without a rooster will be unfertilized and will never develop into chicks. If you want consistently delicious eating eggs, a rooster is unnecessary.
🏡 How much space do chickens need?
Inside the coop, each standard-sized hen needs about 3-4 square feet. For a run or outdoor space, plan on 8-10 square feet per bird if they won’t be free-ranging. More space is always better to prevent boredom and pecking issues. We aim for closer to 10-15 sq ft per bird in our run because we don’t always have time for full free-range.
🕰 How long do chickens live?
With good care, backyard chickens can live for 5-10 years. However, their peak egg-laying years are typically the first 2-3 years. After that, production usually tapers off, though many will continue to lay periodically for several more years.
—
Honestly, bringing chickens onto our homestead has been one of the most rewarding decisions we’ve made. Yes, there are chores, unexpected costs, and a constant battle against predators, but the joy of collecting warm, fresh eggs every morning, and watching our happy flock scratch around, makes it all worth it. It’s a tangible connection to our food and a constant source of entertainment (and sometimes exasperation!).
What’s your biggest challenge with raising backyard chickens for eggs? I’d love to hear your story.
📚 More From Our Homestead
- Top Homesteading Books for Beginners 2026: Start Today
- Tiny Farm, Big Rewards: Best Low Maintenance Farm Animals
- Tiny Space, Big Harvest: How to Start Urban Homesteading Small Space
- Build a Movable Chicken Tractor for Sustainable Pest Control
- Urban Homesteading with Kids: Start Smart Today!
Ready to Start Your Homestead Journey?
Free guides, checklists, and tools to help you build your dream homestead.
👉 Related: Homesteading on a Budget: Our Smart Start Guide
👉 Related: Mastering: What Essential Homesteading Skills Beginners Need
👉 Related: Finding Your Homestead: A Beginner’s Property Guide