Tag: livestock

  • Quail Farming Income Guide: Profitable Small-Scale Farming

    The Ultimate Quail Farming Income Guide: From Backyard Hobby to Profitable Enterprise

    Quail farming represents one of the most accessible and high-margin opportunities in the modern homesteading and small-scale agricultural sectors. Due to their rapid growth cycles, minimal space requirements, and high demand for gourmet eggs and meat, a well-managed quail operation can generate significant secondary or primary income in under eight weeks.

    Getting Started: Requirements and Initial Setup

    To launch a successful quail income project, you don’t need a massive acreage. In fact, many successful farmers begin in a garage, shed, or small backyard corner. However, you must prioritize efficiency to ensure profitability.

    Initial Requirements

    • Housing: Vertical cage systems (battery cages) are the most space-efficient for production. Coturnix quail need approximately 0.5 to 1 square foot per bird.
    • Climate Control: Quail are hardy but suffer in extreme heat or drafts. Proper ventilation and a temperature range of 65-75Β°F (18-24Β°C) optimize egg production.
    • Lighting: To maintain year-round laying, you require a lighting setup that provides 14-16 hours of light per day.
    • Watering/Feeding Systems: Automatic nipple waterers prevent mess and reduce labor, while gravity feeders minimize feed waste.

    Estimated Startup Costs (Example for 100 Birds)

    • Hatching Eggs or Chicks: $100 – $200
    • Brooder Setup: $50 – $80 (Heat lamp, container, bedding)
    • Vertical Caging System: $250 – $400
    • Initial Feed (High Protein): $50
    • Incubator (for scaling): $100 – $300
    • Total Estimated Startup: $550 – $1,030

    Income Potential: Realistic Revenue Scenarios

    Your income depends heavily on your local market and your ability to sell direct-to-consumer versus wholesale. Coturnix quail begin laying at 6-7 weeks, meaning your ROI (Return on Investment) happens faster than with chickens.

    | Scenario | Number of Birds | Primary Product | Monthly Est. Revenue | Annual Est. Profit (After Feed) |

    | :— | :— | :— | :— | :— |

    | Low (Backyard) | 50 | Eggs & Whole Meat | $200 – $350 | $1,800 – $2,500 |

    | Medium (Urban Farm) | 250 | Eggs, Meat, Chicks | $1,200 – $1,800 | $10,000 – $14,000 |

    | High (Commercial) | 1,000+ | Value-Added & Live Sales | $5,000 – $8,000 | $45,000+ |

    Note: High-end scenarios often include selling fertile hatching eggs online, which command a much higher price than eating eggs ($1.00+ per egg vs $0.30 per egg).

    Comprehensive Cost Breakdown

    To maintain a profitable margin, you must track every cent. Feed is your largest recurring expense, typically accounting for 60-70% of total operating costs.

  • Feed (Game Bird Crumble): Approximately $0.60 – $0.80 per bird per month. High protein (24-30%) is essential for growth and egg production.
  • Bedding/Waste Management: $15 – $30 per month. Using pine shavings or a sand-base under cages.
  • Electricity: $10 – $25 per month (LED lighting and seasonal brooder heat).
  • Packaging: $0.15 per egg carton or $0.30 per shrink-wrap bag for meat. Bulk purchasing reduces this cost.
  • Replacement Stock: If you aren’t hatching your own, budget for $1-$2 per day-old chick.
  • Step-by-Step Process to Launching your Farm

    Step 1: Market Research

    Before buying birds, contact local high-end restaurants, Asian markets, and health food stores. Quail eggs are a delicacy in many cultures and a staple for Paleo/Keto enthusiasts. Determine if there is a demand for “Pasture Raised,” “Organic Feed,” or “Heritage” labels.

    Step 2: Choose Your Primary Breed

    For income, the Coturnix (Japanese Quail) is the industry standard. They grow the fastest, lay the most eggs (up to 300/year), and have the best meat-to-bone ratio. Bobwhite quail are popular for flight-ready hunting preserves but take twice as long to mature.

    Step 3: Setup and Brooding

    Start with day-old chicks if you want to save money, or 3-week-old “started” birds to bypass the fragile brooding phase. Maintain a temperature of 95Β°F for the first week, dropping it by 5 degrees each week until they are fully feathered.

    Step 4: Maintenance and Collection

    Collect eggs daily. Quail eggs are fragile; handle with care. Clean cages at least twice a week to prevent ammonia buildup, which can damage the birds’ respiratory systems and lower production levels.

    Step 5: Processing and Sales

    If selling meat, birds are reach peak weight at 8 weeks. Learn to process efficiently; with practice, a single bird can be dressed in under two minutes. For eggs, focus on branding. Clean, clear cartons with a professional label can double your asking price.

    Scaling Your Operation

    Once your first 50-100 birds are profitable, scaling is the only way to reach a full-time income.

    • In-House Hatching: Buy a high-quality cabinet incubator. By hatching your own eggs, you eliminate the cost of buying chicks and can sell the surplus chicks to other hobbyists (typically $2-$5 each).
    • Value-Added Products: Pickled quail eggs are a high-margin item found in gift shops and bars. They have a long shelf life and can be sold for $10-$15 per jar.
    • Fertilizer Sales: Quail manure is extremely high in nitrogen. Dried and bagged, it is a goldmine for organic gardeners.
    • Niche Feathers: Sell feathers to fly-tying enthusiasts or craft suppliers.

    Legal & Regulatory Compliance

    Quail regulations are generally more relaxed than chicken or turkey regulations, but they vary by region.

    • Agricultural Zoning: Check if your property is zoned for “small livestock.” In many cities, quail are categorized as “songbirds” or “pets,” allowing you to bypass chicken bans.
    • Meat Processing (USA): Under the 1,000-bird exemption, many states allow farmers to process and sell a limited number of poultry directly to consumers without a USDA-inspected facility. Always verify your state’s Department of Agriculture guidelines.
    • Egg Sales: Most states require an “Egg Handler’s License” or specific “Candling” standards if selling to grocery stores. Farm-gate sales usually have fewer restrictions.
    • Wildlife Permits: Some states require a permit for Bobwhite quail because they are native game birds. Coturnix rarely require this.

    Success Stories

    Scenario A: The Side-Hustle Pro

    Sarah, an urban gardener, started with 60 Coturnix quail in her garage using a 5-tier rack. She sells 30 dozen eggs a week to a local coffee shop and several neighbors. After feed and bedding costs, Sarah nets $320 per month, which covers her own groceries and gardening supplies.

    Scenario B: The Full-Time Expansion

    Marcus transitioned from a corporate job to a small-scale farm. He manages 1,500 birds. By selling fertile hatching eggs on eBay and shipping them nationwide, he generates $4,000 a month. He supplements this by selling meat to three local farm-to-table restaurants, bringing his total monthly net profit to over $6,500.

    Frequently Asked Questions (FAQ)

    1. Are quail more profitable than chickens?

    Per square foot, yes. Quail mature in 6 weeks compared to 20 weeks for chickens, and they require significantly less feed and space. Their eggs also command a premium price in specialty markets.

    2. How many eggs does a single quail lay?

    A healthy Coturnix hen will lay 250 to 300 eggs per year. Production usually peaks in the first year and declines in the second.

    3. Do I need a rooster to get eggs?

    No. Hens will lay eggs without a male present. However, you will need a rooster (usually 1 male per 4-5 females) if you want to produce fertile eggs for hatching.

    4. Is quail meat in high demand?

    Yes, particularly in the fine-dining industry and among health-conscious consumers. It is seen as a lean, high-protein alternative to chicken with a richer flavor.

    5. Can I keep quail on the ground?

    You can, but for commercial income, wire-floor cages are generally preferred. Ground-raised quail are more susceptible to parasites (coccidiosis) and it is much harder to keep the eggs clean for sale.


    πŸ“š More From Our Homestead

    Ready to Start Your Homestead Journey?

    Free guides, checklists, and tools to help you build your dream homestead.

    Explore Free Resources β†’


  • Homesteading Supplies List for Beginners: The Essentials

    !An essential homesteading supplies list for beginners featuring hand tools and garden gloves on a wooden table.

    Most people think you need a hundred-acre ranch and a brand-new tractor to start living the dream, but honestly? I started with a few pots on a balcony and a cheap pair of gloves. The truth is, the right homesteading supplies list for beginners focuses on quality over quantity and versatility over flashiness.

    🎯 Quick Answer: Your must-have homesteading supplies include high-quality hand tools (shovels, hoes), food preservation gear (canning jars), basic fencing, and reliable seed banks. Focus first on tools that serve multiple purposes to keep your initial investment low and your productivity high.

    🌱 Start Your Homestead Plan β†’

    πŸ”‘ Key Takeaways

    * Invest in multi-purpose tools to save space and money.

    * Prioritize food preservation gear early to avoid harvest waste.

    * Good footwear and gloves are non-negotiable for safety.

    * Start small with water management and fencing essentials.

    * Focus on soil health tools like broadforks and compost bins.

    !Using a metal spade for [gardening, a key item on any homesteading supplies list for beginners.](https://xlvvlujsctgiorcwbtkv.supabase.co/storage/v1/object/public/blog-images/homesteading-supplies-list-for-beginners-the-essentials/after_intro-1776179914087.png)

    1. Gardening Tools: The Foundation of Self-Sufficiency

    Every homesteading supplies list for beginners begins in the dirt. You don’t need a gas-powered tiller that will break your back and your budget. Instead, focus on a high-quality stainless steel spade and a sturdy garden rake. These two tools will handle 80% of your initial yard work.

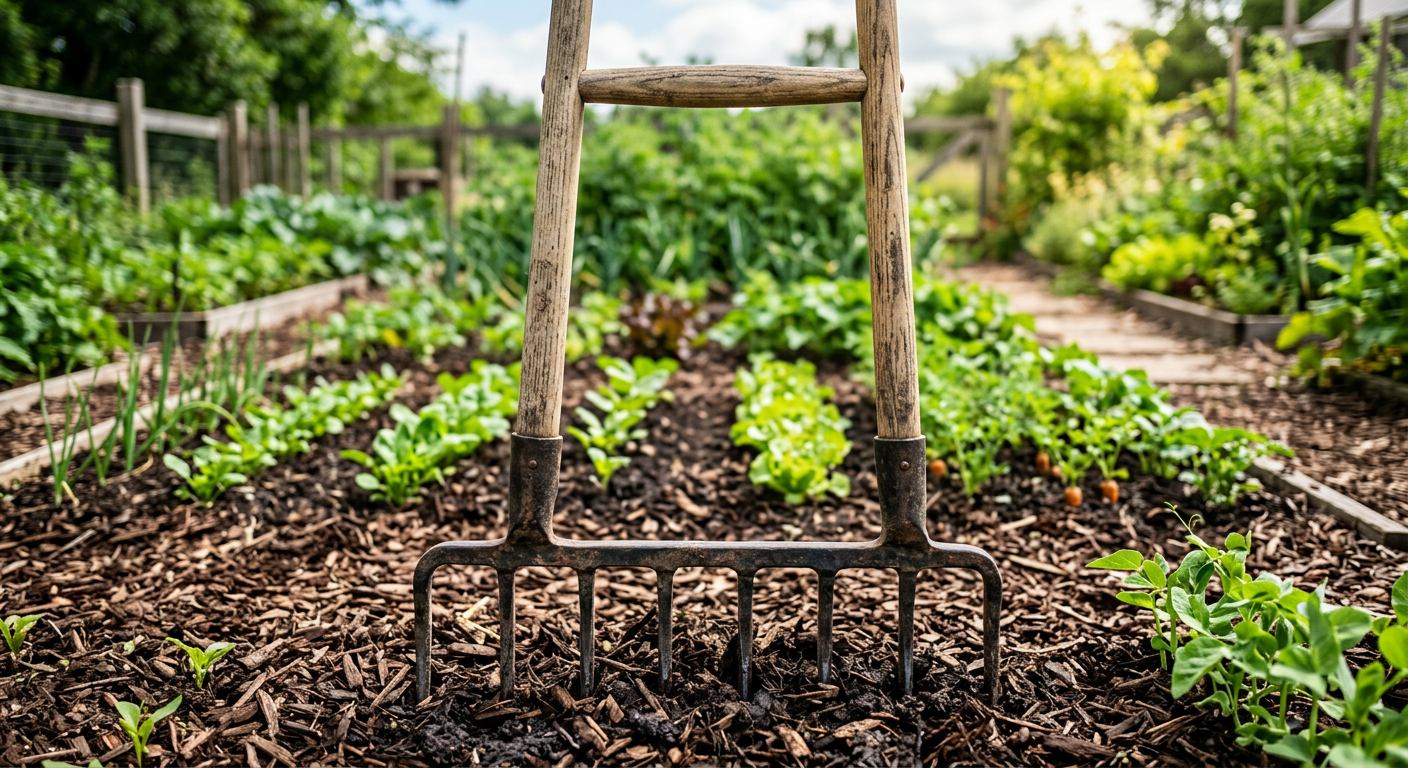
    I highly recommend adding a broadfork to your kit. It aerates the soil without flipping it, which keeps those helpful microbes exactly where they belong. Pair this with a collection of heirloom seeds that you can save and replant next year. It’s the ultimate way to close the loop on your food production.

    Don’t skip this β€” it’ll save you hours (and money).

    Now that you’ve got the tools to grow the food, you need to think about how you’re going to keep it from spoilingβ€”and that’s where things get really fun.

    2. The Kitchen Kit: Preserving the Harvest

    Growing the food is only half the battle; the real magic happens in the kitchen. When building out your homesteading supplies list for beginners, look for a reliable water-bath canner or, better yet, a pressure canner. A pressure canner allows you to preserve low-acid foods like beans and meats safely.

    Stock up on glass Mason jars, new lids, and a good fermentation crock. Fermenting is one of the easiest ways to dive into homesteading because it requires zero electricity and adds a massive boost of probiotics to your diet.

    πŸ“‹ Get the Beginner Checklist β†’

    Keep reading β€” this is where most people mess up.

    Once your kitchen is stocked, you’ll find that your focus shifts from the counter to the perimeter of your property.

    3. Livestock Essentials: Fencing and Feed

    Even if you’re only starting with three chickens, livestock requires a specific set of tools. You’ll need galvanized steel waterers and feeders that can withstand the elements. Plastic might be cheaper, but it cracks in the winter and warps in the summer heat.

    Hardware cloth is the gold standard for your homesteading supplies list for beginners. Unlike standard chicken wire (which only keeps chickens in), hardware cloth keeps predators out. Don’t learn the hard way like I didβ€”raccoons are surprisingly clever with their paws.

    But wait until you hear about the one tool that makes moving heavy bags of feed feel like a breeze.

    !A high-quality broadfork used for soil aeration, part of a homesteading supplies list for beginners.

    4. Maintenance and Repair: The “Homesteaders Toolbox”

    You are now the plumber, the carpenter, and the mechanic. A solid cordless drill, a heavy-duty wheelbarrow, and a high-quality pocket knife are absolute essentials. I’ve found that a wheelbarrow with two wheels in the front is much more stable on uneven terrain than the traditional single-wheel version.

    Also, keep a “fix-it” bucket handy. This should include zip ties, duct tape, fencing pliers, and extra twine. It’s the small stuff that usually breaks when you’re three miles from the nearest hardware store and the sun is going down.

    This next part? Nobody talks about it, but it changed everything for us.

    5. Personal Gear: Protecting the Homesteader

    We often spend so much on the animals and the garden that we forget to take care of ourselves. A pair of waterproof, insulated boots will save your toes during those muddy spring chores. Look for brands that offer lifetime warranties because you will put them to the test.

    High-quality leather work gloves are another must. They protect against thorns, splinters, and blisters that can put you out of commission for days. Homesteading is a marathon, not a sprint, and your body is your most important tool.

    πŸ’‘ Pro Tips

    * Buy Secondhand First: Scour Facebook Marketplace and estate sales for shovels, rakes, and canning jars. Often, the older tools are made of better steel than the new stuff.

    Focus on One Project: Don’t buy the whole homesteading supplies list for beginners at once. Buy what you need for the next* project only.

    * Organization is Key: Get a wall-mounted rack for your hand tools. Tools left on the ground rust faster and become a tripping hazard.

    * Keep a Journal: A simple notebook to track what works and what doesn’t is just as important as a shovel.

    ⚠️ Beginner Mistakes to Avoid

    * Buying Cheap Tools: You’ll end up buying them twice. It’s better to have one great shovel than three flimsy ones.

    * Overcomplicating the First Year: You don’t need a tractor for a half-acre garden. Master the hand tools first.

    * Neglecting Tool Care: If you don’t oil your wooden handles and clean the mud off your blades, they won’t last the season.

    * Ignoring the Water Source: Not having enough hoses or a reliable water barrel system can lead to a lot of heavy lifting you didn’t plan for.

    !Glass jars for food preservation, a must-have on a homesteading supplies list for beginners.

    Frequently Asked Questions

    What is the most important tool for a new homesteader?

    A high-quality, sharp spade. Whether you are planting trees, digging a fence post, or turning compost, a good spade is utilized daily.

    Should I buy a tiller or a broadfork?

    For beginners, a broadfork is usually better. It’s cheaper, doesn’t require fuel, and preserves your soil structure much better than a motorized tiller.

    How many canning jars do I really need?

    Start with 2-3 dozen quart jars and 2 dozen pint jars. You will be surprised how quickly they fill up once your garden starts producing.

    Where can I find affordable homesteading supplies?

    Check local farm auctions, Craigslist, and thrift stores. Specifically, look for high-quality vintage brands that just need a little sanding and oil.

    Getting started doesn’t have to be overwhelming. Focus on the basics, buy the best you can afford, and take it one day at a time. This lifestyle is all about the journey and the lessons learned along the way.

    What’s your biggest challenge with finding the right tools for your space? I’d love to hear your story in the comments below!

    πŸ”§ See Recommended Tools β†’


    πŸ“š More From Our Homestead

    Ready to Start Your Homestead Journey?

    Free guides, checklists, and tools to help you build your dream homestead.

    Explore Free Resources β†’


    πŸ‘‰ Related: How to Make Money From a Small Homestead

    πŸ‘‰ Related: Homesteading Hacks: Save Serious Money on Groceries!

    πŸ‘‰ Related: Basic Food Preservation for Beginners: Our Family’s Go-To Methods

  • Easiest Homesteading Animals to Raise? Here’s Our Story

    !A peaceful backyard showing what are the easiest homesteading animals to raise in a natural setting.

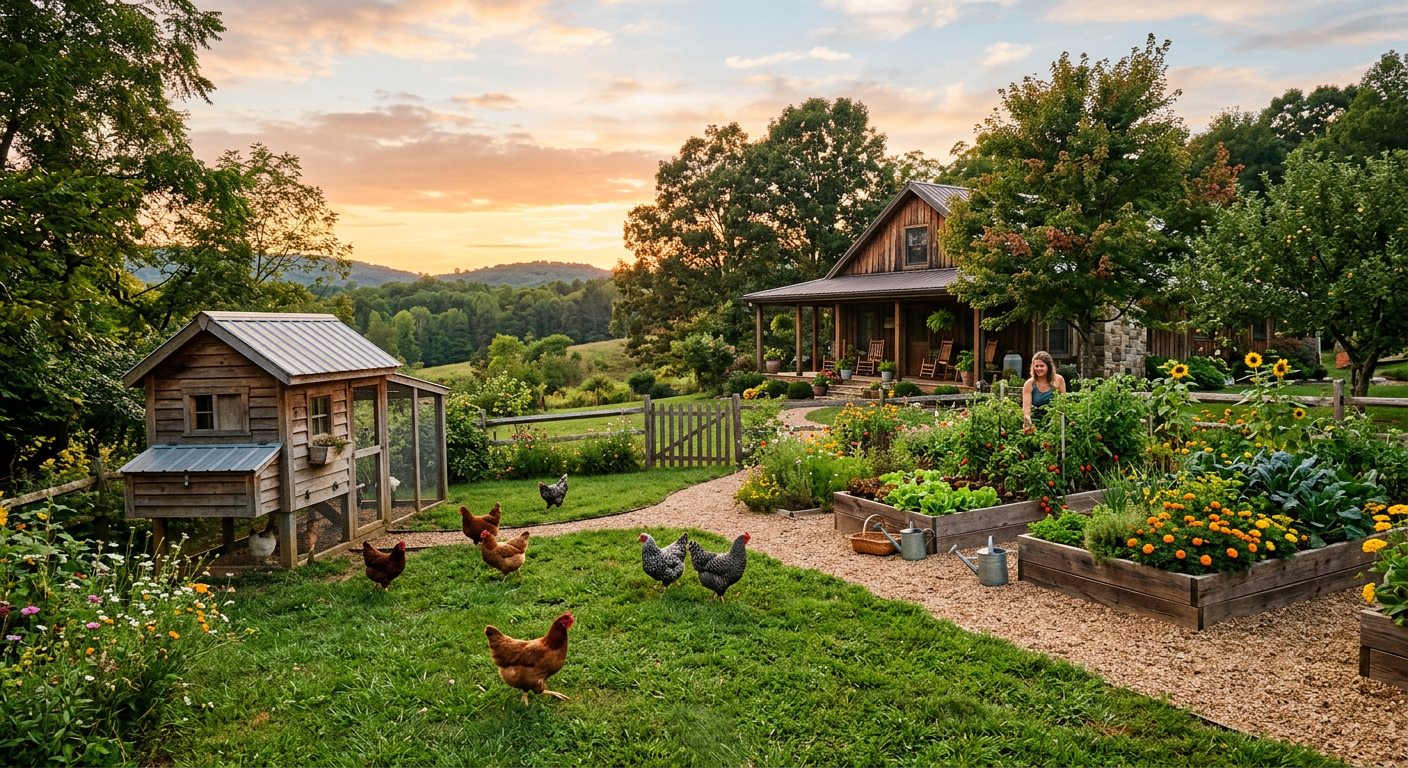
    When we first started dreaming of our homestead, the animal questions hit us hard. Were we ready for the commitment? Would we wake up one day to a chicken escaping or a goat eating our prize-winning tomatoes? It felt overwhelming, but we knew animals were a cornerstone of self-sufficiency. So, we started small, very small, and learned a ton along the way about what are the easiest homesteading animals to raise.

    🎯 Quick Answer: The easiest homesteading animals for beginners are typically chickens (for eggs), rabbits, and sometimes ducks. They require less space, lower initial investment, and simpler daily care compared to larger livestock, making them ideal for learning the ropes of animal husbandry.

    🌱 Start Your Homestead Plan β†’

    πŸ”‘ Key Takeaways

    * Chickens are often the gateway animal: They’re relatively forgiving, provide daily rewards, and teach basic animal care.

    * Consider your space and climate: What works in a small backyard in Florida might not work on acres in Alaska.

    * Start with a clear purpose: Eggs, meat, weed control, or manure? Your goals will guide your choices.

    * Factor in costs beyond purchase price: Feed, housing, veterinary care, and processing all add up.

    * Rabbits offer quick returns: Especially for meat, they grow fast and are highly efficient.

    * Ducks are hardy and productive: Great for eggs, pest control, and don’t need a pond, just a water source for splashing.

    Our First Foray: Chickens for Eggs

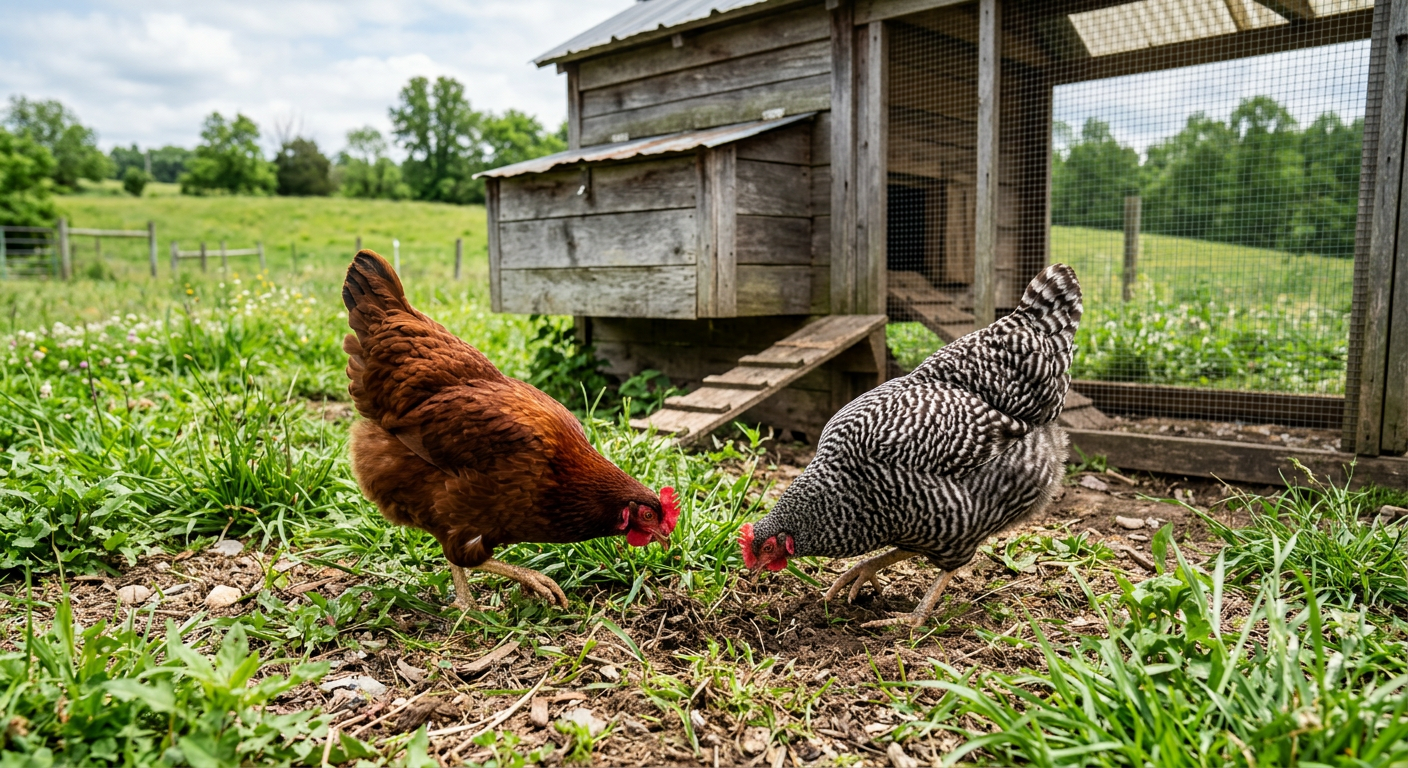
    When we first asked ourselves, “what are the easiest homesteading animals to raise?” the unanimous answer from our homesteader friends was chickens. We started with just six laying hens – three Rhode Island Reds and three Barred Plymouth Rocks – back in 2018. The setup cost us about $400. This included a pre-built coop we found on sale, a feeder, a waterer, and the six chicks themselves at about $3 each. We chose these breeds because they’re known for being good layers and fairly docile.

    Why Chickens are Great for Beginners

    * Daily Rewards: Nothing beats fresh eggs every morning. Our six hens gave us an average of 4-5 eggs a day during peak season. It’s incredibly motivating!

    * Relatively Low Maintenance: They need daily food and water, coop cleaning every week or two, and protection from predators. We spent about 15-20 minutes a day on routine care.

    * Pest Control: Our free-ranging chickens dramatically reduced the bug population in our garden (though we had to watch them around younger plants!).

    * Compost Boosters: Chicken manure is a fantastic addition to the compost pile, enriching our garden beds.

    We quickly learned the true joy of watching them scratch around, and even the occasional skirmish over a tasty bug became part of the daily entertainment. But before you get your own flock, make sure you know what you’re getting into.

    This next part? Nobody talks about it, but it changed everything for us.

    The Unexpected Joy of Rabbits

    Okay, so chickens were great, but we wanted to explore a meat source that wasn’t as noisy or required processing that involved plucking feathers (which, let me tell you, is a job!). That’s when we discovered rabbits. When considering what are the easiest homesteading animals to raise for meat, rabbits quickly rose to the top of our list. Initially, we were a little squeamish, but the efficiency and quality of the meat won us over.

    We started with two New Zealand White does and one buck for $150 total, plus another $200 for sturdy hutches, water bottles, and feeders. Within four months, our first litter was ready for processing. Rabbits have a short gestation period (31 days) and can produce several litters a year.

    Why Rabbits are a Homesteading Gem

    * Quiet & Clean: Compared to other livestock, rabbits are incredibly quiet. Their droppings are also a fantastic, ‘cold’ manure that can be used directly in the garden without composting.

    * Space-Efficient: You can raise a significant number of rabbits in a relatively small area, making them perfect for urban or suburban homesteads. We fit three hutches in a 10×10 foot area.

    * Fast Turnaround: From birth to butcher size, it takes about 10-12 weeks for most meat breeds. This means you can have a consistent supply of lean, healthy meat.

    * Low Feed Conversion Ratio: They convert feed to meat very efficiently, often requiring less feed per pound of meat than chickens or larger animals.

    Our biggest lesson with rabbits was the importance of proper ventilation in their hutches and keeping them safe from predators. Raccoons are a real threat, so secure housing is non-negotiable. Now that you understand the meat side, let’s splash into another easy option.

    πŸ“‹ Get the Beginner Checklist β†’

    Diving into Ducks: The Unsung Heroes

    After a few years with chickens and rabbits, we wanted to diversify our egg supply and add another layer of pest control. Enter ducks! We were initially hesitant, imagining a messy pond full of quacking, but what are the easiest homesteading animals to raise for unique eggs and pest control? Ducks, hands down. We started with five Pekin ducklings for about $25 total. We already had a secure coop space, so our only extra cost was a large, shallow tub for them to splash in.

    Benefits of Raising Ducks

    * Hardy & Disease Resistant: Ducks are generally much hardier than chickens and tend to be more resistant to common poultry diseases. We’ve had far fewer health issues with our ducks.

    * Excellent Foragers: They are incredible at pest control, devouring slugs, snails, and various insects that chickens often ignore. Our garden saw a significant reduction in pests after we introduced the ducks.

    * Rich, Large Eggs: Duck eggs are larger and richer than chicken eggs, fantastic for baking. Our five Pekins gave us 4-5 eggs a day.

    * Less Destructive to Gardens: While they love to forage, they tend to do less damage to garden beds than chickens, as they don’t scratch as aggressively. They do love to dabble and make mud, though, so good drainage is key.

    Our biggest piece of advice for ducks is to ensure they have access to water deep enough to submerge their heads to keep their nostrils clean – even if it’s just a sturdy kiddie pool. They don’t need a pond, but they absolutely thrive with plenty of water for splashing and preening. But before you get too excited about all these animals, there are a few things you need to consider carefully.

    Keep reading β€” this is where most people mess up.

    Key Considerations Before Getting Started

    Choosing what are the easiest homesteading animals to raise isn’t just about the animal itself; it’s about your specific situation. We learned this the hard way by almost getting goats before realizing our fencing was nowhere near adequate.

    Space Requirements

    * Chickens: Require about 2-3 square feet per bird inside the coop and 8-10 square feet per bird in an outdoor run. Our 6 hens lived comfortably in a 24 sq ft coop with a 50 sq ft run. For free-ranging, allow ample space. (USDA’s guide on small flock care).

    * Rabbits: Each adult rabbit needs at least a 24×30 inch hutch. They fare better with more space, especially does with litters. Our three adult rabbits lived in individual 36×30 inch hutches.

    * Ducks: Similar to chickens, about 3-4 square feet per bird inside the coop and 10-15 square feet per bird in a run. They also need a water source for splashing that’s at least 6-8 inches deep and wide enough for them to move around in.

    Time Commitment & Daily Chores

    * Chickens/Ducks: 15-30 minutes daily for feeding, watering, egg collection, and general observation. Weekly coop cleaning can take 30-60 minutes.

    * Rabbits: 10-20 minutes daily for feeding, watering, and checking on kits. Weekly hutch cleaning takes about 15-30 minutes per hutch.

    Initial and Ongoing Costs

    This is where many beginners get surprised. We track all our homestead expenses, and it’s always more than you think.

    * Initial: Animal purchase, housing (coop, hutches), feeders, waterers, fencing.

    * Ongoing: Feed (varies greatly but can be $20-$50/month for a small flock/colony), bedding, supplements, and potential veterinary costs. Our chicken feed for six hens costs us about $25 a month, while rabbit feed for our colony runs about $30 a month.

    Don’t skip this β€” it’ll save you hours (and money).

    !Rhode Island Red and Barred Rock hens, often considered what are the easiest homesteading animals to raise.

    Getting Started: Actionable Steps for New Homesteaders

    So you’ve decided what are the easiest homesteading animals to raise for your situation. Now, let’s get them! Here’s how we approach bringing new animals onto our homestead.

    1. Research Local Regulations

    Before you even look at buying an animal, check your local city or county ordinances. Many suburban areas have limits or prohibitions on certain livestock. This can save you a lot of headache (and potential fines!). We had a scare recently when our county considered new restrictions on fowl, which luckily didn’t pass.

    2. Plan and Build Secure Housing

    Predator protection is paramount. Coyotes, raccoons, stoats, hawks – they’re all looking for an easy meal. For our chickens and ducks, we built an entirely enclosed run using hardware cloth (not chicken wire!) buried six inches into the ground. For rabbits, we use sturdy, elevated hutches with secure latches and wire bottoms to allow droppings to fall through. For ideas on homestead layouts or building, check out our post on Your First Homestead Layout: Simple Steps for Beginners.

    3. Source Healthy Animals

    Buy from reputable breeders or hatcheries. Inspect the animals for signs of illness (lethargy, discharge, ruffled feathers/fur). Healthy stock means fewer problems down the line. We typically order day-old chicks and ducklings from known hatcheries or purchase weaned rabbits from local breeders with good reviews.

    4. Prepare for Feed and Water

    Have your feed, feeders, and waterers ready before the animals arrive. Choose species-appropriate feed. For our chickens and ducks, we use a high-quality layer feed. Rabbits get a special pellet alongside hay. Ensure water is always fresh and clean. Consider automatic waterers to save time.

    πŸ’‘ Pro Tips

    * Start small: Don’t try to get all the animals at once. Master one species before adding another.

    * Observe daily: Learn your animals’ routines. Any change in behavior can be an early sign of trouble.

    * Have a plan for emergencies: Know a local vet who treats livestock or keep a basic animal first-aid kit on hand.

    * Batch chores: We feed and water all our animals at the same time each morning and evening to create an efficient routine.

    * Utilize their waste: Animal manure is a goldmine for your garden. Research composting methods for chickens and ducks or use rabbit manure directly.

    ⚠️ Beginner Mistakes to Avoid

    * Underestimating predator pressure: Many dreams are dashed by predators. Invest in strong, secure housing from day one.

    * Ignoring local regulations: Waking up to a notice from the city about your illegal chickens is no fun. Check first!

    * Starting with too many animals: Overwhelm leads to burnout. A small, well-managed flock/colony is better than a large, neglected one.

    * Not having a plan for processing (meat animals): If you’re raising for meat, understand the process, find local resources, or be prepared to do it yourself.

    * Skimping on feed quality: Cheap feed often means unhealthy animals and lower production. Invest in good nutrition.

    Frequently Asked Questions

    What are the easiest homesteading animals to raise for a small backyard?

    For a small backyard, especially in urban or suburban settings, chickens (for eggs) and rabbits (for meat or pets) are generally the easiest. They require less space and can be housed in contained systems. Consider dwarf chicken breeds for even smaller footprints. Our small urban setup started with 4 chickens in a 4×8 ft coop.

    How much time do beginner homesteading animals require daily?

    Most beginner animals like chickens, ducks, or rabbits require about 15-30 minutes of daily care. This includes feeding, watering, checking on their well-being, and collecting eggs or checking on litters. Weekly deep cleaning of coops or hutches will add more time.

    Can I mix different easy homesteading animals in one space?

    Generally, no. While some people successfully integrate chickens and ducks, or even specific breeds of rabbits, it’s not recommended for beginners. Different species have different needs, social structures, and potential for disease transmission or aggression. We keep our chickens and ducks in separate runs adjacent to each other, and rabbits in their own hutches.

    What’s the biggest cost associated with easy homesteading animals?

    After the initial setup cost for housing, feed is almost always the biggest ongoing expense. It can fluctuate with market prices, but it’s a constant. We try to offset ours by foraging for greens for our rabbits and growing a small flock-specific garden for our chickens and ducks.

    Do I need a permit to raise chickens or ducks in my backyard?

    It depends entirely on your local municipality. Some cities allow a certain number of hens but no roosters, while others prohibit all poultry. Always check with your local zoning and animal control departments before bringing any animals home. This is especially true for us as we live on the edge of the city limits.

    !A homesteader holding a rabbit, one of the top choices for what are the easiest homesteading animals to raise.

    Ready to Bring Life to Your Homestead?

    Deciding what are the easiest homesteading animals to raise for your unique situation is the first exciting step! For us, starting with a small flock of chickens was the perfect introduction, opening the door to rabbits and ducks later. Each animal brought its own rewards and lessons, deepening our connection to the land and our food source. Remember, homesteading is a journey, not a destination, and every animal adds to the rich tapestry of that experience.

    What’s your biggest challenge with starting with homesteading animals? I’d love to hear your story.

    πŸ”§ See Recommended Tools β†’


    πŸ“š More From Our Homestead

    Ready to Start Your Homestead Journey?

    Free guides, checklists, and tools to help you build your dream homestead.

    Explore Free Resources β†’


    πŸ‘‰ Related: Homesteading Without Land? Get Experience Now!

    πŸ‘‰ Related: Maintaining Off-Grid Appliances and Systems for Longevity

  • Raising Backyard Chickens: Pros, Cons & What to Expect

    !A flock of hens grazing in a garden, highlighting raising backyard chickens for eggs pros cons.

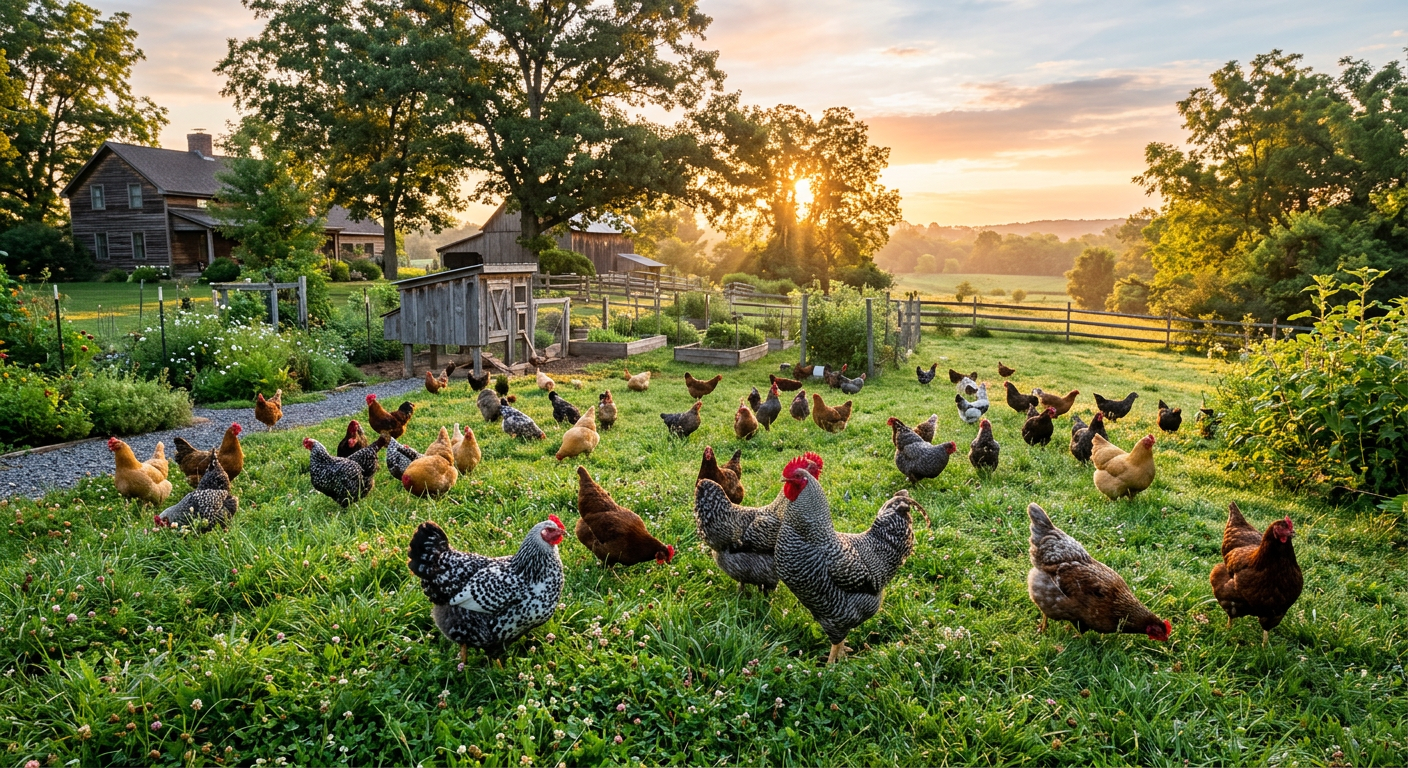
    When we first moved to our homestead, one of the very first things my partner and I talked about was getting chickens. Fresh eggs every morning? The idea was just so appealing! We pictured happy hens clucking around, scratching in the dirt, and providing us with breakfast β€” it sounded like a dream. And in many ways, it truly has been, but it wasn’t without its steep learning curve and a few unexpected realities.

    🎯 Quick Answer: Raising backyard chickens for eggs offers incredibly fresh, nutritious food and a rewarding connection to your food source, but it also comes with daily responsibilities, potential costs, and the need to protect them from predators. It’s a commitment, but one that many homesteaders find incredibly worthwhile for the consistent supply of fresh eggs.

    🌱 Start Your Homestead Plan β†’

    πŸ”‘ Key Takeaways

    * Fresh Eggs are Unbeatable: The taste and nutrition of homegrown eggs far surpass store-bought.

    * Daily Commitment: Chickens require daily feeding, watering, and coop maintenance, rain or shine.

    * Upfront Costs: Expect initial expenses for chicks, coop, feed, and supplies – we spent about $500 to get started with 6 hens.

    * Predator Protection is Key: Raccoons, fox, and even hawks are always a threat; secure housing is non-negotiable.

    * Local Ordinance Check: Always verify local laws regarding backyard poultry before investing.

    * Educational for Families: It’s a fantastic way for kids to learn about food systems and animal care.

    !A basket of fresh colorful eggs showing the benefits of raising backyard chickens for eggs pros cons.

    The Unbeatable Pros of Raising Backyard Chickens for Eggs

    There’s a reason homesteaders and backyard enthusiasts alike rave about their flock. For us, the benefits quickly outweighed the initial effort. Here’s why we love our hens.

    Fresh, Nutritious, and Delicious Eggs

    Let’s be honest, this is usually the number one draw, and for good reason! The eggs you’ll get from your own hens are in a league of their own. We noticed a difference immediately, especially in the vibrant orange yolks. Our kids, who were initially skeptical, now swear by “homestead eggs.”

    * Taste: They simply taste better. Richer, fuller flavor. It’s hard to go back to store-bought once you’ve experienced fresh.

    * Nutrition: Studies suggest backyard eggs can have higher levels of Omega-3 fatty acids, Vitamin D, and lower cholesterol, especially if your hens free-range. Our flock gets to forage for bugs and greens, which we believe makes a big difference.

    * Availability: No more running to the store just for eggs! We usually have more than enough for our family of four, plus some to share with neighbors.

    This next part? Nobody talks about it, but it changed everything for us.

    Pest Control and Garden Helpers

    When we first tried growing a small vegetable garden, the slugs and grasshoppers were relentless. This is where our chickens became invaluable! We trained them to respect our raised beds (mostly!) and they feast on garden pests.

    * Bug Exterminators: They’re fantastic at controlling insects like grasshoppers, slugs, and grubs without chemicals. Just remember to supervise them around delicate seedlings. We let ours free-range in the garden area for an hour or so each evening after harvest, and it’s a game-changer.

    * Weed Control: Chickens love to scratch and peck at weeds, effectively tilling and clearing areas. We’ve used them to clear out patches before planting our fall cover crops.

    * Fertilizer Producers: Chicken manure is a rich source of nitrogen, perfect for composting and enriching your garden soil. We collect it from the coop and add it directly to our compost piles. It’s a key ingredient in our how to start a vegetable garden in a small backyard.

    Curious about the flip side? It’s not all sunshine and perfectly laid eggs! I’ll cover the real cons next.

    The Real Cons of Raising Backyard Chickens for Eggs

    Before you dive headfirst into chicken ownership, it’s crucial to understand the challenges. We certainly faced a few surprises! It’s not always the idyllic farm life depicted in magazines.

    Daily Commitment and Responsibility

    Chickens, like any pet or livestock, require consistent care. This isn’t a set it and forget it kind of deal. Even on vacation, we need reliable sitters.

    * Daily Chores: Feed, fresh water, and egg collection need to happen every single day. We spend about 15-20 minutes daily on basic chicken care.

    * Coop Maintenance: Their coop needs regular cleaning. We deep clean our coop monthly, and spot clean bedding weekly to keep things sanitary and minimize odors. A clean coop is crucial for healthy hens and disease prevention.

    * Weather Challenges: Whether it’s scorching summer heat or frigid winter snow, you’ll need to ensure they have adequate shelter, ventilation, and unfrozen water. Winter for us means checking water multiple times a day.

    Keep reading β€” this is where most people mess up.

    Upfront Costs and Ongoing Expenses

    Getting started with chickens isn’t free. We budgeted, but some things still popped up!

    * Initial Setup: You’ll need to buy chicks (we spent $45 for 6 chicks), a brooder setup (heat lamp, feeder, waterer – about $75), a coop (we built ours for around $300 in materials, but a pre-made coop can easily be $500-$1500), and fencing.

    * Feed Costs: This is the biggest ongoing expense. A 50lb bag of layer feed costs us about $20-$25 and lasts our 6 hens about 3-4 weeks. Factor in treats, grit, and oyster shell too.

    * Health and Supplies: While usually hardy, chickens can get sick. Vet bills for chickens are rare, but you might need remedies, wormers, or mite treatments. We also keep diatomaceous earth on hand for pest control, which adds a few dollars here and there.

    Here’s an important point: not every chicken lays forever. I’ll get into that next!

    πŸ“‹ Get the Beginner Checklist β†’

    Predators and Pest Attractions

    This is a big one. Nature wants your chickens, and trust me, they’re relentless! We learned this the hard way when a raccoon got into our first, less secure coop.

    * Constant Threat: Raccoons, foxes, hawks, owls, weasels, stray dogs, and even neighborhood cats are all potential predators. A secure coop is paramount. We use hardware cloth, not chicken wire, for all openings and bury our fence line to prevent digging predators.

    * Rodents: Chicken feed can attract mice and rats. Store feed in airtight metal containers and keep the coop clean to deter them. We actually use a movable chicken tractor some seasons to keep them moving off the same ground.

    Egg Production Naturally Declines

    When we got our first hens, they were egg-laying machines! But like all things, it doesn’t last forever.

    * Peak Production: Most hens lay best for their first 2-3 years. After that, production typically declines. Some breeds lay longer than others.

    * Winter Slowdown: Shorter daylight hours in winter mean fewer eggs, sometimes none at all, without supplemental lighting. This is completely normal.

    * Molting: Once a year, hens will stop laying to regrow their feathers. This can last 6-12 weeks, and it’s a time to make sure they get extra protein!

    Don’t skip this β€” it’ll save you hours (and money).

    !A secure wooden coop illustrating the setup for raising backyard chickens for eggs pros cons.

    πŸ’‘ Pro Tips

    * Start Small: Begin with 3-6 hens. This allows you to learn the ropes without being overwhelmed. We started with six and it felt just right.

    * Research Breeds: Choose breeds known for good egg production, docile temperaments, and suitability for your climate. For beginners, breeds like Rhode Island Reds, Plymouth Rocks, or Orpingtons are fantastic choices. We have a mix, and our Wyandottes are incredibly friendly!

    * Build Predator-Proof from Day One: Don’t skimp on coop security. Bury hardware cloth, use sturdy latches, and inspect regularly. It’s much easier to do it right the first time than to fix it after a loss.

    * Compost Everything: Use your chicken coop clean-out material (straw, shavings, manure) directly into your compost pile. It’s a fantastic nitrogen source and reduces waste.

    * Observe Your Flock: Spend a few minutes each day just watching your chickens. You’ll quickly learn their normal behaviors, making it easier to spot when something is off, like an illness or bullying.

    ⚠️ Beginner Mistakes to Avoid

    * Not checking local ordinances: This is huge! Many cities have rules about the number of chickens, roosters, and coop setbacks. Check your HOA too. We have friends who had to rehome their flock because they didn’t do their homework.

    Using chicken wire for security: Chicken wire keeps chickens in, but it doesn’t keep predators out*. Raccoons can tear right through it. Invest in 1/2″ hardware cloth for secure coops.

    * Overfeeding treats: While chickens love treats, too many can lead to obesity and reduced egg production. Stick to 10% or less of their daily intake, focusing on healthy options like kitchen scraps or scratch grains.

    * Ignoring ventilation: A lack of proper airflow in the coop can lead to respiratory issues. Ensure there are vents high up for hot air to escape, but still protect from drafts in winter.

    Buying roosters unintentionally: Unless you want* fertile eggs and baby chicks, avoid roosters. They can be noisy, aggressive, and aren’t necessary for egg production. Most hatcheries will specify whether chicks are sexed hens or straight run (unsexed).

    !Child feeding a chicken, an educational benefit of raising backyard chickens for eggs pros cons.

    Frequently Asked Questions

    πŸ₯š How many eggs will a backyard chicken lay?

    Most healthy laying hens will produce 4-6 eggs per week during their peak laying years (ages 1-3). This can vary greatly by breed, feed quality, daylight hours, and the individual hen’s health. We average about 4-5 eggs per day from our 6 hens during spring and summer.

    πŸ’° What’s the cost of raising backyard chickens for eggs?

    Initial costs can range from $200 (for a very DIY setup) to $1,500+ (for a fancy pre-built coop and equipment). Ongoing costs for feed, grit, and oyster shell average about $20-$30 per month for a small flock of 4-6 hens. So, while you get those fresh eggs, it’s generally not cheaper than store-bought eggs if you factor in all costs.

    βš–οΈ Do I need a rooster for my hens to lay eggs?

    No, absolutely not! Hens will lay eggs whether a rooster is present or not. The only difference is that eggs laid by hens without a rooster will be unfertilized and will never develop into chicks. If you want consistently delicious eating eggs, a rooster is unnecessary.

    🏑 How much space do chickens need?

    Inside the coop, each standard-sized hen needs about 3-4 square feet. For a run or outdoor space, plan on 8-10 square feet per bird if they won’t be free-ranging. More space is always better to prevent boredom and pecking issues. We aim for closer to 10-15 sq ft per bird in our run because we don’t always have time for full free-range.

    πŸ•° How long do chickens live?

    With good care, backyard chickens can live for 5-10 years. However, their peak egg-laying years are typically the first 2-3 years. After that, production usually tapers off, though many will continue to lay periodically for several more years.

    Honestly, bringing chickens onto our homestead has been one of the most rewarding decisions we’ve made. Yes, there are chores, unexpected costs, and a constant battle against predators, but the joy of collecting warm, fresh eggs every morning, and watching our happy flock scratch around, makes it all worth it. It’s a tangible connection to our food and a constant source of entertainment (and sometimes exasperation!).

    What’s your biggest challenge with raising backyard chickens for eggs? I’d love to hear your story.

    πŸ”§ See Recommended Tools β†’


    πŸ“š More From Our Homestead

    Ready to Start Your Homestead Journey?

    Free guides, checklists, and tools to help you build your dream homestead.

    Explore Free Resources β†’


    πŸ‘‰ Related: Homesteading on a Budget: Our Smart Start Guide

    πŸ‘‰ Related: Mastering: What Essential Homesteading Skills Beginners Need

    πŸ‘‰ Related: Finding Your Homestead: A Beginner’s Property Guide