Tag: DIY

  • Homesteading on a Budget: Our Smart Start Guide

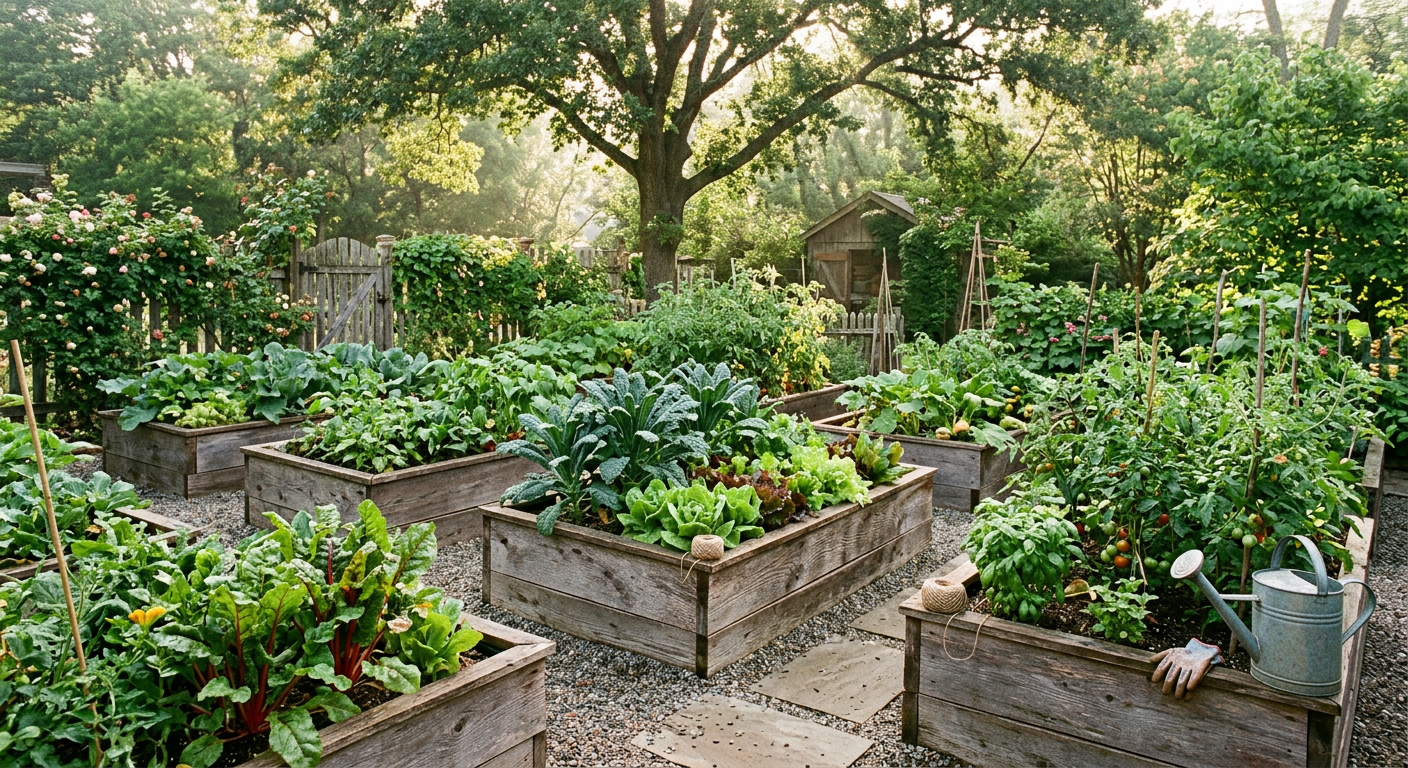
    !A thriving backyard garden showing how to get started homesteading on a budget with DIY raised beds.
    When we first started dreaming of our homestead, the biggest thing holding us back wasn’t the hard work (we’re not afraid of dirty hands!), it was the sheer perceived cost. We pictured huge barns, expensive equipment, and acres of land, and thought, “There’s no way we can afford that!” But thankfully, we quickly learned that how to get started homesteading on a budget isn’t just possible; it’s often the best way to begin. We started small, learned as we went, and saved thousands by being resourceful.

    ๐ŸŽฏ Quick Answer: To get started homesteading on a budget, focus on skill-building over immediate large purchases, prioritize high-yield projects like gardening and composting, and leverage free or low-cost resources like community gardens, skill-shares, and DIY projects. Start with what you have, where you are.

    ๐ŸŒฑ Start Your Homestead Plan โ†’

    ๐Ÿ”‘ Key Takeaways

    Skills First, Purchases Second: Invest time in learning before spending money on tools or supplies. Knowing how* to do something saves you from buying unnecessary gadgets.

    * Start Small & Scale Up: Don’t try to do everything at once. Focus on one or two projects that offer the most immediate return, like a small vegetable garden or composting system.

    * DIY & Repurpose: The most cost-effective homesteads are built on ingenuity. Look for free materials, learn to fix things, and repurpose items you already own.

    * Community is Key: Barter skills, share resources, and learn from experienced homesteaders. Your community is an invaluable, often free, resource.

    * Track Your Wins (and Losses): Keep a journal of what works and what doesn’t. This helps you refine your approach and avoid costly mistakes in the future.

    * Focus on ‘Highest Return’ Projects: Prioritize activities that directly reduce your grocery bill or build essential self-sufficiency skills immediately.

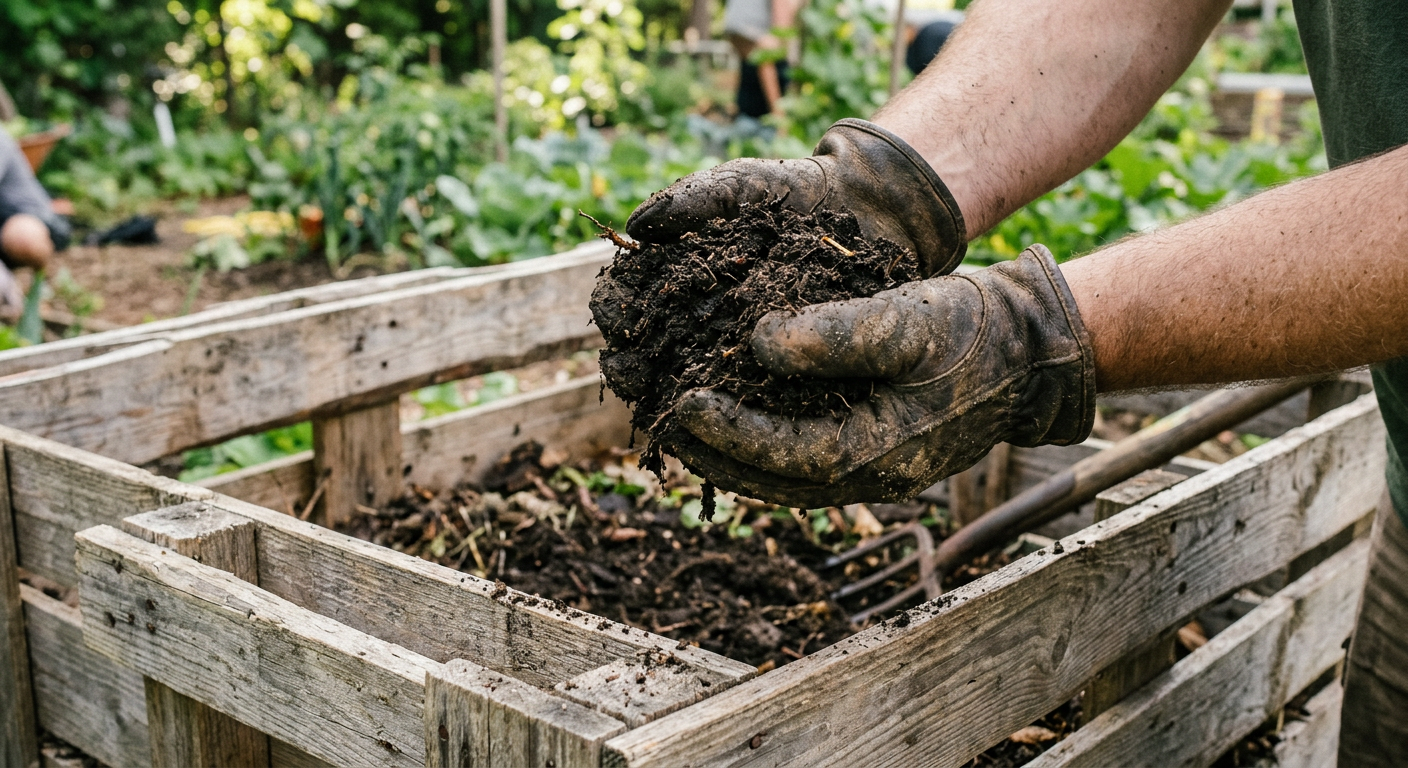
    !Close-up of healthy compost, a key part of how to get started homesteading on a budget.
    Our Journey: Starting with Just a Small Garden Plot

    When we decided to take the plunge, we didn’t buy a sprawling farm. In fact, we were still living in a suburban home with a postage-stamp-sized backyard. Our very first step in how to get started homesteading on a budget was transforming about 100 square feet of lawn into a vegetable garden. We spent less than $50 that first spring on some seeds, soil amendments, and a few hand tools we already had. That tiny garden, while not feeding us entirely, gave us fresh produce for months and invaluable experience.

    Prioritizing High-Yield, Low-Cost Projects

    We learned early on that not all homesteading projects are created equal in terms of upfront cost versus return. Our priorities became:

    * Vegetable Gardening: Hands down, this was the biggest bang for our buck. We saved hundreds of dollars on groceries by growing our own tomatoes, lettuce, beans, and herbs. For more on getting started, check out our guide on How to Start a Small Backyard Vegetable Garden: Beginner Guide.

    * Composting: Free fertilizer! We started with a simple DIY pallet compost bin. All our kitchen scraps, yard waste, and even shredded paper went in, and rich soil came out. Cost: essentially zero.

    * Preserving Food: Learning basic canning, freezing, and dehydrating meant we could make our garden bounty last. We started with a basic water bath canner our grandma gave us.

    This next part? Nobody talks about it, but it changed everything for us.

    The Power of DIY and Scavenging for Your Homestead

    One of the biggest budget-savers on our homestead has been our willingness to build, fix, and repurpose. We rarely buy new if we can help it. When figuring out how to get started homesteading on a budget, think like a scavenger. Our chicken coop was built from reclaimed pallets and old fence posts we got for free from a local construction site. Our first rainwater catchment system (a crucial budget saver for irrigation!) was literally just a fifty-gallon food-grade barrel we bought for $20, connected to our gutter with a simple diverter.

    Where to Find Free & Cheap Materials:

    * Craigslist/Facebook Marketplace (Free Section): This is a goldmine for everything from moving boxes (great for sheet mulching!) to compost, landscaping rocks, and even lumber scraps.

    * Construction Sites: Always ask first! Often, they’ll let you take scrap wood, concrete blocks, or dirt for free.

    * Local Businesses: Restaurants might have five-gallon pickle buckets (perfect for harvesting or small storage), bakeries might have large plastic tubs, and fruit stands often have apple boxes.

    * Roadside Finds: Keep an eye out for discarded furniture, old tires (great for elevated garden beds), or broken appliances that have useful parts.

    We’ve outfitted entire sections of our homestead purely from salvaged materials. It takes more time and creativity, yes, but it saves an incredible amount of money. Next, I’ll share how we approached animal integration without breaking the bank.

    Smart Ways to Introduce Livestock on a Shoestring

    Adding animals can feel like a massive jump in cost, but it doesn’t have to be. We integrated chickens into our homestead after about a year, and we did it as frugally as possible. When considering how to get started homesteading on a budget with animals, always ask yourself: What’s the immediate benefit, and what’s the minimum viable setup?

    Our Chicken Experiment (and How We Kept Costs Low)

    We started with just three baby chicks we bought for about $4 each. Their initial brooder was a large plastic tote in our spare bathroom! We built their first small coop almost entirely from free pallets and reclaimed roofing tin. Our total investment was under $75 for the chicks, some feed, and a few hardware pieces.

    * Consider “Free” Chickens: Sometimes local farmers or enthusiasts offer surplus roosters or older hens for free. Check local groups!

    * DIY Housing: Avoid expensive pre-made coops or shelters. Learn to build your own from scavenged materials. For inspiration, check out our post on Build a Movable Chicken Tractor for Sustainable Pest Control.

    * Forage & Supplement: Let your chickens free-range if possible to reduce feed costs. We also sprout grains and grow fodder for them (more free food!).

    * Start Small: Don’t get 20 chickens if you’ve never had any. Start with 3-5, learn their needs, and expand if your budget and space allow.

    Keep reading โ€” this is where most people mess up.

    ๐Ÿ“‹ Get the Beginner Checklist โ†’

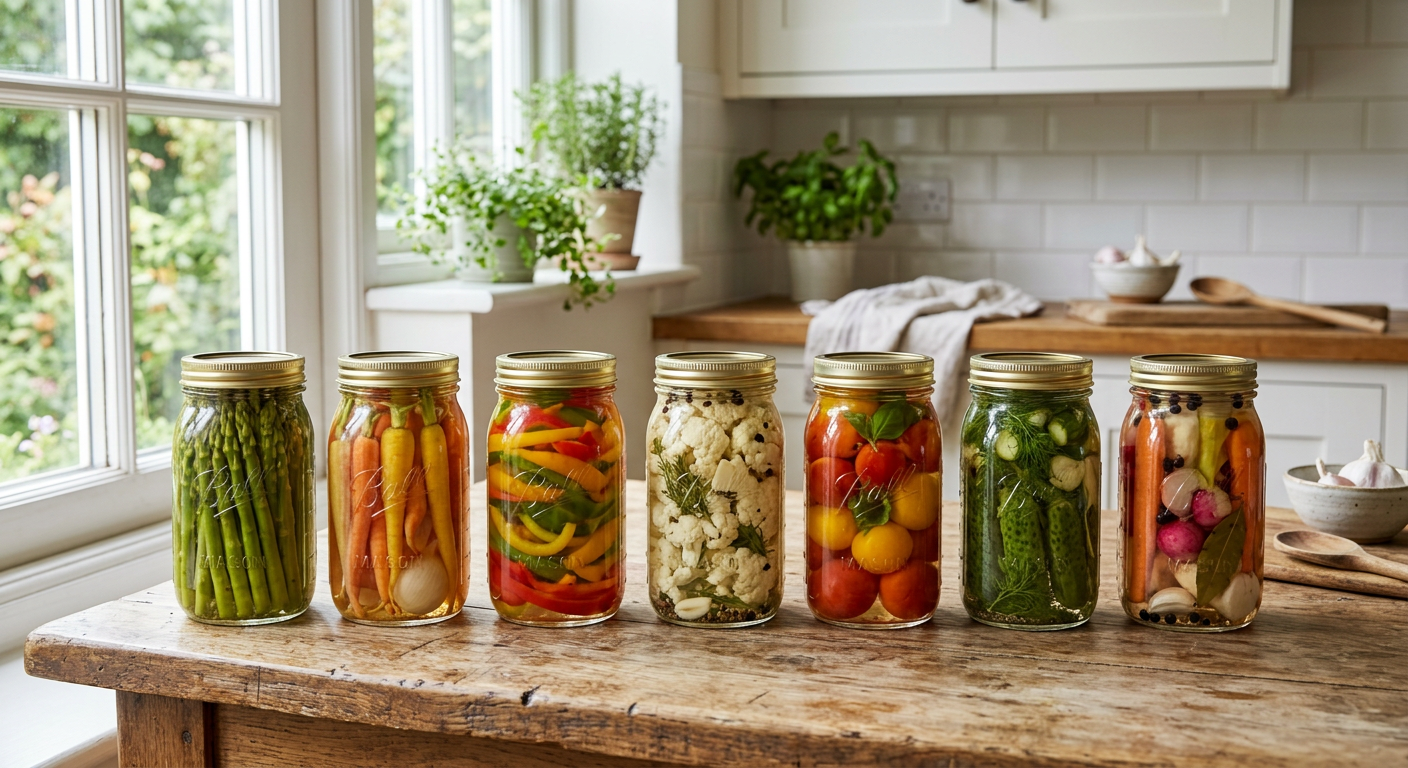
    !Preserved jars of food highlighting how to get started homesteading on a budget through food storage.

    Building Essential Skills (Without Paid Courses!)

    This is perhaps the most overlooked aspect of how to get started homesteading on a budget: investing in your knowledge. Every skill you learn for free means you don’t have to pay someone else to do it, or buy an expensive tool you’ll only use once. We spent countless hours reading books from the library, watching YouTube videos, and talking to experienced homesteaders.

    Frugal Skill-Building Resources:

    * Your Local Library: Seriously, it’s a treasure trove. We’ve learned about everything from canning to basic carpentry and animal husbandry just through library books. There are some fantastic Top Homesteading Books for Beginners 2026: Start Today.

    * Online Tutorials: From YouTube to university extension sites (like the USDA National Agricultural Library), there’s a wealth of free information on almost any homesteading topic you can imagine.

    * Local Co-ops & Groups: Many areas have gardening clubs, homesteading meetups, or permaculture groups. These are fantastic places to learn, share resources, and even barter skills.

    * Apprenticeships/Volunteering: Offer to help out a local farm or experienced homesteader in exchange for learning. It’s hands-on experience that costs you nothing but time.

    The less you have to pay for an expert, the more money stays in your budget for the essentials. Speaking of essentials, let’s talk about the common pitfalls.

    ๐Ÿ’ก Pro Tips

    The “Homesteading Before You Homestead” Mindset: Start practicing skills now*, even if you’re in an apartment. Grow herbs in pots, learn to mend clothes, cook from scratch. You’re already homesteading!

    * Leverage Free Manure: Find local farms or equestrians who are happy for you to take their aged manure for your garden. Itโ€™s a fantastic, free soil amendment.

    * Seed Saving: Once you’ve grown a first successful crop, learn to save seeds from open-pollinated varieties. This virtually eliminates future seed costs.

    * “Use It Up, Wear It Out, Make It Do, or Do Without”: This old adage is the homesteader’s mantra. Truly embrace it to save money and foster resourcefulness.

    * One-Year Plan: Focus on what you can realistically achieve in your first year with minimal investment. For us, it was a productive garden and starting our compost and worm bin.

    โš ๏ธ Beginner Mistakes to Avoid

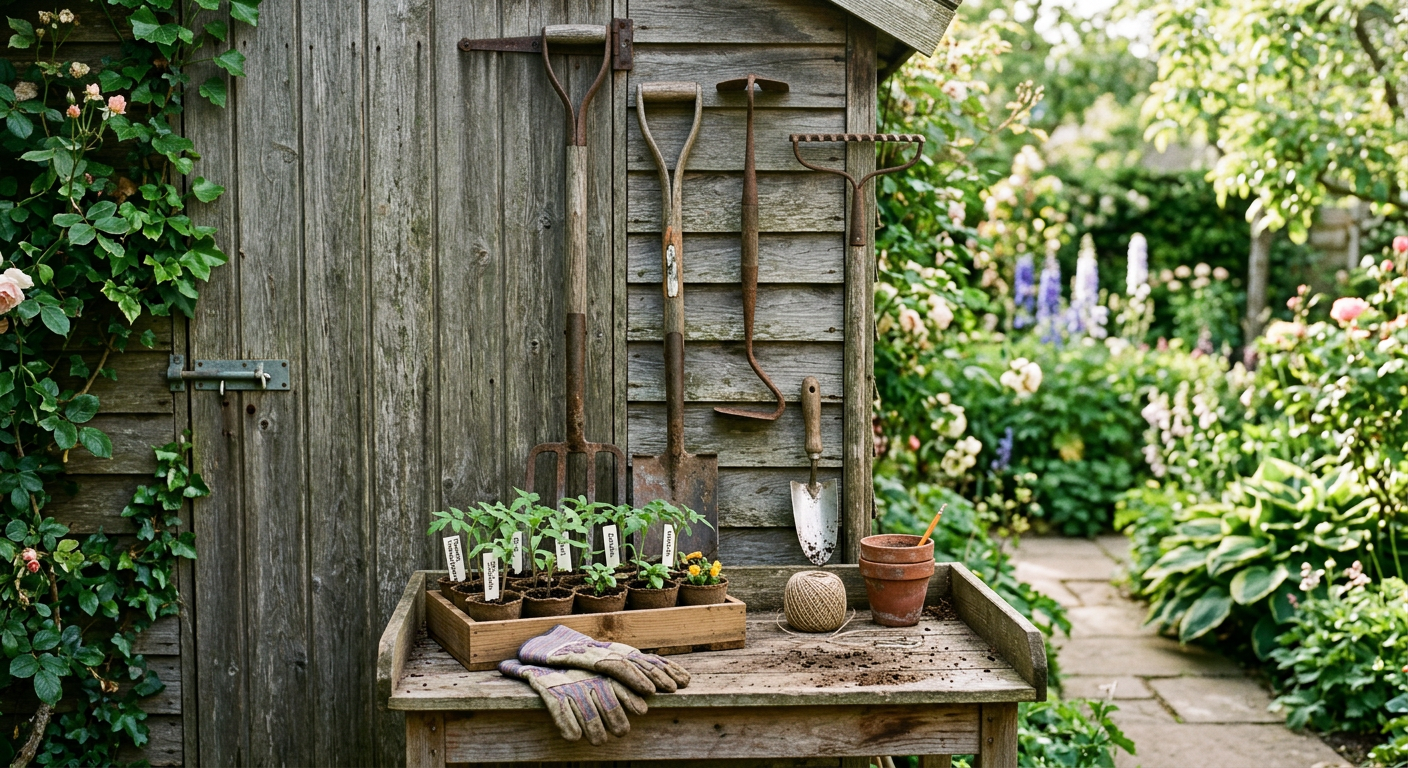
    Buying Too Many Tools Too Soon: Resist the urge for every shiny new garden gadget. Start with the basics (shovel, rake, hoe, hand trowel) and only buy specialized tools when you truly* need them and have the experience to back it up. We have a great guide on Essential Homesteading Tools to Buy First? Our Top Picks!.

    * Overspending on Seeds/Plants: Especially as a beginner, it’s easy to buy more than you can possibly plant or care for. Start small. Seeds are cheaper than starts.

    * Ignoring Soil Health: Trying to grow in poor soil is a recipe for frustration and wasted money on fertilizers. Focus on building healthy soil from day one with compost, mulch, and cover crops.

    * Taking on Too Many Projects: Burnout leads to wasted resources. Start with one or two manageable projects, master them, then slowly expand your homestead. You can’t do it all at once.

    * Not Learning Basic Repairs: Paying someone else to fix a leaky faucet or a broken fence post quickly eats into your budget. Watch videos, read manuals, and learn basic maintenance.

    !Second-hand tools and seedlings represent how to get started homesteading on a budget efficiently.
    Frequently Asked Questions

    How much money do I need to start homesteading?

    You can literally start with zero dollars if you’re willing to invest time and effort. Start with free resources like library books and foraging. Many of us started with just a few dollars for seeds and grew from there. The goal is to reduce reliance on money, not necessarily to spend a lot of it.

    Can I homestead without a lot of land?

    Absolutely! We started on less than an eighth of an acre. Urban homesteading is a growing movement. Focus on vertical gardening, container gardening, and maximizing every square foot. Check out our post on Tiny Space, Big Harvest: How to Start Urban Homesteading Small Space.

    What’s the very first step on a budget?

    The absolute first step is to assess your current skills and resources. What do you already have? What can you learn for free? For us, it was a small patch of grass and a determination to learn how to grow food. Start with research and skill-building before any purchases.

    How do I acquire animals cheaply?

    Look for local farm sales, check online classifieds from hobby farmers offering surplus animals, or even consider rescuing animals. DIY pens and coops from reclaimed materials will drastically cut costs. Remember, chickens are often the most affordable entry point for livestock.

    Is homesteading ever truly free?

    While you’ll always have some input of time, energy, or very basic supplies, the financial outlay can be incredibly low, especially if you prioritize skill-building, foraging, and repurposing. The goal isn’t necessarily zero cost, but rather, maximum self-sufficiency and minimal reliance on external systems.

    Honestly, how to get started homesteading on a budget boils down to one thing: ingenuity. We didn’t start with a trust fund or a sprawling farm. We started with two hands, a small garden, and a burning desire to live more sustainably. Every saved seed, every reclaimed board, every fresh egg from our own backyard felt like a huge victory. It’s a journey of learning, adapting, and celebrating the small wins.

    What’s your biggest challenge with starting a homestead on a budget? I’d love to hear your story.

    ๐Ÿ”ง See Recommended Tools โ†’


    ๐Ÿ“š More From Our Homestead

    Ready to Start Your Homestead Journey?

    Free guides, checklists, and tools to help you build your dream homestead.
    Explore Free Resources โ†’


    ๐Ÿ‘‰ Related: Mastering: What Essential Homesteading Skills Beginners Need

    ๐Ÿ‘‰ Related: Finding Your Homestead: A Beginner’s Property Guide

    ๐Ÿ‘‰ Related: Easiest Homesteading Animals to Raise? Here’s Our Story

  • Raising Backyard Chickens: Pros, Cons & What to Expect

    !A flock of hens grazing in a garden, highlighting raising backyard chickens for eggs pros cons.

    When we first moved to our homestead, one of the very first things my partner and I talked about was getting chickens. Fresh eggs every morning? The idea was just so appealing! We pictured happy hens clucking around, scratching in the dirt, and providing us with breakfast โ€” it sounded like a dream. And in many ways, it truly has been, but it wasn’t without its steep learning curve and a few unexpected realities.

    ๐ŸŽฏ Quick Answer: Raising backyard chickens for eggs offers incredibly fresh, nutritious food and a rewarding connection to your food source, but it also comes with daily responsibilities, potential costs, and the need to protect them from predators. It’s a commitment, but one that many homesteaders find incredibly worthwhile for the consistent supply of fresh eggs.

    ๐ŸŒฑ Start Your Homestead Plan โ†’

    ๐Ÿ”‘ Key Takeaways

    * Fresh Eggs are Unbeatable: The taste and nutrition of homegrown eggs far surpass store-bought.

    * Daily Commitment: Chickens require daily feeding, watering, and coop maintenance, rain or shine.

    * Upfront Costs: Expect initial expenses for chicks, coop, feed, and supplies โ€“ we spent about $500 to get started with 6 hens.

    * Predator Protection is Key: Raccoons, fox, and even hawks are always a threat; secure housing is non-negotiable.

    * Local Ordinance Check: Always verify local laws regarding backyard poultry before investing.

    * Educational for Families: Itโ€™s a fantastic way for kids to learn about food systems and animal care.

    !A basket of fresh colorful eggs showing the benefits of raising backyard chickens for eggs pros cons.

    The Unbeatable Pros of Raising Backyard Chickens for Eggs

    Thereโ€™s a reason homesteaders and backyard enthusiasts alike rave about their flock. For us, the benefits quickly outweighed the initial effort. Hereโ€™s why we love our hens.

    Fresh, Nutritious, and Delicious Eggs

    Letโ€™s be honest, this is usually the number one draw, and for good reason! The eggs youโ€™ll get from your own hens are in a league of their own. We noticed a difference immediately, especially in the vibrant orange yolks. Our kids, who were initially skeptical, now swear by “homestead eggs.”

    * Taste: They simply taste better. Richer, fuller flavor. Itโ€™s hard to go back to store-bought once youโ€™ve experienced fresh.

    * Nutrition: Studies suggest backyard eggs can have higher levels of Omega-3 fatty acids, Vitamin D, and lower cholesterol, especially if your hens free-range. Our flock gets to forage for bugs and greens, which we believe makes a big difference.

    * Availability: No more running to the store just for eggs! We usually have more than enough for our family of four, plus some to share with neighbors.

    This next part? Nobody talks about it, but it changed everything for us.

    Pest Control and Garden Helpers

    When we first tried growing a small vegetable garden, the slugs and grasshoppers were relentless. This is where our chickens became invaluable! We trained them to respect our raised beds (mostly!) and they feast on garden pests.

    * Bug Exterminators: Theyโ€™re fantastic at controlling insects like grasshoppers, slugs, and grubs without chemicals. Just remember to supervise them around delicate seedlings. We let ours free-range in the garden area for an hour or so each evening after harvest, and itโ€™s a game-changer.

    * Weed Control: Chickens love to scratch and peck at weeds, effectively tilling and clearing areas. We’ve used them to clear out patches before planting our fall cover crops.

    * Fertilizer Producers: Chicken manure is a rich source of nitrogen, perfect for composting and enriching your garden soil. We collect it from the coop and add it directly to our compost piles. It’s a key ingredient in our how to start a vegetable garden in a small backyard.

    Curious about the flip side? It’s not all sunshine and perfectly laid eggs! I’ll cover the real cons next.

    The Real Cons of Raising Backyard Chickens for Eggs

    Before you dive headfirst into chicken ownership, it’s crucial to understand the challenges. We certainly faced a few surprises! It’s not always the idyllic farm life depicted in magazines.

    Daily Commitment and Responsibility

    Chickens, like any pet or livestock, require consistent care. This isn’t a set it and forget it kind of deal. Even on vacation, we need reliable sitters.

    * Daily Chores: Feed, fresh water, and egg collection need to happen every single day. We spend about 15-20 minutes daily on basic chicken care.

    * Coop Maintenance: Their coop needs regular cleaning. We deep clean our coop monthly, and spot clean bedding weekly to keep things sanitary and minimize odors. A clean coop is crucial for healthy hens and disease prevention.

    * Weather Challenges: Whether itโ€™s scorching summer heat or frigid winter snow, you’ll need to ensure they have adequate shelter, ventilation, and unfrozen water. Winter for us means checking water multiple times a day.

    Keep reading โ€” this is where most people mess up.

    Upfront Costs and Ongoing Expenses

    Getting started with chickens isn’t free. We budgeted, but some things still popped up!

    * Initial Setup: Youโ€™ll need to buy chicks (we spent $45 for 6 chicks), a brooder setup (heat lamp, feeder, waterer โ€“ about $75), a coop (we built ours for around $300 in materials, but a pre-made coop can easily be $500-$1500), and fencing.

    * Feed Costs: This is the biggest ongoing expense. A 50lb bag of layer feed costs us about $20-$25 and lasts our 6 hens about 3-4 weeks. Factor in treats, grit, and oyster shell too.

    * Health and Supplies: While usually hardy, chickens can get sick. Vet bills for chickens are rare, but you might need remedies, wormers, or mite treatments. We also keep diatomaceous earth on hand for pest control, which adds a few dollars here and there.

    Here’s an important point: not every chicken lays forever. I’ll get into that next!

    ๐Ÿ“‹ Get the Beginner Checklist โ†’

    Predators and Pest Attractions

    This is a big one. Nature wants your chickens, and trust me, theyโ€™re relentless! We learned this the hard way when a raccoon got into our first, less secure coop.

    * Constant Threat: Raccoons, foxes, hawks, owls, weasels, stray dogs, and even neighborhood cats are all potential predators. A secure coop is paramount. We use hardware cloth, not chicken wire, for all openings and bury our fence line to prevent digging predators.

    * Rodents: Chicken feed can attract mice and rats. Store feed in airtight metal containers and keep the coop clean to deter them. We actually use a movable chicken tractor some seasons to keep them moving off the same ground.

    Egg Production Naturally Declines

    When we got our first hens, they were egg-laying machines! But like all things, it doesn’t last forever.

    * Peak Production: Most hens lay best for their first 2-3 years. After that, production typically declines. Some breeds lay longer than others.

    * Winter Slowdown: Shorter daylight hours in winter mean fewer eggs, sometimes none at all, without supplemental lighting. This is completely normal.

    * Molting: Once a year, hens will stop laying to regrow their feathers. This can last 6-12 weeks, and itโ€™s a time to make sure they get extra protein!

    Don’t skip this โ€” it’ll save you hours (and money).

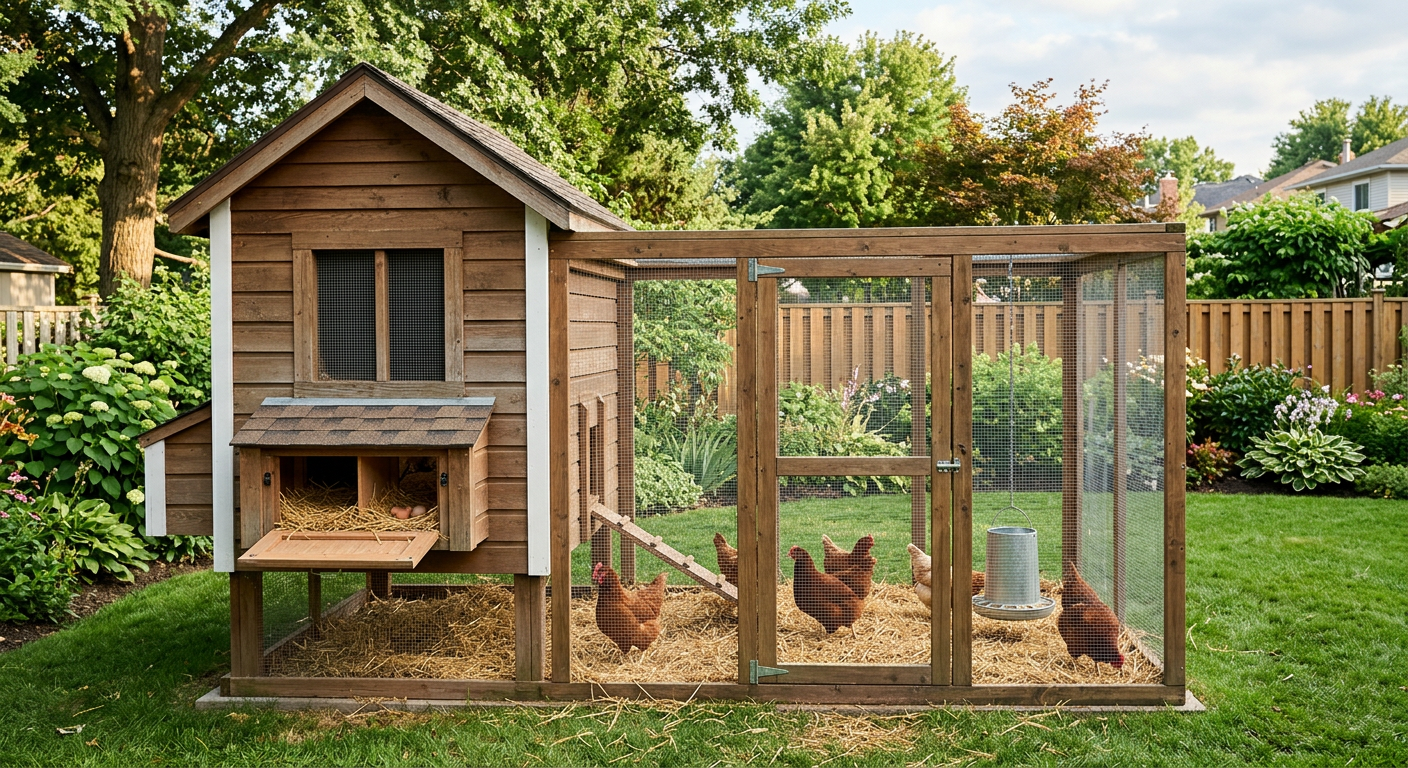
    !A secure wooden coop illustrating the setup for raising backyard chickens for eggs pros cons.

    ๐Ÿ’ก Pro Tips

    * Start Small: Begin with 3-6 hens. This allows you to learn the ropes without being overwhelmed. We started with six and it felt just right.

    * Research Breeds: Choose breeds known for good egg production, docile temperaments, and suitability for your climate. For beginners, breeds like Rhode Island Reds, Plymouth Rocks, or Orpingtons are fantastic choices. We have a mix, and our Wyandottes are incredibly friendly!

    * Build Predator-Proof from Day One: Don’t skimp on coop security. Bury hardware cloth, use sturdy latches, and inspect regularly. It’s much easier to do it right the first time than to fix it after a loss.

    * Compost Everything: Use your chicken coop clean-out material (straw, shavings, manure) directly into your compost pile. It’s a fantastic nitrogen source and reduces waste.

    * Observe Your Flock: Spend a few minutes each day just watching your chickens. You’ll quickly learn their normal behaviors, making it easier to spot when something is off, like an illness or bullying.

    โš ๏ธ Beginner Mistakes to Avoid

    * Not checking local ordinances: This is huge! Many cities have rules about the number of chickens, roosters, and coop setbacks. Check your HOA too. We have friends who had to rehome their flock because they didn’t do their homework.

    Using chicken wire for security: Chicken wire keeps chickens in, but it doesn’t keep predators out*. Raccoons can tear right through it. Invest in 1/2″ hardware cloth for secure coops.

    * Overfeeding treats: While chickens love treats, too many can lead to obesity and reduced egg production. Stick to 10% or less of their daily intake, focusing on healthy options like kitchen scraps or scratch grains.

    * Ignoring ventilation: A lack of proper airflow in the coop can lead to respiratory issues. Ensure there are vents high up for hot air to escape, but still protect from drafts in winter.

    Buying roosters unintentionally: Unless you want* fertile eggs and baby chicks, avoid roosters. They can be noisy, aggressive, and aren’t necessary for egg production. Most hatcheries will specify whether chicks are sexed hens or straight run (unsexed).

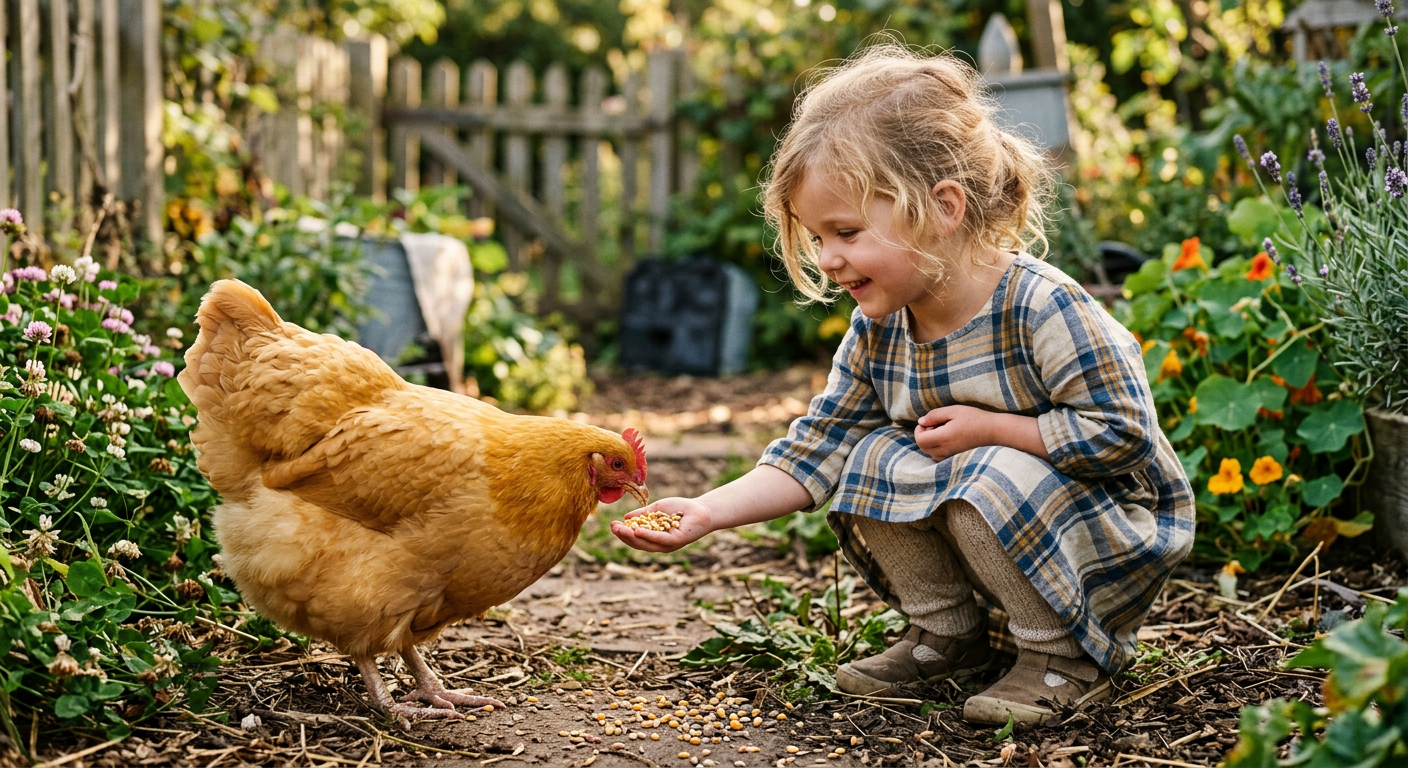
    !Child feeding a chicken, an educational benefit of raising backyard chickens for eggs pros cons.

    Frequently Asked Questions

    ๐Ÿฅš How many eggs will a backyard chicken lay?

    Most healthy laying hens will produce 4-6 eggs per week during their peak laying years (ages 1-3). This can vary greatly by breed, feed quality, daylight hours, and the individual hen’s health. We average about 4-5 eggs per day from our 6 hens during spring and summer.

    ๐Ÿ’ฐ What’s the cost of raising backyard chickens for eggs?

    Initial costs can range from $200 (for a very DIY setup) to $1,500+ (for a fancy pre-built coop and equipment). Ongoing costs for feed, grit, and oyster shell average about $20-$30 per month for a small flock of 4-6 hens. So, while you get those fresh eggs, it’s generally not cheaper than store-bought eggs if you factor in all costs.

    โš–๏ธ Do I need a rooster for my hens to lay eggs?

    No, absolutely not! Hens will lay eggs whether a rooster is present or not. The only difference is that eggs laid by hens without a rooster will be unfertilized and will never develop into chicks. If you want consistently delicious eating eggs, a rooster is unnecessary.

    ๐Ÿก How much space do chickens need?

    Inside the coop, each standard-sized hen needs about 3-4 square feet. For a run or outdoor space, plan on 8-10 square feet per bird if they won’t be free-ranging. More space is always better to prevent boredom and pecking issues. We aim for closer to 10-15 sq ft per bird in our run because we don’t always have time for full free-range.

    ๐Ÿ•ฐ How long do chickens live?

    With good care, backyard chickens can live for 5-10 years. However, their peak egg-laying years are typically the first 2-3 years. After that, production usually tapers off, though many will continue to lay periodically for several more years.

    Honestly, bringing chickens onto our homestead has been one of the most rewarding decisions weโ€™ve made. Yes, there are chores, unexpected costs, and a constant battle against predators, but the joy of collecting warm, fresh eggs every morning, and watching our happy flock scratch around, makes it all worth it. Itโ€™s a tangible connection to our food and a constant source of entertainment (and sometimes exasperation!).

    What’s your biggest challenge with raising backyard chickens for eggs? I’d love to hear your story.

    ๐Ÿ”ง See Recommended Tools โ†’


    ๐Ÿ“š More From Our Homestead

    Ready to Start Your Homestead Journey?

    Free guides, checklists, and tools to help you build your dream homestead.

    Explore Free Resources โ†’


    ๐Ÿ‘‰ Related: Homesteading on a Budget: Our Smart Start Guide

    ๐Ÿ‘‰ Related: Mastering: What Essential Homesteading Skills Beginners Need

    ๐Ÿ‘‰ Related: Finding Your Homestead: A Beginner’s Property Guide

  • Urban Homesteading with Kids: Start Smart Today!

    Hey there, fellow dreamers! My heart races a little every time I hear someone talk about bringing a bit of the farm to the city, especially when they ask, “How to get started urban homesteading with kids?” It warms my soul because that’s exactly where our journey began, right in our cozy suburban backyard! We might have visions of sprawling acres, but the truth is, a surprising amount of self-sufficiency can happen on a small patch of land, even with little hands eager to “help” (and, let’s be honest, sometimes “rearrange” your meticulously planted rows!).

    When we first dipped our toes into urban homesteading, our kids were tiny โ€” 3 and 5 years old. My husband, Mark, and I knew we wanted to teach them where food truly comes from, beyond a grocery store shelf. We wanted to slow down, connect with nature, and build a more resilient life, right in our neighborhood. The key for us was starting small, involving the kids every step of the way, and accepting that perfection wasn’t the goal. Muddy boots, crooked carrots, and a few escaped chickens became part of our charm. If you’re looking to cultivate a little bit of country in your city life and want to know how to get started urban homesteading with kids, you’ve come to the right place. We’ll walk through our family’s experiences, sharing the ups, downs, and invaluable lessons weโ€™ve learned.

    Why Urban Homesteading with Kids is a Game-Changer

    Honestly, I can’t imagine our family life without our homesteading adventures. It’s not just about growing food; it’s about growing people. For us, having our children involved from day one transformed mundane tasks into magical discoveries. Theyโ€™ve learned patience waiting for seeds to sprout, responsibility caring for our animals, and the incredible satisfaction of eating something they helped grow or harvest.

    * Connection to Nature: Even in the city, thereโ€™s immense joy in observing a worm, understanding the life cycle of a plant, or watching a bee pollinate a flower. Our kids spend hours outside, eyes wide with wonder.

    * Practical Skills: From planting seeds to harvesting vegetables and even helping with animal chores, they’re developing skills that many kids today just don’t get. They know how to identify edible plants, understand composting, and have a healthy respect for hard work.

    * Healthy Eating Habits: When they’ve seen a tomato grow from a tiny flower, they’re far more likely to eat it! Our kids eat an astonishing variety of fruits and vegetables, and I truly believe urban homesteading is why.

    * Family Bonding: These shared projects, whether it’s building a raised bed or collecting eggs, become cherished memories. We’re working towards a common goal, learning and laughing together.

    Starting Small: Your First Steps to Urban Homesteading with Kids

    One of the biggest mistakes beginners make is trying to do too much, too fast. We certainly felt that pull! But trust me, a few small, consistent wins build momentum. Think about what truly excites your family and your kids.

    1. Plan Your Garden Together

    Before you even think about digging, sit down as a family and dream! What do you all want to grow? Let the kids draw pictures of their ideal garden. When we planned our first significant urban garden, we gave each child a small corner of a raised bed to choose one thing they wanted to grow. Our daughter, Lily, insisted on cultivating “super sweet peas” (which she then ate straight off the vine!), while our son, Finn, was obsessed with finding the biggest pumpkin seed.

    Consider your space: Do you have a sunny balcony? A small backyard? Raised beds are fantastic for urban spaces because they offer better drainage, fewer weeds, and you can control the soil quality. We started with two 4×8 foot raised beds โ€“ a manageable size for a family of four. You can find simple plans online, or purchase kits. Our first two beds cost us about $150 in lumber and another $200 for good quality organic soil, which felt like a significant investment then, but paid for itself in fresh produce many times over. Learn more about planning your garden in our post, How to Start a Small Backyard Vegetable Garden: Beginner Guide.

    2. Choose Kid-Friendly Plants (and Tasks!)

    Gardening needs to be fun and engaging, especially when you’re figure out how to get started urban homesteading with kids. Here are some plants and tasks that are great for little helpers:

    * Seeds that are easy to handle: Peas, beans, squash, corn. Avoid tiny seeds like carrots for their first go, unless you pre-seed them on a paper strip.

    * Fast growers: Radishes (harvest in 3-4 weeks!), bush beans, lettuce. Quick success keeps interest high.

    * Edible flowers: Nasturtiums (peppery!) and calendula are beautiful and safe for kids to pick and taste.

    * Herbs: Mint, basil, and chives are incredibly rewarding and smell amazing! Weโ€™ve got a whole post about Best Perennial Herbs for Cold Climate Homesteads if you’re looking for hardy options.

    Kid-friendly tasks:

    * Watering (with a small watering can, supervision optional but recommended to avoid over-watering!)

    * Harvesting (cucumbers, cherry tomatoes, berries, peas are great for little hands)

    * “Helping” with weeding (teach them what’s a weed and what’s not!)

    * Mixing soil with compost

    Incorporating Small Livestock: When You’re Ready

    For many, the thought of urban chickens is the cornerstone of how to get started urban homesteading with kids. We waited a full year before getting chickens, making sure our garden was established and we felt confident in our capacity. Check your local ordinances first โ€“ this is crucial! Many cities allow a small number of hens (roosters are usually a no-go due to noise).

    Urban Chickens: Our Family’s Feathered Friends

    We started with three Rhode Island Reds, which cost us about $5 each as chicks. We built a small coop ourselves from reclaimed palets and some new lumber (around $150 total), and bought a bag of organic feed for about $25. Our kids absolutely adored the chicks, holding them gently and watching them grow. Collecting eggs became the highlight of their day!

    Tips for urban chickens and kids:

    * Build a secure coop: Predators are everywhere, even in the city. We added a run with mesh buried a foot deep to deter digging predators.

    * Teach gentle handling: Chickens are hardy but can get stressed. Supervise interaction, especially at first.

    * Daily chores: Assign small responsibilities like filling the waterer or scattering scratch grains. Our kids learned valuable consistency.

    * Egg safety: Teach them how to collect eggs carefully and inspect them.

    Beyond Chickens: Thinking Small and Sustainable

    If chickens aren’t feasible, consider other small animals:

    * Worm Composting (Vermiculture): Not livestock in the traditional sense, but red wigglers are incredible decomposers! We have a small worm bin under our kitchen sink. It cost us about $30 for the bin and worms, and the kids love feeding them kitchen scraps. Plus, you get fantastic “worm castings” for your garden.

    * Composting: Even without worms, a simple backyard compost pile or tumbler is an easy way to reduce waste and create nutrient-rich soil. Our kids take great pride in adding their apple cores and banana peels.

    Maximizing Your Small Space for Urban Homesteading with Kids

    Don’t let a small footprint discourage you! Urban homesteading is all about creativity. We live on a standard city lot, about 0.15 acres, but we’ve squeezed a lot into it.

    Vertical Gardening Solutions

    When you can’t go out, go up! Vertical gardens are a lifesaver. We use stacked planters for herbs, hanging baskets for strawberries, and a vertical wall planter for lettuce. This technique significantly increased our yield without taking up precious ground space.

    Edible Landscaping

    Replace ornamental shrubs with edible ones! Think blueberry bushes, dwarf fruit trees (they can even be grown in large pots!), or perennial herbs like oregano and thyme as ground cover. We planted a dwarf apple tree that gives us about 30-40 apples a year โ€“ perfect for pies. Our kids love watching the fruit develop. For more ideas on efficient layouts, check out Your First Homestead Layout: Simple Steps for Beginners.

    Water Conservation

    Water is a precious resource. We installed a 50-gallon rain barrel that connects to our gutter, costing about $100. It’s amazing how much water it collects for our garden, and the kids love checking its level. This is a simple yet impactful step towards sustainability. Learn more from our post on Best Small Scale Rainwater Systems for Off-Grid Living.

    Lessons Learned (and Laughed About) While Urban Homesteading with Kids

    Our journey hasn’t been without its share of hilarious mishaps and learning curves. I remember one summer when our zucchini patch absolutely exploded. We had so much zucchini, we were leaving it on neighbors’ doorsteps in the dead of night like garden ninjas!

    * Patience is a Virtue: Growing food teaches incredible patience. Kids learn that things don’t happen instantly.

    * Expect Imperfection: Not every seed will sprout. Pests will attack. Animals will get into things. It’s all part of the process. “Failure” is just a step towards learning.

    * Involve Them in Everything: Even the less glamorous tasks, like turning the compost pile (our kids call it “feeding the stink heap”), can be fun if approached with the right attitude.

    * Celebrate Small Wins: The first sprout, the first egg, the first perfectly ripe tomato. Make a big deal out of these moments!

    * Flexibility is Key: Kids’ interests change. Some days they’ll be super engaged; other days, not so much. Don’t force it. Let it be a natural part of family life.

    At the end of the day, how to get started urban homesteading with kids isn’t about perfectly manicured gardens or maximum yields. It’s about the journey, the discovery, and the invaluable life lessons you impart. It’s about raising independent, resourceful, and nature-loving humans capable of contributing to a more sustainable future.

    FAQ: Urban Homesteading with Kids

    Q: What’s the absolute best first step for urban homesteading with kids?

    A: My top recommendation is to start a small, easy-to-manage vegetable garden together. Choose 3-5 quick-growing, kid-friendly plants like radishes, bush beans, or cherry tomatoes. Give them their own small patch or pot to be solely responsible for. Success in this small venture will build their confidence and enthusiasm for more!

    Q: How much space do you really need for urban homesteading?

    A: Surprisingly little! We’ve seen incredible things done on balconies, patios, and small backyards. Even a sunny windowsill can yield herbs and microgreens. The key is to think vertically with planters and trellises, and prioritize plants with high yields per square foot.

    Q: Are chickens too much work for an urban setting with kids?

    A: Chickens do require daily care, but it’s very manageable, especially with a good coop setup. Our kids quickly took over egg collection and helping with water and feed. The benefits โ€“ fresh eggs, pest control, and endless entertainment โ€“ often outweigh the work. Just make sure to check your city’s regulations first!

    Q: What are some cost-saving tips for starting an urban homestead?

    A: Start with seeds instead of plant starts, hunt for free compost or use your own kitchen scraps, build raised beds from reclaimed materials (like pallets), and look for local plant swaps. We’ve saved a ton by using DIY solutions. Check out Essential Homesteading Tools to Buy First? Our Top Picks! for smart initial investments.

    Q: How do you keep kids from getting bored with gardening chores?

    A: We make it a game! “Who can find the biggest weed?” “Let’s count how many cherry tomatoes we can pick!” We also give them their own kid-sized tools and specific, age-appropriate tasks. Most importantly, we celebrate every harvest and use what we grow in meals, so they see the direct benefit of their hard work. You can explore more ideas on how to keep kids engaged on your homestead at usehomesteados.com.

    If you’re eager to build a more self-sufficient, connected life with your family, start small, embrace the mess, and dive into urban homesteading with kids. It’s truly one of the most rewarding adventures you’ll ever embark on. Have questions or want to share your own urban homesteading stories? Drop a comment below, or explore more of our family’s journey and practical tips right here at usehomesteados.com!


    Ready to start your homesteading journey? Visit UseHomesteados.com for more guides, tools, and resources.


    ๐Ÿ‘‰ Related: Build a Movable Chicken Tractor for Sustainable Pest Control

    ๐Ÿ‘‰ Related: Tiny Space, Big Harvest: How to Start Urban Homesteading Small Space

    ๐Ÿ‘‰ Related: Tiny Farm, Big Rewards: Best Low Maintenance Farm Animals

  • Urban Homesteading with Kids: Start Smart Today!

    Hey there, fellow dreamers! My heart races a little every time I hear someone talk about bringing a bit of the farm to the city, especially when they ask, “How to get started urban homesteading with kids?” It warms my soul because that’s exactly where our journey began, right in our cozy suburban backyard! We might have visions of sprawling acres, but the truth is, a surprising amount of self-sufficiency can happen on a small patch of land, even with little hands eager to “help” (and, let’s be honest, sometimes “rearrange” your meticulously planted rows!).

    When we first dipped our toes into urban homesteading, our kids were tiny โ€” 3 and 5 years old. My husband, Mark, and I knew we wanted to teach them where food truly comes from, beyond a grocery store shelf. We wanted to slow down, connect with nature, and build a more resilient life, right in our neighborhood. The key for us was starting small, involving the kids every step of the way, and accepting that perfection wasn’t the goal. Muddy boots, crooked carrots, and a few escaped chickens became part of our charm. If you’re looking to cultivate a little bit of country in your city life and want to know how to get started urban homesteading with kids, you’ve come to the right place. We’ll walk through our family’s experiences, sharing the ups, downs, and invaluable lessons weโ€™ve learned.

    Why Urban Homesteading with Kids is a Game-Changer

    Honestly, I can’t imagine our family life without our homesteading adventures. It’s not just about growing food; it’s about growing people. For us, having our children involved from day one transformed mundane tasks into magical discoveries. Theyโ€™ve learned patience waiting for seeds to sprout, responsibility caring for our animals, and the incredible satisfaction of eating something they helped grow or harvest.

    * Connection to Nature: Even in the city, thereโ€™s immense joy in observing a worm, understanding the life cycle of a plant, or watching a bee pollinate a flower. Our kids spend hours outside, eyes wide with wonder.

    * Practical Skills: From planting seeds to harvesting vegetables and even helping with animal chores, they’re developing skills that many kids today just don’t get. They know how to identify edible plants, understand composting, and have a healthy respect for hard work.

    * Healthy Eating Habits: When they’ve seen a tomato grow from a tiny flower, they’re far more likely to eat it! Our kids eat an astonishing variety of fruits and vegetables, and I truly believe urban homesteading is why.

    * Family Bonding: These shared projects, whether it’s building a raised bed or collecting eggs, become cherished memories. We’re working towards a common goal, learning and laughing together.

    Starting Small: Your First Steps to Urban Homesteading with Kids

    One of the biggest mistakes beginners make is trying to do too much, too fast. We certainly felt that pull! But trust me, a few small, consistent wins build momentum. Think about what truly excites your family and your kids.

    1. Plan Your Garden Together

    Before you even think about digging, sit down as a family and dream! What do you all want to grow? Let the kids draw pictures of their ideal garden. When we planned our first significant urban garden, we gave each child a small corner of a raised bed to choose one thing they wanted to grow. Our daughter, Lily, insisted on cultivating “super sweet peas” (which she then ate straight off the vine!), while our son, Finn, was obsessed with finding the biggest pumpkin seed.

    Consider your space: Do you have a sunny balcony? A small backyard? Raised beds are fantastic for urban spaces because they offer better drainage, fewer weeds, and you can control the soil quality. We started with two 4×8 foot raised beds โ€“ a manageable size for a family of four. You can find simple plans online, or purchase kits. Our first two beds cost us about $150 in lumber and another $200 for good quality organic soil, which felt like a significant investment then, but paid for itself in fresh produce many times over. Learn more about planning your garden in our post, How to Start a Small Backyard Vegetable Garden: Beginner Guide.

    2. Choose Kid-Friendly Plants (and Tasks!)

    Gardening needs to be fun and engaging, especially when you’re figure out how to get started urban homesteading with kids. Here are some plants and tasks that are great for little helpers:

    * Seeds that are easy to handle: Peas, beans, squash, corn. Avoid tiny seeds like carrots for their first go, unless you pre-seed them on a paper strip.

    * Fast growers: Radishes (harvest in 3-4 weeks!), bush beans, lettuce. Quick success keeps interest high.

    * Edible flowers: Nasturtiums (peppery!) and calendula are beautiful and safe for kids to pick and taste.

    * Herbs: Mint, basil, and chives are incredibly rewarding and smell amazing! Weโ€™ve got a whole post about Best Perennial Herbs for Cold Climate Homesteads if you’re looking for hardy options.

    Kid-friendly tasks:

    * Watering (with a small watering can, supervision optional but recommended to avoid over-watering!)

    * Harvesting (cucumbers, cherry tomatoes, berries, peas are great for little hands)

    * “Helping” with weeding (teach them what’s a weed and what’s not!)

    * Mixing soil with compost

    Incorporating Small Livestock: When You’re Ready

    For many, the thought of urban chickens is the cornerstone of how to get started urban homesteading with kids. We waited a full year before getting chickens, making sure our garden was established and we felt confident in our capacity. Check your local ordinances first โ€“ this is crucial! Many cities allow a small number of hens (roosters are usually a no-go due to noise).

    Urban Chickens: Our Family’s Feathered Friends

    We started with three Rhode Island Reds, which cost us about $5 each as chicks. We built a small coop ourselves from reclaimed palets and some new lumber (around $150 total), and bought a bag of organic feed for about $25. Our kids absolutely adored the chicks, holding them gently and watching them grow. Collecting eggs became the highlight of their day!

    Tips for urban chickens and kids:

    * Build a secure coop: Predators are everywhere, even in the city. We added a run with mesh buried a foot deep to deter digging predators.

    * Teach gentle handling: Chickens are hardy but can get stressed. Supervise interaction, especially at first.

    * Daily chores: Assign small responsibilities like filling the waterer or scattering scratch grains. Our kids learned valuable consistency.

    * Egg safety: Teach them how to collect eggs carefully and inspect them.

    Beyond Chickens: Thinking Small and Sustainable

    If chickens aren’t feasible, consider other small animals:

    * Worm Composting (Vermiculture): Not livestock in the traditional sense, but red wigglers are incredible decomposers! We have a small worm bin under our kitchen sink. It cost us about $30 for the bin and worms, and the kids love feeding them kitchen scraps. Plus, you get fantastic “worm castings” for your garden.

    * Composting: Even without worms, a simple backyard compost pile or tumbler is an easy way to reduce waste and create nutrient-rich soil. Our kids take great pride in adding their apple cores and banana peels.

    Maximizing Your Small Space for Urban Homesteading with Kids

    Don’t let a small footprint discourage you! Urban homesteading is all about creativity. We live on a standard city lot, about 0.15 acres, but we’ve squeezed a lot into it.

    Vertical Gardening Solutions

    When you can’t go out, go up! Vertical gardens are a lifesaver. We use stacked planters for herbs, hanging baskets for strawberries, and a vertical wall planter for lettuce. This technique significantly increased our yield without taking up precious ground space.

    Edible Landscaping

    Replace ornamental shrubs with edible ones! Think blueberry bushes, dwarf fruit trees (they can even be grown in large pots!), or perennial herbs like oregano and thyme as ground cover. We planted a dwarf apple tree that gives us about 30-40 apples a year โ€“ perfect for pies. Our kids love watching the fruit develop. For more ideas on efficient layouts, check out Your First Homestead Layout: Simple Steps for Beginners.

    Water Conservation

    Water is a precious resource. We installed a 50-gallon rain barrel that connects to our gutter, costing about $100. It’s amazing how much water it collects for our garden, and the kids love checking its level. This is a simple yet impactful step towards sustainability. Learn more from our post on Best Small Scale Rainwater Systems for Off-Grid Living.

    Lessons Learned (and Laughed About) While Urban Homesteading with Kids

    Our journey hasn’t been without its share of hilarious mishaps and learning curves. I remember one summer when our zucchini patch absolutely exploded. We had so much zucchini, we were leaving it on neighbors’ doorsteps in the dead of night like garden ninjas!

    * Patience is a Virtue: Growing food teaches incredible patience. Kids learn that things don’t happen instantly.

    * Expect Imperfection: Not every seed will sprout. Pests will attack. Animals will get into things. It’s all part of the process. “Failure” is just a step towards learning.

    * Involve Them in Everything: Even the less glamorous tasks, like turning the compost pile (our kids call it “feeding the stink heap”), can be fun if approached with the right attitude.

    * Celebrate Small Wins: The first sprout, the first egg, the first perfectly ripe tomato. Make a big deal out of these moments!

    * Flexibility is Key: Kids’ interests change. Some days they’ll be super engaged; other days, not so much. Don’t force it. Let it be a natural part of family life.

    At the end of the day, how to get started urban homesteading with kids isn’t about perfectly manicured gardens or maximum yields. It’s about the journey, the discovery, and the invaluable life lessons you impart. It’s about raising independent, resourceful, and nature-loving humans capable of contributing to a more sustainable future.

    FAQ: Urban Homesteading with Kids

    Q: What’s the absolute best first step for urban homesteading with kids?

    A: My top recommendation is to start a small, easy-to-manage vegetable garden together. Choose 3-5 quick-growing, kid-friendly plants like radishes, bush beans, or cherry tomatoes. Give them their own small patch or pot to be solely responsible for. Success in this small venture will build their confidence and enthusiasm for more!

    Q: How much space do you really need for urban homesteading?

    A: Surprisingly little! We’ve seen incredible things done on balconies, patios, and small backyards. Even a sunny windowsill can yield herbs and microgreens. The key is to think vertically with planters and trellises, and prioritize plants with high yields per square foot.

    Q: Are chickens too much work for an urban setting with kids?

    A: Chickens do require daily care, but it’s very manageable, especially with a good coop setup. Our kids quickly took over egg collection and helping with water and feed. The benefits โ€“ fresh eggs, pest control, and endless entertainment โ€“ often outweigh the work. Just make sure to check your city’s regulations first!

    Q: What are some cost-saving tips for starting an urban homestead?

    A: Start with seeds instead of plant starts, hunt for free compost or use your own kitchen scraps, build raised beds from reclaimed materials (like pallets), and look for local plant swaps. We’ve saved a ton by using DIY solutions. Check out Essential Homesteading Tools to Buy First? Our Top Picks! for smart initial investments.

    Q: How do you keep kids from getting bored with gardening chores?

    A: We make it a game! “Who can find the biggest weed?” “Let’s count how many cherry tomatoes we can pick!” We also give them their own kid-sized tools and specific, age-appropriate tasks. Most importantly, we celebrate every harvest and use what we grow in meals, so they see the direct benefit of their hard work. You can explore more ideas on how to keep kids engaged on your homestead at usehomesteados.com.

    If you’re eager to build a more self-sufficient, connected life with your family, start small, embrace the mess, and dive into urban homesteading with kids. It’s truly one of the most rewarding adventures you’ll ever embark on. Have questions or want to share your own urban homesteading stories? Drop a comment below, or explore more of our family’s journey and practical tips right here at usehomesteados.com!


    Ready to start your homesteading journey? Visit UseHomesteados.com for more guides, tools, and resources.


    ๐Ÿ‘‰ Related: Build a Movable Chicken Tractor for Sustainable Pest Control

    ๐Ÿ‘‰ Related: Tiny Space, Big Harvest: How to Start Urban Homesteading Small Space